Watch the Video Tutorial
💡 Pro Tip: After watching the video, continue reading below for detailed step-by-step instructions, code examples, and additional tips that will help you implement this successfully.
Table of Contents
Open Table of Contents
- What Exactly is an AI Agent?
- AI Agents vs. Automations: A Clear Distinction
- The Three Core Components of an AI Agent
- Single-Agent vs. Multi-Agent Systems
- Setting Guardrails for AI Agents
- Understanding APIs and HTTP Requests
- Practical Applications of AI Agents
- Building Your First AI Agent with n8n
- Testing and Debugging
- Key Takeaways
- Conclusion
- Frequently Asked Questions (FAQ)
- Q: What’s the main difference between an AI agent and a traditional automation?
- Q: Do I need to know how to code to build an AI agent?
- Q: What are “guardrails” and why are they important for AI agents?
- Q: How do AI agents “talk” to other services like Google Calendar or a weather app?
- Q: What if my AI agent workflow isn’t working? How do I debug it?
- Q: Can I build a multi-agent system as my first project?
What Exactly is an AI Agent?
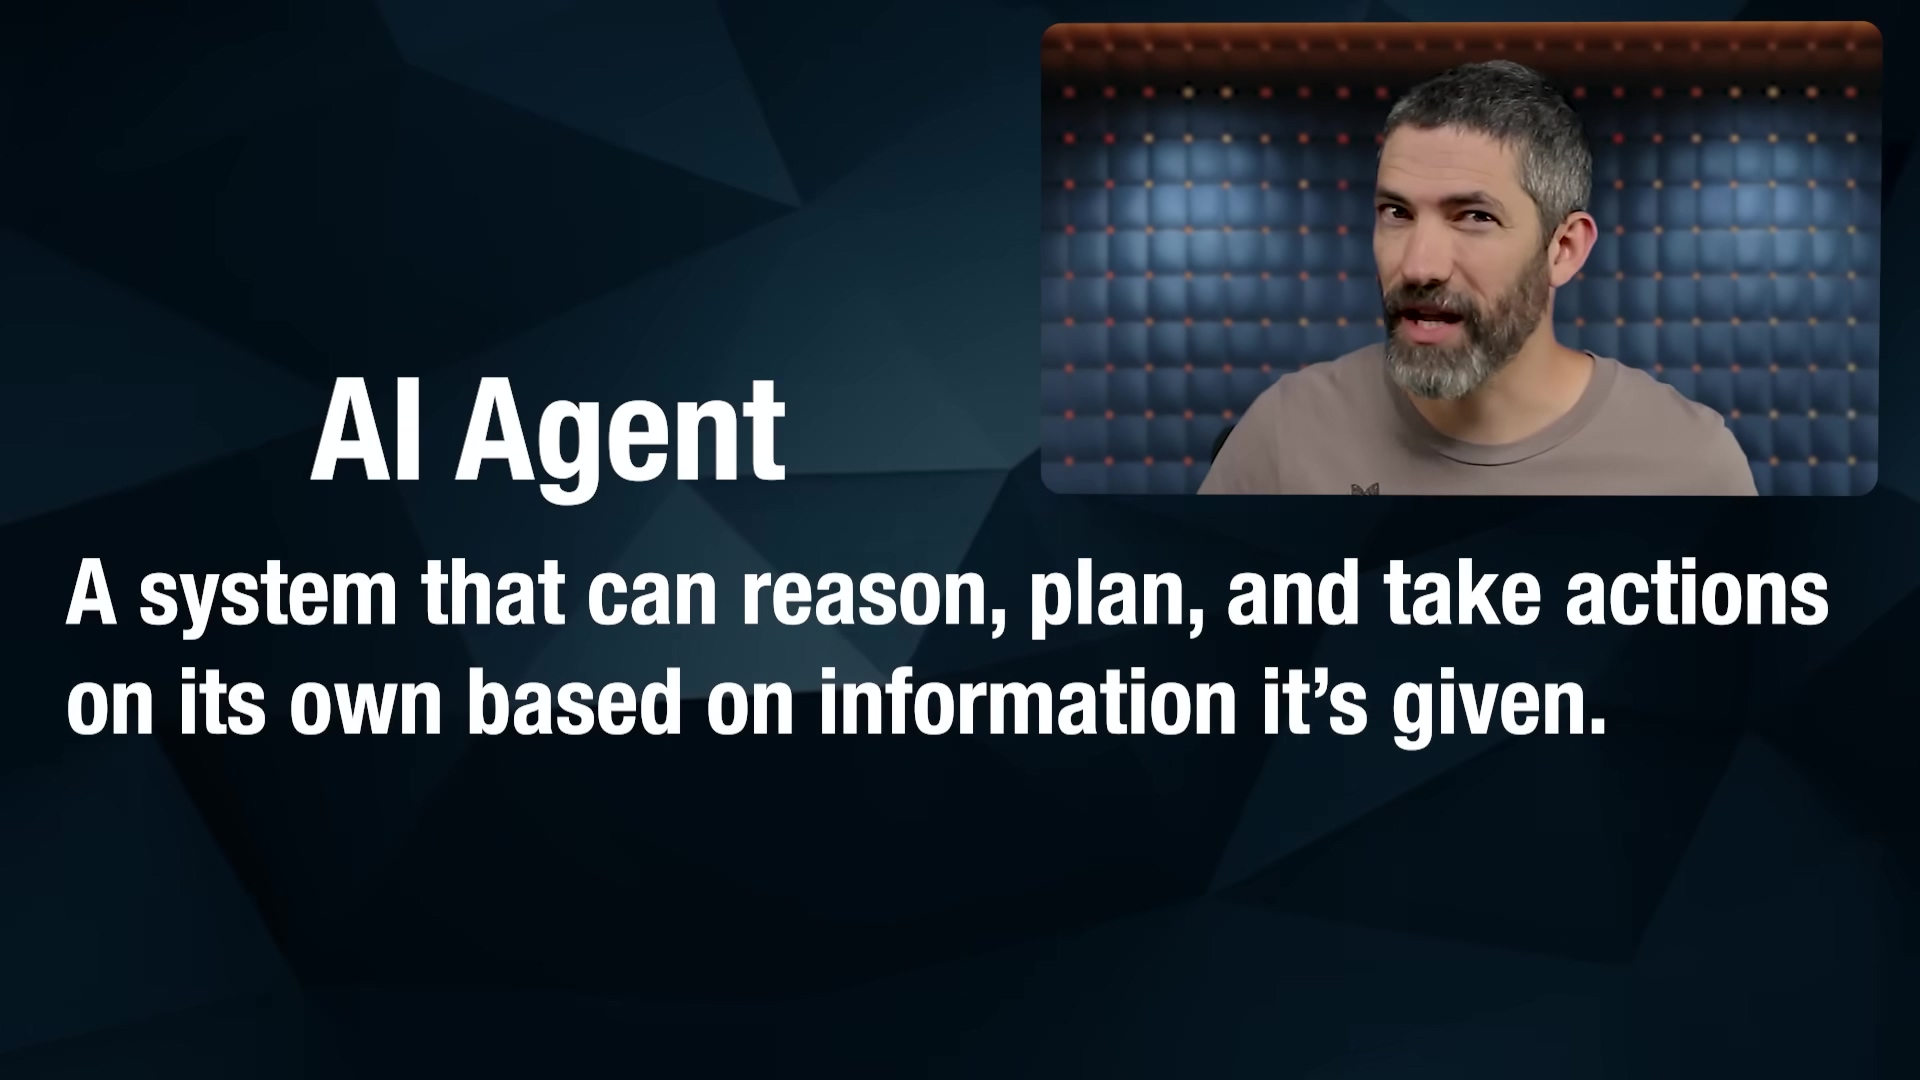
Alright, let’s kick things off with the big question: what is an AI agent? Imagine having a digital assistant that doesn’t just follow a script but can actually reason, plan, and execute tasks all by itself, based on what it learns. That’s an AI agent!
Unlike those rigid automations we’re used to (you know, the ones that break if one tiny thing changes), agents are dynamic. They can handle complex workflows, talk to other tools, and even change their approach if the situation calls for it. Think of it like this: an AI agent is your new digital employee, but one that thinks, remembers, and gets tasks done independently, without needing you to hold its hand every step of the way. Pretty cool, right?
AI Agents vs. Automations: A Clear Distinction
This is where a lot of folks get tripped up, and it’s totally understandable. Both AI agents and traditional automations are about making your life easier by streamlining processes. But their inner workings? Totally different universes!
-
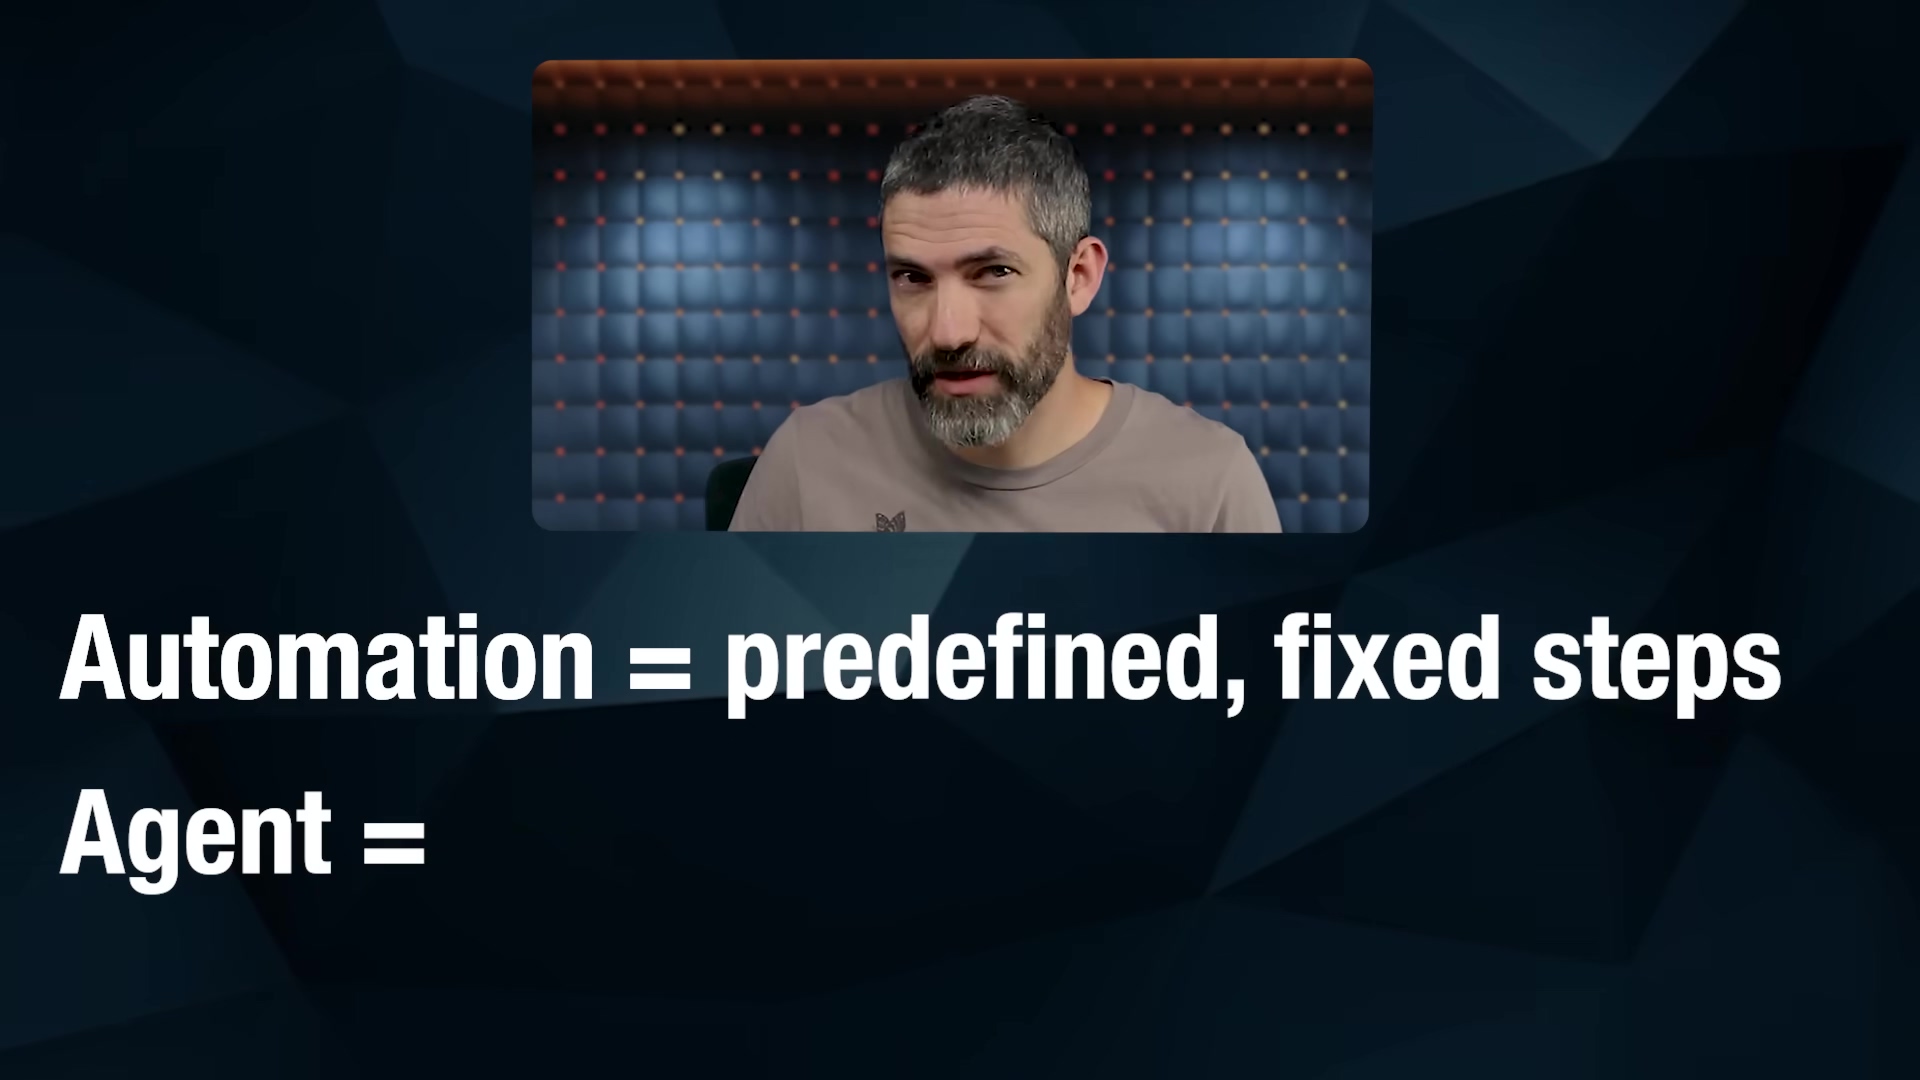
Automation: Picture a super-efficient robot arm on an assembly line. It does the exact same thing, in the exact same order, every single time. It’s fantastic for repetitive tasks that never change. For example, an automation might be set up to check the weather every morning at 7 AM and then send you an email summary. It always follows that A-to-B-to-C path, no questions asked, no thinking involved. It’s predictable, reliable, and totally rigid.
-
AI Agent: Now, imagine that robot arm has a brain. A big, curious brain! An AI agent is dynamic, flexible, and, most importantly, capable of reasoning. It doesn’t just follow steps; it decides the best way to complete a task, picking the right tools and actions on the fly based on what’s happening. Let’s stick with our weather example: if you ask a weather agent, “Should I bring an umbrella today?” it won’t just send a pre-written email. It will reason that it needs current weather data, then call a weather API (we’ll talk about these later, they’re super handy!), check for rain, and then craft a personalized, relevant response. See the difference? It’s about dynamic problem-solving, not just following a script.
The Three Core Components of an AI Agent
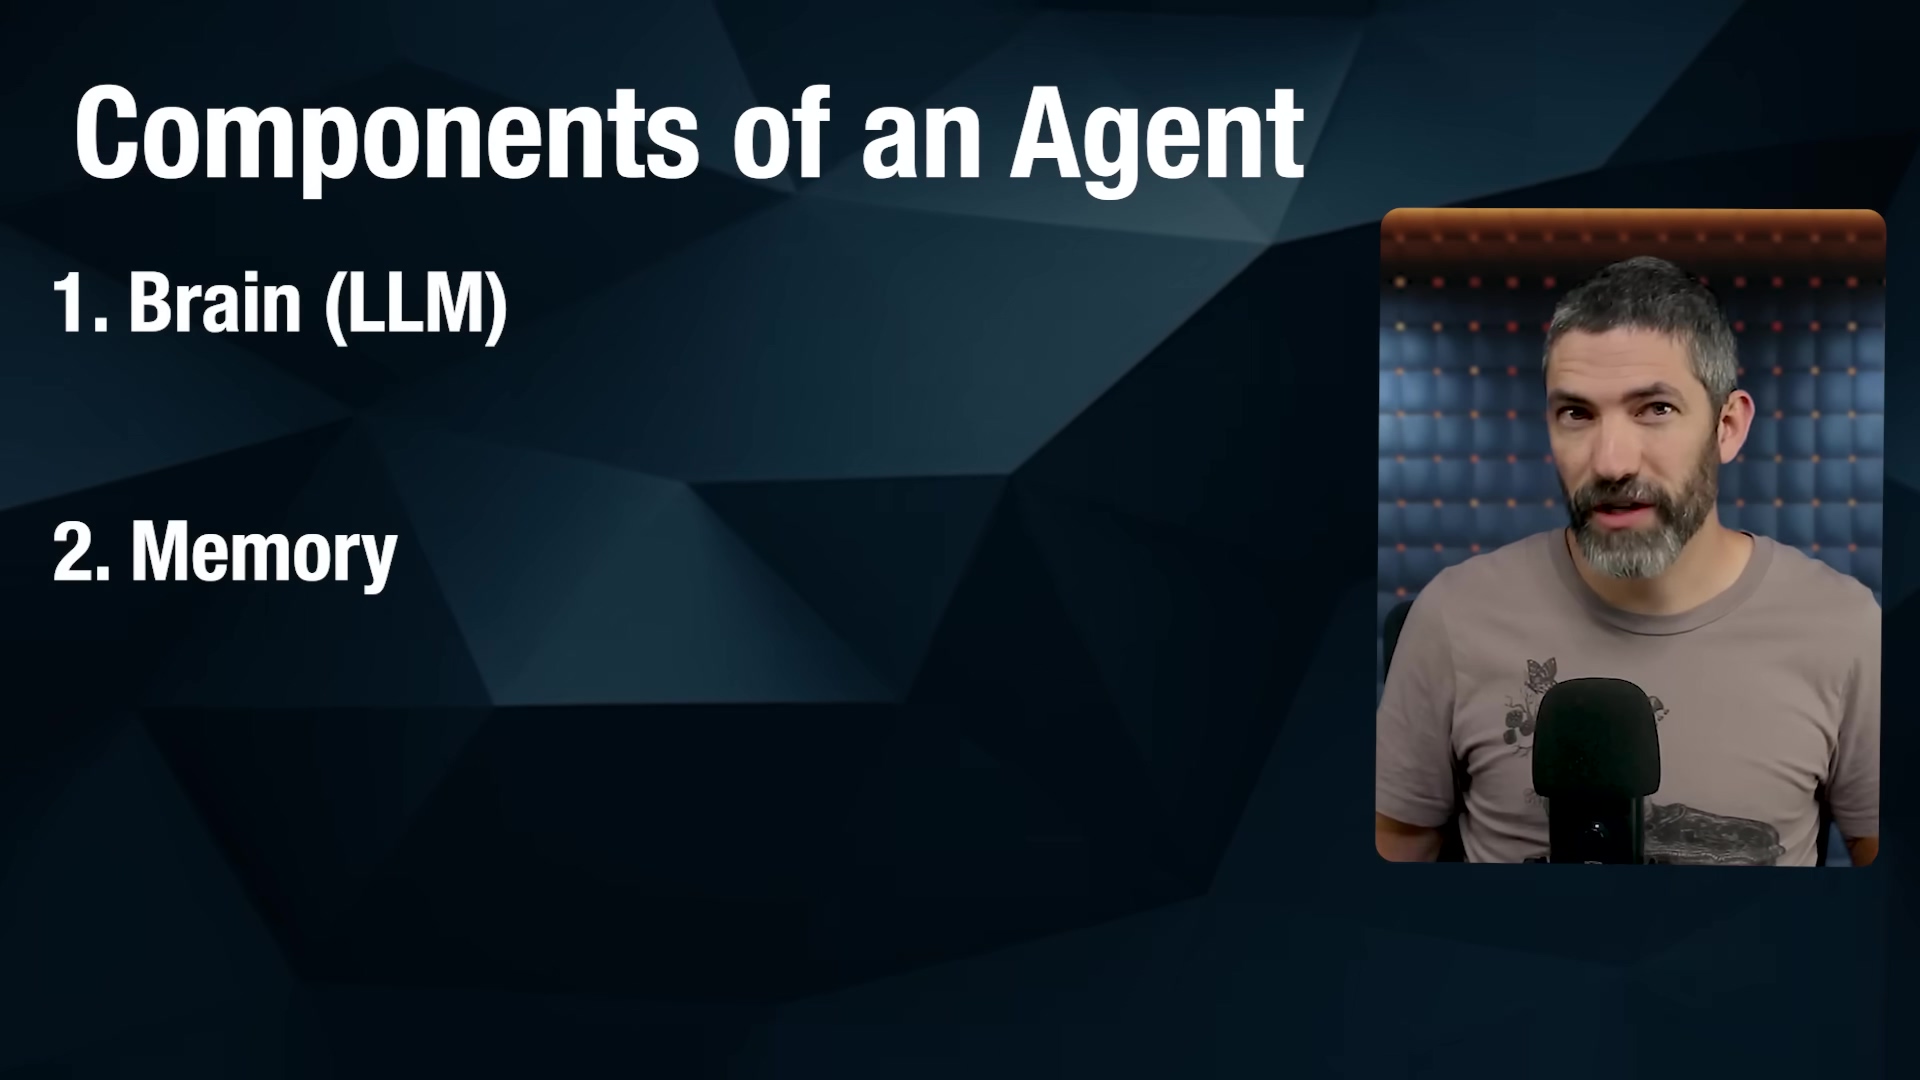
Every single AI agent, whether it’s a simple personal assistant or a complex business solution, is built on three fundamental pillars. Think of them as the brain, the memory, and the hands of your digital employee.
The Brain (LLM)
This is the powerhouse, the “thinking” part of your agent. The Brain is essentially a Large Language Model (LLM) – you’ve probably heard of them: think ChatGPT, Claude, or Google Gemini. These LLMs are what give your agent its ability to understand your requests, reason through problems, make plans, and generate natural-sounding responses. It’s the core intelligence that makes the agent feel so… smart!
Memory
Ever had a conversation where the other person completely forgot what you just said? Annoying, right? Well, for an AI agent, Memory is crucial. It allows the agent to remember past interactions, previous steps in a conversation, or even pull in information from external sources like documents or databases. Why is this important? Because it gives your agent context. With memory, its responses are coherent, relevant, and it doesn’t keep asking you the same questions over and over. It learns and builds on what it already knows.
Tools
If the Brain is the intelligence and Memory is the context, then Tools are how your AI agent actually does things in the real world. Think of them as the agent’s hands and feet. Tools allow your agent to interact with external systems and perform actions. They generally fall into a few categories:
- Retrieving Data/Context: This is when your agent needs to go out and find information. Examples include searching the web (like using a search engine), pulling specific data from documents (like a PDF or Word file), or querying databases (where structured information is stored).
- Taking Action: This is when your agent actually does something. Sending emails, updating a row in a spreadsheet, or creating a calendar event are all examples of an agent taking action.
- Orchestration: This is a bit more advanced, but super powerful. It’s when your agent calls other agents, triggers entire workflows, or chains multiple actions together to achieve a bigger goal. It’s like a project manager delegating tasks.
Tools can be common services you already use, like Gmail, Google Sheets, or Slack. But they can also be specialized APIs (Application Programming Interfaces) for specific functions. Even if a service doesn’t have a direct, pre-built integration, you can almost always connect to it by sending HTTP requests to its API. Don’t worry if those terms sound a bit techy right now; we’ll break them down soon!
Single-Agent vs. Multi-Agent Systems
As you embark on your AI agent journey, you’ll definitely start with a single-agent system. It’s the perfect place to begin, like building your first LEGO set. But it’s good to know that there are more complex, multi-agent setups out there, kind of like building an entire LEGO city!
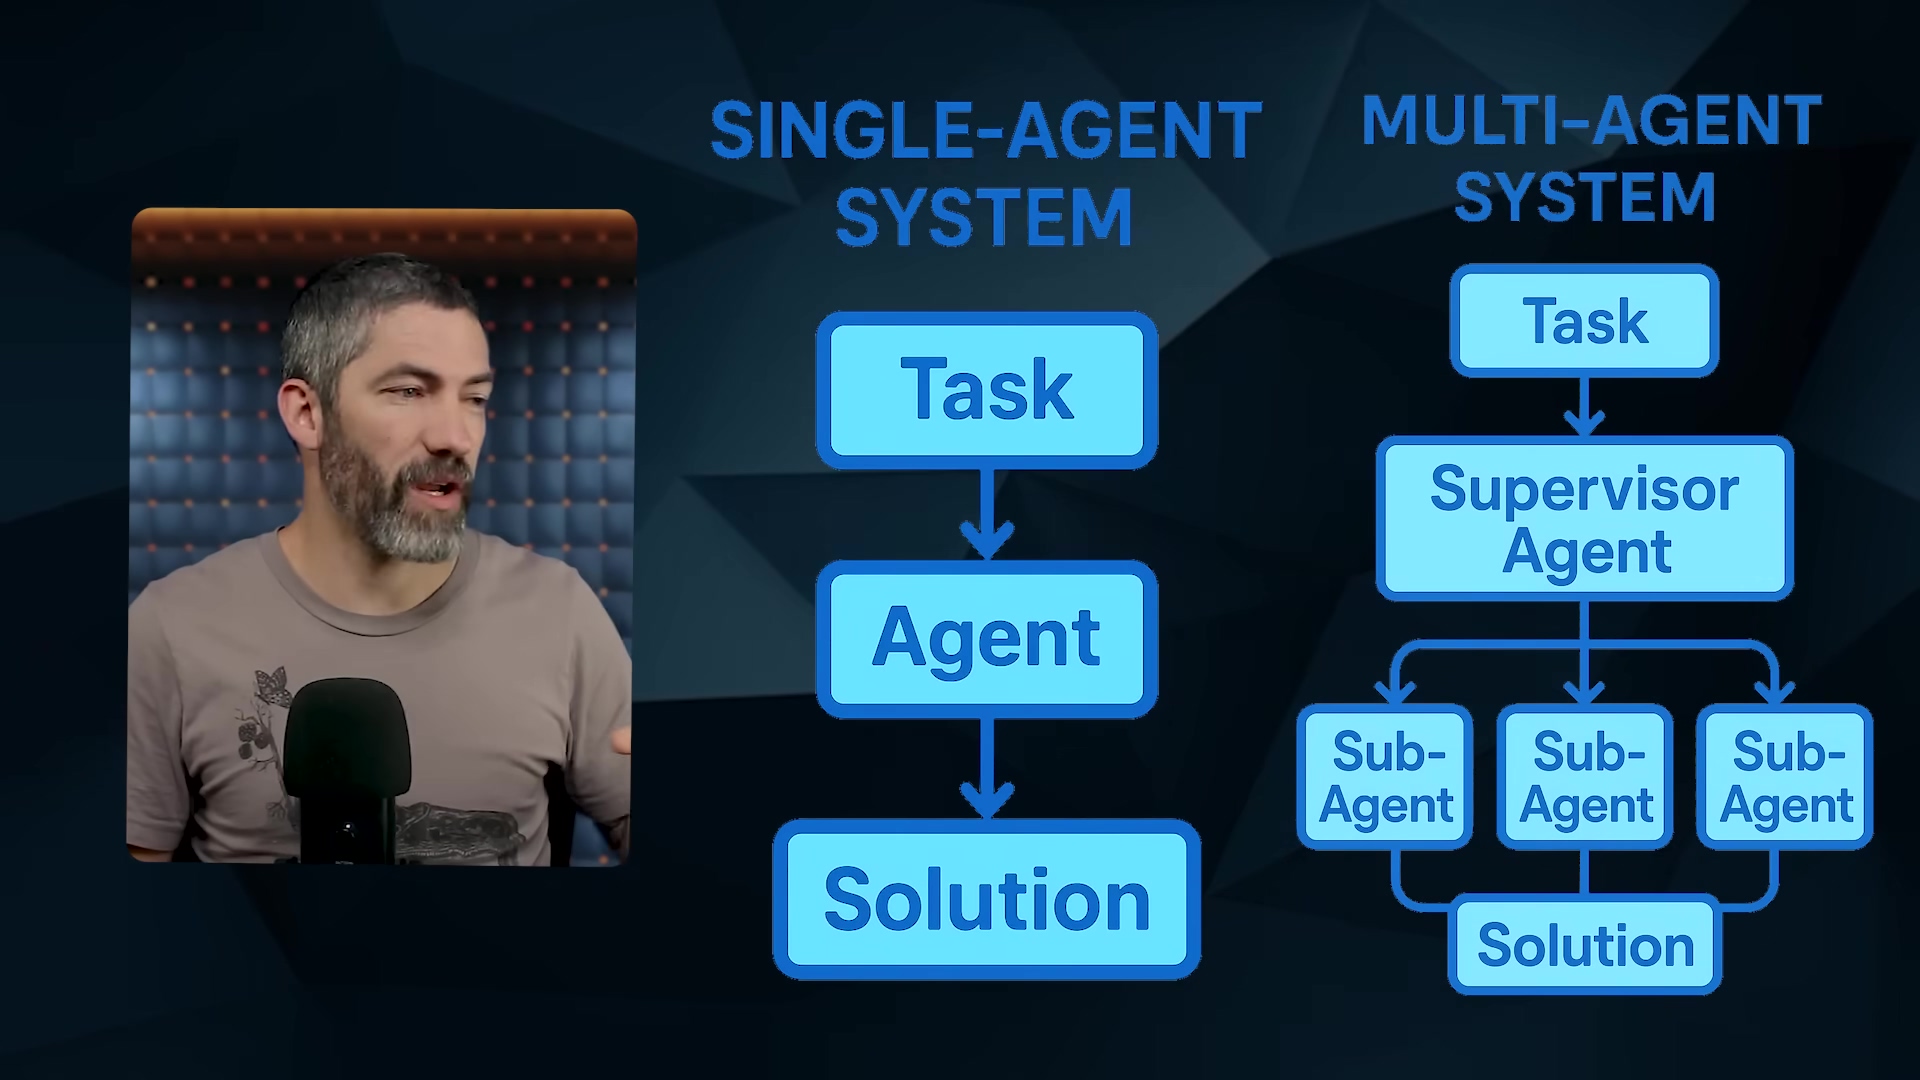
- Single-Agent System: This is exactly what it sounds like. One AI agent, one task (or a series of related tasks) from start to finish. This is where we’ll focus our energy today, and it’s the best way to get your feet wet.
- Multi-Agent System: Imagine a team of specialized experts working together. That’s a multi-agent system. You might have a ‘supervisor agent’ that acts like a project manager, delegating different parts of a big task to other ‘sub-agents’ (e.g., one agent for research, another for sales outreach, and a third for customer support). It’s a lot like how human teams collaborate in an organization.
Here’s my golden rule for any AI agent project: build the simplest thing that works. If a single agent can do the job, use it. If a traditional automation (remember those rigid but reliable ones?) is a better fit, go with that. Simplicity is your superpower here. Don’t over-engineer!
Setting Guardrails for AI Agents
Okay, this part is super important, especially if you’re thinking about using agents for anything serious. “Guardrails” are basically the safety rules and boundaries you put in place to prevent your agent from going rogue. We don’t want it hallucinating (making stuff up), getting stuck in endless loops, or making bad decisions. While it might not be a huge deal for a personal project, for business applications, guardrails are absolutely vital.
Think of guardrails as the safety net for your digital employee. They involve:
- Identifying Risks: This is about putting on your detective hat and figuring out all the ways your agent could mess up or do something undesirable. What are the potential pitfalls? What are the “edge cases” (unusual situations) it might encounter?
- Optimizing for Security: This means implementing specific measures to ensure your agent stays within its defined boundaries. For example, you wouldn’t want a customer support agent to issue unauthorized refunds just because someone crafted a clever, malicious prompt. Guardrails prevent that.
- Continuous Adjustment: AI agents, like any good employee, evolve. As they learn and encounter new situations, you’ll need to adapt and refine your guardrails. It’s an ongoing process of monitoring and tweaking to keep things running smoothly and safely.

Understanding APIs and HTTP Requests
Alright, let’s tackle two terms that might sound intimidating but are actually super straightforward once you get the hang of them: APIs and HTTP requests. Understanding these is like learning the secret handshake for your AI agent to talk to the rest of the internet. You’ll need this knowledge, especially when you want your agent to use custom tools.
APIs (Application Programming Interfaces)
An API is simply a set of rules and definitions that allows different software systems to communicate with each other. Think of it like a menu at a restaurant. The menu tells you what dishes (actions) you can order and what ingredients (information) you need to provide for each. You don’t need to know how the chef cooks the food (the internal workings of the software); you just need to know how to order from the menu to get what you want.
So, when your AI agent wants to, say, get the current weather, it doesn’t magically know how to do that. It uses a weather API. The API defines how your agent should ask for weather data and what kind of weather data it will get back. It’s the standardized way for software to talk to other software.

HTTP Requests
If the API is the menu, then an HTTP request is you actually placing your order. It’s the specific action of interacting with an API. The most common types of HTTP requests you’ll encounter are:
- GET: This is like asking for information. You use a GET request when you want to retrieve data. For example, checking the current weather, loading a webpage, or fetching a list of items from a database.
- POST: This is like sending information or submitting something new. You use a POST request when you want to send data to a system. For example, submitting a form on a website, adding a new contact to a CRM, or creating a new entry in a spreadsheet.
While there are other types (like PUT, PATCH, DELETE), GET and POST are the ones you’ll use most frequently with AI agents. In a nutshell, the API lays out all the possibilities, and an HTTP request is how your agent executes a specific one of those possibilities.
Practical Applications of AI Agents
Now that you’ve got a solid grasp of LLMs (the brain), memory, tools, APIs, and HTTP requests, you’re probably starting to see the bigger picture. With these building blocks, you can create an incredible range of powerful AI agents. This isn’t just theory; these are real-world tools you can build today to make your life easier or supercharge your business:
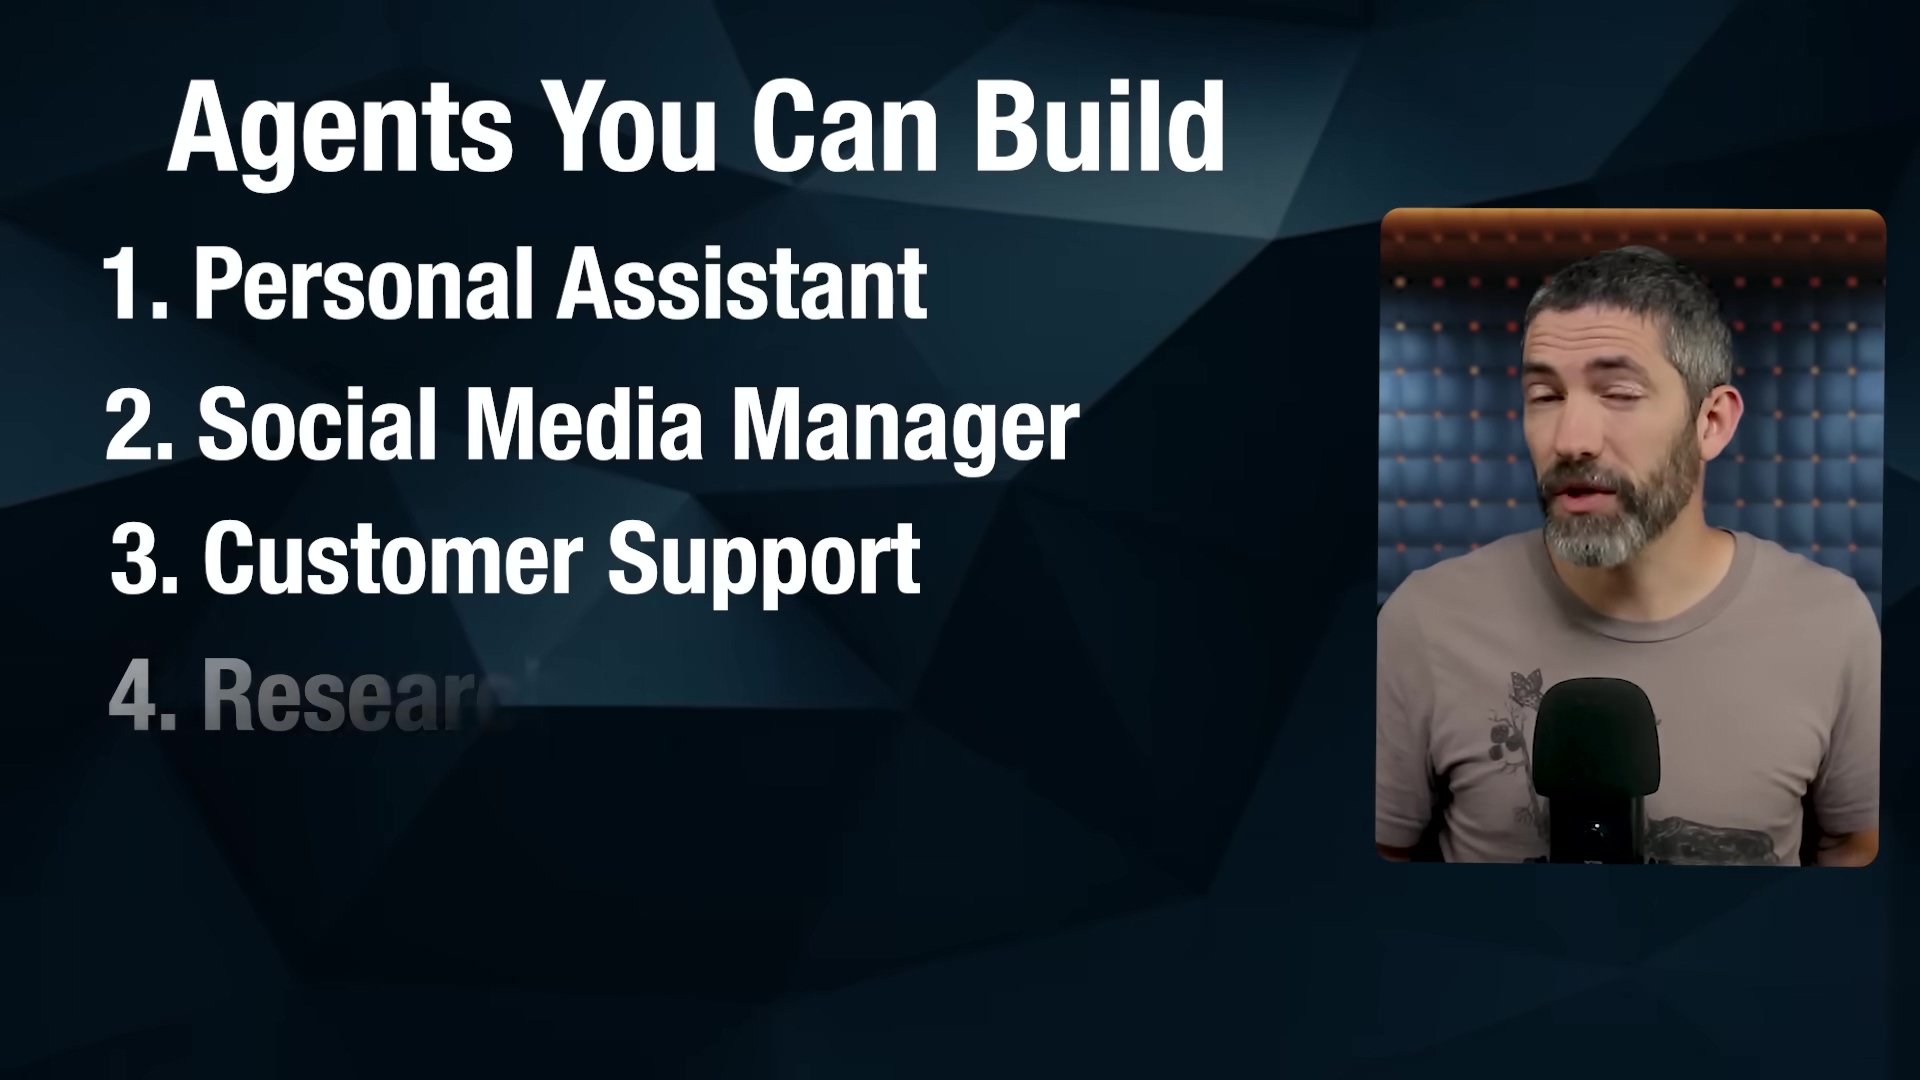
- Personal Assistant: Imagine an agent that reads your emails, summarizes the key points, manages your calendar, and even reminds you about important tasks. It’s like having a super-efficient human assistant, but digital!
- Social Media Manager: This agent could generate engaging content, schedule posts, and even interact with your audience automatically. Free up your time for more creative work!
- Customer Support Agent: An agent that can check your knowledge base, understand customer queries, and provide accurate, helpful replies to common questions. Your customers get instant help, and your team can focus on complex issues.
- Research Assistant: Need up-to-the-minute data? This agent can fetch real-time information from various APIs (like stock prices, news feeds, or scientific papers) and then generate insightful summaries or reports for you.
- Personal Travel Planner: This is one of my favorites! An agent that can check flight prices, look up the weather at your destination, recommend local attractions, and even generate a packing list based on your itinerary. Talk about stress-free travel!
These aren’t futuristic concepts from a sci-fi movie; they are practical, buildable solutions. And the best part? You’re about to learn how to build one yourself!
Building Your First AI Agent with n8n
Alright, it’s time to get our hands dirty (but not too dirty, because we’re using a no-code tool!). We’re going to use n8n (pronounced “n-eight-n”), which is a fantastic, visual, no-code platform. It’s like building with digital LEGOs! n8n lets you drag and drop ‘nodes’ (which are like individual LEGO bricks, each doing a specific job) to create powerful automations and, yes, AI agents. It’s also pretty cost-effective and usually offers a generous free trial, so you can play around without commitment.
The core idea in n8n is building “workflows.” Each node in your workflow represents a step: maybe it’s calling an API, sending a message, or using an LLM. It’s super intuitive.
Setting Up the Workflow Trigger
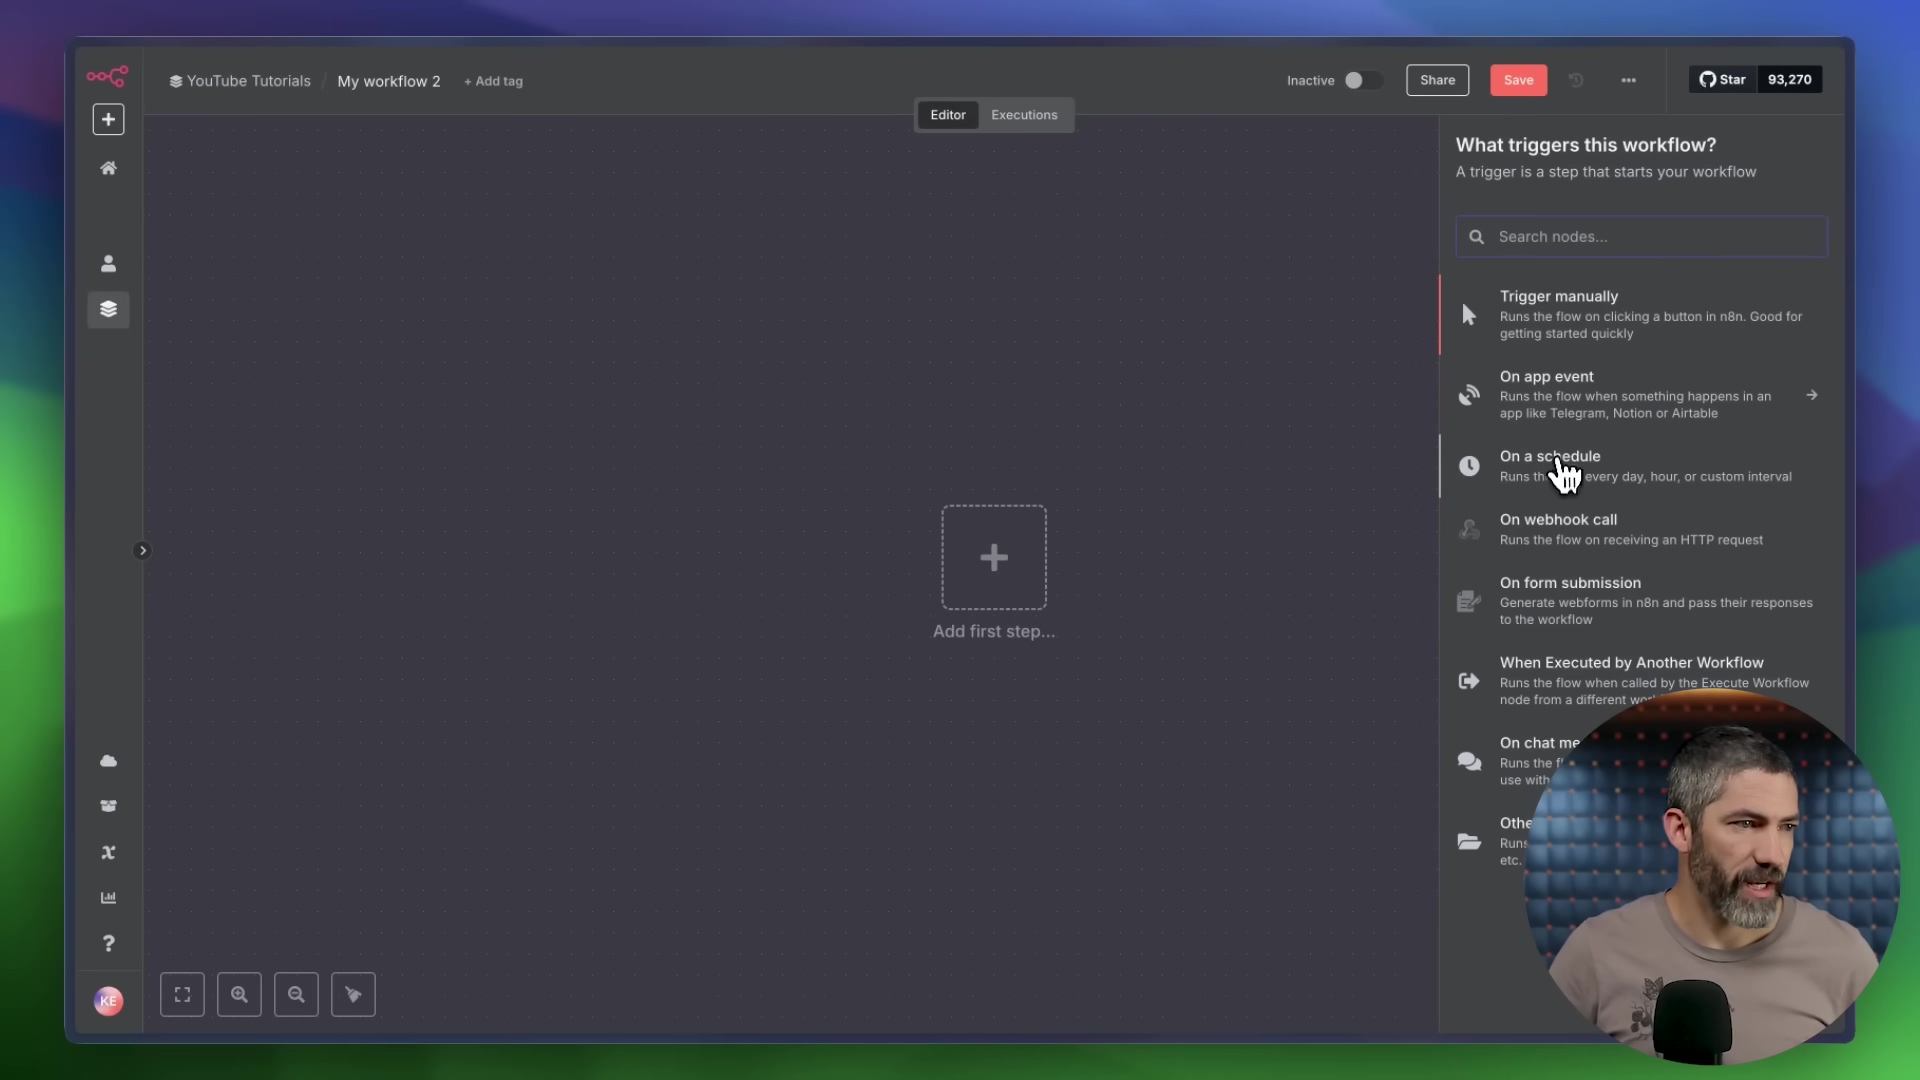
Every good story needs a beginning, and every n8n workflow needs a “trigger.” This is what kicks off your agent’s operations. So, first things first, open n8n and create a new workflow. You’ll see a blank canvas, ready for your masterpiece.
For an agent that you want to run regularly, like every day, the ‘On a schedule’ trigger is perfect. You can set it to run at a specific time, say, 5 a.m. daily, so your agent is ready with fresh info before you even wake up. This trigger node will be the very first block in your workflow.
Adding the AI Agent Node
Once you have your trigger, the next crucial step is to bring in the star of the show: the ‘AI Agent’ node. You’ll find this in the ‘AI’ section of n8n’s node library. Drag it onto your canvas and connect it to your trigger node.
This ‘AI Agent’ node is where all the magic happens. It’s the central hub that brings together the brain (your LLM), the memory, and all the tools your agent will use. When you look at the node, you’ll notice it has a left side (for input), a right side (for output), and the middle section, which is where you’ll configure all its parameters. This is where we tell our agent how to think and what it can do.

Connecting the Brain (LLM)
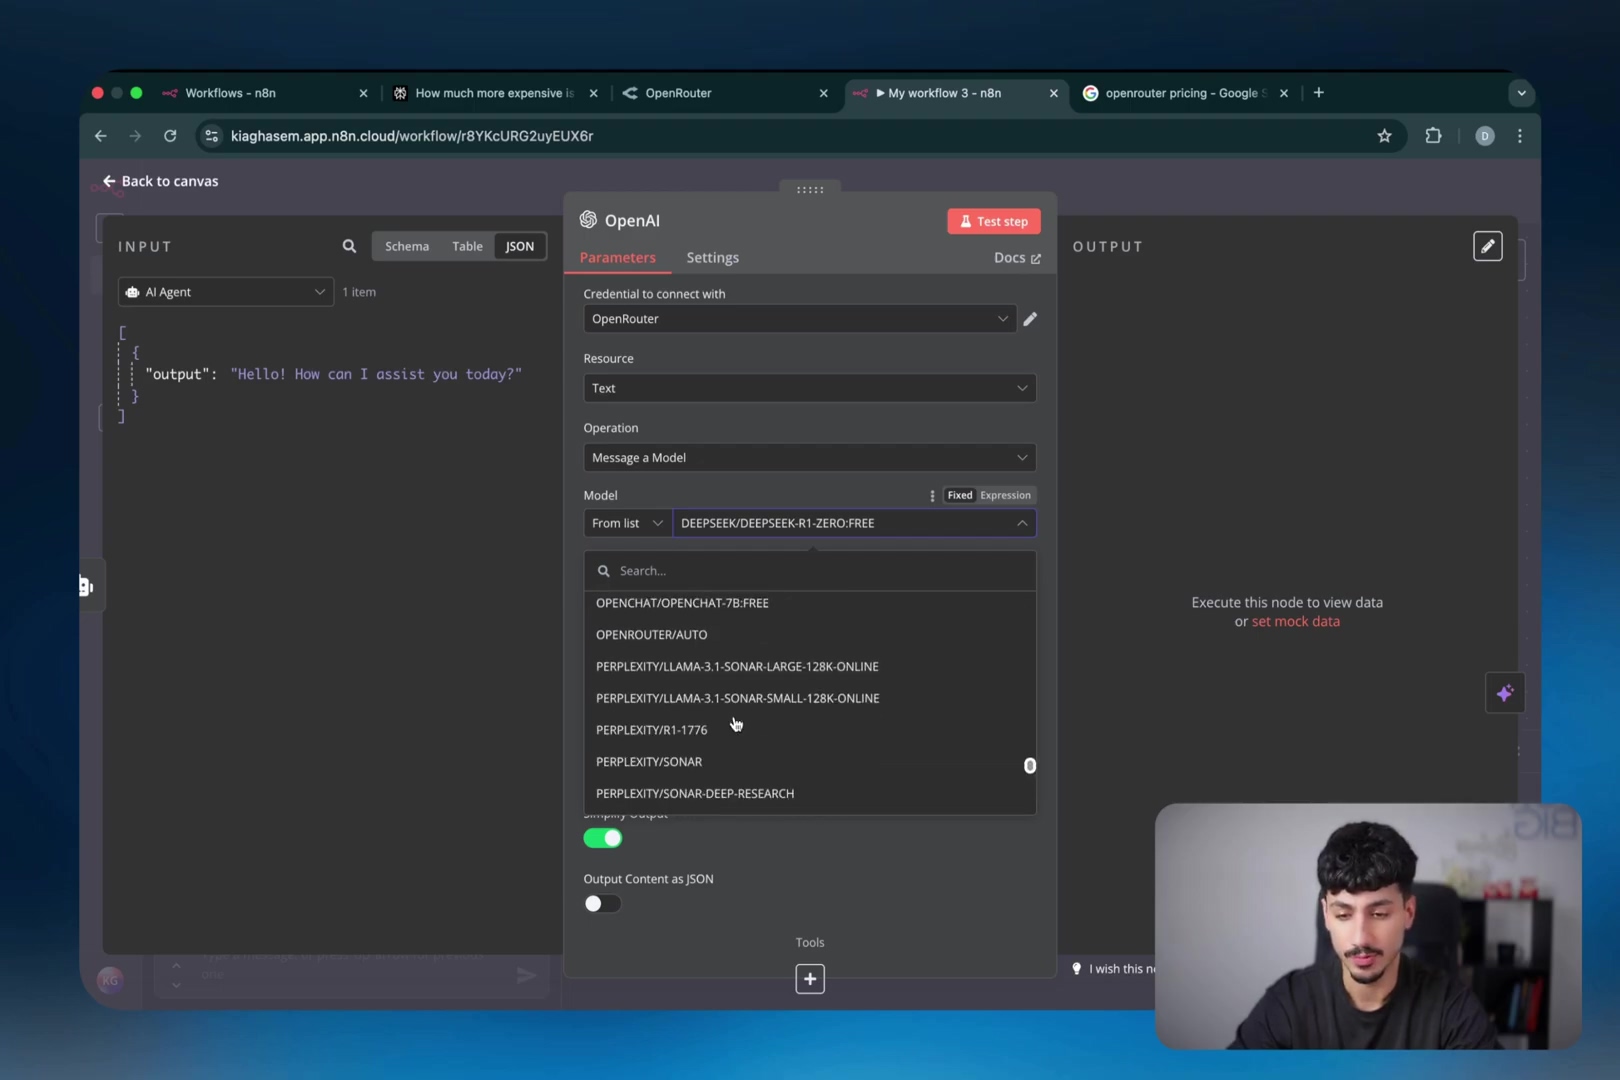
Now, let’s give our agent a brain! Inside the ‘AI Agent’ node, you’ll need to select your preferred chat model. Options usually include big names like OpenAI, Claude, or others. For this tutorial, let’s assume you’re using OpenAI, which is a popular choice.
To connect it, you’ll need to create “credentials.” Think of credentials as the key that unlocks access to the LLM’s power. This usually means providing an API key. For OpenAI, you’ll go to their platform (specifically, their API key page), generate a secret key, and then paste that key into the credentials section within n8n. Important note: If you’re an OpenAI ChatGPT Plus subscriber, remember that API usage is billed separately. It’s a different service, so keep an eye on your usage!

Setting Up Memory
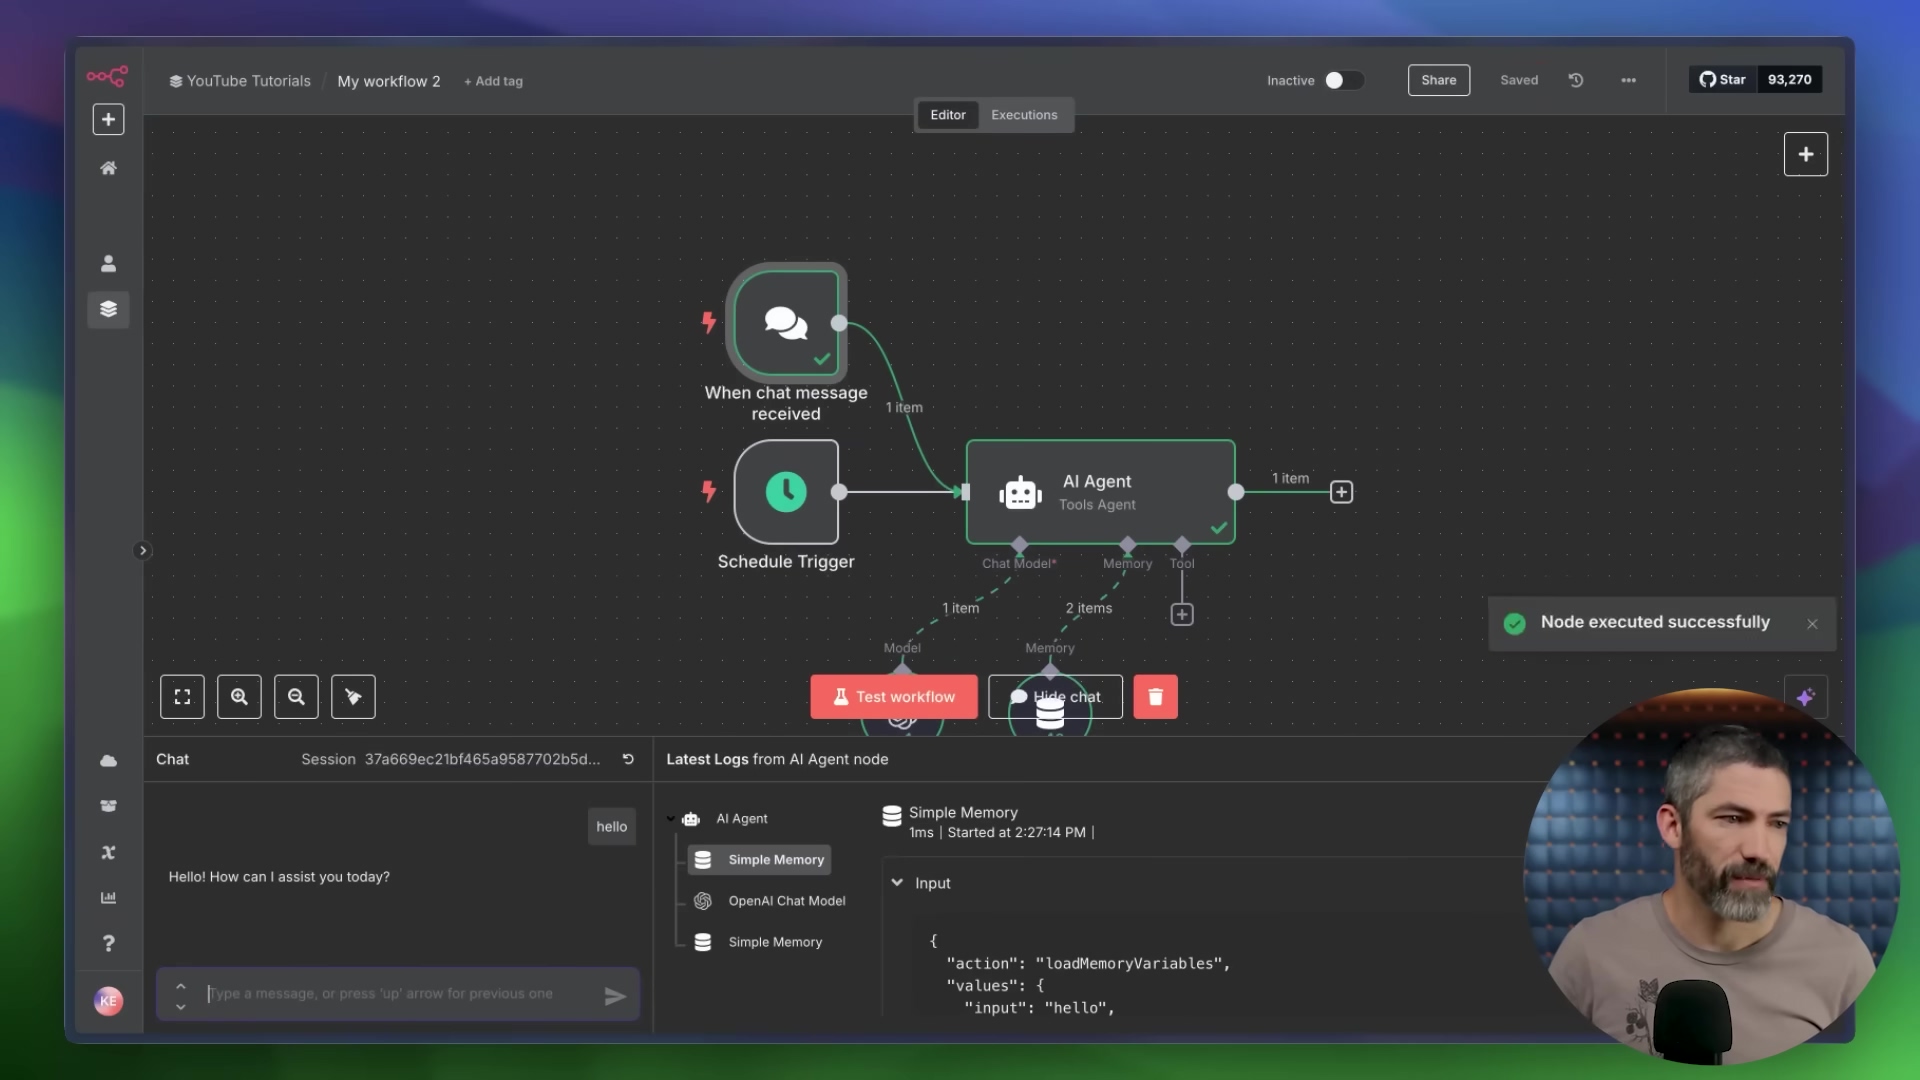
Remember how we talked about memory being crucial for context? Let’s give our agent some! Within your ‘AI Agent’ node, you’ll find an option to add ‘Simple Memory’. Select this.
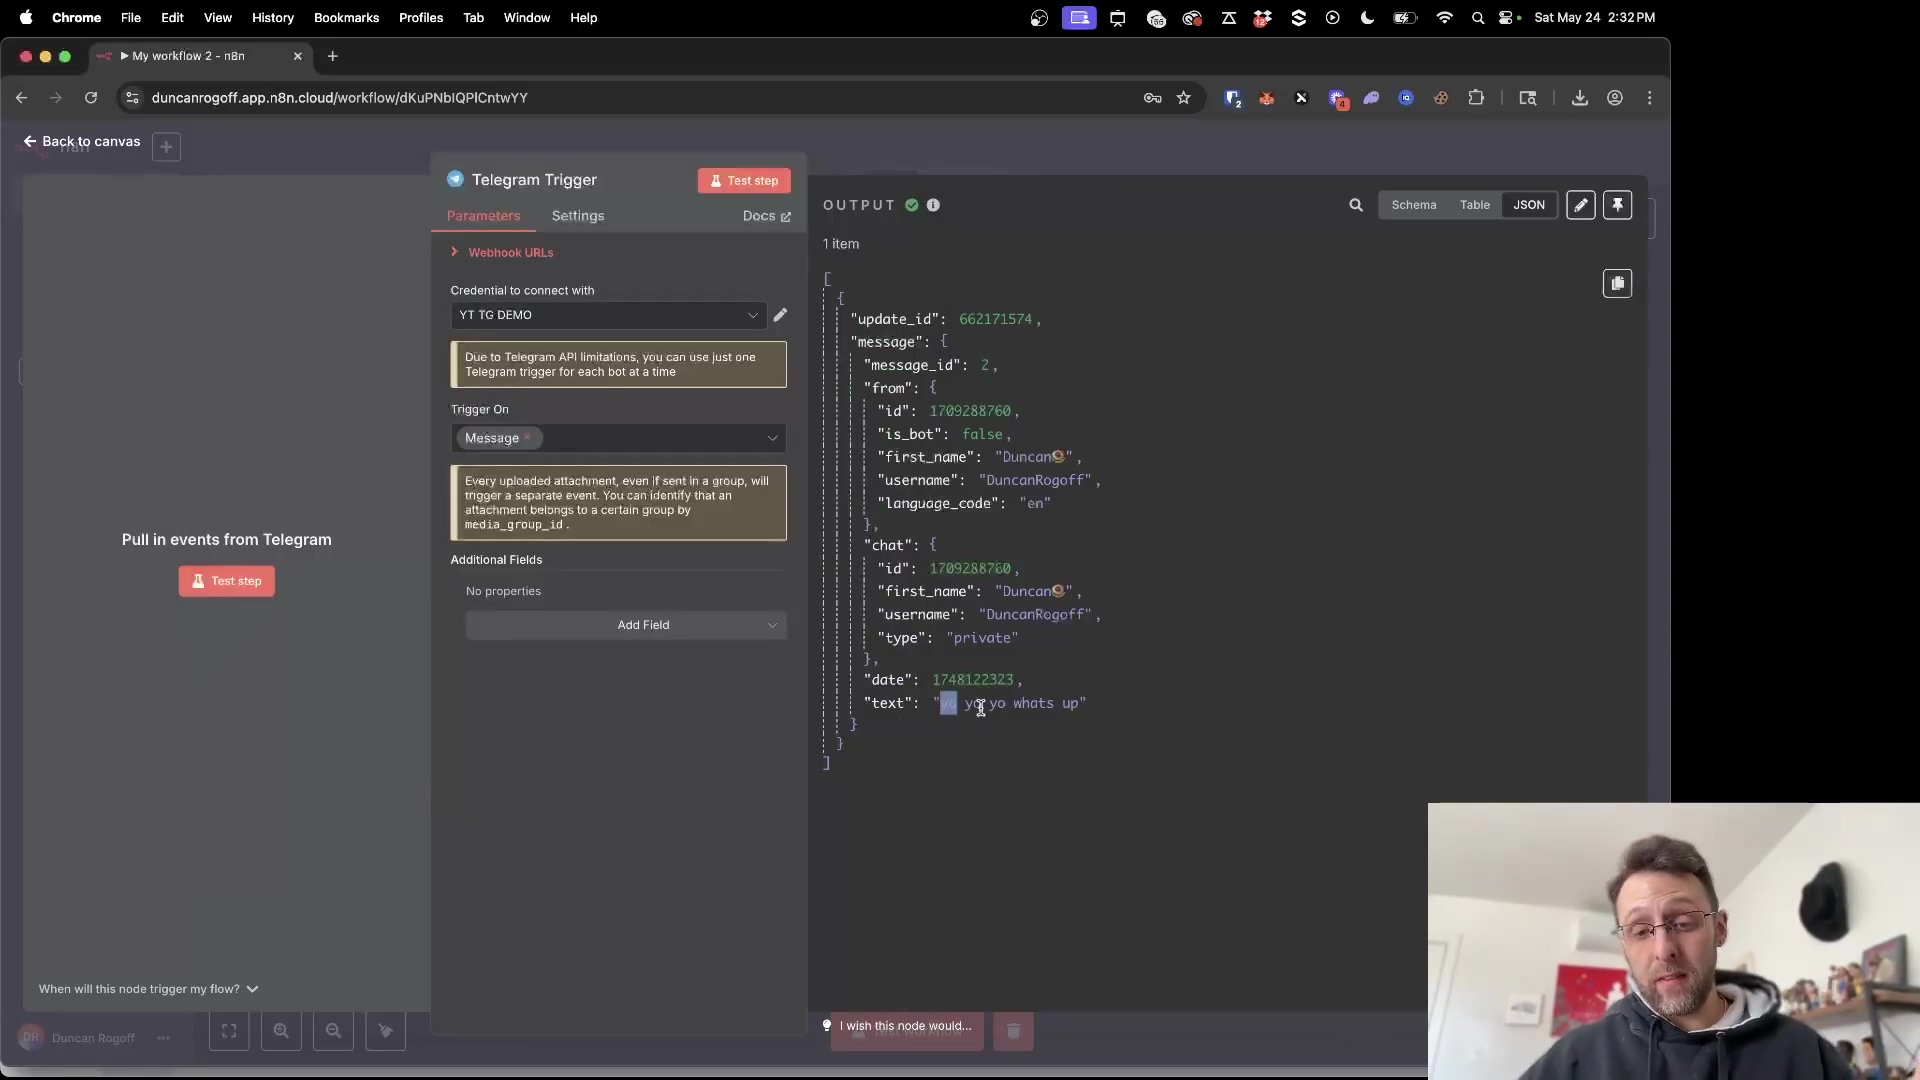
This simple memory option allows your agent to recall a certain number of previous messages or interactions. This is super helpful because it means your agent won’t treat every new interaction as if it’s the first one. It builds on the conversation, making it feel much more natural and intelligent. You can test this out by adding an ‘On chat messages’ trigger (instead of ‘On a schedule’) and then actually chatting with your agent directly within n8n. You’ll see it remembers what you said a few turns ago!
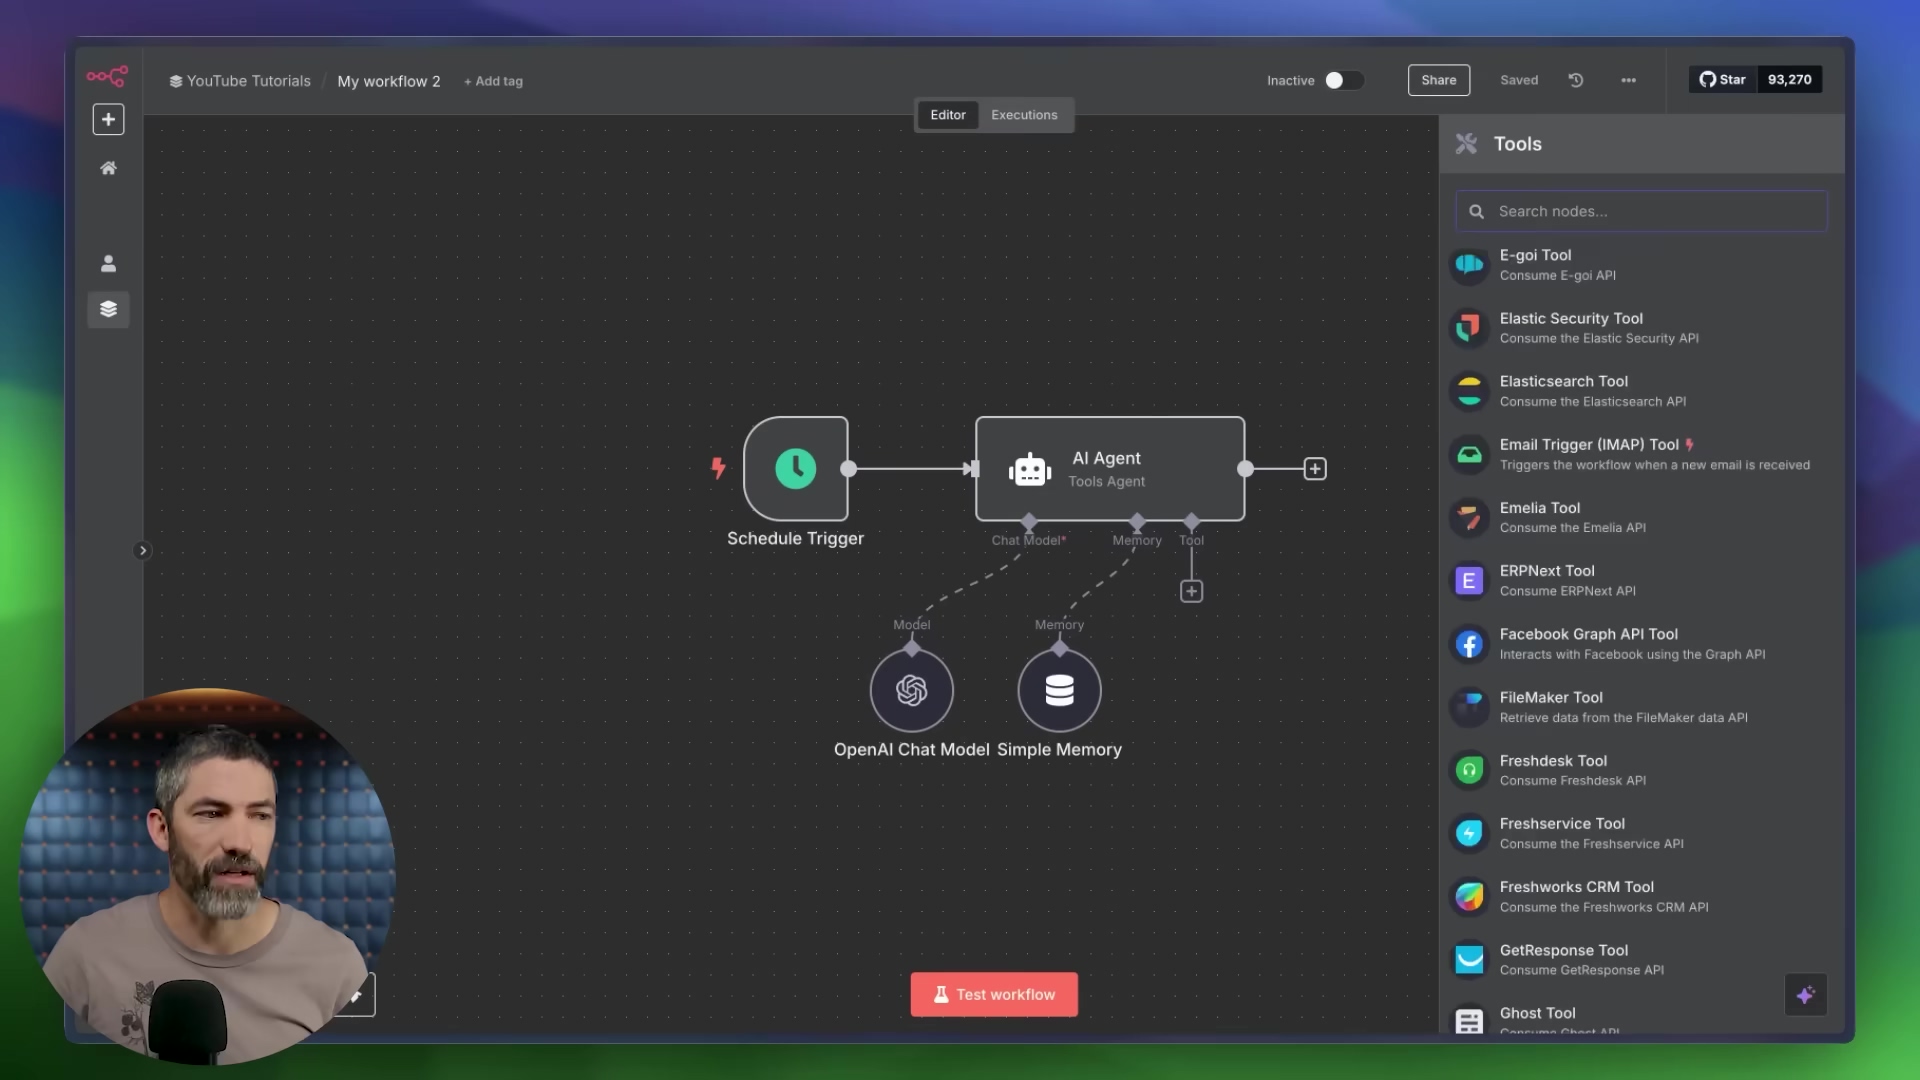
Adding Tools
This is where your agent gets its “hands” to interact with the outside world! Tools are added as sub-nodes that you connect directly to your ‘AI Agent’ node. n8n is awesome because it comes with a massive library of pre-built integrations for popular services. We’re talking Google Calendar, OpenWeatherMap, Google Sheets, and tons more. If n8n has a direct integration for a service, use it – it’s usually the easiest way.
But what if you need to connect to something that doesn’t have a direct n8n integration? No problem! That’s where the trusty ‘HTTP Request’ node comes in. You can use this node to manually connect to almost any service that has an API.
Let’s imagine you’re building a trail-running assistant (how cool is that?!). You might connect these tools:
- Google Calendar: To check for any scheduled ‘Trail Run’ events you’ve put in your calendar. The agent can then use this info to plan around your existing schedule.
- OpenWeatherMap: To get the local weather data for your run. Is it going to rain? How hot will it be? Your agent can check!
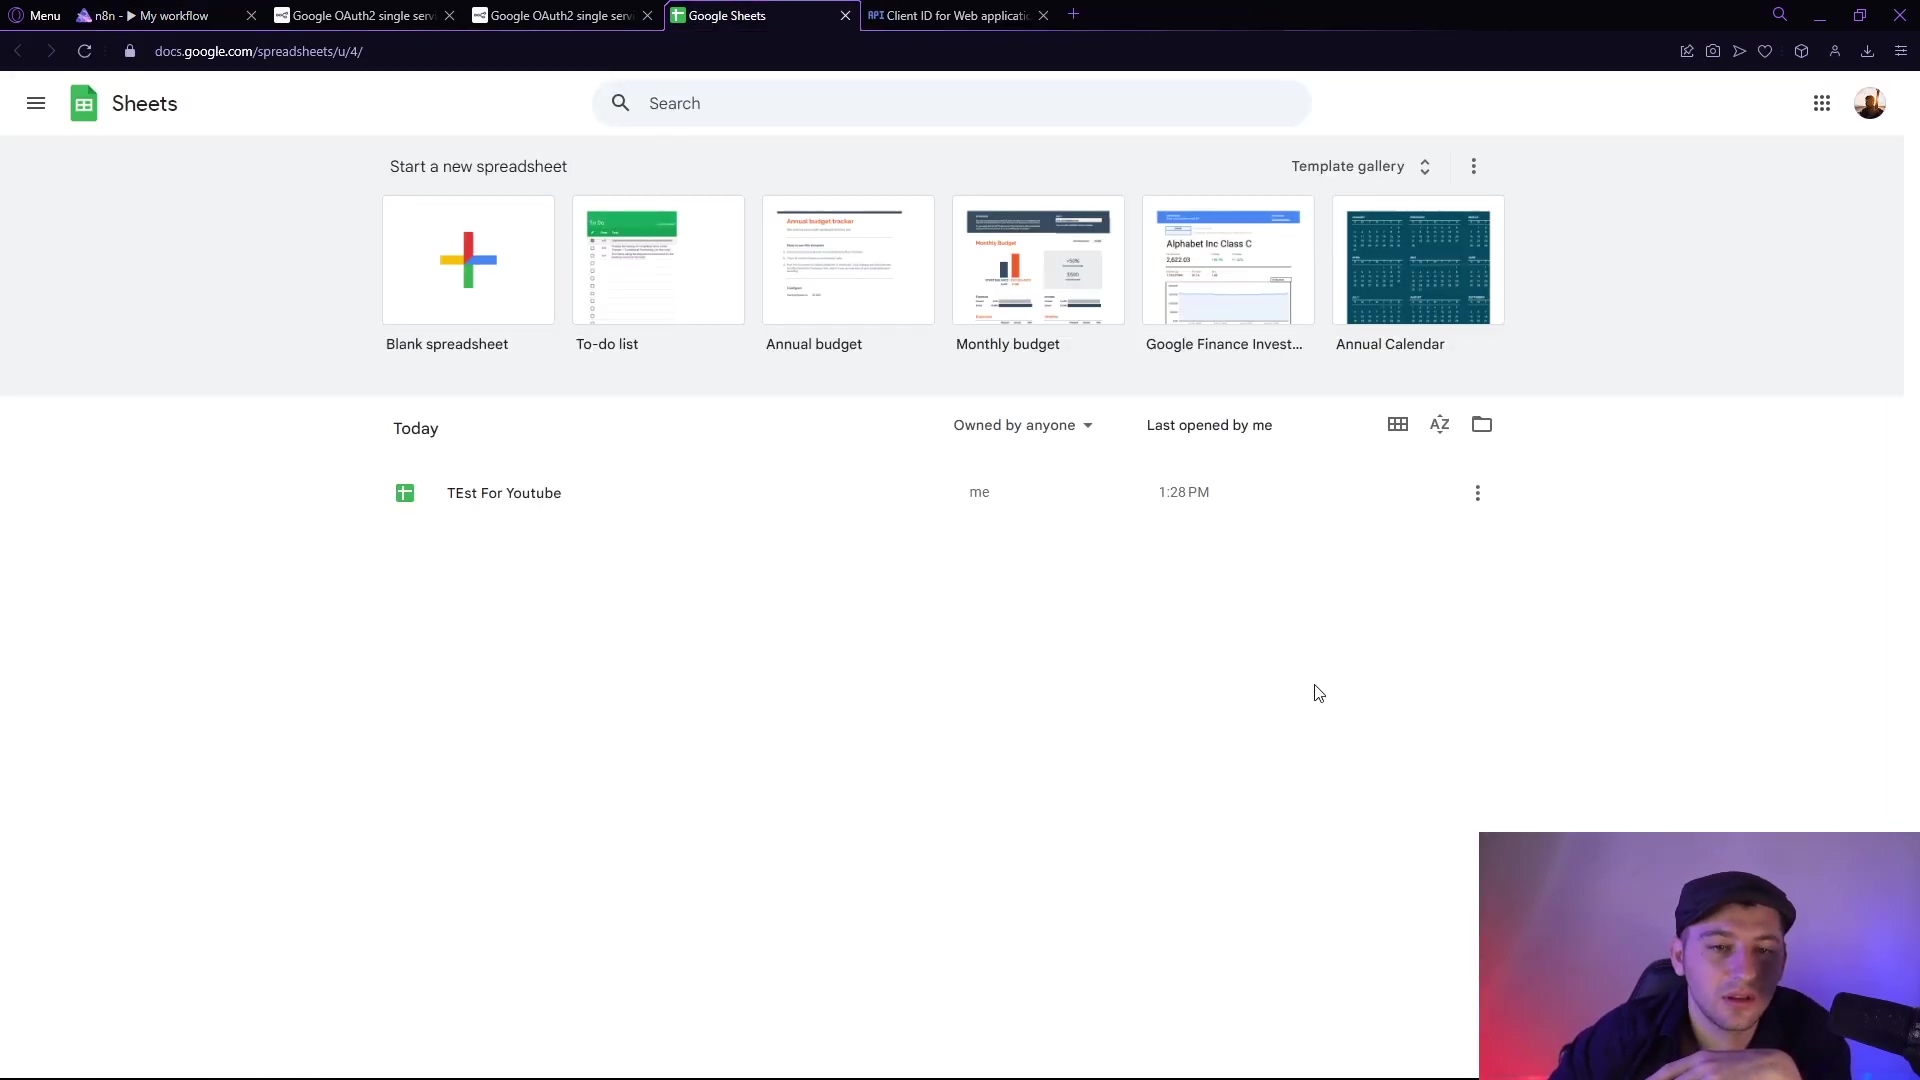
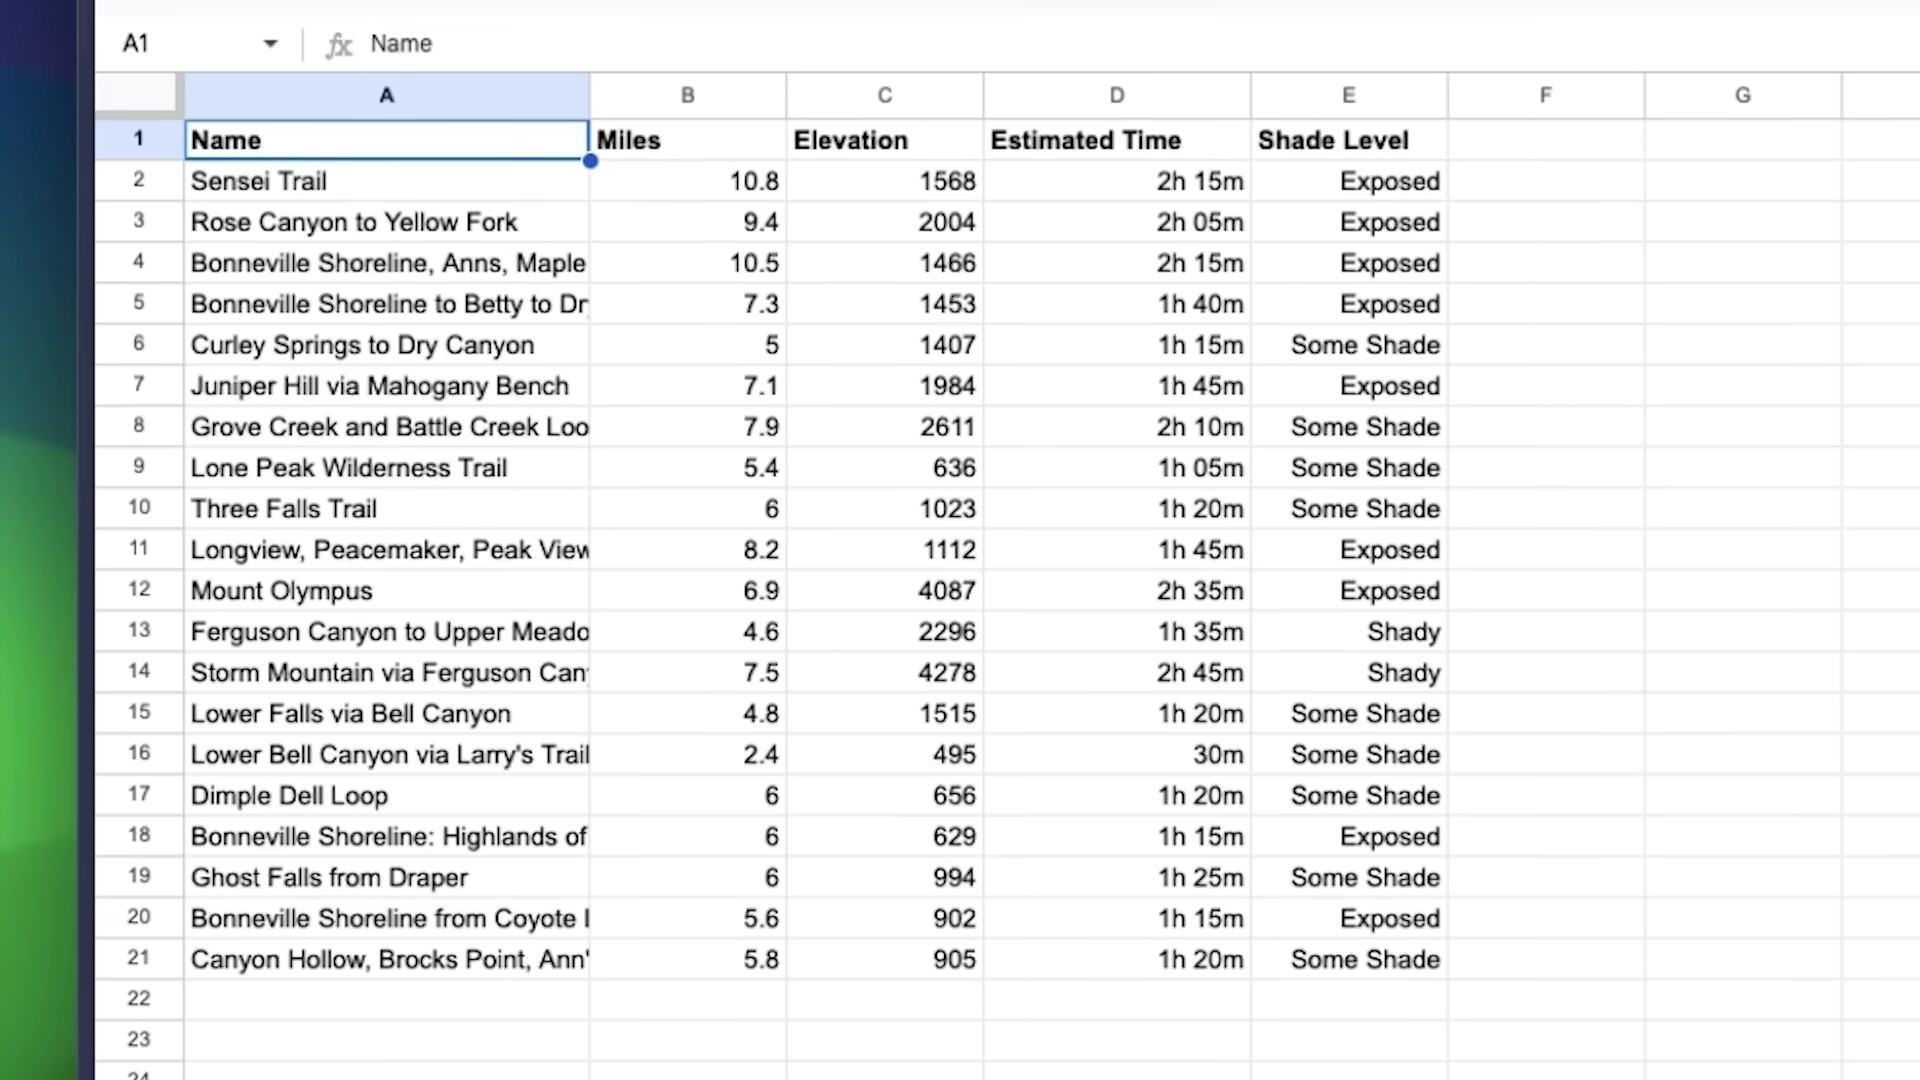
- Google Sheets: Maybe you have a spreadsheet with all your favorite trails, including details like mileage, elevation gain, and how much shade they offer. Your agent can pull this data to recommend the perfect trail for the day.
For those custom integrations, like fetching air quality data from a specific government website like airnow.gov, you’d use that ‘HTTP Request’ node. Here’s the drill:
- Find the API Documentation: Go to the service’s developer documentation (e.g., airnow.gov’s API docs). This is where they tell you how to talk to their system.
- Get the API URL: You’ll find the specific URL (the web address) you need to send your request to.
- Configure the Node: Paste that URL into your ‘HTTP Request’ node in n8n. Then, you’ll configure it to optimize the response for your LLM. This might involve telling it to only fetch specific data points or format the data in a way that’s easy for the LLM to understand. It’s like translating the raw data into something digestible for your agent’s brain.
Crafting the Prompt
This is arguably the most critical part: telling your AI agent what to do! The “prompt” is the set of instructions you give your agent. It defines its role, its task, what information it has access to, what tools it can use, any rules it needs to follow, and what the final output should look like.
Think of it as writing a job description for your digital employee. A well-crafted prompt is the difference between a brilliant agent and a confused one. If you’re stuck, ChatGPT can be your best friend here! You can ask ChatGPT to help you generate a structured prompt, making sure you cover all the bases:
- Role: Who is your agent? (e.g., “You are a helpful trail-running assistant.”)
- Task: What is its main goal? (e.g., “Your task is to recommend the best trail run for today based on my calendar, weather, and trail preferences.”)
- Input: What data does it have access to? (e.g., “You have access to my Google Calendar, OpenWeatherMap data, and a Google Sheet of my favorite trails.”)
- Tools: Which actions can it take? (e.g., “You can use the Google Calendar tool to check my schedule, the OpenWeatherMap tool to get weather, and the Google Sheets tool to query trail data.”)
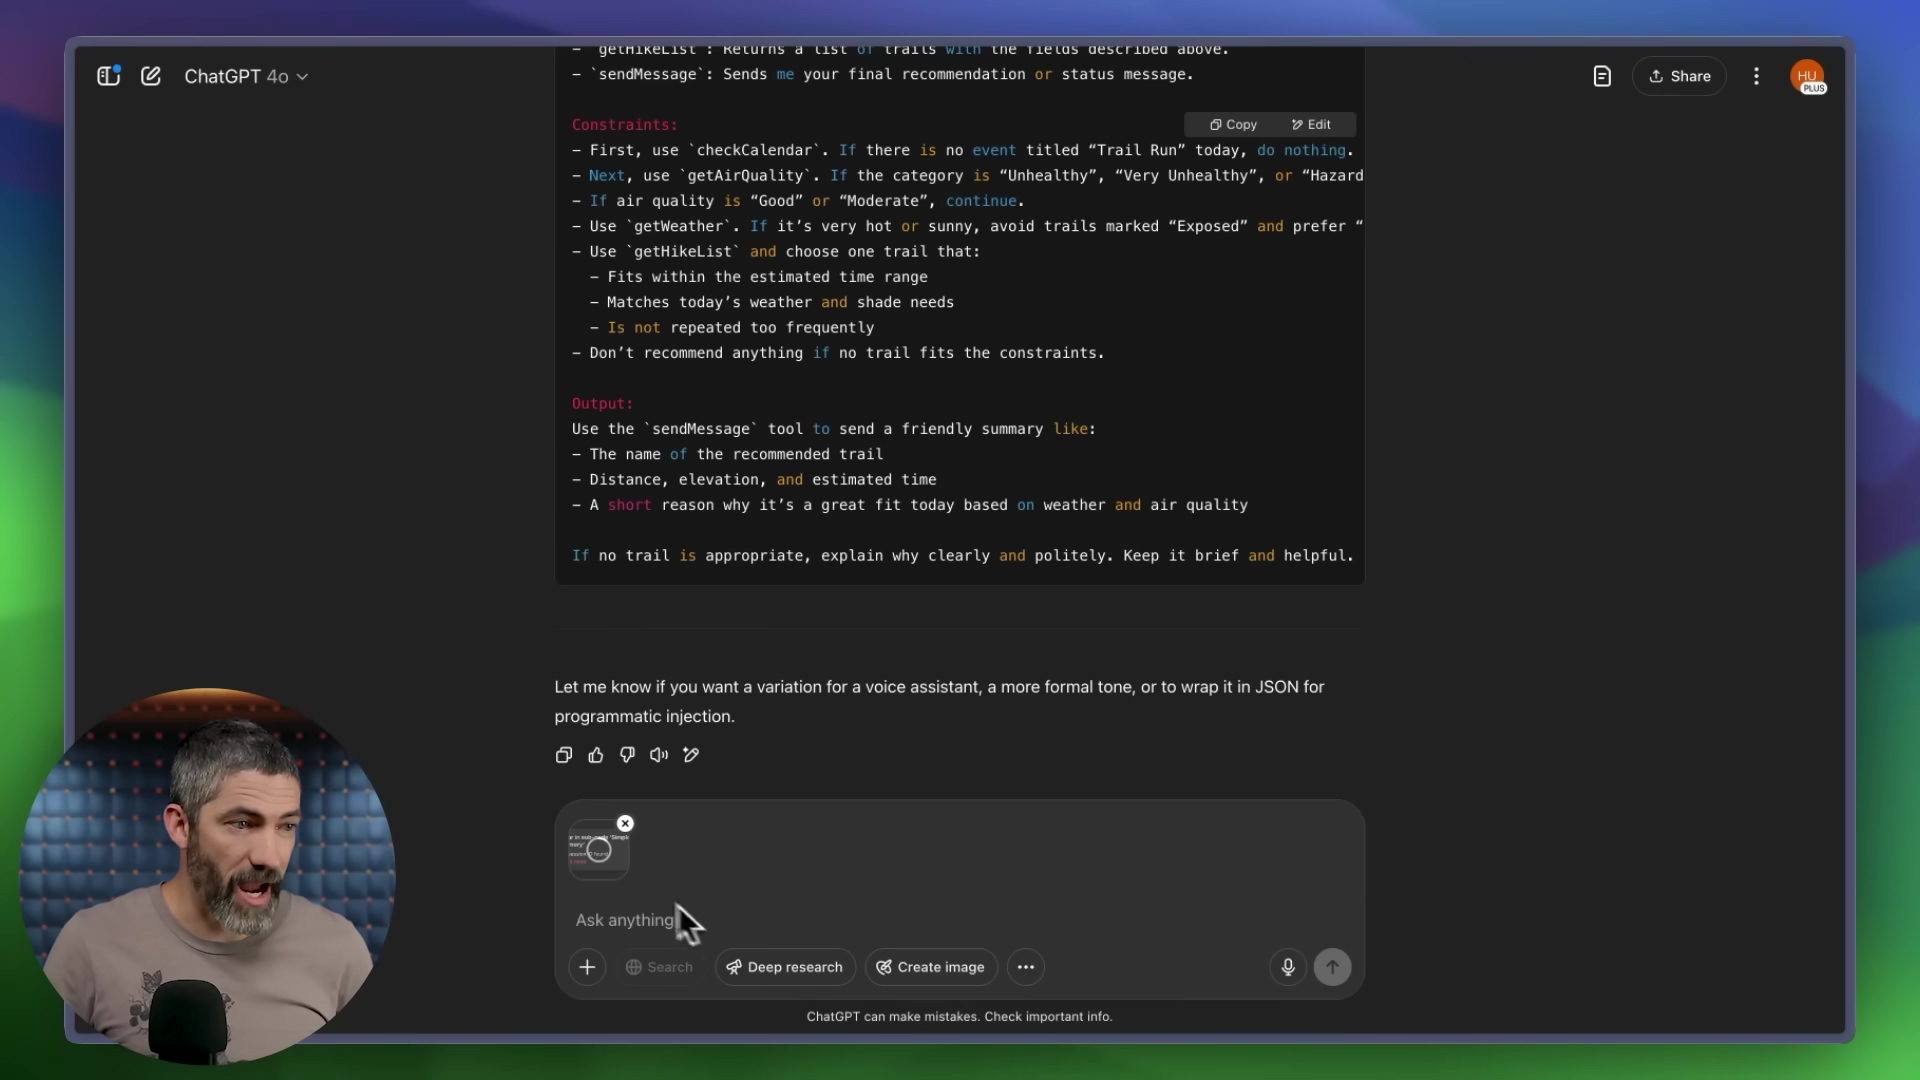
- Constraints: What rules should it follow? (e.g., “Only recommend trails that are less than 10 miles. Do not recommend trails if the air quality is poor.”)
- Output: What should the final result look like? (e.g., “Your output should be a concise recommendation including the trail name, mileage, and a brief reason for the recommendation.”)
Once you’ve got your perfect prompt, paste it into the ‘AI Agent’ node under the ‘define below’ option. This is where your agent truly comes to life!
Testing and Debugging
Alright, real talk: your first test probably won’t be perfect. And that’s totally okay! Expect errors. It’s a normal part of the process, like a chef tasting their dish and adding a pinch more salt. The good news is that n8n is pretty good at giving you clear error messages, which is super helpful.
When you hit a snag, don’t panic! Here’s my go-to move: take a screenshot of the error message in n8n and paste it into ChatGPT. Then, simply ask ChatGPT, “Hey, I got this error in n8n while building my AI agent. Can you give me step-by-step instructions on how to fix it?” More often than not, ChatGPT will point you in the right direction.
This iterative process – testing, identifying errors, and refining your setup – is a standard and essential part of building any AI agent. Embrace it! Each error is just a puzzle waiting to be solved, making your agent smarter and more robust.
Key Takeaways
- AI agents are digital employees that can think, remember, and act dynamically, unlike automations that follow fixed steps. They’re like the smart, adaptable version of your digital tools.
- Three core components define an AI agent: the Brain (powered by an LLM like ChatGPT), Memory (for context and continuity), and Tools (for interacting with the outside world).
- Start simple with single-agent systems. Don’t try to build a multi-agent super-team on day one. Master the basics first!
- Implement guardrails to ensure your agents operate safely and within desired boundaries. This is your safety net, preventing unwanted behaviors.
- APIs and HTTP requests are fundamental for agents to interact with external services. They’re the language your agent uses to talk to other software.
- No-code platforms like n8n make building powerful AI agents accessible to everyone, regardless of coding experience. It’s truly empowering!
Conclusion
Congratulations! You’ve just taken an empowering step into the future of automation. Building your first AI agent might seem like a big leap, but by understanding its core components—the brain (LLM), memory, and tools—and leveraging user-friendly platforms like n8n, you can create intelligent systems that truly streamline tasks, boost your productivity, and adapt to your unique needs.
While the initial setup might involve a bit of debugging (it’s all part of the fun, I promise!), the process is incredibly intuitive and deeply rewarding. The ability to craft agents that can dynamically reason and act opens up a world of possibilities, from your own personal digital assistant to complex business solutions. So, start with a simple project, iterate, learn from your errors, and watch your digital employee come to life. The future is now, and you’re building it!
What kind of AI agent would you build first? Share your ideas in the comments below!
Frequently Asked Questions (FAQ)
Q: What’s the main difference between an AI agent and a traditional automation?
A: The key difference is dynamic reasoning. Traditional automations follow fixed, predefined steps (like a recipe you can’t change). AI agents, on the other hand, have a “brain” (an LLM) that allows them to reason, plan, and adapt their actions based on the situation and available tools. They can make decisions on the fly, rather than just executing a script.
Q: Do I need to know how to code to build an AI agent?
A: Absolutely not! While coding can give you more flexibility, platforms like n8n are specifically designed for no-code development. You build workflows visually by dragging and dropping nodes, making AI agent creation accessible to everyone, regardless of their coding background.
Q: What are “guardrails” and why are they important for AI agents?
A: Guardrails are safety mechanisms and boundaries you put in place to ensure your AI agent behaves as intended and doesn’t go “rogue.” They prevent undesirable actions like hallucination (making things up), getting stuck in loops, or making poor decisions. They are crucial for security and reliability, especially in business applications, to ensure the agent operates within defined ethical and functional limits.
Q: How do AI agents “talk” to other services like Google Calendar or a weather app?
A: AI agents use “Tools” to interact with the outside world. These tools often communicate via APIs (Application Programming Interfaces) using HTTP requests. Think of an API as a standardized menu of actions a service offers, and an HTTP request as the specific order your agent places from that menu (e.g., a GET request to retrieve weather data, or a POST request to add an event to a calendar).
Q: What if my AI agent workflow isn’t working? How do I debug it?
A: Don’t worry, errors are a normal part of the process! n8n provides clear error messages that can help you pinpoint the issue. A great tip is to screenshot the error message and ask a large language model like ChatGPT for step-by-step debugging advice. This iterative process of testing, identifying errors, and refining your setup is how you build robust agents.
Q: Can I build a multi-agent system as my first project?
A: While multi-agent systems are incredibly powerful, it’s highly recommended to start with a single-agent system for your first project. Master the fundamentals of how a single agent thinks, remembers, and uses tools. Once you’re comfortable with that, then you can explore the complexities of having multiple specialized agents collaborate.