Watch the Video Tutorial
💡 Pro Tip: After watching the video, continue reading below for detailed step-by-step instructions, code examples, and additional tips that will help you implement this successfully.
Table of Contents
Open Table of Contents
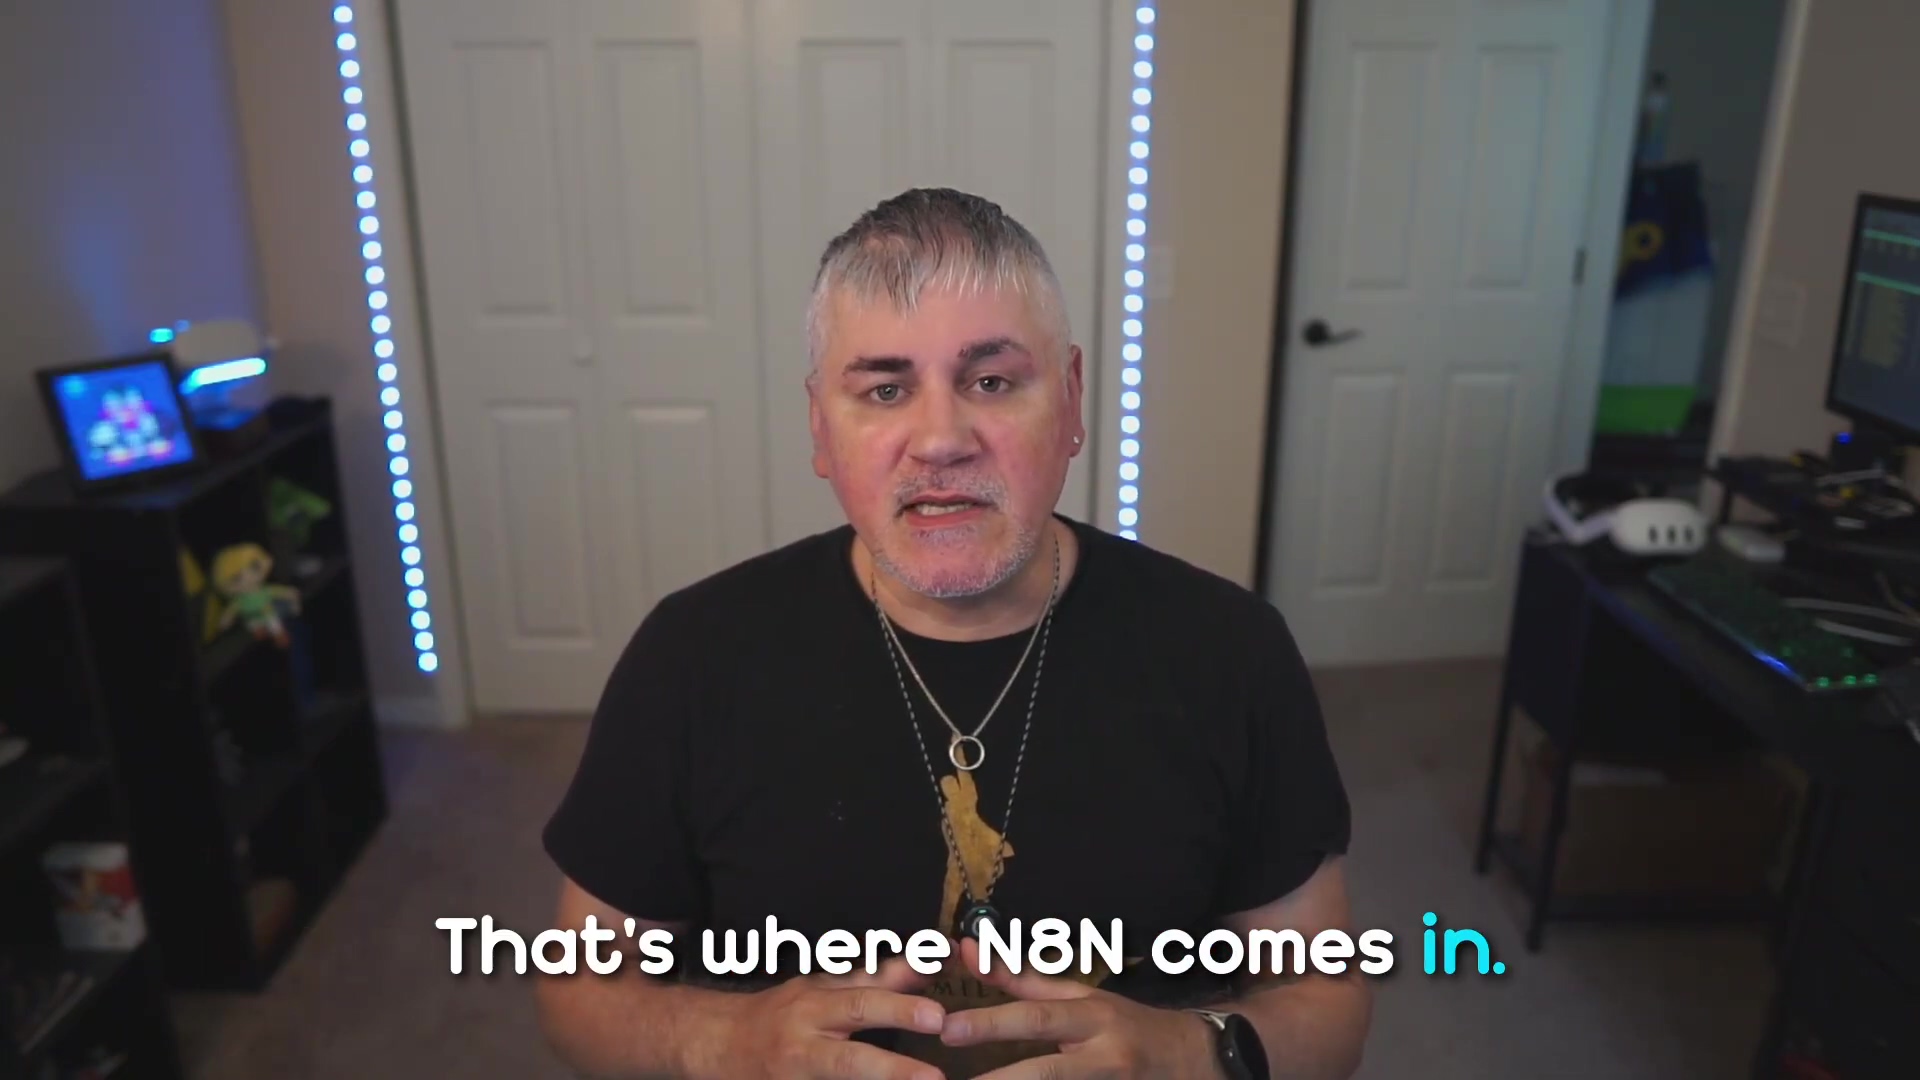
Introduction to N8N and Telegram Integration
Alright, let’s talk about superpowers! Automating tasks between different applications can significantly boost your productivity. Think of it like building LEGOs, but instead of plastic bricks, you’re connecting digital services. And when you bring n8n, a powerful workflow automation tool, together with Telegram, a super popular messaging app, you get a robust solution for real-time notifications, data exchange, and even interactive bot functionalities. It’s like having your own personal digital assistant that never sleeps! This guide will walk you through the essential steps to establish a secure and functional connection. Ready to dive in?
Required Resources and Cost-Benefit Analysis
So, you’re probably wondering, “What do I need, and how much is this going to cost me?” Good questions! Integrating n8n with Telegram is a surprisingly cost-effective way to automate communications. Below is a breakdown of the necessary resources and a comparison between setting things up yourself (the DIY route) versus using commercial alternatives. Spoiler alert: DIY with n8n is usually way cheaper and gives you more control!
Resource Checklist
| Item | Description | Estimated Cost (USD) | Notes |
|---|---|---|---|
| Software | |||
| n8n | Workflow automation platform (self-hosted or cloud) | Free (self-hosted) / Varies (cloud) | Essential for creating workflows |
| Telegram | Messaging application | Free | Used for bot creation and messaging |
| Accounts | |||
| Telegram Account | Required to create and manage bots | Free | Personal or business account |
| Tools | |||
| Web Browser | For accessing n8n and Telegram Web | Free | Standard web browser |
Cost-Benefit Comparison: DIY vs. Commercial Solutions
This table is super handy for deciding if you want to roll up your sleeves or pay someone else to handle the nitty-gritty. For me, the control and cost savings of n8n are a no-brainer!
| Feature | DIY n8n + Telegram Integration | Commercial Automation Platform (e.g., Zapier, Make) |
|---|---|---|
| Setup Time | ~5-15 minutes (after initial n8n setup) | ~10-30 minutes |
| Monthly Cost | ~$0 (self-hosted n8n) / Varies (n8n cloud) | $20 - $500+ (depending on usage and features) |
| Flexibility | High (fully customizable workflows) | Moderate to High (template-based, but extensible) |
| Scalability | High (depends on n8n hosting infrastructure) | High (managed by provider) |
| Control | Full control over data and infrastructure | Limited (data processed by third-party) |
| Learning Curve | Moderate (requires understanding of n8n concepts) | Low to Moderate (user-friendly interfaces) |
| Best For | Users seeking maximum control, cost savings, and complex custom workflows. | Users prioritizing ease of use, managed services, and quick setup for common integrations. |
Step-by-Step Integration Guide
Alright, this is where the magic happens! This section outlines the precise steps to connect n8n with Telegram. Don’t worry, I’ll be holding your hand every step of the way. We’re going to make this a smooth setup process, I promise.
1. Adding the Telegram Trigger in n8n
First things first, we need to tell n8n to listen for messages from Telegram. Think of this as setting up a special mailbox just for your Telegram bot. This “mailbox” is called a “trigger node.” It’s the starting point of your workflow, waiting for something to happen.
Here’s how you do it:
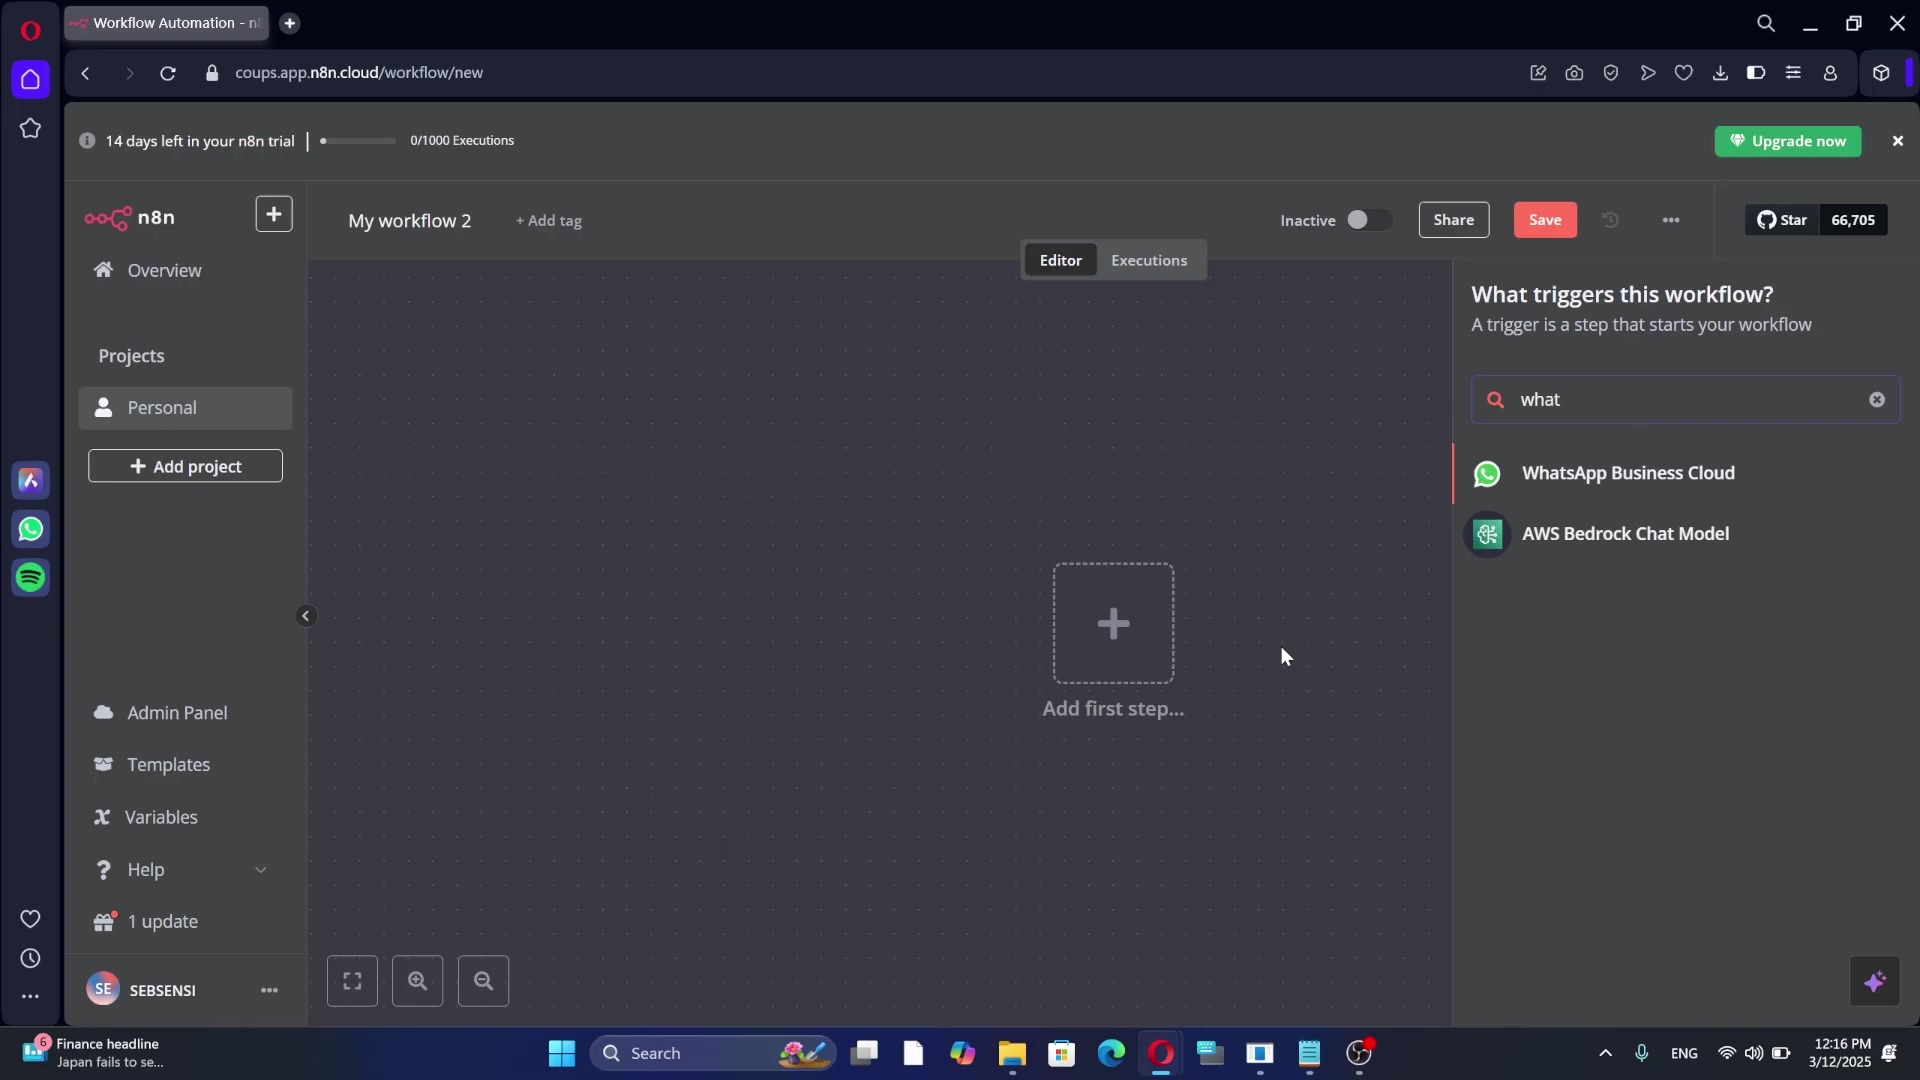
- Open your n8n workflow canvas. This is where you build your automations. If you’re just starting, you’ll likely see a big empty space.
- You can either click the big
Add first step...button or the+(plus) icon to add a new node. Both do the same thing. - In the search bar that pops up, type
Telegram. You’ll see a few options. We want the one that saysTelegram Trigger. - Once you select it, a new node will appear on your canvas. In its configuration panel, make sure
Messageis selected as theTrigger Type. This means your workflow will kick off whenever your bot receives a new message.
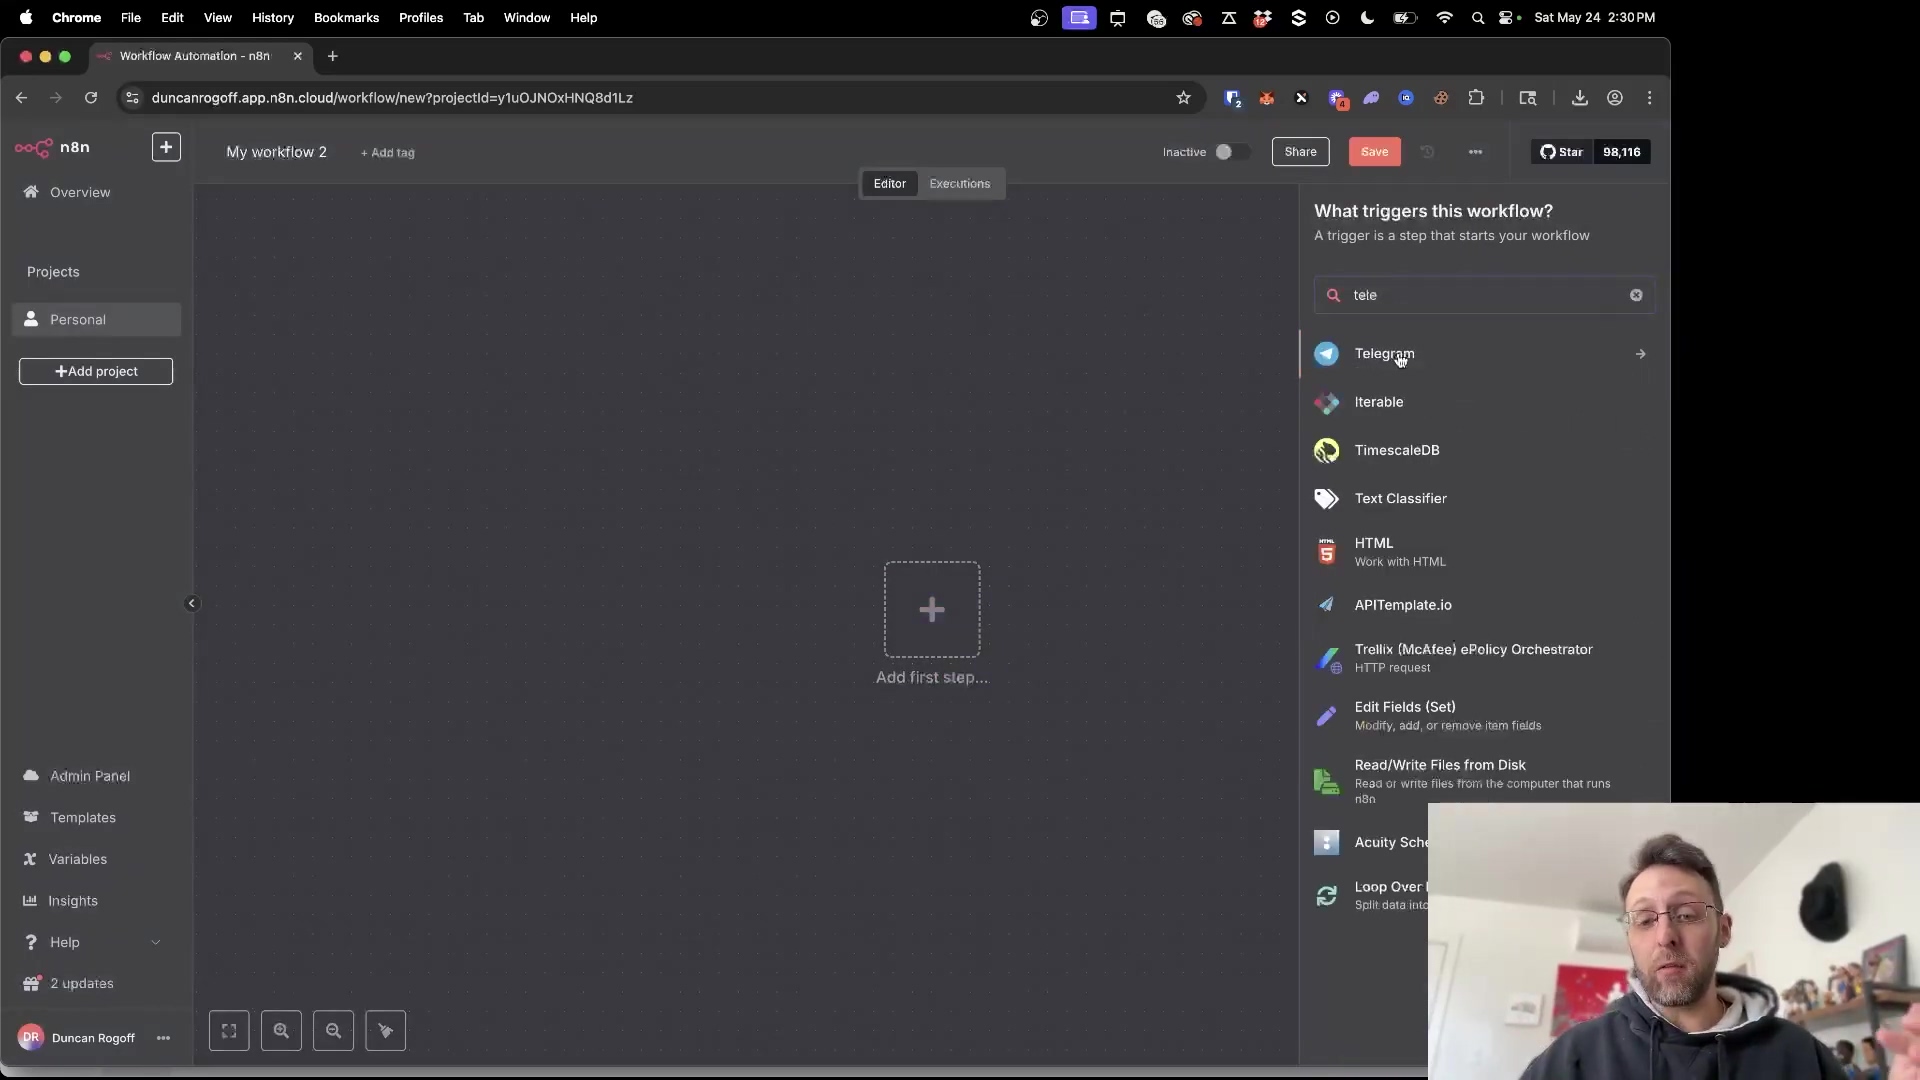
Expected Feedback: You should now see a Telegram Trigger node on your n8n canvas, probably with a little red warning sign because it’s not fully configured yet. That’s totally normal!
2. Creating a Telegram Bot and Obtaining the Access Token
Okay, this is a super crucial step! To connect n8n to Telegram, we need a special key, an “access token.” This token is like the secret handshake that allows n8n to talk to your Telegram bot. And who gives us this secret handshake? None other than the legendary BotFather! Yes, that’s his actual name, and he’s awesome.
Here’s how to get your token:
- Open Telegram (on your phone or desktop, doesn’t matter).
- In the search bar, type
BotFather. Make sure you select the official one, which usually has a blue verified badge next to its name. Don’t fall for imposters! - Start a chat with BotFather. You can type
/startif you haven’t chatted before. - To create a new bot, type the command
/newbotand send it. - BotFather will then ask you to choose a name for your bot. This is the friendly name people will see (e.g., “My Awesome Automation Bot”). Type it in and send.
- Next, BotFather will ask for a username for your bot. This is the unique identifier. Important: The username must end with
bot(e.g.,MyAwesomeAutomation_bot). Pick something unique, as it can’t be taken by anyone else. Type it in and send. - If all goes well, BotFather will congratulate you! And, most importantly, it will provide you with an
HTTP API token. This is a long string of letters and numbers. Copy this token carefully! You’ll need it in the next step. I usually just tap/click on it to copy it to my clipboard.
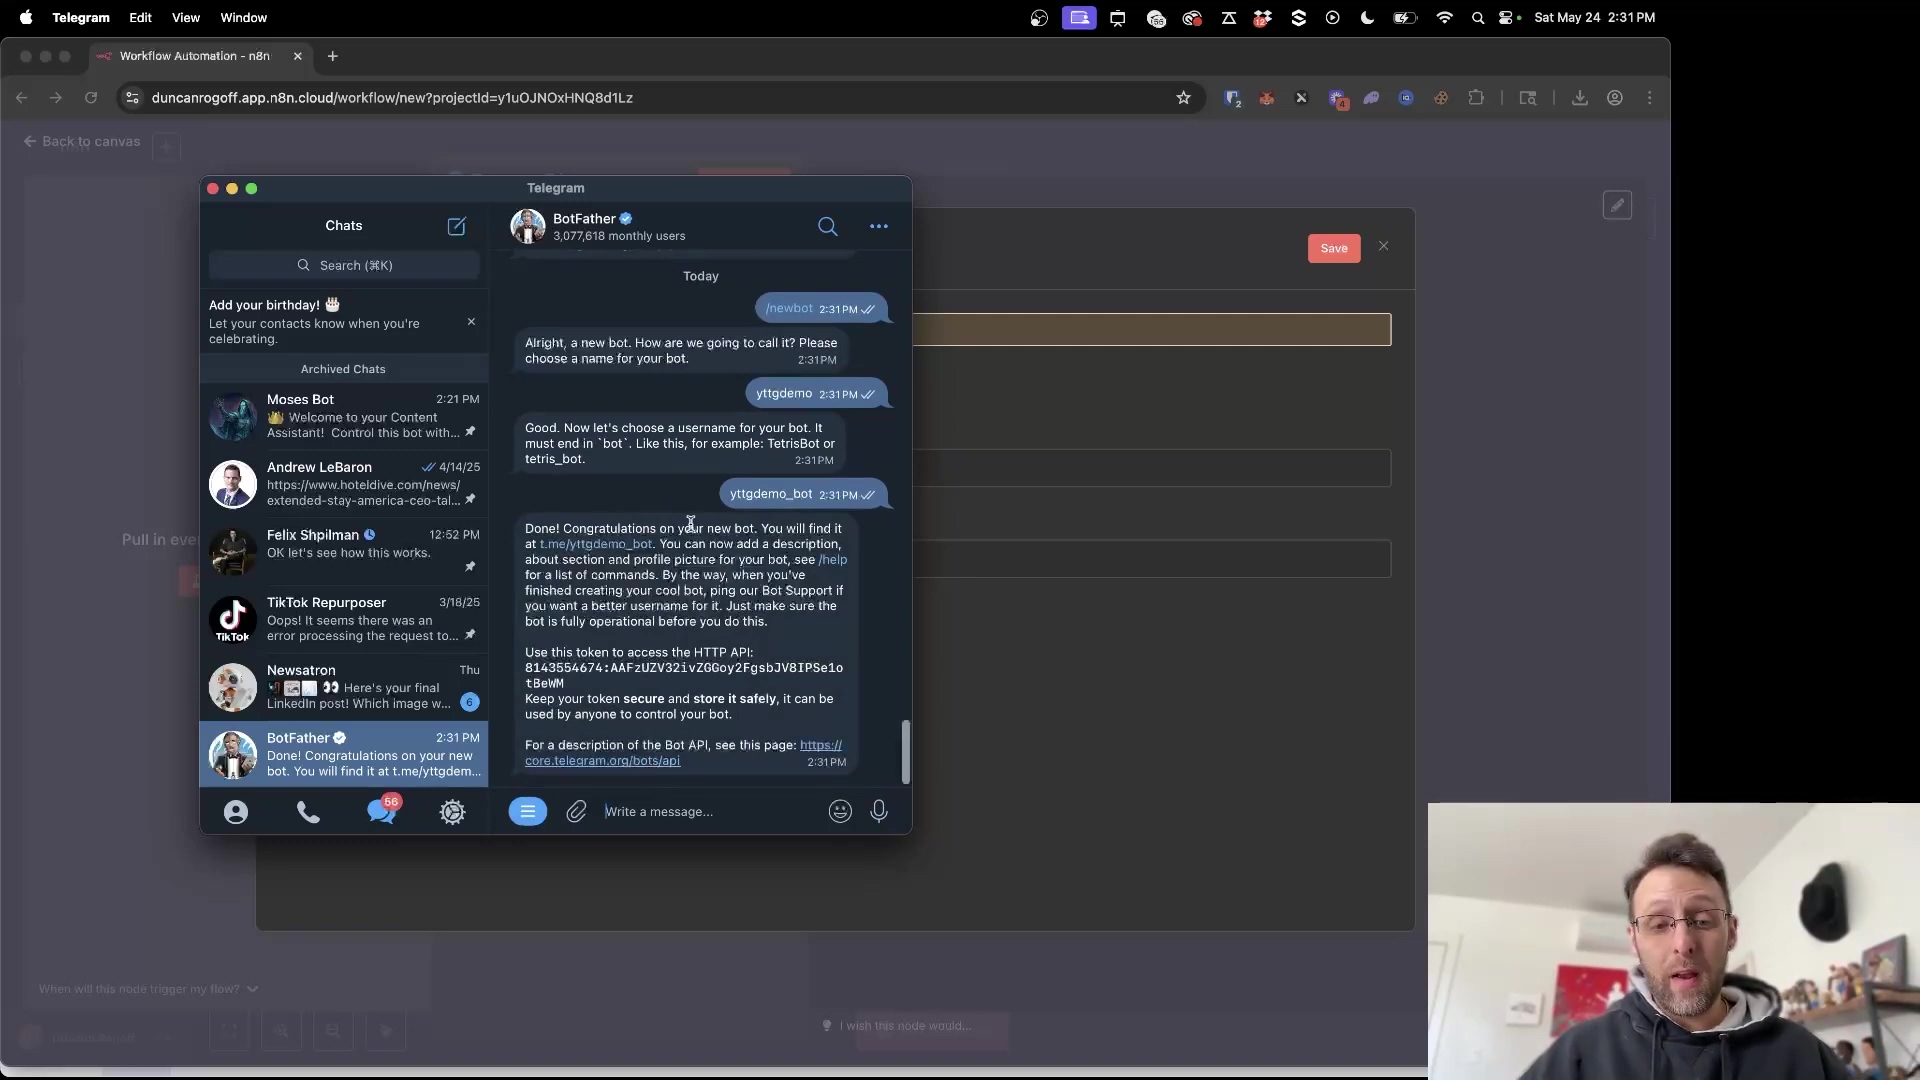
Expected Feedback: BotFather will send you a message confirming your bot’s creation and, crucially, a line that starts with Use this token to access the HTTP API: followed by your unique token. Keep this token safe; it’s like the password for your bot!
3. Configuring the Telegram Connection in n8n
Got that shiny new access token? Excellent! Now, let’s head back to n8n and tell it how to use that token to connect to your bot. This is where we bridge the gap between n8n and Telegram.
- Return to your n8n workflow where you added the
Telegram Triggernode. - Click on the
Telegram Triggernode to open its configuration panel on the right side. - Look for the
Connectiondropdown. It probably saysAdd newor something similar. Click on it and selectCreate New Credential. - A new window or pop-up will appear. This is where you’ll store your bot’s secret token securely within n8n.
- Credential Name: Give it a descriptive name, something like
My Telegram Bot ConnectionorAutomation Bot Token. This helps you remember what it is if you have multiple bots later. - Access Token: This is where you paste the long token you copied from BotFather. Double-check that you’ve pasted the entire token.
- Base URL: This should typically remain
https://api.telegram.org. You usually don’t need to change this unless you’re doing something super custom.
- Credential Name: Give it a descriptive name, something like
- Click
Saveto finalize the credential. n8n will encrypt and store this token for you.
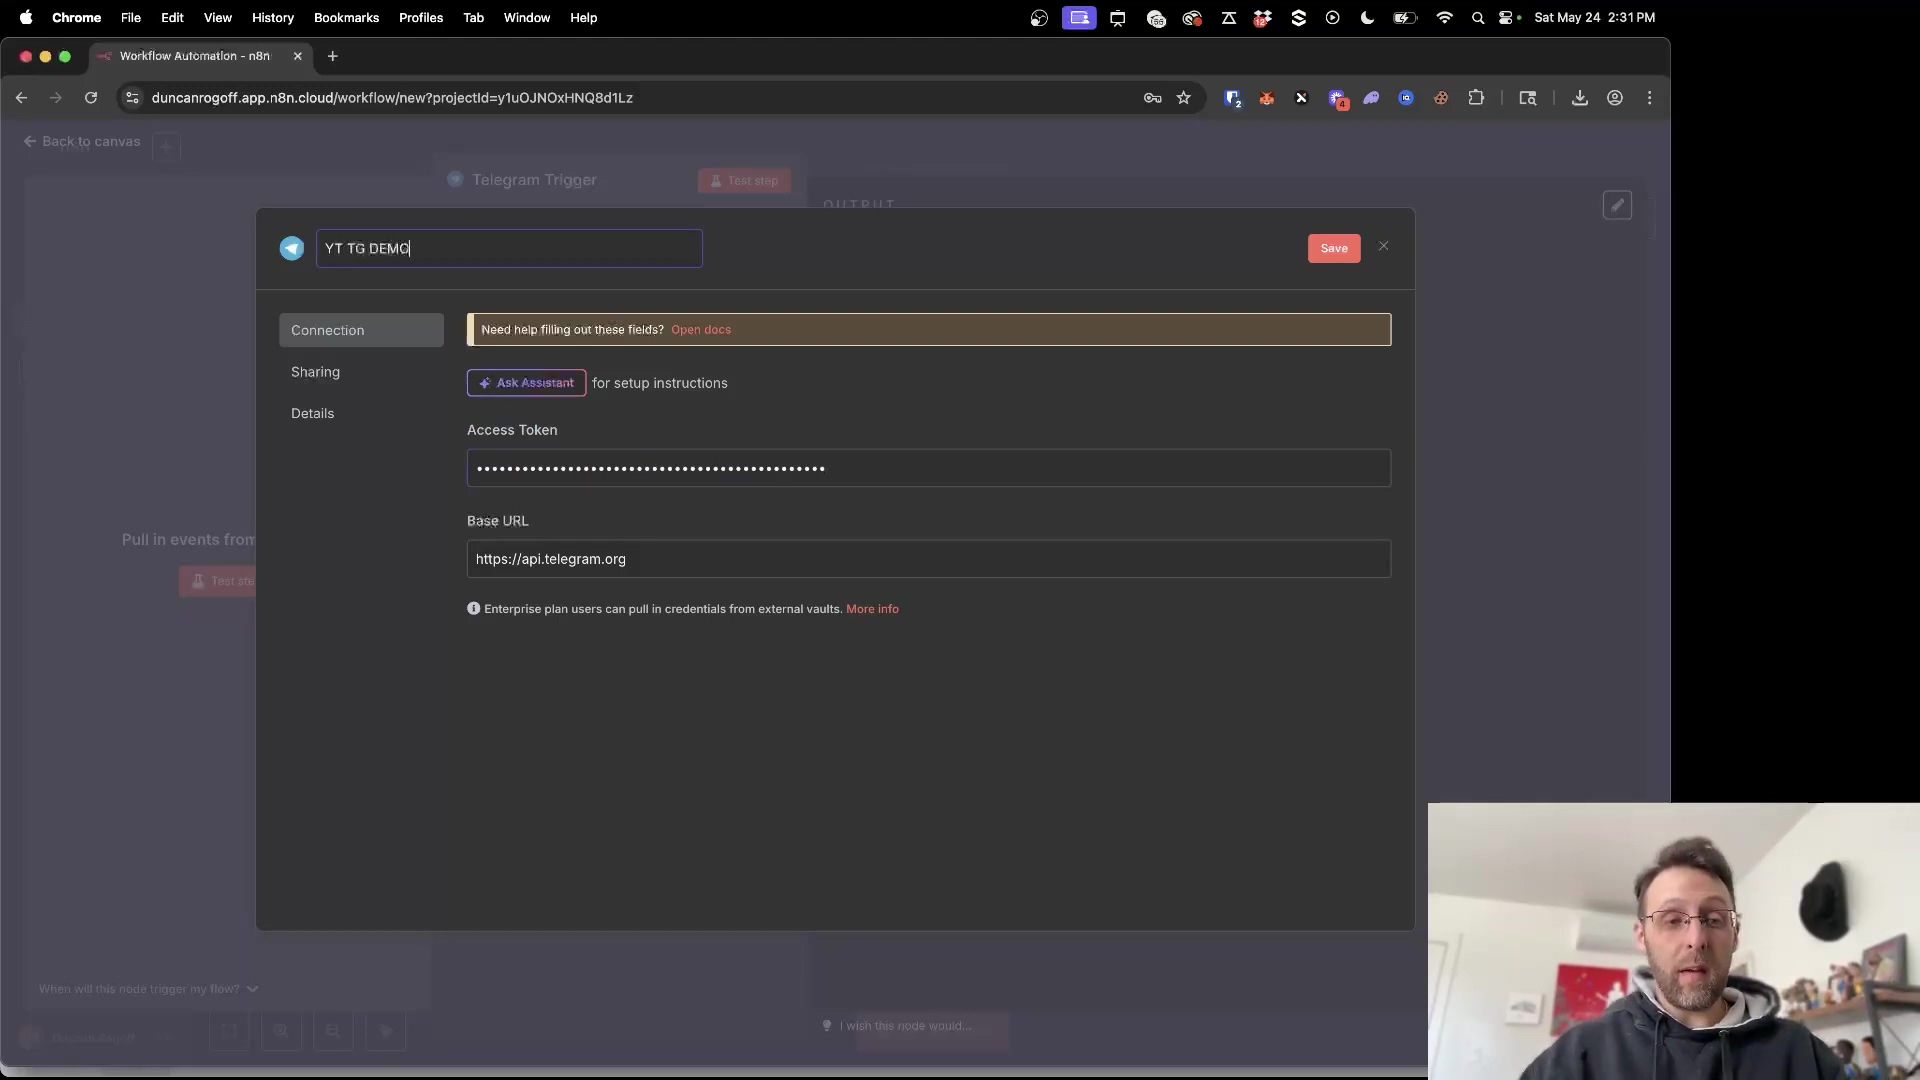
Expected Feedback: The Telegram Trigger node’s configuration panel should now show your newly created credential name under the Connection dropdown. The red warning sign on the node might disappear, or it might just be waiting for a test. You’re almost there!
4. Testing the Connection
We’ve set everything up, but how do we know it actually works? Time for the moment of truth: testing the connection! This is like pressing the “on” button to see if the lights come on.
- Back in your n8n workflow, make sure your
Telegram Triggernode is selected. - In its configuration panel, you’ll see a button that says
Test step. Click it! This puts the trigger node into “listening” mode. - Now, open your personal Telegram app (the one you use every day).
- Search for your newly created bot by its username (remember, the one ending with
bot). - Start a chat with your bot and send it a simple message, like
Hello, bot!orTest message. - Immediately switch back to your n8n workflow. If everything is connected correctly, you should see the incoming message data appear in the n8n output panel below the node. It will show details like your message text, your chat ID, and other information.
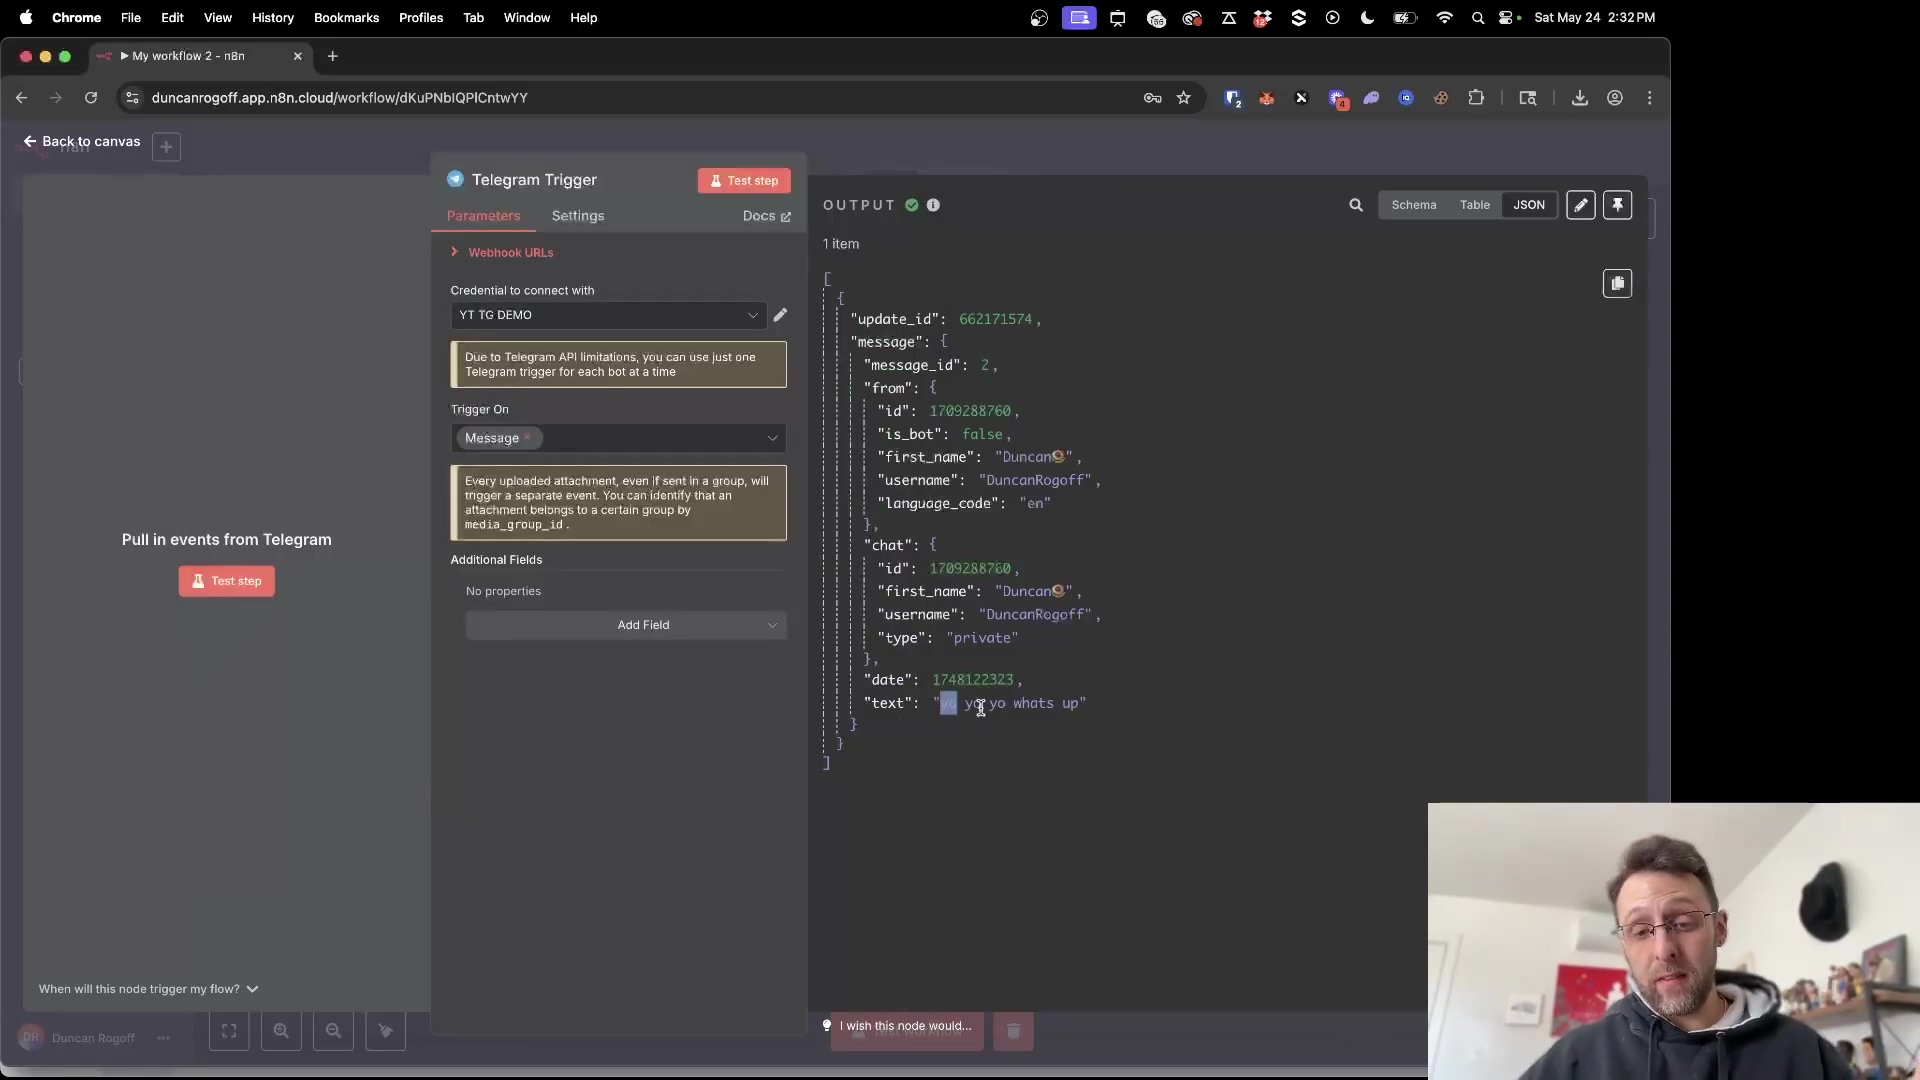
Expected Feedback: After sending a message to your bot, the Telegram Trigger node in n8n should show a green Success message, and the panel below the workflow canvas will populate with JSON data representing the message you just sent. If you see that data, you’ve nailed it! Your n8n and Telegram bot are now officially chatting buddies.
Critical Security Best Practices
⚠️ Secure Your Bot with an IF Node: Okay, listen up! This is super important. Your Telegram bot is now public, meaning anyone who knows its username can send it messages. If your n8n workflow does something sensitive (like sending you private data or triggering an action), you absolutely must restrict who can trigger it. We don’t want any digital pranksters messing with your automations, right?
To prevent unauthorized access, we’re going to add an IF node immediately after your Telegram Trigger. Think of the IF node as a bouncer at a club, only letting in the VIPs (that’s you!).
Here’s how to set it up:
- After your
Telegram Triggernode, click the+icon to add a new node. - Search for
IFand select theIFnode. - Connect the
Telegram Triggernode to theIFnode. - Now, configure the
IFnode. We need to tell it to check thechat.idorfrom.idof the incoming message. This is a unique identifier for your Telegram chat.- How to find your
chat.id: When you tested theTelegram Triggernode in the previous step, the output data contained yourchat.id. It’s usually a long number. Copy that number down. - In the
IFnode’s configuration:- For the
Value 1field, click theAdd Expressionbutton (the little gear icon or a button that looks like{{ }}). - In the expression editor, type
{{ $json.message.chat.id }}. This tells n8n to grab the chat ID from the incoming message data. - For the
Operation, selectis equal to. - For the
Value 2field, paste your personal Telegramchat.id(the number you copied).
- For the
- How to find your
- This setup ensures that only messages originating from your specific chat ID will proceed through the workflow. Any other message will be ignored by the rest of your workflow, effectively securing your automation.
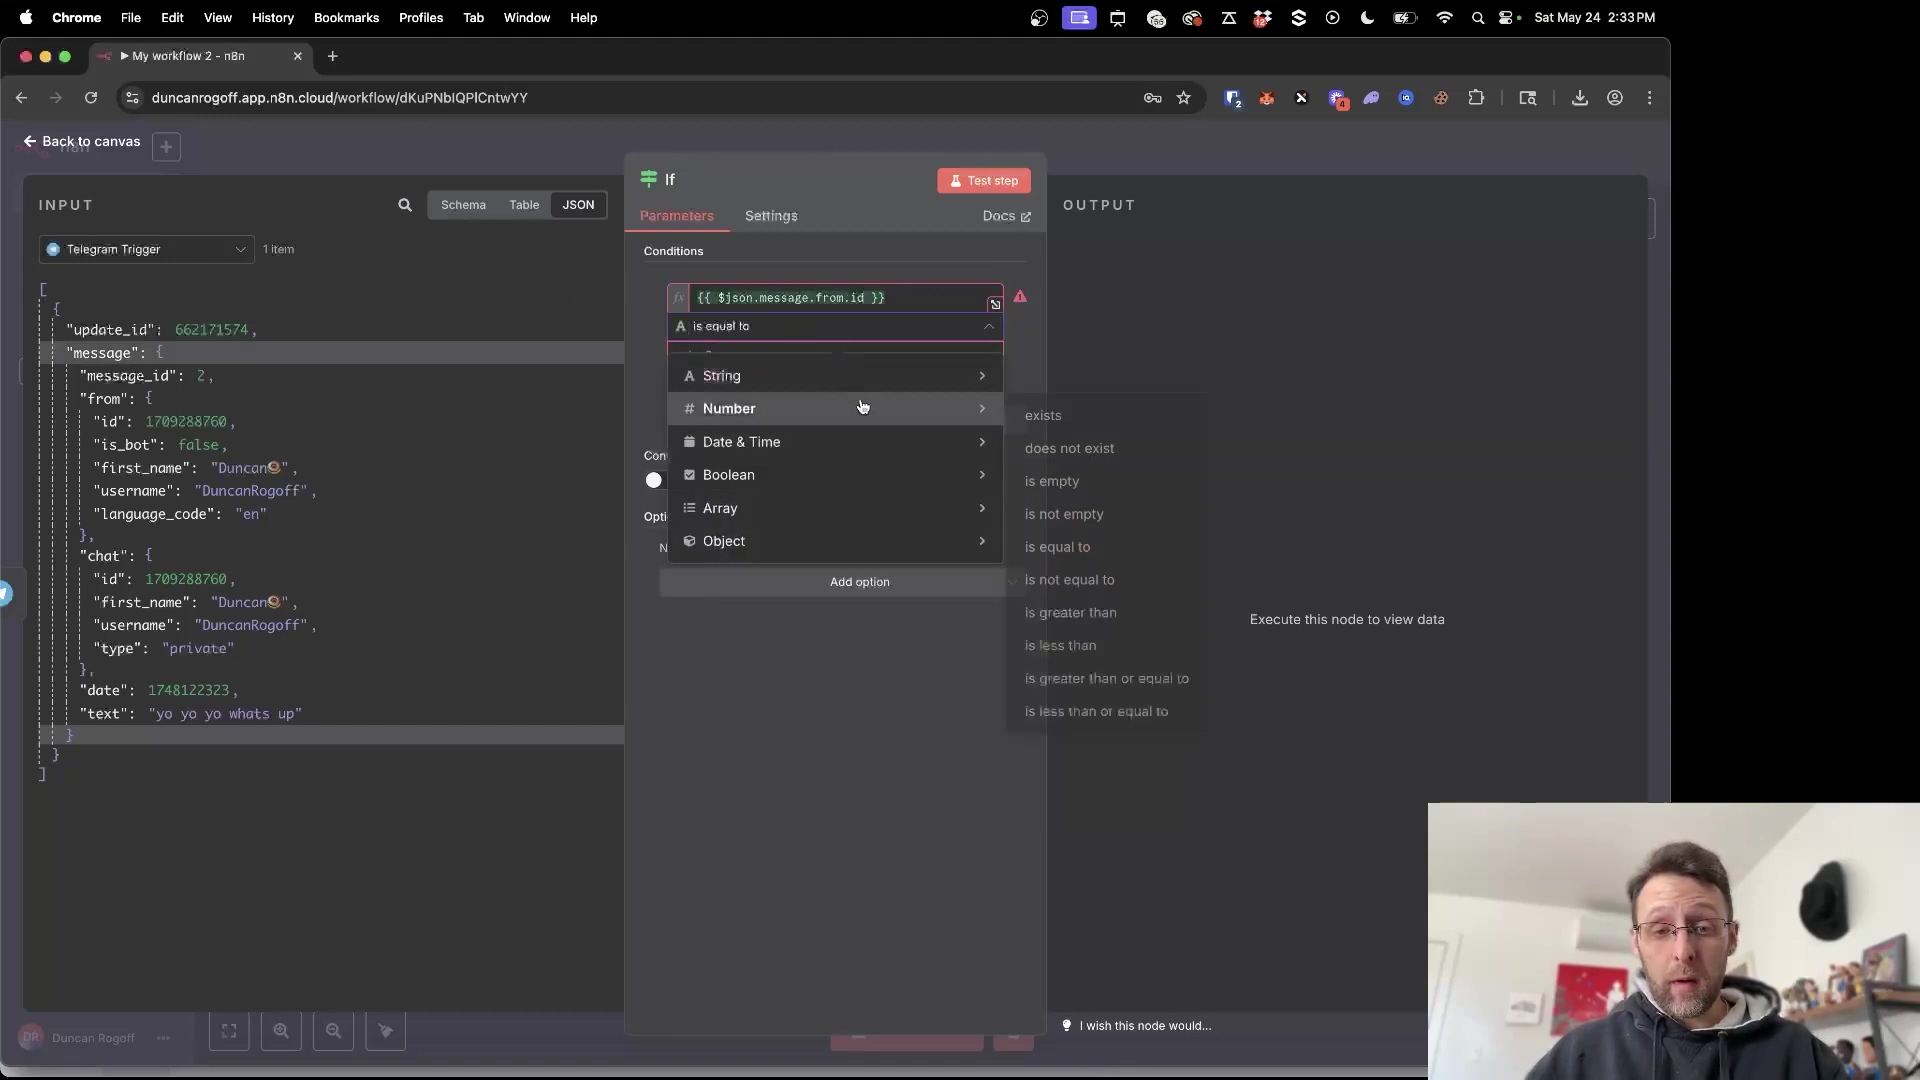
Expected Feedback: When you send a message from your personal Telegram account, the IF node should show a green true output, and the workflow will continue. If someone else sends a message, the IF node will show false, and the workflow will stop there, protecting your automation.
Key Takeaways
Alright, let’s recap the awesomeness we just created:
- Rapid Integration: Connecting n8n to Telegram is a quick process, often achievable in minutes. See? I told you it would be easy!
- BotFather is Key: Telegram’s BotFather is the essential tool for creating your bot and obtaining that crucial API token. He’s the real MVP here.
- Secure Your Workflow: Always, always, always implement an
IFnode with a chat ID check to prevent unauthorized execution of your n8n workflows. Safety first, right? - Versatile Automation: Once connected, your Telegram bot can be used for a wide range of automations, from simple notifications to complex interactive commands. The sky’s the limit!
Conclusion
Phew! You made it! By following these straightforward steps, you’ve effortlessly integrated n8n with Telegram, unlocking a whole universe of automation possibilities. This powerful combination allows you to create highly responsive and interactive workflows, enhancing your personal or business operations. It’s like having a tiny, tireless robot working for you 24/7.
Whether you’re looking to receive instant notifications, control smart devices, or build complex conversational agents, the n8n-Telegram integration provides a robust and flexible foundation. And remember, the added security measure of filtering messages by chat ID ensures that your automations remain private and secure. No unwanted guests crashing your automation party!
Now, armed with this guide, go forth and automate your Telegram interactions with n8n! If you hit any snags, don’t worry, that’s part of the journey. Just re-read the steps, and you’ll get it. You’ve got this!
Frequently Asked Questions (FAQ)
Q: What is n8n and why should I use it with Telegram?
A: n8n is an open-source workflow automation tool that lets you connect different apps and services without writing code. Think of it as a digital conductor for your online tools. You should use it with Telegram to automate messages, send notifications, create interactive bots, or even control other services directly from your chat app. It’s super powerful for real-time communication and task management!
Q: My Telegram bot isn’t responding. What should I check first?
A: Ah, the classic “silent bot” problem! First, double-check that your n8n workflow is active (the toggle in the top right of n8n should be green). Second, make sure your Telegram Trigger node is correctly configured with the right access token. Third, did you click Test step on the Telegram Trigger node before sending a message to your bot? That puts it in listening mode. Finally, ensure your internet connection is stable. Sometimes it’s the simplest things!
Q: Can I use multiple Telegram bots with a single n8n instance?
A: Absolutely! You can create multiple Telegram bots via BotFather, each with its own unique access token. In n8n, you’ll create a separate “credential” for each bot’s token. Then, in your workflows, you can simply select the specific bot’s credential you want that workflow’s Telegram Trigger or Telegram node to use. It’s like having a whole team of digital assistants!
Q: Why is the IF node for security so important?
A: Great question! When you create a Telegram bot, it’s publicly accessible. Without the IF node checking your specific chat.id, anyone who finds your bot’s username could potentially send it messages and trigger your n8n workflow. If your workflow performs sensitive actions (like sending emails, accessing data, or controlling smart devices), this could be a major security risk. The IF node acts as a gatekeeper, ensuring only you (or specific authorized users) can activate your automations.
Q: What if I accidentally share my bot’s access token?
A: If your bot’s access token is compromised, the first thing you should do is go back to BotFather in Telegram. Use the /revoke command, select your bot, and BotFather will generate a new access token for you. Then, update the credential in n8n with this new token. This immediately invalidates the old, compromised token, keeping your bot secure. Better safe than sorry!