Watch the Video Tutorial
💡 Pro Tip: After watching the video, continue reading below for detailed step-by-step instructions, code examples, and additional tips that will help you implement this successfully.
Hey there, fellow automation enthusiast! Boyce here, your friendly neighborhood self-taught automation consultant. You know, I’ve been down the rabbit hole of workflow automation myself, and let me tell you, connecting different tools can sometimes feel like trying to build a LEGO spaceship with no instructions. But fear not! Today, we’re going to tackle a super common and incredibly powerful integration: connecting N8N to Google Sheets.
Automating your workflows is like having a tiny robot assistant doing all the repetitive, soul-crushing tasks for you. And integrating tools like N8N (which is an awesome open-source automation platform, by the way!) with Google Sheets is a prime example of how you can seriously boost your productivity. This guide is going to walk you through every single step, no stone unturned, to get N8N talking to your Google Sheets, enabling that sweet, sweet seamless data flow and automation. Ready to become a workflow wizard? Let’s dive in!
Table of Contents
Open Table of Contents
- Required Resources and Cost-Benefit Analysis
- Setting Up Your Google Cloud Project
- Configuring OAuth Consent Screen and Credentials
- Connecting N8N to Google Sheets
- Testing the Integration
- 💡 Critical Best Practice Tips
- Key Takeaways
- Conclusion
- Frequently Asked Questions (FAQ)
- Q: Why do I need a Google Cloud Project just to connect N8N to Google Sheets?
- Q: I’m getting an “app not verified” warning during authorization. Is this a problem?
- Q: My N8N page went blank after authorization. Did something go wrong?
- Q: Can I use the same Google Cloud Project and credentials for multiple N8N instances or workflows?
- Q: What if I want N8N to access Google Drive files, not just Sheets?
Required Resources and Cost-Benefit Analysis
Before we even think about diving into the nitty-gritty setup, let’s get our ducks in a row. What do we need, and why are we even bothering with this DIY approach when there are commercial options out there? Good questions! Let’s break it down.
Resource Checklist
Think of this as your shopping list before you start cooking up some automation magic. We’re keeping it lean and mean, I promise!
| Tool/Material | Purpose | Estimated Cost (One-time/Monthly) |
|---|---|---|
| Google Cloud Account | API management, credential creation | Free (for basic usage) |
| N8N Instance | Workflow automation platform | Free (self-hosted) / Paid (cloud) |
| Google Sheets Account | Data storage and manipulation | Free |
| Internet Connection | Access to platforms | Existing |
DIY vs. Commercial Solutions
Okay, so why go through the effort of setting this up yourself when you could just pay for something like Zapier? That’s a totally valid question, and one I wrestled with myself! Here’s a quick comparison to help you decide if this DIY adventure is right for you. Spoiler alert: if you like control and saving money, you’re in the right place!
| Feature | DIY N8N + Google Sheets Integration | Commercial Automation Platform (e.g., Zapier) |
|---|---|---|
| Setup Complexity | Moderate (requires technical steps) | Low (user-friendly interface) |
| Cost | Very Low (self-hosted N8N is free) | High (monthly subscription fees) |
| Customization | High (full control over workflows) | Moderate (limited by platform features) |
| Maintenance | Required (updates, troubleshooting) | Managed by provider |
| Data Privacy | Full control (self-hosted) | Depends on provider’s policies |
| Scalability | Depends on N8N setup | High (managed by provider) |
See? While the initial setup might take a bit more brainpower, the long-term benefits, especially cost and customization, are huge! For me, that’s a no-brainer.
Setting Up Your Google Cloud Project
Alright, this is where we lay the groundwork. Think of your Google Cloud Project as the central command center for all your Google-related integrations. We need to tell Google that N8N is allowed to play nicely with your Google Sheets. This involves creating a new project and enabling the specific APIs N8N will need.
Creating a New Project
First things first, open up your web browser and head over to the Google Cloud Console. If you’ve never been here before, it might look a bit overwhelming, but don’t worry, we’re just focusing on a few key things.
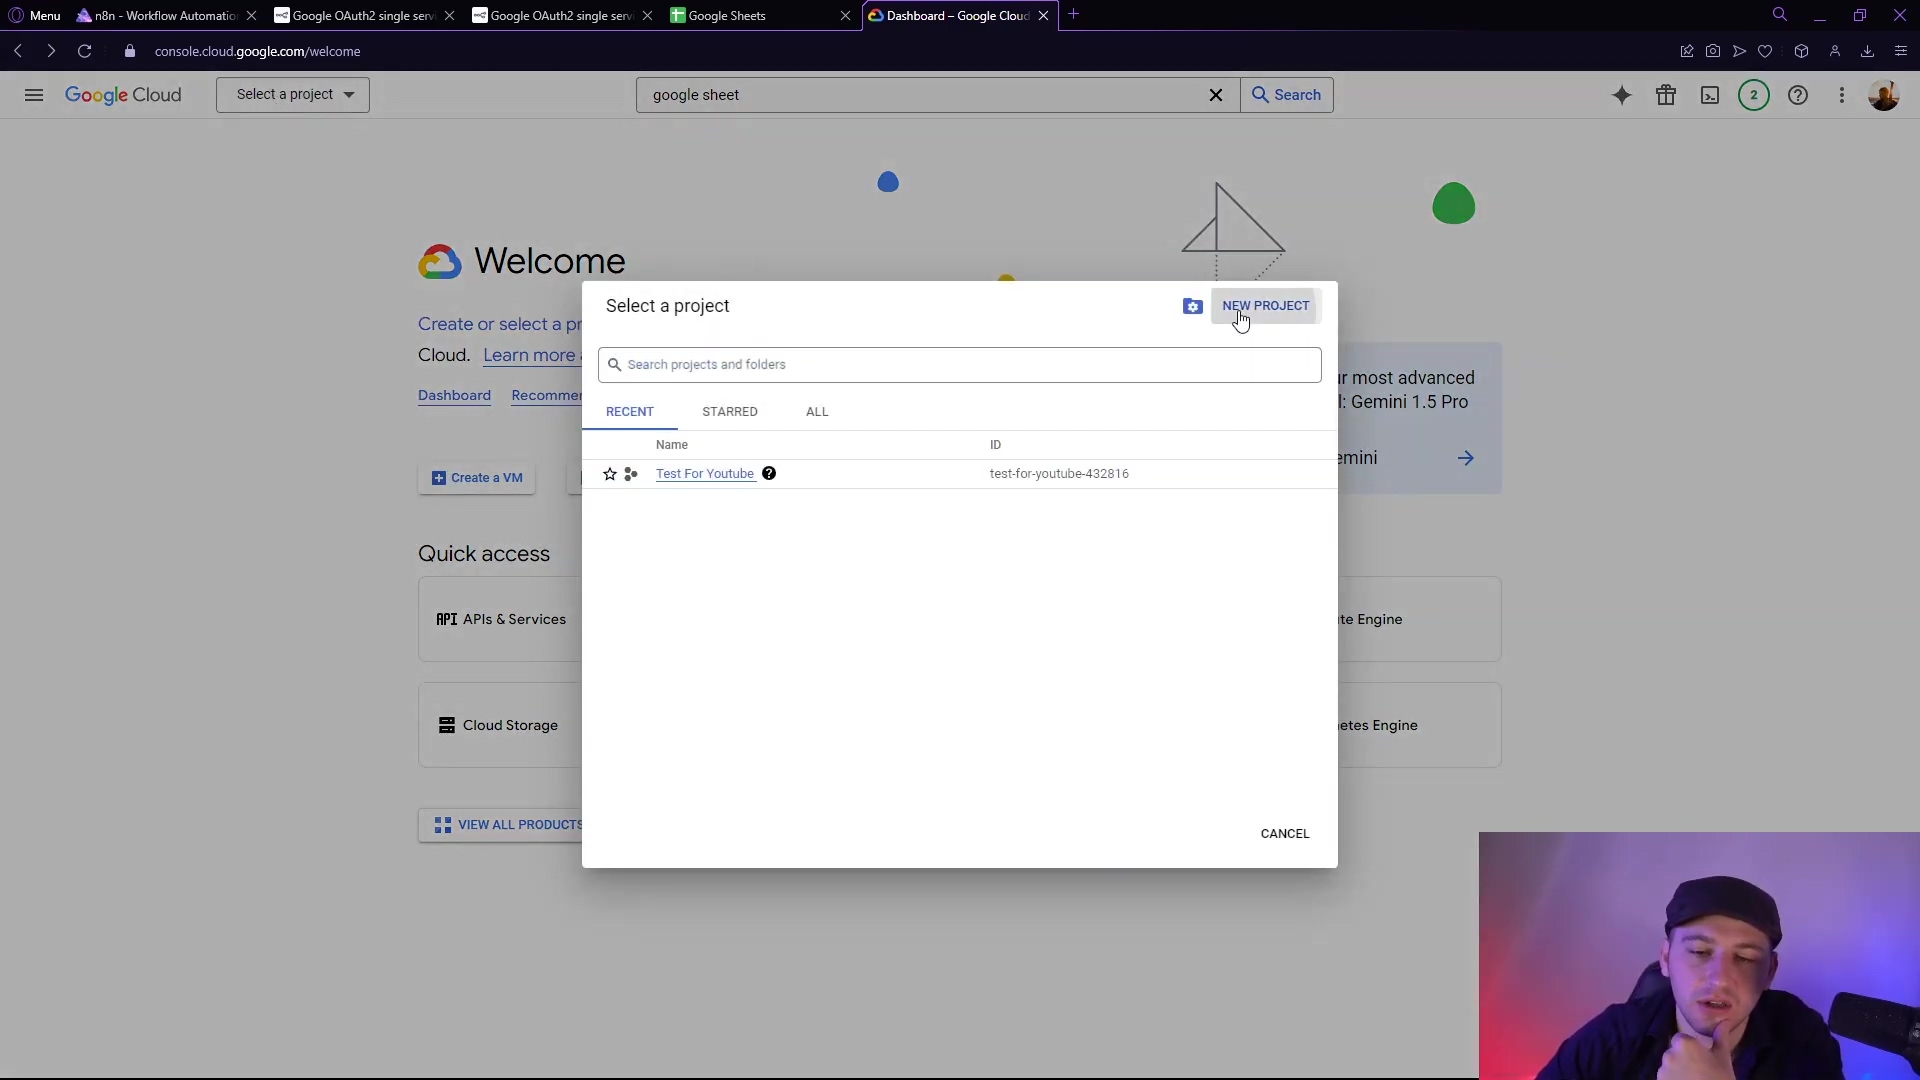
Once you’re logged in, look for the project selector at the top. It usually shows your current project name or says something like “My First Project”. Click on it, and then select “New Project”.
Give your project a descriptive name. Something like “N8N Google Sheets Integration” is perfect because it tells you exactly what this project is for. This helps keep things organized, especially as you start building more automations. Once you’ve named it, hit “Create”.
Expected Feedback: After clicking “Create”, you’ll see a notification pop up, usually in the top right corner, saying “Creating project…”. Once it’s done, it’ll change to “Project created.” and you’ll automatically be switched to your new project. If not, just click the project selector again and choose your newly created project.
Enabling the Google Sheets API
Now that we have our project, we need to give it permission to actually do something with Google Sheets. This is where enabling the Google Sheets API comes in. Think of an API (Application Programming Interface) as a set of rules and tools that allows different software applications to communicate with each other. We’re basically giving N8N a special key to talk to Google Sheets.
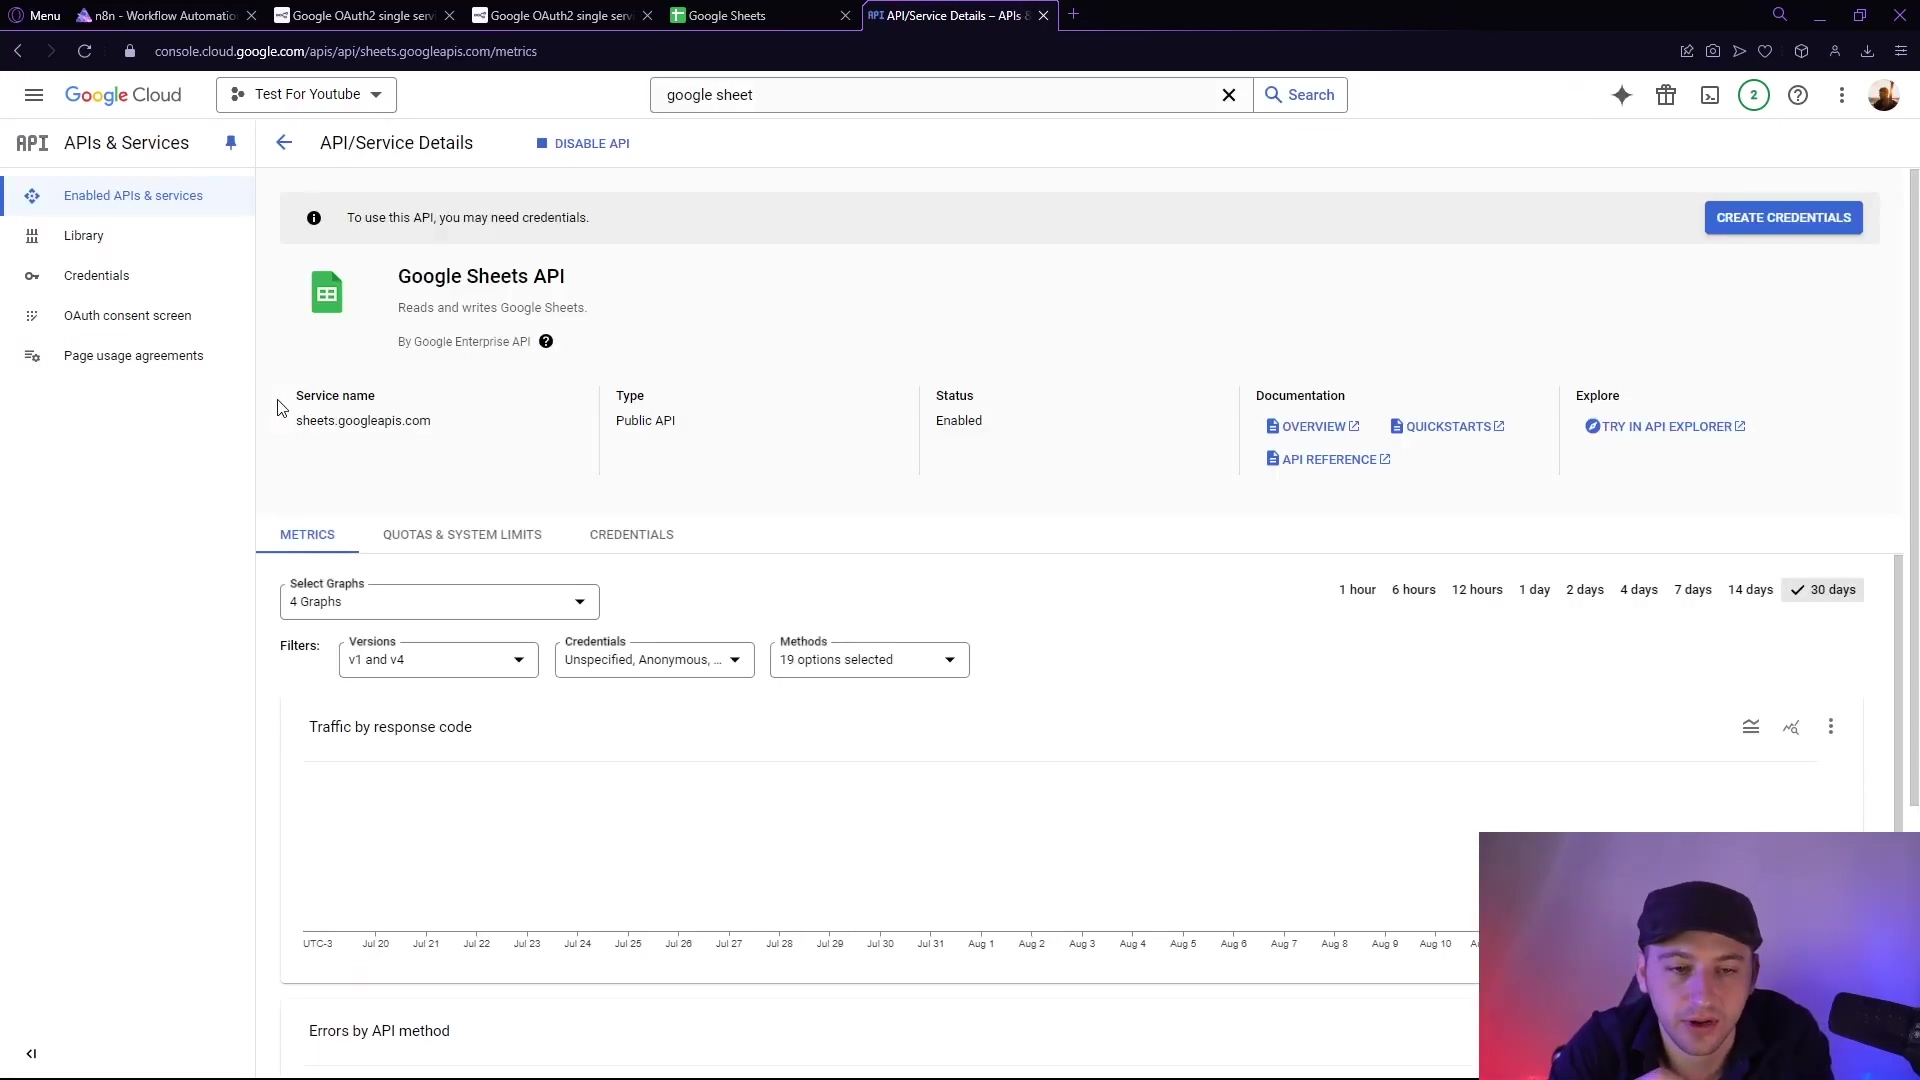
In the Google Cloud Console, use the search bar at the top (it’s super handy!) and type “Google Sheets API”. Click on the result that says “Google Sheets API”.
On the Google Sheets API page, you’ll see a big “Enable” button. Go ahead and click it. This tells Google, “Hey, I want to use this service within my project!”
Expected Feedback: The button will change to a spinner, then to “API Enabled” or “Manage”. You’ll also likely see a notification confirming that the API has been enabled. This means your project now has the green light to interact with Google Sheets.
Configuring OAuth Consent Screen and Credentials
This next part is crucial for security and authorization. We need to set up something called an “OAuth Consent Screen” and then create “Credentials.” What’s OAuth? In simple terms, it’s a secure way for N8N to access your Google Sheets without you having to give N8N your actual Google password. Instead, you grant N8N specific permissions through Google’s own authorization process. The consent screen is what you (or anyone else using your integration) will see when you authorize N8N to access your Google account.
Setting Up the OAuth Consent Screen
From your Google Cloud Project dashboard, navigate to the left-hand menu, find “APIs & Services”, and then click on “OAuth consent screen”.
Here, you’ll be asked about the “User type”. For most personal automation projects, select ‘External’. This means users outside your Google Workspace organization can use your app. Then click “Create”.
Next, you’ll fill out some basic information about your “app” (which is essentially your N8N integration in Google’s eyes):
- App name: Give it a clear name, like “N8N Google Sheets Integration” or “My Automation Bot”. This is what users will see when they authorize access.
- User support email: Put your email here. If anyone has questions about your app, this is how they’ll reach you.
- App logo (Optional): You can upload a logo if you want, but it’s not necessary for our purposes.
- Developer contact information: Add your email again here. Google uses this to contact you about your project.
Once you’ve filled these out, click “Save and Continue”.
img_consent_screen
Expected Feedback: You’ll move to the “Scopes” section. If you see a summary of the information you just entered, you’re on the right track.
Adding Scopes and Test Users
Now we’re defining exactly what N8N is allowed to do with your Google account. These are called “scopes.” Think of them as specific permissions. We don’t want to give N8N access to everything, just what it needs to work with Google Sheets.
On the “Scopes” page, click “Add or Remove Scopes”. In the right-hand panel that appears, search for “Google Sheets API”. You’ll see a few options. For full functionality, I usually select the one that says .../auth/spreadsheets (which allows N8N to view, edit, create, and delete your spreadsheets) and .../auth/drive (which allows N8N to manage files in your Google Drive, which sheets are a part of). Select these, then click “Update”.
Next, on the “Test users” section, click “Add Users”. This is super important for testing! Add the exact Google account email address that you’ll be using to connect N8N to Google Sheets. This tells Google that this specific account is authorized to use your unverified app during development. Click “Add” and then “Save and Continue”.
Expected Feedback: You’ll land on the “Summary” page. Review everything, and if it looks good, click “Back to Dashboard”. Your OAuth consent screen is now configured!
Creating Credentials
This is where we get the actual “keys” (Client ID and Client Secret) that N8N will use to identify itself to Google. It’s like getting a special ID card for your N8N instance.
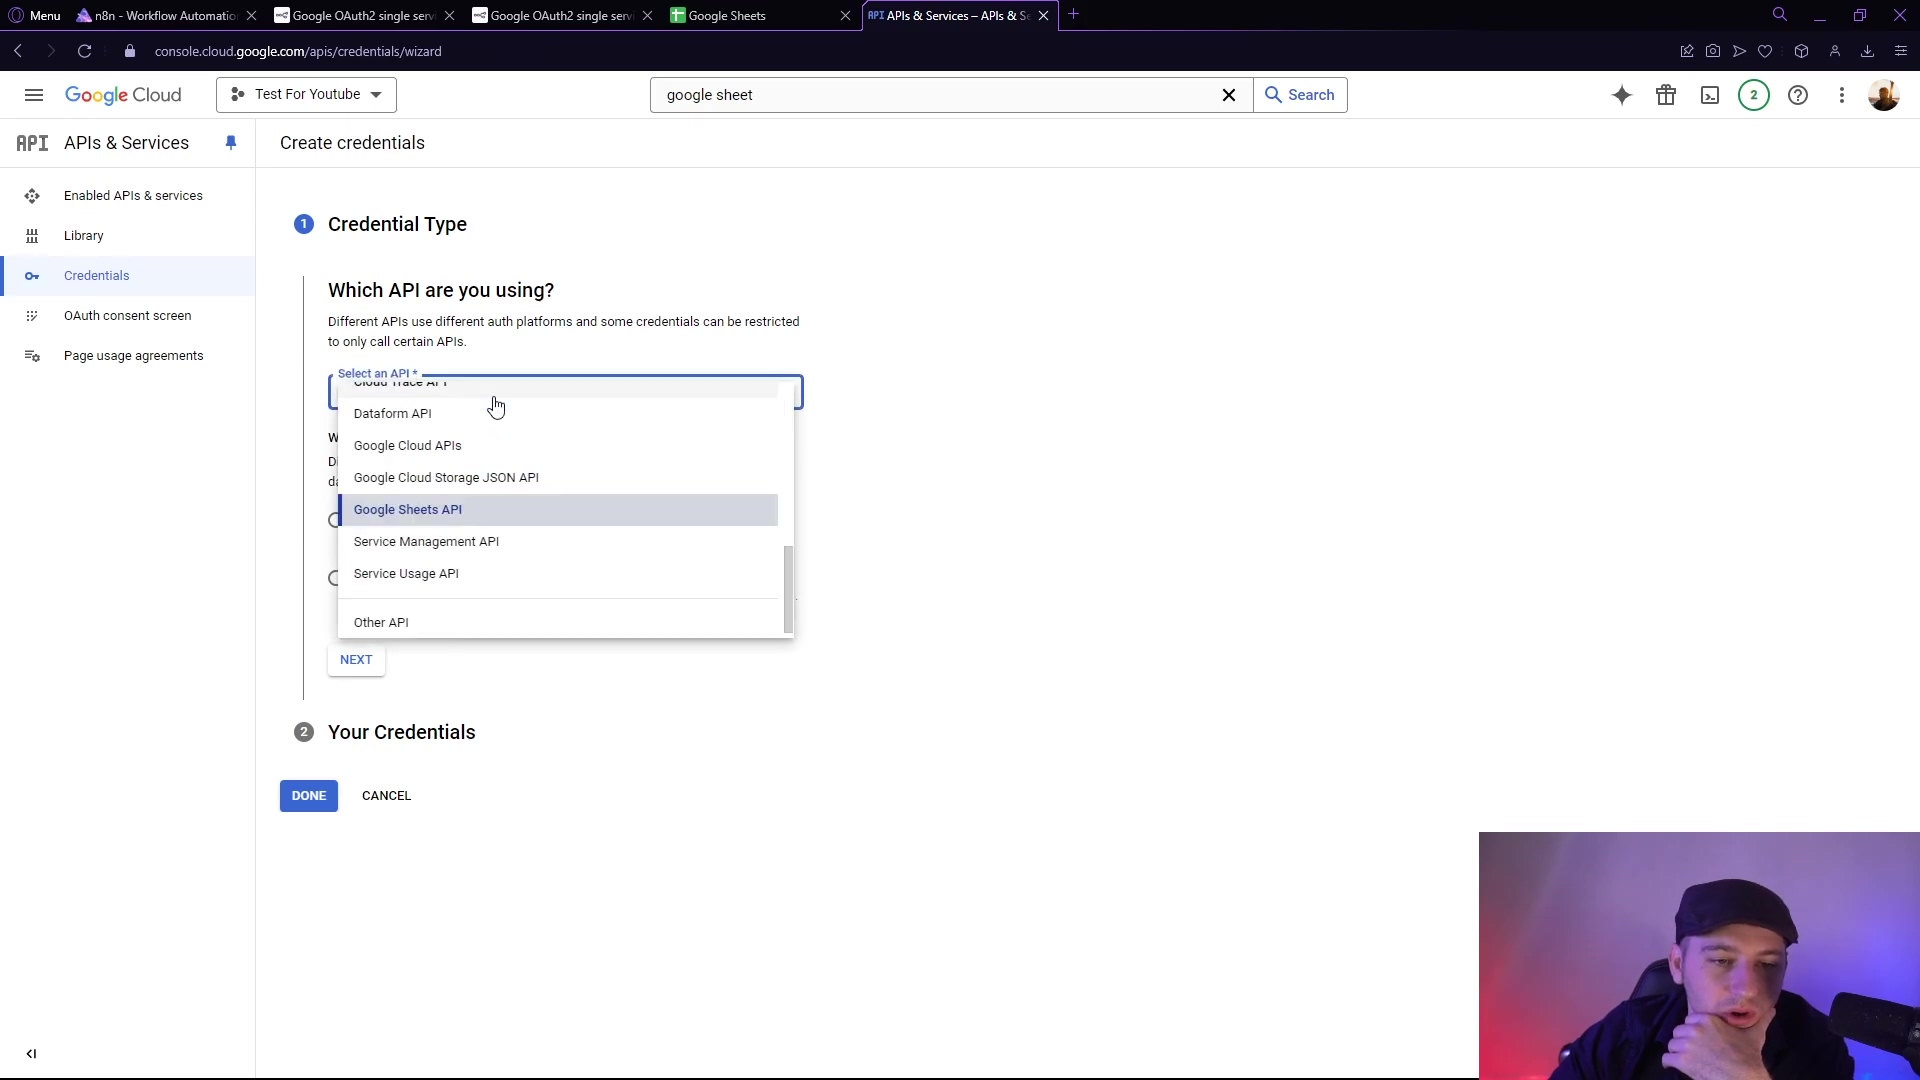
From the Google Cloud Console, go back to “APIs & Services” and then click on “Credentials”.
Click on ”+ CREATE CREDENTIALS” at the top, and select “OAuth client ID” from the dropdown.
For the “Application type”, choose ‘Web application’. Even though N8N might be self-hosted, it’s still communicating over the web, so this is the correct choice.
Give it a name, something like “N8N Web Client” or “Google Sheets N8N”.
Now, here’s the most crucial part: the ‘Authorized redirect URIs’. This is the specific URL that Google will send the authorization code back to after you’ve given permission. N8N needs this to complete the connection. If this is wrong, the whole thing falls apart. Trust me, I’ve been there!
How to get the N8N Redirect URI:
- Open your N8N instance in another browser tab.
- Go to “Credentials” (usually found in the left sidebar).
- Click “New Credential”.
- Search for “Google Sheets OAuth2” and select it.
- You’ll see a field called “OAuth Redirect URL”. Copy this URL exactly as it appears. It usually looks something like
https://your-n8n-url.com/rest/oauth2-credential/callbackorhttp://localhost:5678/rest/oauth2-credential/callbackif you’re running it locally.
Paste that copied URL into the ‘Authorized redirect URIs’ field in Google Cloud. Then click “CREATE”.
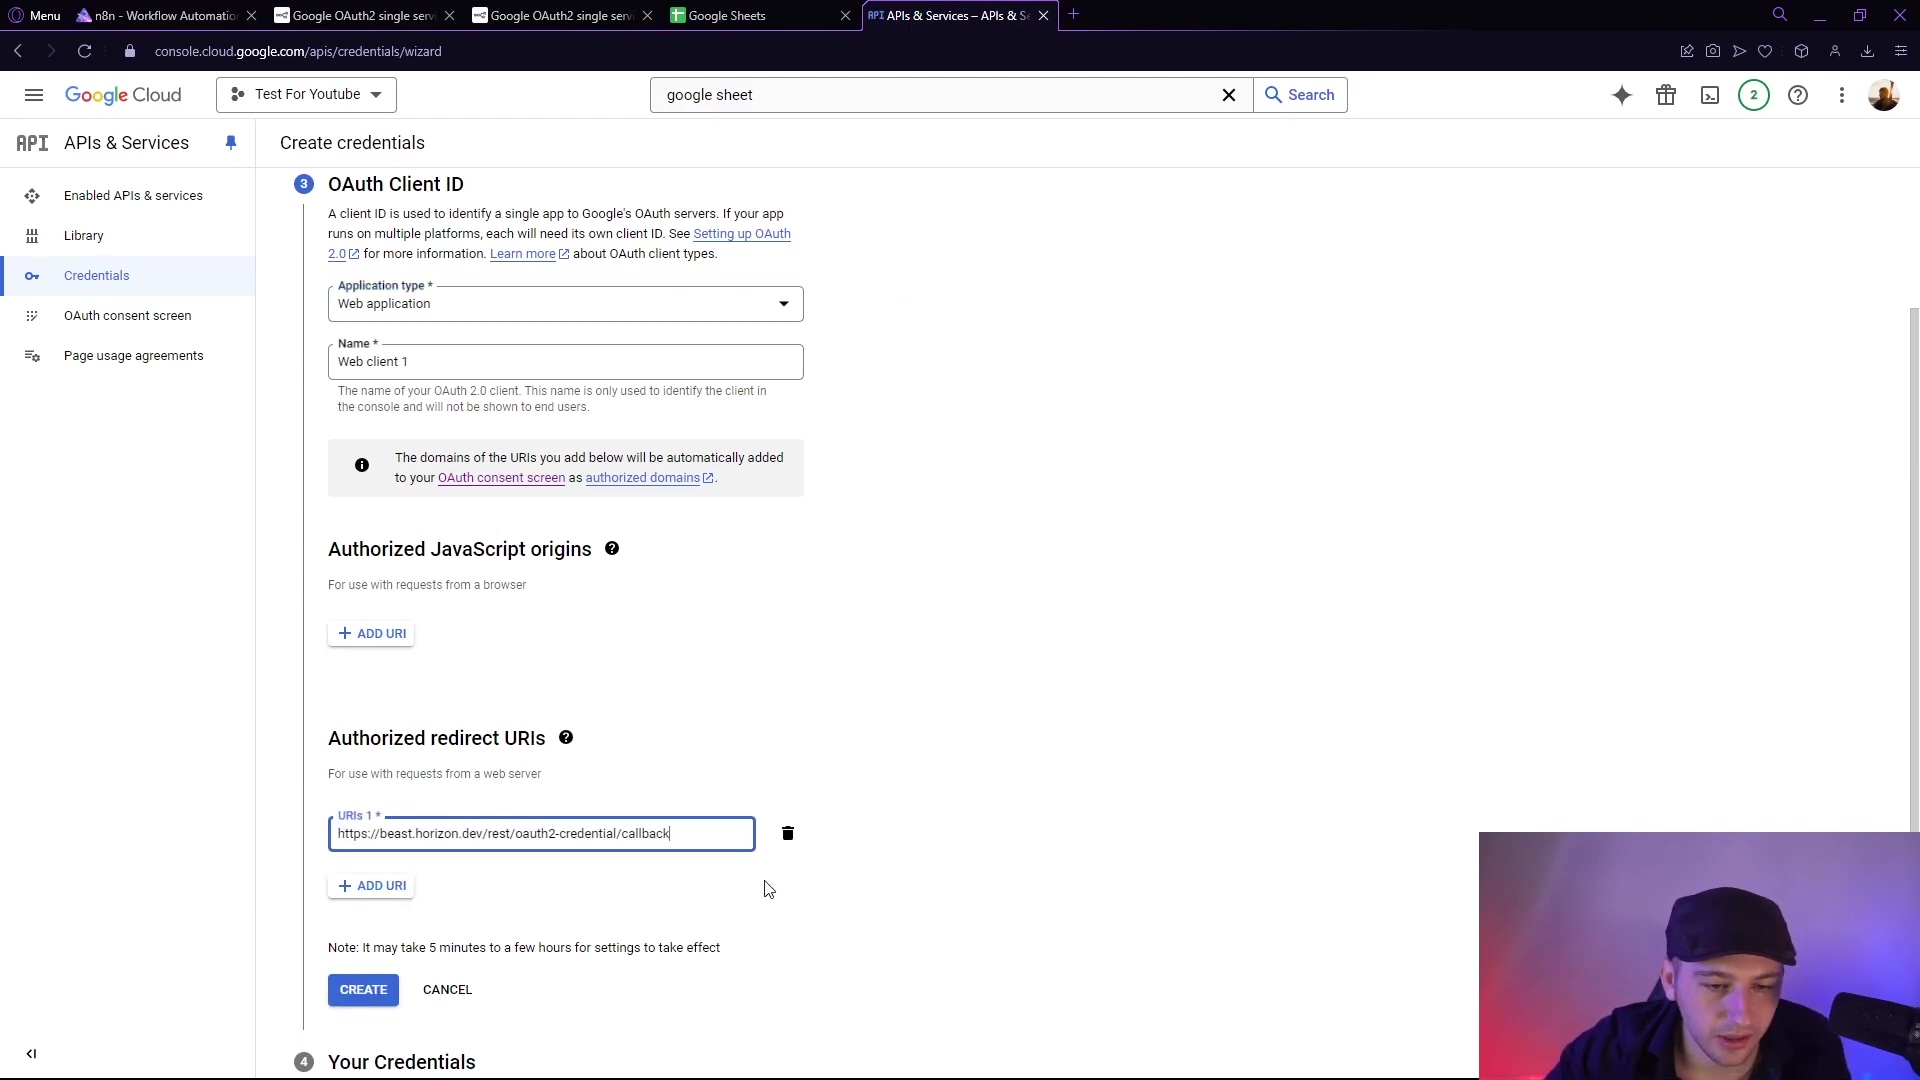
Expected Feedback: A pop-up will appear showing your “Client ID” and “Client Secret”. DO NOT CLOSE THIS POP-UP YET! These are your golden tickets. Copy both of them somewhere safe, like a temporary text file. You’ll need them in the next step.
Connecting N8N to Google Sheets
We’re in the home stretch! You’ve done all the heavy lifting on the Google Cloud side. Now, it’s time to tell N8N about the credentials we just created so it can actually use them to talk to Google Sheets.
Adding Credentials in N8N
Back in your N8N instance, if you closed the “New Credential” window, open it again by going to “Credentials” and clicking “New Credential”. Search for “Google Sheets OAuth2”.
Now, paste the “Client ID” and “Client Secret” you copied from Google Cloud into their respective fields in N8N. Give this credential a name, like “My Google Sheets Account” or “Sheets Main”. This helps you identify it later if you have multiple Google accounts.
Click “Save”.
Expected Feedback: The credential will be saved, and you’ll see a “Connect” button or similar next to the credential name. This means N8N is ready for the final authorization step.
Authorizing the Connection
This is the moment of truth! We’re going to tell Google to officially link your N8N instance with your Google account.
In N8N, with your newly created Google Sheets OAuth2 credential open, click the “Connect” button (or “Sign in with Google” if that’s what it says).
A new browser tab or pop-up window will open, redirecting you to Google’s authorization page. This is the OAuth consent screen we configured earlier! Select the Google account you added as a “test user” in Google Cloud.
You might see a warning that says “Google hasn’t verified this app.” Don’t panic! This is normal for apps you’ve created yourself and haven’t submitted for Google’s official review process. Since you’re the developer and you’re using it for your own purposes, it’s perfectly fine to proceed. Just click “Continue” (or “Go to [App Name] (unsafe)” if that’s the option) and grant the necessary permissions.
Once you’ve granted permissions, the tab will close, and you’ll be redirected back to N8N.
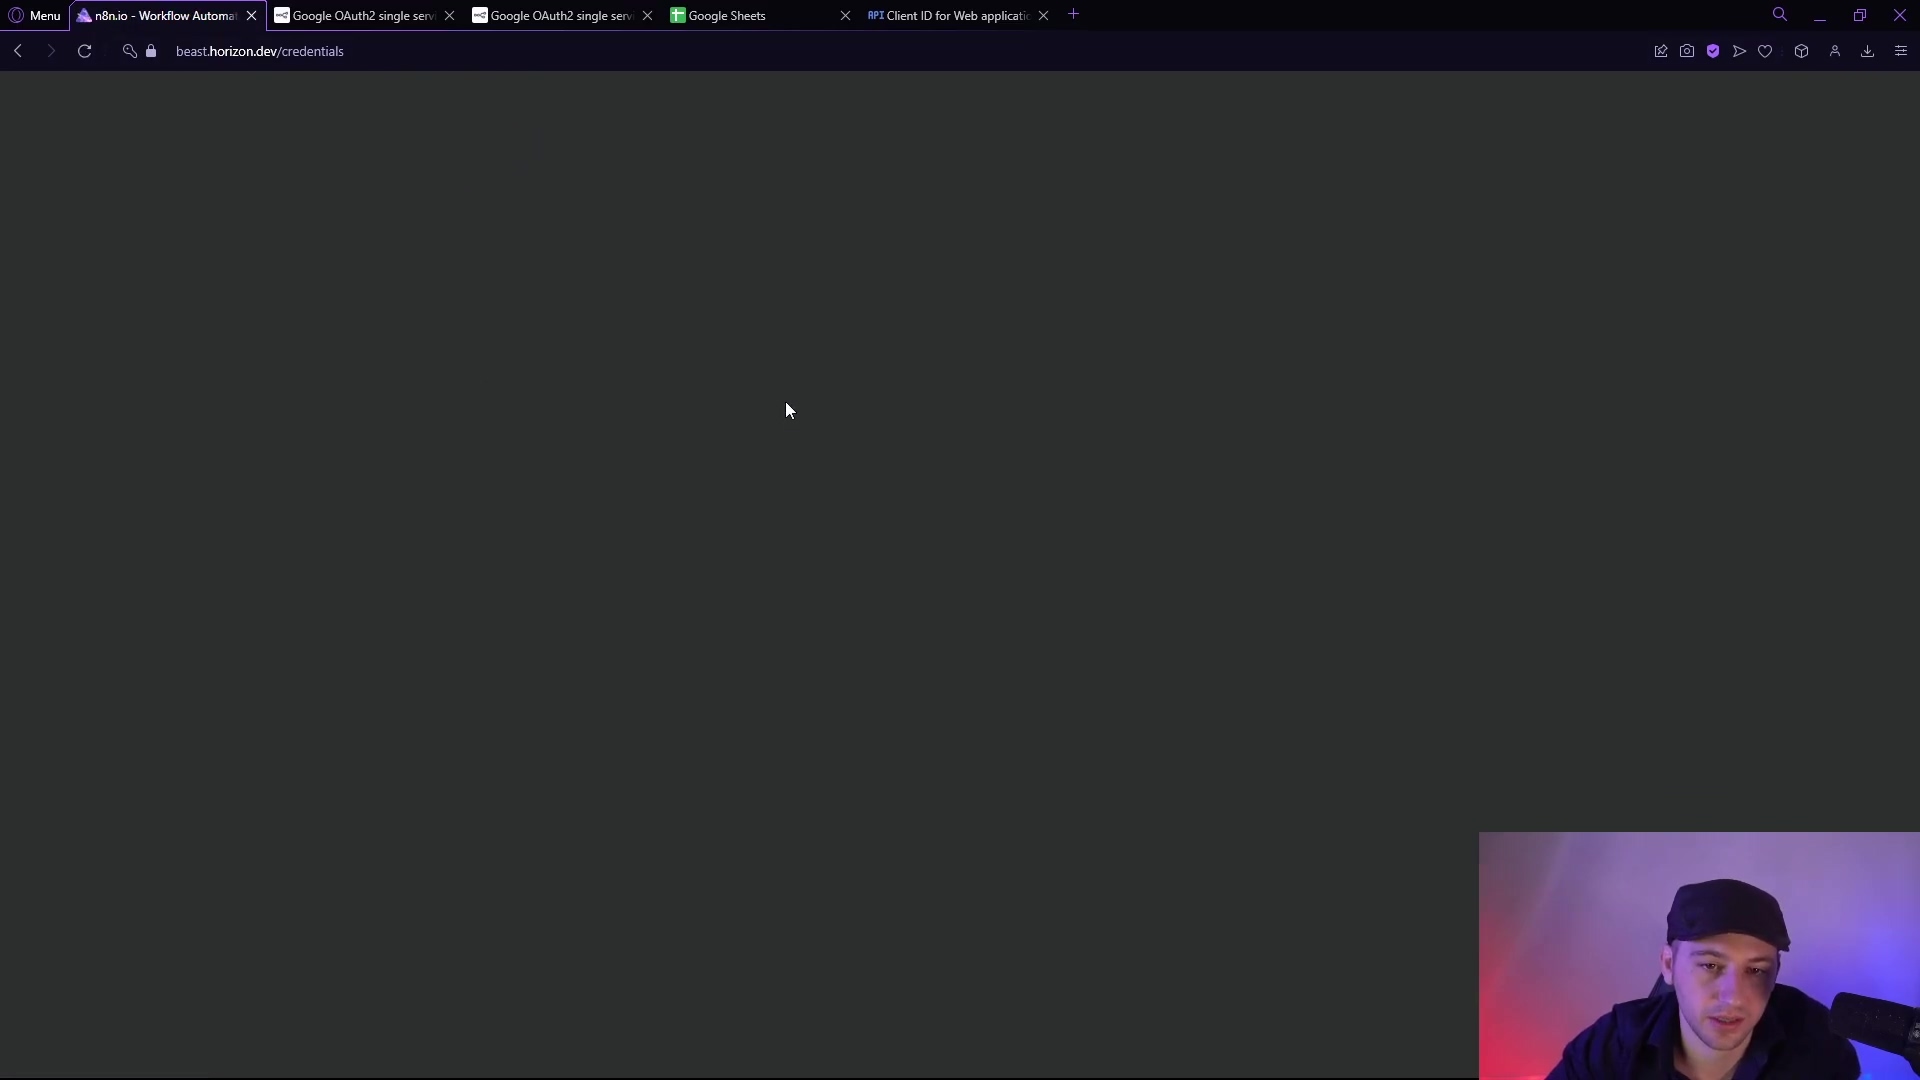
Expected Feedback: In N8N, the credential status should change to “Account connected” or similar. You might see a green checkmark. If the N8N page appears blank after authorization, don’t worry, it’s a known minor display bug. Simply refresh the N8N page in your browser, and the “Account connected” status should magically appear. You’ve nailed it!
Testing the Integration
Congratulations! You’ve done the hard part. But how do we know it actually works? We test it, of course! We’ll create a super simple N8N workflow to make sure everything is talking nicely.
- Create a New Workflow: In N8N, go to “Workflows” and click “New”.
- Add a Manual Trigger: Drag and drop a “Manual Trigger” node onto the canvas. This is just a way for us to manually kick off the workflow for testing.
- Add a Google Sheets Node: Drag and drop a “Google Sheets” node next to the Manual Trigger. Connect the two nodes by dragging a line from the Manual Trigger’s output to the Google Sheets node’s input.
- Configure the Google Sheets Node:
- Double-click the Google Sheets node to open its settings.
- For “Credential”, select the Google Sheets OAuth2 credential you just created (e.g., “My Google Sheets Account”).
- For “Operation”, choose “Create a spreadsheet”.
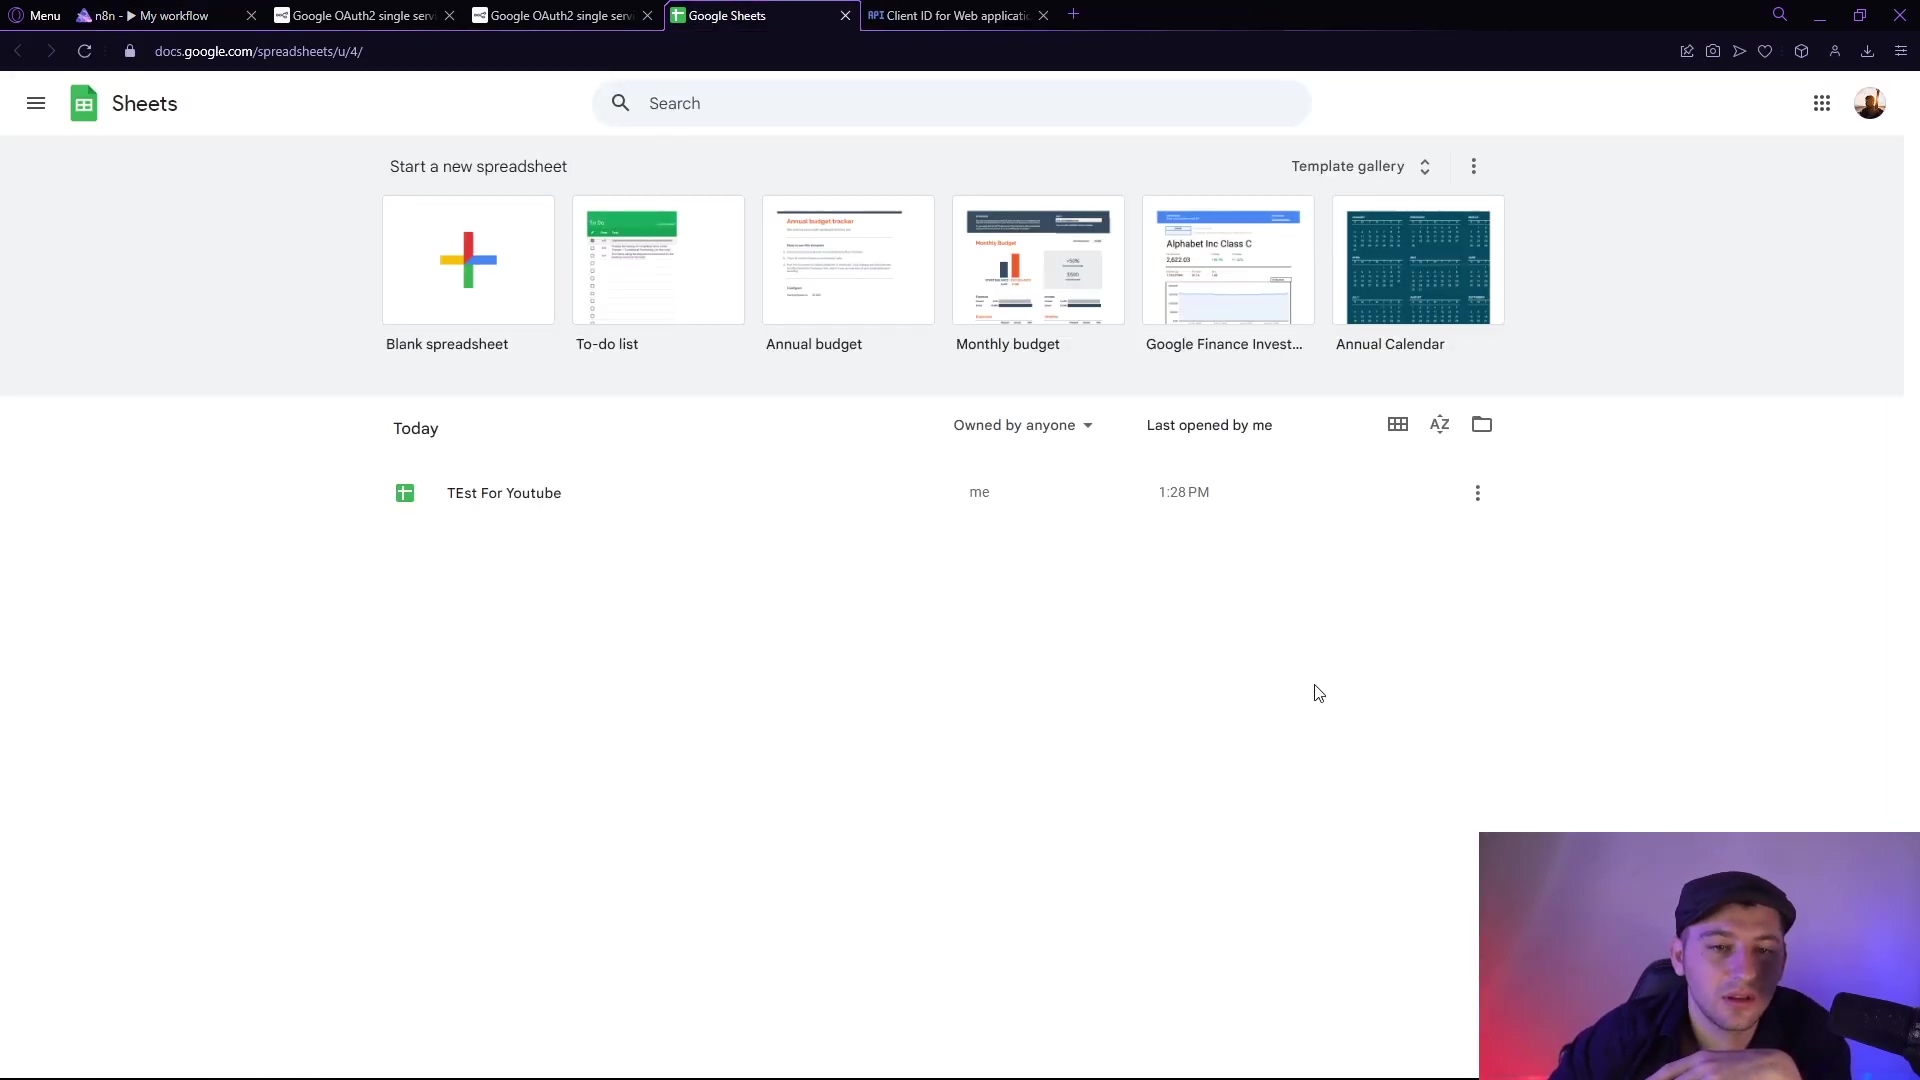
- For “Spreadsheet Name”, type something unique like “N8N Test Spreadsheet - [Your Name]” or “TEST For Youtube”.
- Execute the Workflow: Click the “Execute Workflow” button (usually a play icon) in the N8N interface.
Expected Feedback:
- In N8N, you’ll see the nodes light up as the workflow runs. If successful, the Google Sheets node will show a green checkmark, and you’ll see output data in the panel below, indicating the new spreadsheet was created.
- Now, open your Google Sheets in your browser. You should see a brand new spreadsheet with the exact name you specified (e.g., “N8N Test Spreadsheet - [Your Name]”) in your list of sheets! If it’s there, you’ve successfully integrated N8N with Google Sheets. Give yourself a pat on the back!
💡 Critical Best Practice Tips
Alright, you’re a pro now, but even pros follow best practices. These tips will help keep your automations secure and running smoothly:
- Security First: Your Client ID and Client Secret are like the keys to your Google kingdom. Always keep them confidential. Never, ever share them publicly or embed them directly in code that’s visible to others. Treat them like your password!
- Least Privilege: When you were adding those API scopes, remember how we picked specific ones? That’s the principle of “least privilege.” Only grant the minimum necessary permissions required for your N8N workflows to function. Don’t give N8N access to your entire Google Drive if it only needs to read one spreadsheet. It’s like giving someone a key to just the front door, not the whole house.
- Error Monitoring: Things can go wrong. Internet can drop, APIs can change. Implement error handling in your N8N workflows (N8N has great error handling features!) and monitor your workflows. This helps you quickly identify and address any issues with your Google Sheets integration, ensuring your data stays consistent and reliable. Don’t just set it and forget it!
Key Takeaways
So, what did we learn today? A lot, I hope! But if you take away anything, remember these core concepts:
- Google Cloud Project: This is your central hub for managing all your Google API access and credentials. It’s where the magic starts.
- OAuth Consent Screen: This is the friendly face Google shows when you authorize an app. Configuring it correctly is vital for secure user authentication.
- Client ID & Secret: These are the unique identifiers and secret keys that securely connect N8N to your Google Sheets API. Guard them well!
- N8N Workflow Testing: Always, always test your integration with a simple workflow. It’s the only way to confirm successful data exchange and avoid headaches later.
Conclusion
Whew! We made it! By following these detailed, step-by-step instructions, you’ve successfully integrated N8N with Google Sheets. You’ve unlocked powerful automation capabilities for your data management tasks, turning repetitive chores into automated triumphs. This integration not only streamlines your workflows but also empowers you to build sophisticated, automated solutions with minimal manual intervention. How cool is that?
While this guide focused on a direct N8N to Google Sheets connection, remember that N8N’s versatility extends to hundreds of other applications. It’s a robust, open-source alternative to many commercial automation platforms, giving you more control and often saving you a ton of money in the long run. The initial setup might have seemed a bit technical, but the long-term benefits in efficiency, customization, and frankly, just feeling like a tech wizard, are substantial.
Now, armed with this knowledge, go forth and automate! Implement this powerful integration in your own projects. And hey, if you hit any snags or have any questions, don’t hesitate to reach out. We’re all in this automation journey together!
Frequently Asked Questions (FAQ)
Q: Why do I need a Google Cloud Project just to connect N8N to Google Sheets?
A: Think of the Google Cloud Project as your central control panel within Google’s ecosystem. It’s where you tell Google which services you want to use (like Google Sheets API) and where you manage the security credentials (like Client ID and Secret) that allow external applications like N8N to securely access your data. Without it, Google wouldn’t know who N8N is or what permissions it should have.
Q: I’m getting an “app not verified” warning during authorization. Is this a problem?
A: Not at all for personal use! This warning is common for applications you’ve created yourself and haven’t submitted to Google for official review. Since you’re the developer and you’re using it for your own automations, you can safely proceed by clicking “Continue” or the equivalent option. It just means Google hasn’t vetted it for public distribution, which isn’t necessary for your private workflows.
Q: My N8N page went blank after authorization. Did something go wrong?
A: Nope, you’re probably fine! This is a known minor display bug in N8N. Just refresh your browser page, and you should see the “Account connected” status appear for your Google Sheets credential. Your connection should be successfully authorized.
Q: Can I use the same Google Cloud Project and credentials for multiple N8N instances or workflows?
A: Yes, absolutely! Once you’ve set up your Google Cloud Project and created the OAuth Client ID and Secret, you can reuse those same credentials across multiple N8N workflows or even different N8N instances, as long as the redirect URI matches what you configured in Google Cloud. This is super efficient!
Q: What if I want N8N to access Google Drive files, not just Sheets?
A: Great question! When you were adding “Scopes” in the Google Cloud OAuth Consent Screen setup, you might have noticed other Google Drive related scopes (e.g., .../auth/drive or .../auth/drive.file). If you select those additional scopes during the setup, N8N will gain the necessary permissions to interact with Google Drive files as well, allowing you to build workflows that manage files beyond just spreadsheets.