Watch the Video Tutorial
💡 Pro Tip: After watching the video, continue reading below for detailed step-by-step instructions, code examples, and additional tips that will help you implement this successfully.
Table of Contents
Open Table of Contents
- Understanding n8n’s Core: Fixed vs. Expression Fields
- Deep Dive into JavaScript Object Notation (JSON)
- Foundational n8n Nodes for Workflow Control
- Workflow Control Nodes
- Building a Practical AI-Powered Workflow: Responding to Journalist Inquiries
- Key Takeaways
- Conclusion
- Frequently Asked Questions (FAQ)
- Q: Why should I always use Expression fields instead of Fixed fields?
- Q: What’s the most common mistake beginners make with JSON in n8n?
- Q: How do I know which n8n node to use for a specific task?
- Q: Can I use AI Agent nodes with any Large Language Model (LLM)?
- Q: What if my workflow gets stuck or doesn’t run as expected?
Understanding n8n’s Core: Fixed vs. Expression Fields
Alright, let’s kick things off with something super fundamental in n8n – the two main ways you can feed information into your nodes: Fixed and Expression fields. Think of it like this: are you giving a robot a pre-written script (Fixed) or teaching it to improvise based on what it sees (Expression)?
- Fixed fields are pretty straightforward. You type in a value, and it stays that way. Static. Unchanging. Like a stone tablet.
- Expression fields, on the other hand, are where the magic happens! They let you pull in data dynamically from previous steps in your workflow. This means your workflow can adapt on the fly, referencing and transforming data as it flows through. For building robust, adaptable workflows, expressions are almost always the superior choice. Trust me on this one; it’s a game-changer.
Practical Application: Dynamic Data Input
Let’s make this concrete. Imagine you’re pulling data from a Google Sheet. Instead of manually typing in someone’s fullName or email into a fixed field for every single entry (which would be, well, impossible for a large sheet!), you can use expressions. This allows your workflow to grab that info for each item as it processes. This way, your automation doesn’t just work for one specific case; it works for all of them, no matter how the data changes. Super handy, right?

Deep Dive into JavaScript Object Notation (JSON)
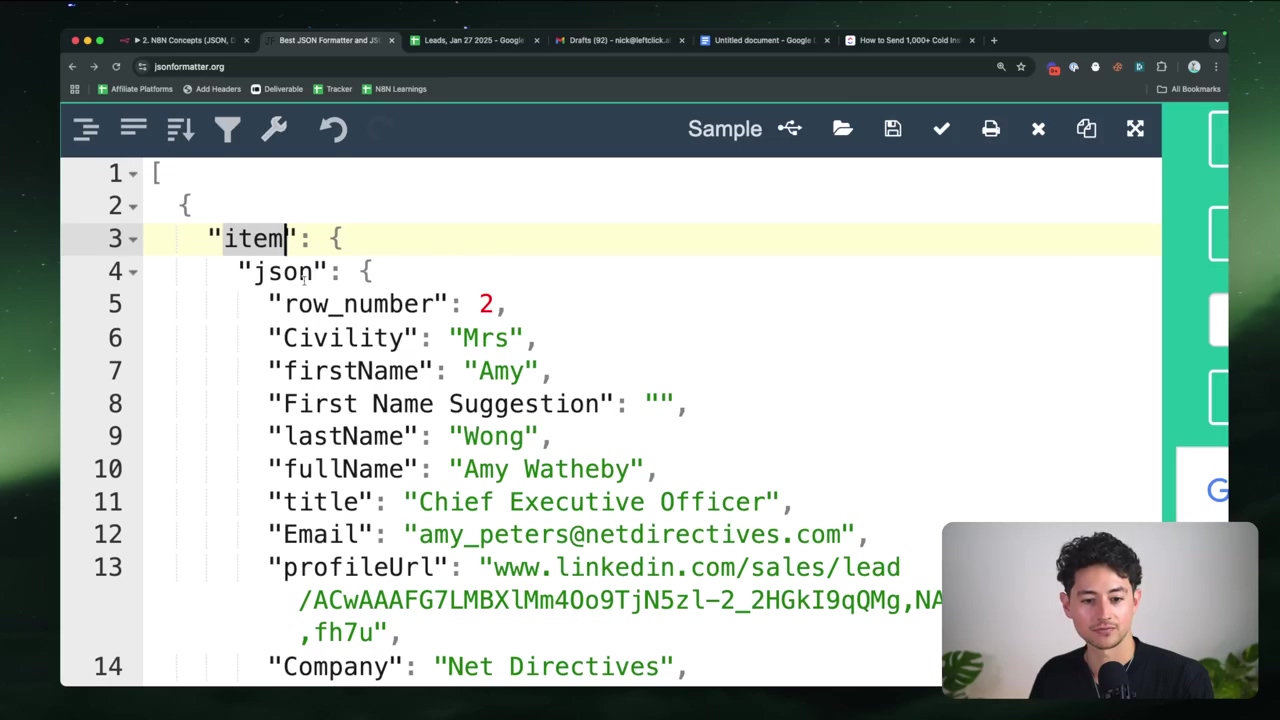
Okay, buckle up, because we’re about to talk about the universal language of data in n8n: JSON (JavaScript Object Notation). If n8n is a spaceship, JSON is the fuel that powers its engines. Understanding its structure and how it works is absolutely crucial for building anything beyond the simplest workflows. JSON is basically a standardized way to represent data, making sure everyone (every system, every API) speaks the same language when exchanging information. This minimizes confusion and maximizes efficiency – exactly what we want in automation!
JSON Data Types and Structure
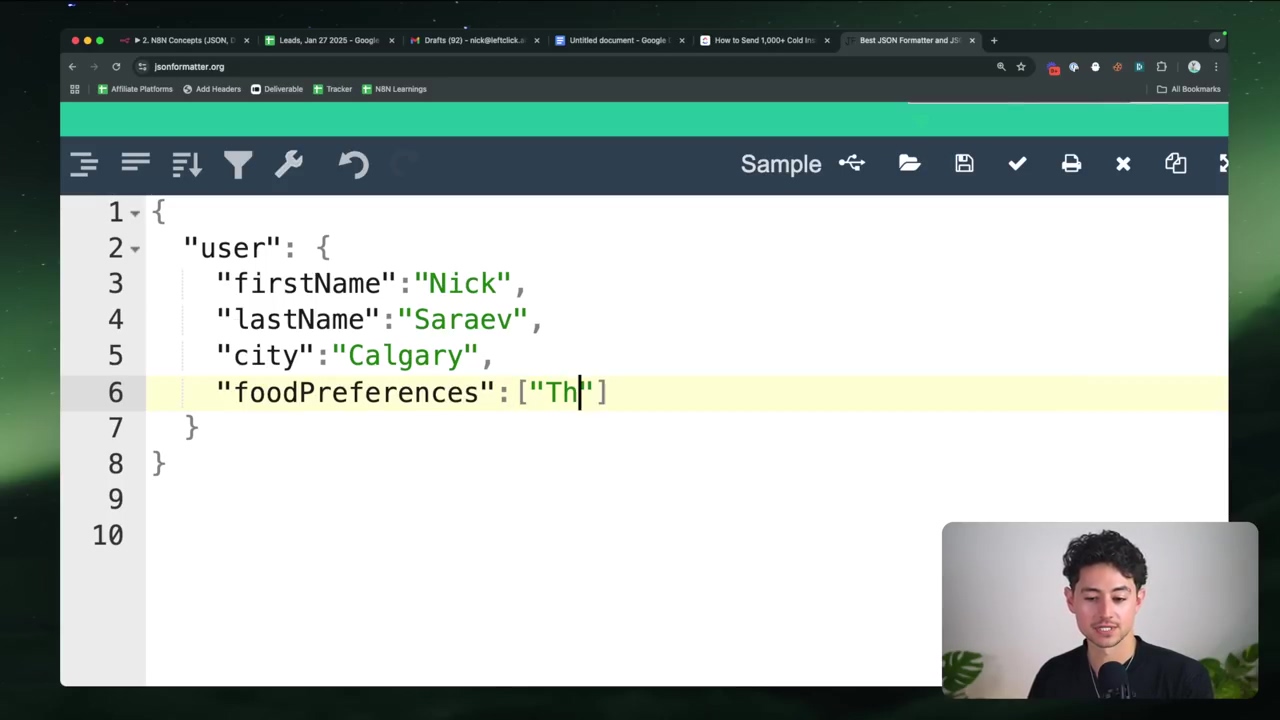
At its heart, JSON uses key-value pairs. Think of it like a dictionary: you have a key (the word you look up) and a value (its definition). Keys are always strings (text in double quotes), and values can be a bunch of different things:
- Strings: Just text, always wrapped in double quotes. Like:
"Nick" - Numbers: Regular numbers, integers, or decimals. Like:
25or3.14 - Booleans: Simple
trueorfalsevalues. No maybe, no sometimes. - Arrays: An ordered list of values, all tucked inside square brackets
[]. Think of it as a shopping list:["milk", "eggs", "bread"] - Objects: An unordered collection of those key-value pairs we just talked about, all wrapped up in curly braces
{}. This is like a mini-database for a single item:{"city": "Calgary", "province": "Alberta"}
The cool thing about JSON is that you can nest these data types within each other. You can have objects inside arrays, arrays inside objects, and so on. This lets you build really complex data structures, just like building with LEGOs! When you’re working with n8n, you’ll be seeing JSON objects and arrays all the time, especially when you’re getting responses back from APIs.
Referencing Data in n8n
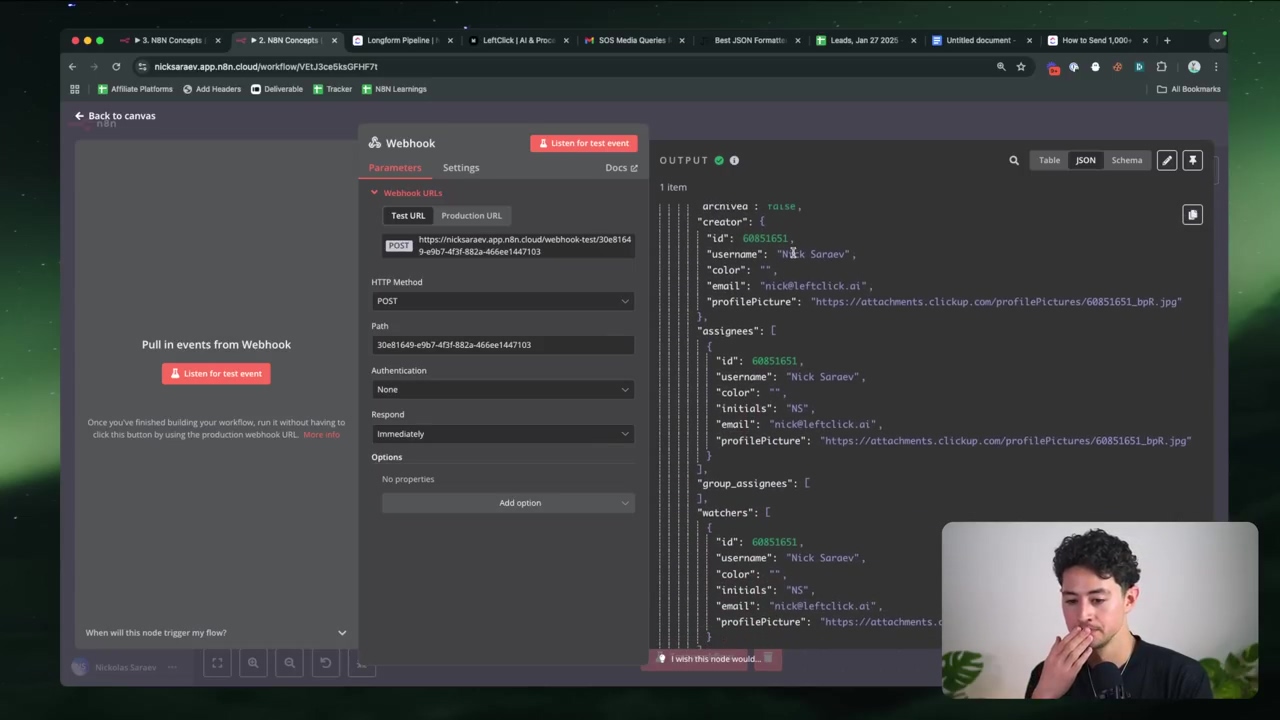
So, how do you actually grab that data once it’s in n8n? Remember, n8n treats all data as an array of objects. To reference data from a node that came before your current one, you’ll use specific syntax. It’s like giving directions to a specific piece of information:
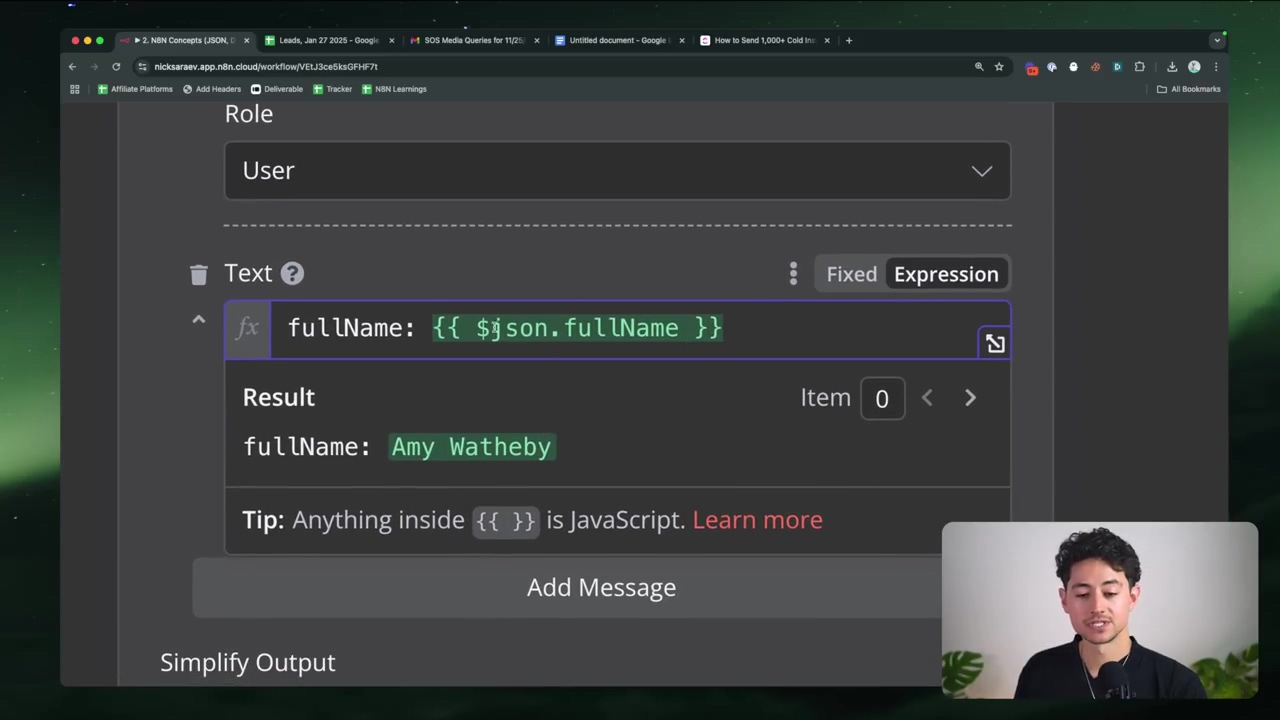
- From the immediately preceding node: If you just want data from the node right before yours, you’ll use
{{ $json.fieldName }}. For example, if the previous node outputted{"name": "Boyce"}, you’d use{{ $json.name }}to get “Boyce”. - From nodes further back: If you need to reach back a few steps, you’ll use
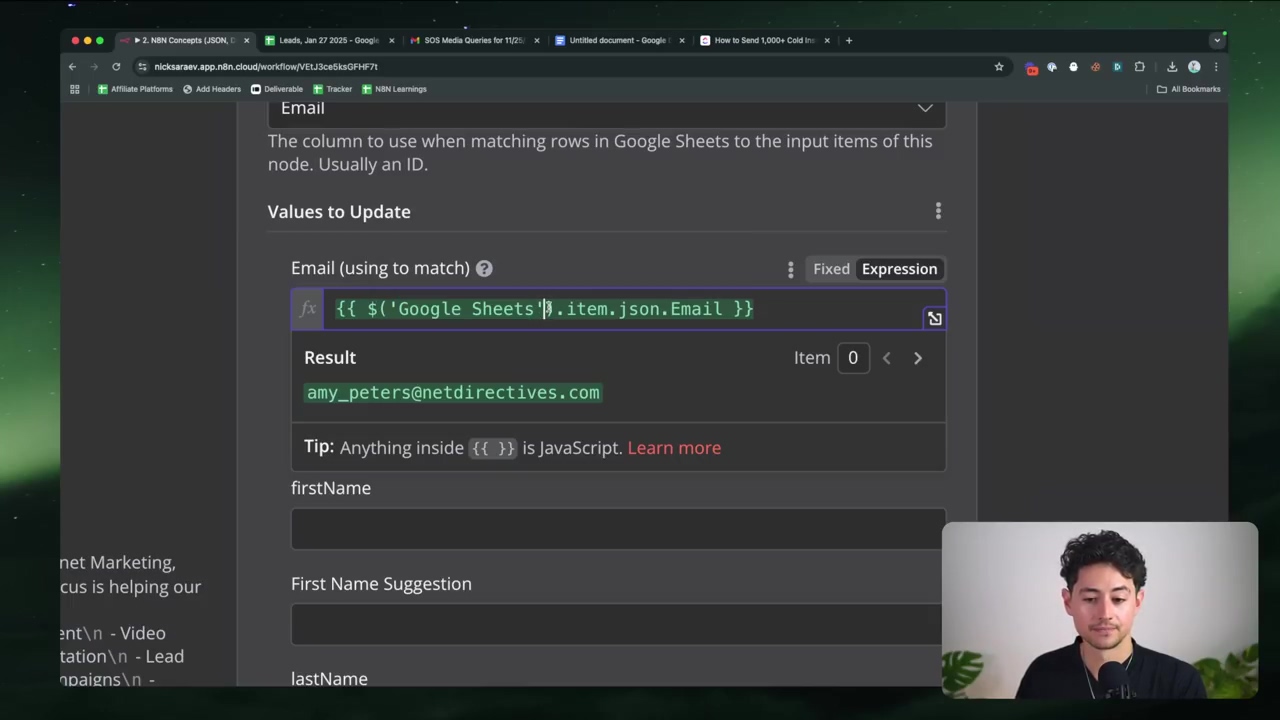
{{ $('Node Name').item.json.fieldName }}. So, if you had a node named “Google Sheet Reader” and it had a field calledemail, you’d use{{ $('Google Sheet Reader').item.json.email }}. This is super powerful for connecting different parts of your workflow!
This structured approach ensures that your data flows precisely where it needs to go, allowing for accurate manipulation throughout your automations. No data gets lost in space on my watch!
Foundational n8n Nodes for Workflow Control
n8n isn’t just about connecting apps; it’s about controlling the flow of your data and the logic of your operations. It’s like being the conductor of an orchestra, making sure every instrument (node) plays its part at the right time. Mastering these foundational nodes is key to building complex, intelligent automations that don’t just do things, but think about how they do them.
HTTP Request Nodes
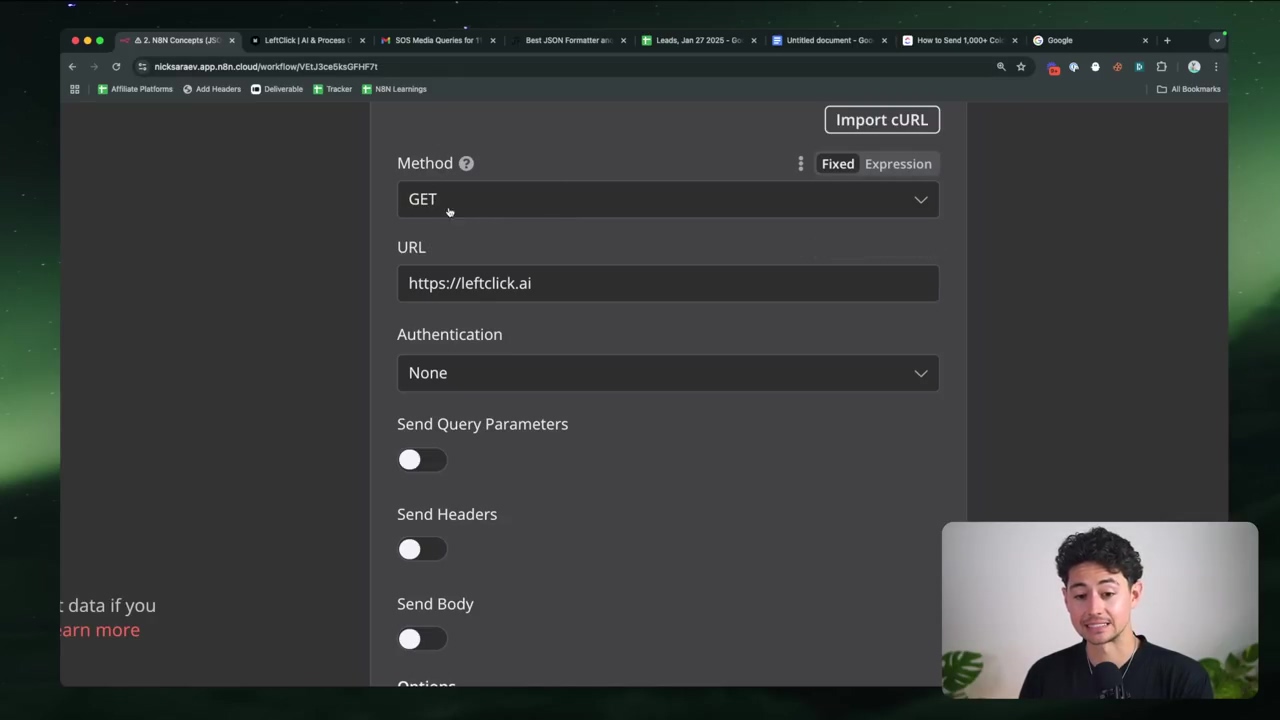
Ever wanted your workflow to act like a web browser? That’s exactly what HTTP Request nodes do! They let your workflow talk to pretty much any external web service out there. You can send different types of requests – GET (to retrieve data, like visiting a website), POST (to send new data, like submitting a form), PUT (to update existing data), or DELETE (to remove data). This node is absolutely fundamental for integrating with APIs that don’t have a pre-built n8n node. It’s your universal translator for the web!
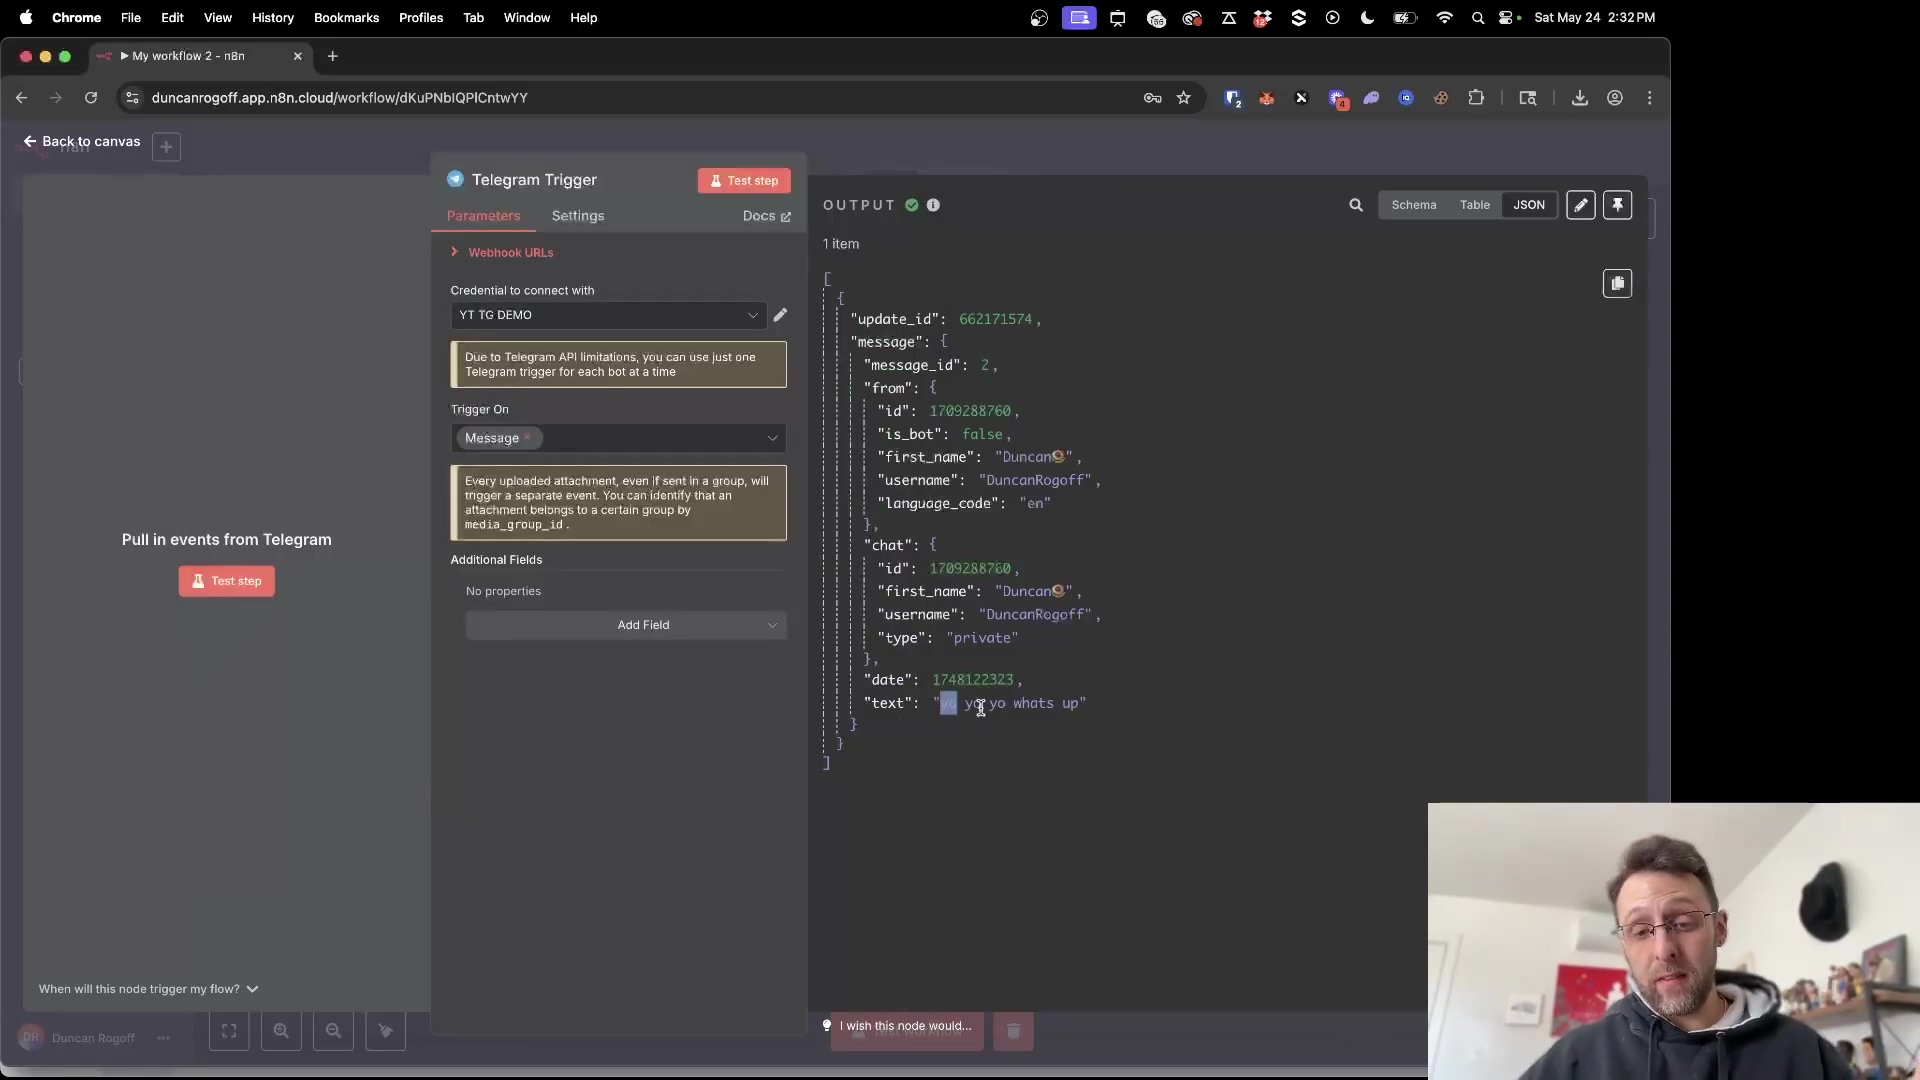
Webhook Nodes
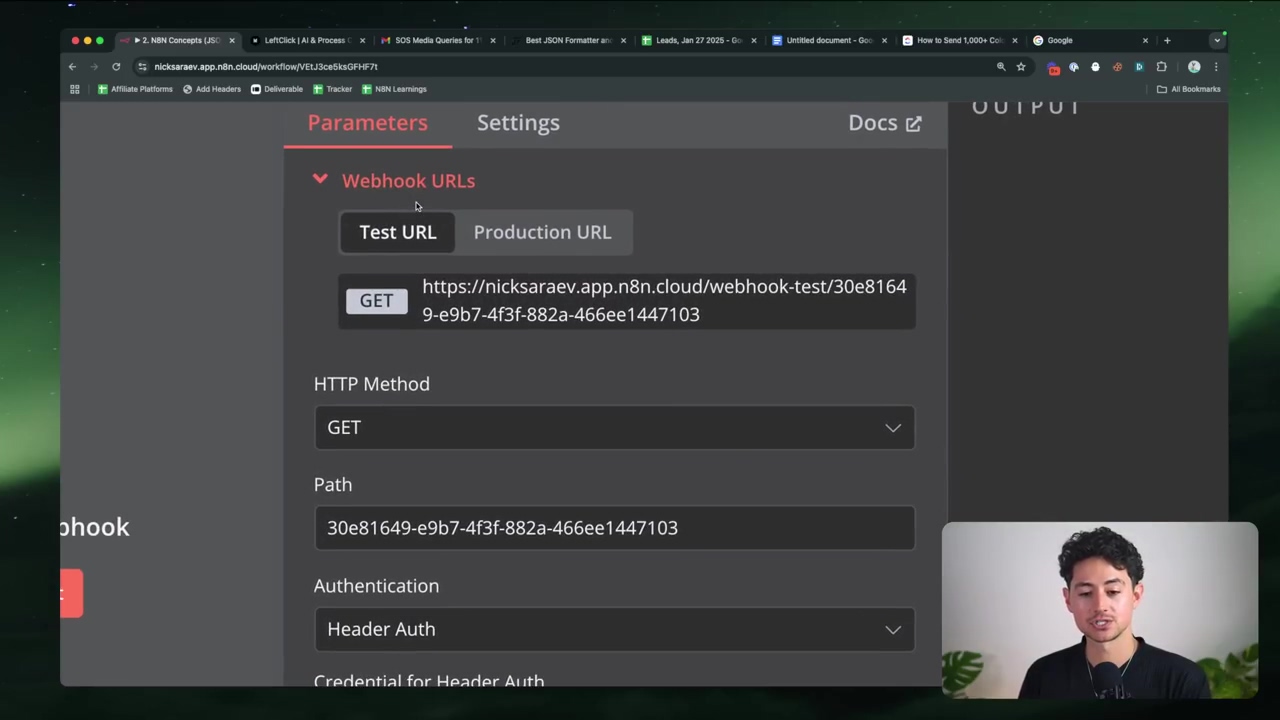
Now, if HTTP Request nodes are about sending data out, Webhook nodes are all about receiving data in. Think of a webhook as a special, unique URL that you give to another service. When something happens in that service (like a new customer signs up, or an email arrives), it “calls” that URL, and boom! Your n8n workflow instantly triggers and gets all the incoming data. This is how you build real-time, event-driven automations. It’s like having a dedicated hotline for your workflow!
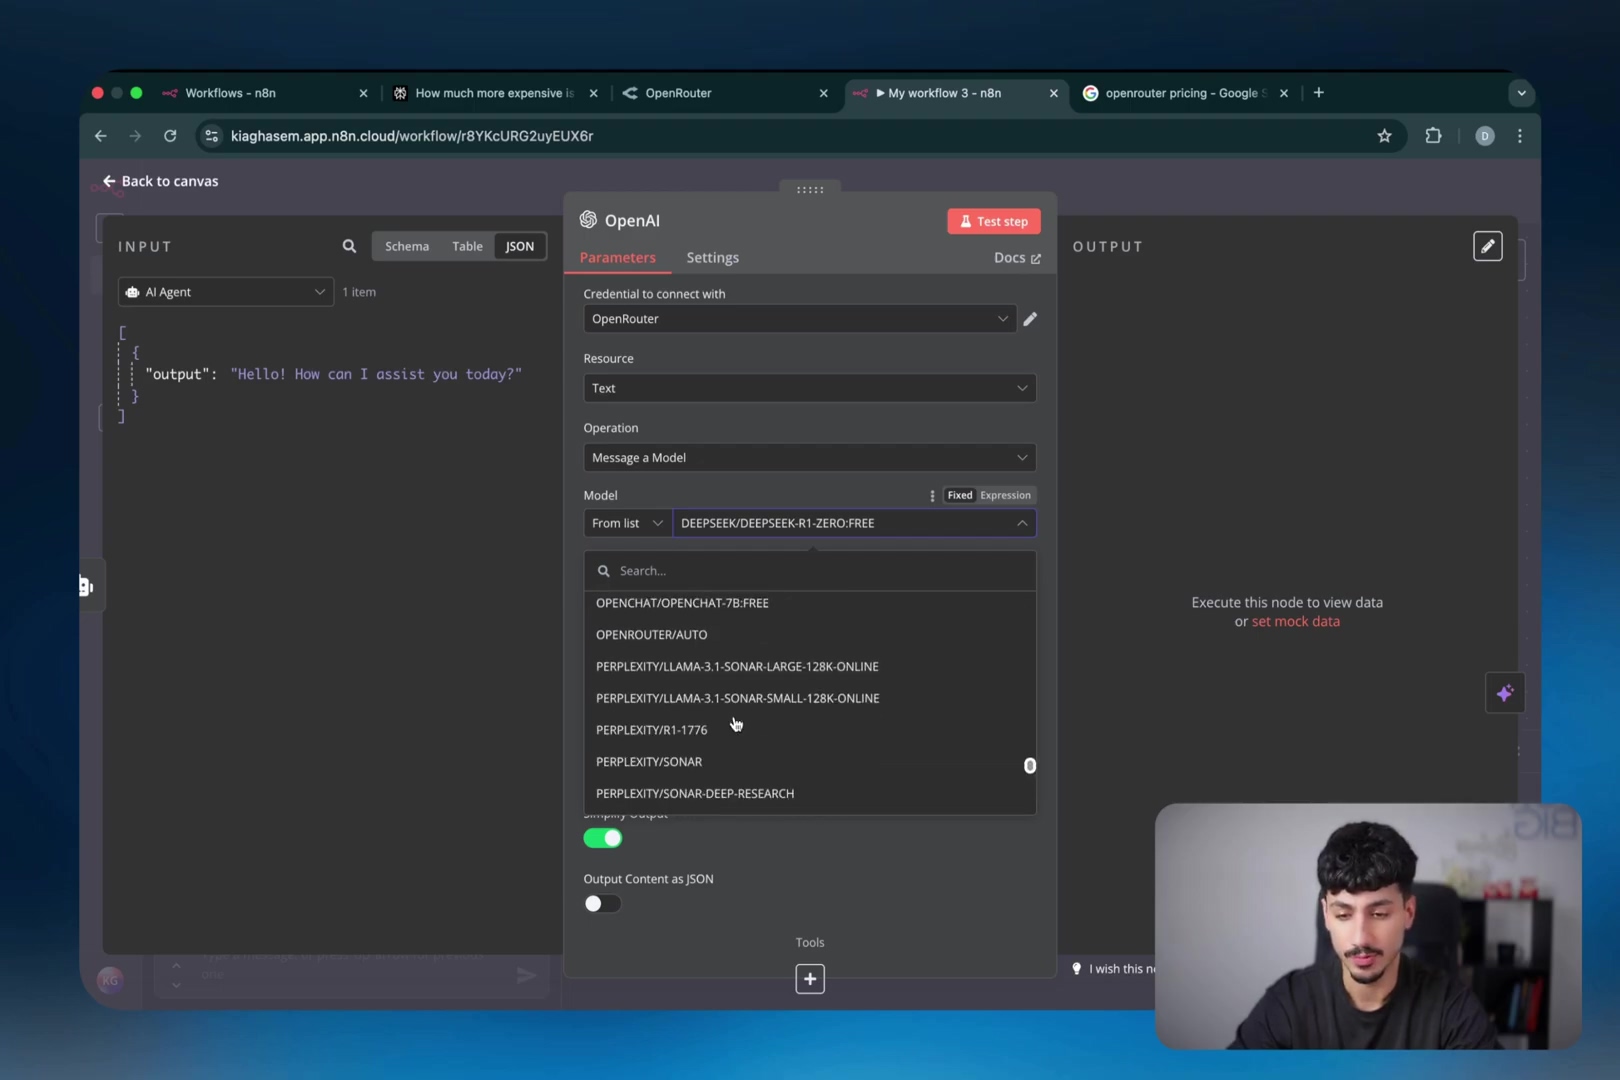
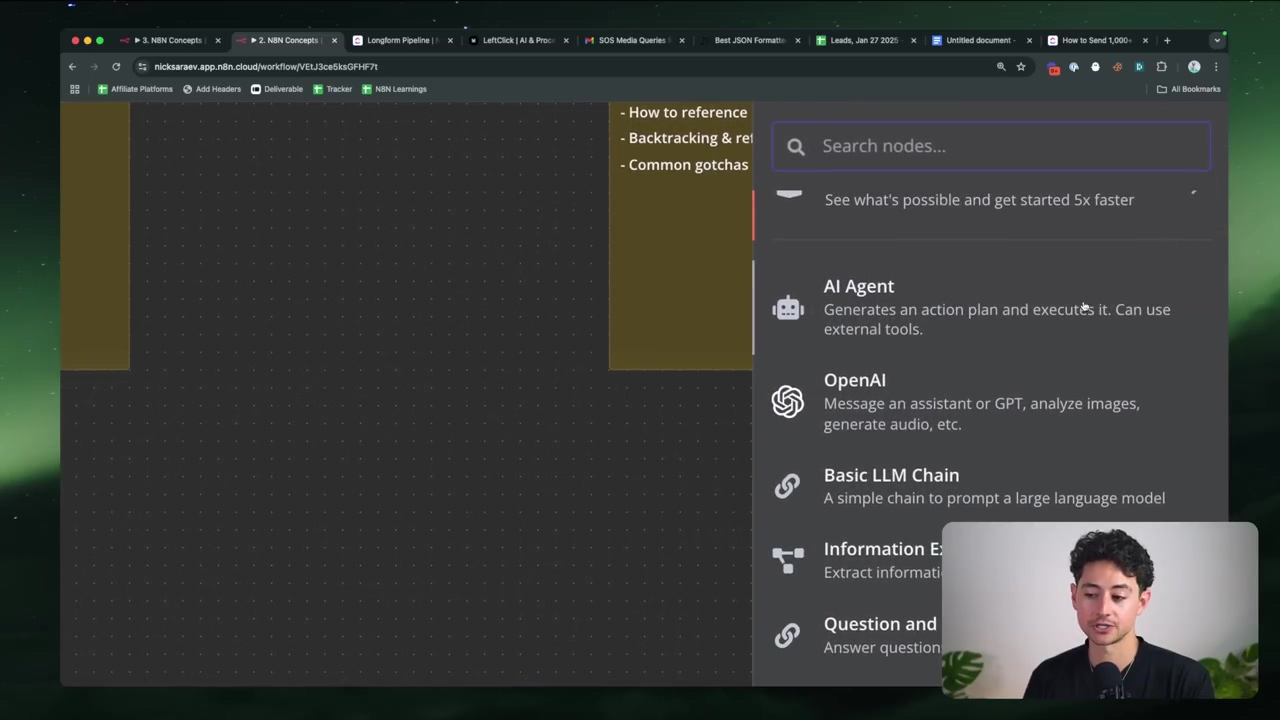
AI Agent Nodes
This is where things get really exciting, my friends! n8n’s AI Agent nodes let you plug powerful Large Language Models (LLMs) like OpenAI’s GPT or Google’s Gemini directly into your workflows. These agents aren’t just for generating text; they can analyze data, summarize information, and even call other tools based on your instructions. This means your automations can become incredibly intelligent, almost like having a digital assistant working for you.
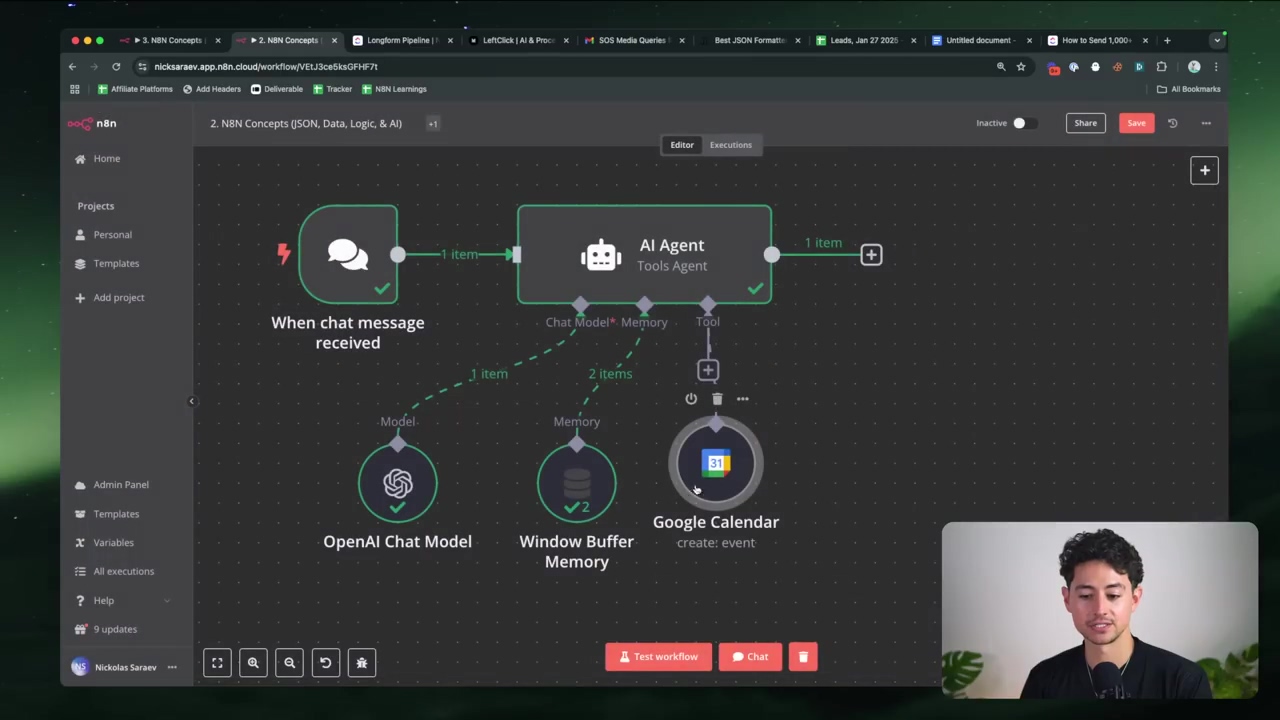
Implementing AI Agents
When you’re setting up your AI agents in n8n, you can configure them with memory (like Window Buffer Memory) to help them remember previous interactions and maintain conversational context. This is super important if you want your AI to have a coherent “conversation” or follow a sequence of thoughts. Plus, you can connect these AI agents to various tools (like a Google Calendar node or a Gmail node) so they can actually perform actions based on their analysis. Imagine an AI that not only understands your request but can also schedule a meeting for you! That’s the power we’re talking about.
Workflow Control Nodes
Beyond just moving data around, n8n gives you powerful tools to manage the flow of that data and the execution paths within your workflows. These are your traffic controllers, making sure everything goes where it needs to go.
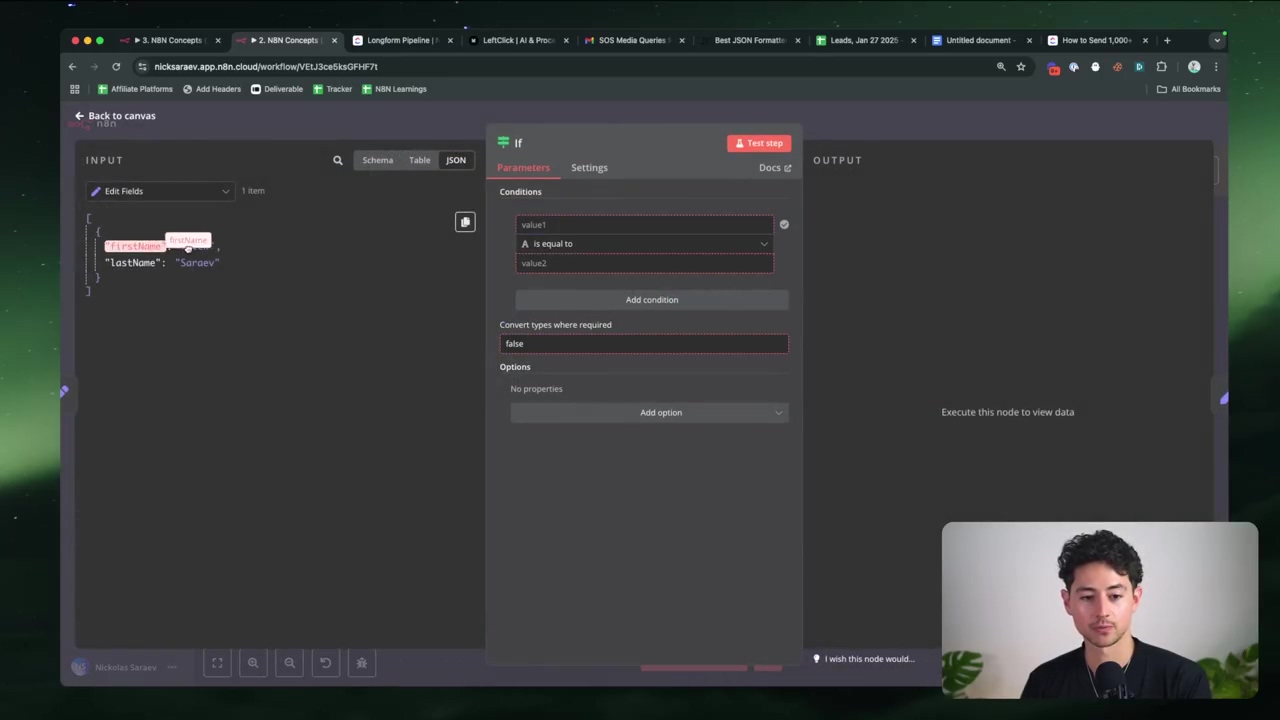
Conditional Logic with ‘If’ Nodes
Ever needed your workflow to make a decision? That’s what the ‘If’ node is for! It’s your workflow’s brain, allowing you to create branching logic. Based on a condition you set (e.g., “if the firstName equals ‘Nick’”), the workflow can then go down one path (the ‘True’ path) or another (the ‘False’ path). This is how you build dynamic responses and make your automations truly smart.
Filtering Data with ‘Filter’ Nodes
Sometimes, you get a whole bunch of data, but you only care about a few specific pieces. That’s where the ‘Filter’ node comes in! It lets you selectively pass items based on criteria you define. If an item matches your filter, it continues happily down the workflow; if not, it gets discarded. This is essential for processing only the relevant data and avoiding unnecessary work.
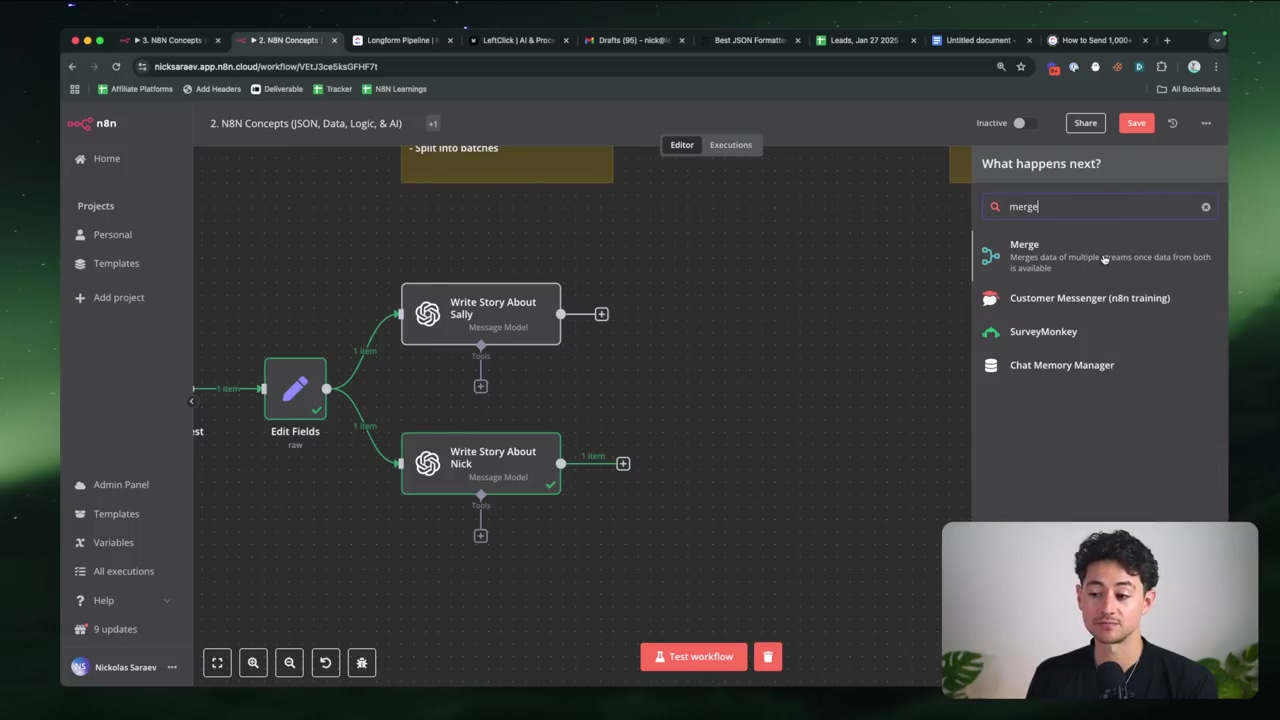
Merging Data Streams
What if different parts of your workflow are doing different things, but you need to bring all that data back together later? The ‘Merge’ node is your solution! It combines data from multiple incoming branches into a single stream. This is super useful when you’ve split your workflow to handle different scenarios, but then need to unify the results for a final step.
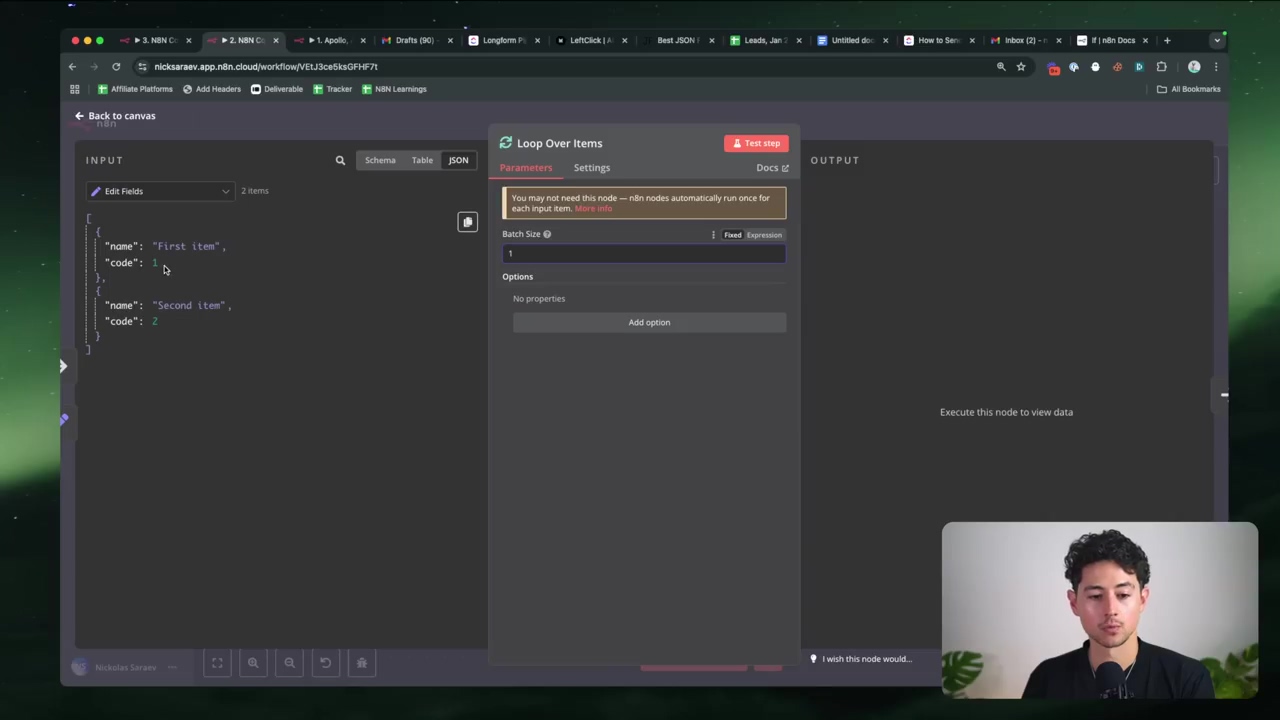
Looping Through Data Items
Imagine you have a list of 100 items, and you need to perform the same action on each one individually. Trying to do that manually would be a nightmare! The ‘Loop Over Items’ node (or sometimes you’ll see it as ‘Split into Batches’) is designed for exactly this. It processes multiple data items one by one. This is particularly useful when you’re dealing with large datasets or when an API you’re talking to has rate limits and needs you to send requests slowly, one at a time. It’s like having a tiny robot worker for each item!
Building a Practical AI-Powered Workflow: Responding to Journalist Inquiries
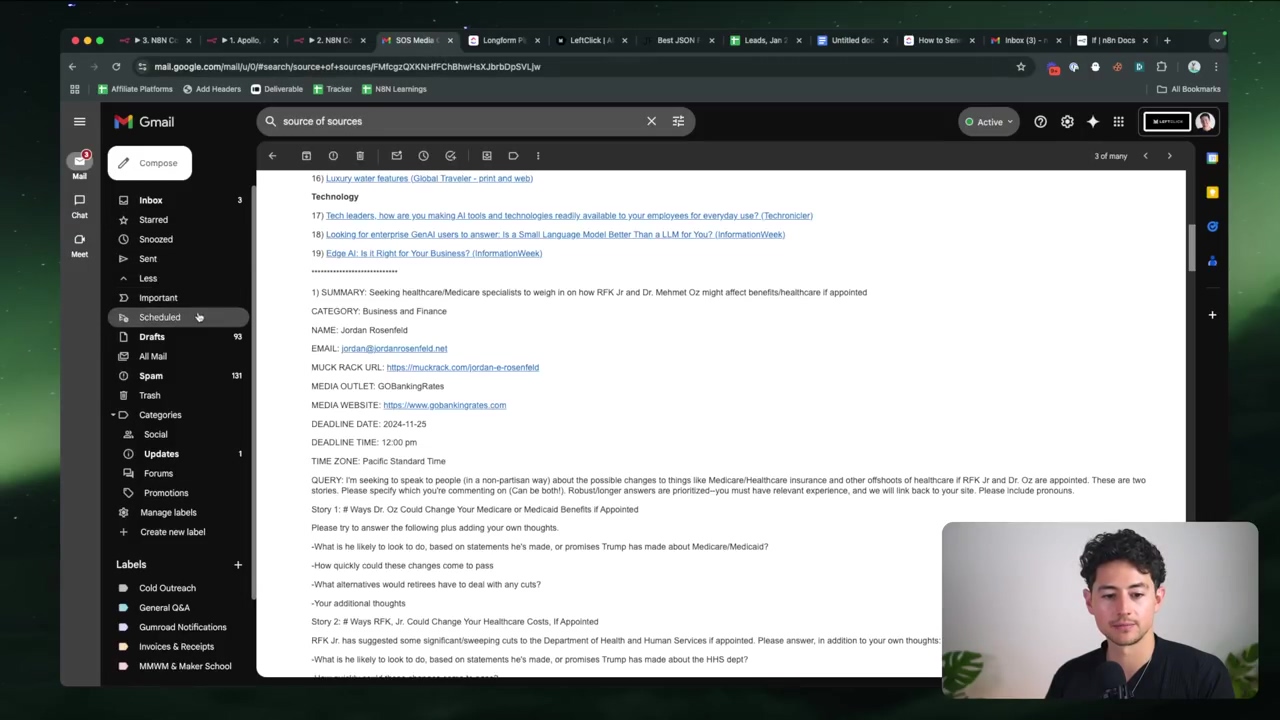
Alright, theory is great, but let’s put these concepts into action! We’re going to build a real-world workflow: an automated system for responding to journalist inquiries. You know, those emails you get from services like Source of Sources (formerly HARO) where journalists are looking for experts. This is a perfect use case for n8n and AI!
Analyzing Journalist Inquiries
The first step in our workflow is receiving those journalist inquiry emails. Once we have them, the key is to extract the relevant text. But here’s the clever part: we’ll then use AI to figure out if the inquiry is even relevant to your expertise. No more wasting time on irrelevant pitches!
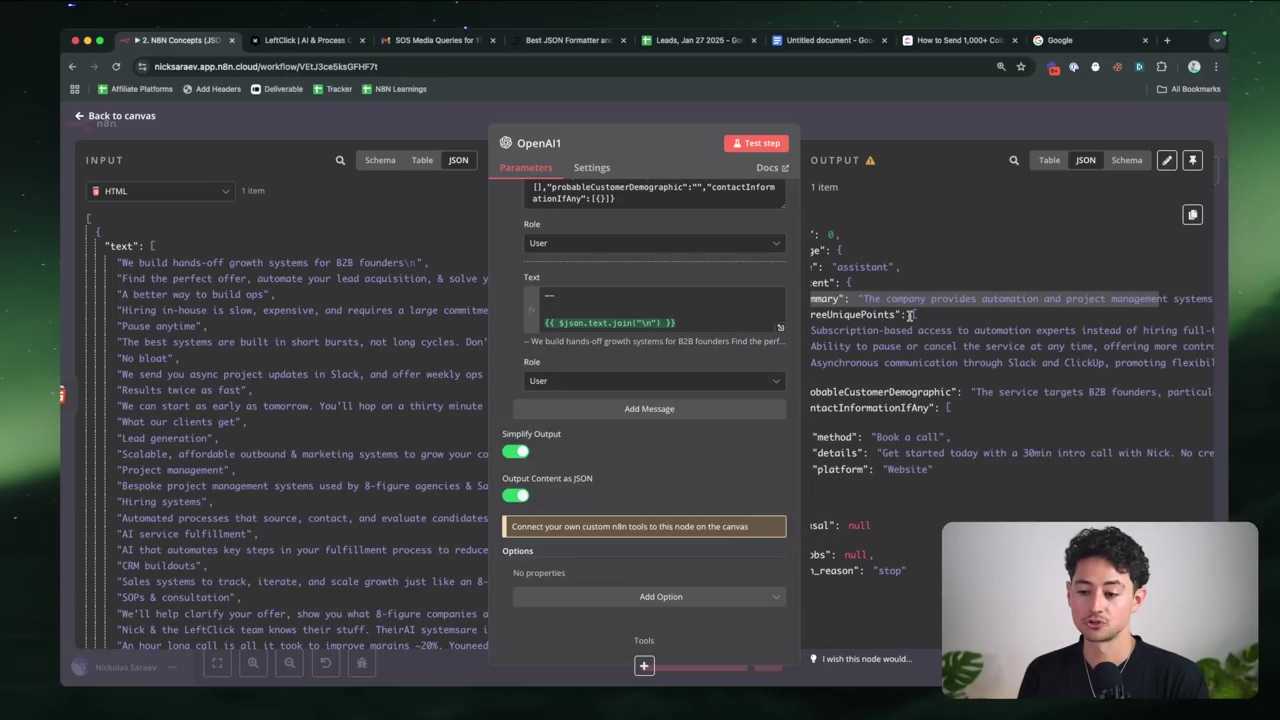
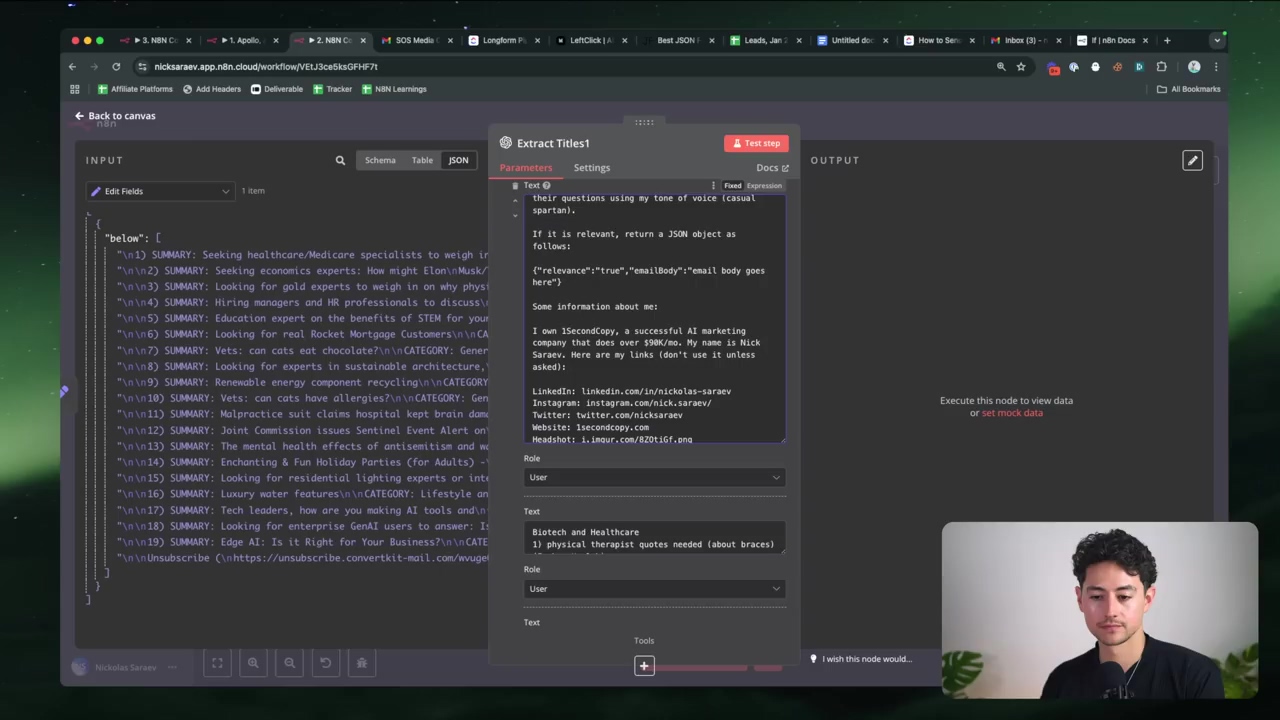
Structuring AI Prompts for Relevance and Response Generation
To get the best out of your AI, you need to give it clear instructions. This means crafting a detailed prompt. Think of it as writing a very specific job description for your AI. Your prompt should include:
- Your expertise: Tell the AI what you’re good at.
- Desired tone: Do you want a formal, friendly, or witty response?
- Instructions for output: Crucially, tell the AI to output a JSON object. This object should clearly indicate if the inquiry is relevant and, if it is, contain a drafted email response. This structured output makes it super easy for n8n to process the AI’s answer.
Workflow Overview
Let’s break down the complete workflow, step by step:
- Gmail Trigger: This node is our starting point. It constantly monitors your Gmail inbox for new journalist inquiry emails. It’s like having a dedicated email assistant.
- Split Content: Once an email arrives, this node parses the email body to isolate individual inquiries. Sometimes emails contain multiple requests, and we want to treat each one separately.
- Extract Titles (AI Node): This is where our AI agent comes in! It takes the extracted inquiry text and, using the structured prompt we talked about, determines its relevance and drafts a potential email response. The output will be that neat JSON object.
- Filter: After the AI has done its magic, this node checks the AI’s JSON output. It only allows inquiries that the AI deemed “relevant” to continue down the workflow. Irrelevant ones get filtered out, saving you time.
- Gmail (Draft): For all the relevant inquiries, this node automatically creates an email draft in your Gmail. This draft will contain the AI-generated response, ready for you to review and send. No more starting from scratch!

Key Takeaways
Alright, if you take nothing else from this, remember these core principles. They’re your guiding stars in the n8n universe:
- Expression Fields are Key: Seriously, always, always, always favor expression fields over fixed fields for dynamic workflows. They give you the flexibility you need.
- JSON is Fundamental: Get cozy with JSON data types and structures. It’s the language n8n speaks, and understanding it will unlock so much power.
- AI Integration: Don’t be shy! Leverage n8n’s AI agent nodes. They’re incredible for building intelligent, automated responses, analyses, and decision-making processes.
- Workflow Control: Master the ‘If’, ‘Filter’, ‘Merge’, and ‘Loop Over Items’ nodes. These are your tools for managing complex data flows and building sophisticated logic.
Conclusion
So, there you have it! Mastering n8n’s foundational concepts – from understanding how JSON data flows to harnessing dynamic expressions and controlling your workflow’s logic – truly empowers you to build some seriously sophisticated automations. By really getting how data moves and transforms within the platform, you can create powerful, AI-driven solutions that streamline complex tasks and boost your efficiency. The ability to integrate AI agents and manage intricate data structures is, in my humble opinion, what truly sets n8n apart, making it an invaluable tool for modern automation.
This isn’t just theoretical knowledge; it’s a practical toolkit for tackling real-world business challenges. Whether you’re personalizing outreach, automating customer support, or, as we saw, responding to journalist inquiries, the principles we’ve discussed here provide a rock-solid foundation for innovation. Now, go forth and apply these methods to conquer your own automation challenges! You’ve got this!
Frequently Asked Questions (FAQ)
Q: Why should I always use Expression fields instead of Fixed fields?
A: Great question! While Fixed fields are simple for static values, Expression fields are like giving your workflow a superpower. They allow your workflow to dynamically pull and manipulate data from previous steps. This means your automation can adapt to changing inputs, making it much more flexible, robust, and scalable. For example, if you’re processing a list of contacts, an Expression field can grab each contact’s name automatically, whereas a Fixed field would only ever use the one name you typed in.
Q: What’s the most common mistake beginners make with JSON in n8n?
A: Oh, I’ve seen this one a million times! The most common mistake is not understanding that n8n often expects data as an array of objects, even if you’re only dealing with one item. Also, getting the syntax for referencing nested data wrong (e.g., {{ $json.data.item.value }} vs. {{ $json.item.data.value }}). Always check the output of the previous node in the “JSON” tab to see the exact structure, and then build your expression from there. It’s like finding your way through a maze – you need a map!
Q: How do I know which n8n node to use for a specific task?
A: That’s a common challenge when you’re starting out! My advice is to first think about what you want to achieve (e.g., “I need to send an email,” “I need to make a decision,” “I need to get data from a website”). Then, look for nodes that match that action. The n8n documentation is fantastic, and the node descriptions are usually very clear. Don’t be afraid to drag a few nodes onto the canvas and experiment! You can always delete them if they’re not the right fit. It’s like trying on different hats until you find the one that fits best.
Q: Can I use AI Agent nodes with any Large Language Model (LLM)?
A: n8n’s AI Agent nodes are designed to be quite flexible. While they often have direct integrations with popular LLMs like OpenAI’s GPT models or Google’s Gemini, you can often connect to other LLMs as well, especially if they provide an API. You might need to use an HTTP Request node to interact with their API if there isn’t a direct n8n integration. Always check the n8n documentation for the most up-to-date list of supported LLMs and integration methods. The world of AI is moving fast, and n8n tries to keep up!
Q: What if my workflow gets stuck or doesn’t run as expected?
A: Ah, the classic automation headache! First, don’t panic. My go-to steps are: 1) Check the execution logs: n8n provides detailed logs for each workflow run. Look for red errors or warnings. 2) Inspect node outputs: Click on each node in your workflow and check the “Output” tab. See if the data coming out is what you expect. This helps you pinpoint exactly where the data flow breaks. 3) Simplify and test: If it’s a complex workflow, try to isolate the problematic section and test it independently. Sometimes, it’s a small typo in an expression or a misconfigured credential. You’re a detective now, solving the mystery of the broken workflow!