Watch the Video Tutorial
💡 Pro Tip: After watching the video, continue reading below for detailed step-by-step instructions, code examples, and additional tips that will help you implement this successfully.
Table of Contents
Open Table of Contents
- Introduction
- Required Resources List & Cost-Benefit Analysis
- Core Nodes for Next-Level Automation
- 1. Tesseract.js: In-Built OCR for Image Text Extraction
- 2. Run Node with Credentials X: Dynamic Credential Management
- 3. Compare Datasets: Efficient Data Difference Spotting
- 4. ConvertAPI: High-Performance File Conversion
- 5. Airtop: Browser Automation with Natural Language
- 6. Apify: Comprehensive Web Scraping
- 7. n8n-nodes-logger: Centralized Workflow Logging
- 8. Perplexity: AI-Powered Research Automation
- 9. Firecrawl: LLM-Ready Website Data Scraping
- 10. Supadata: YouTube Transcription and Data Extraction
- Critical Safety / Best Practice Tips
- Key Takeaways
- Conclusion
- Frequently Asked Questions (FAQ)
- Q: Do I need to be a programmer to use these advanced n8n nodes?
- Q: What’s the biggest risk when using community nodes?
- Q: How can I handle API rate limits when using external services with n8n?
- Q: Can I use these nodes with n8n Cloud, or do I need to self-host?
- Q: How do I find the
credentials IDfor the ‘Run Node with Credentials X’ node?
Introduction
Hey there, fellow automation enthusiasts! Boyce here, your friendly neighborhood self-taught automation consultant. If you’re anything like me, you’ve probably felt that familiar tug-of-war: the desire to automate everything to free up your time, versus the headache of dealing with overly complex tools or basic ones that just don’t cut it. Sound familiar? I’ve been there, trust me.
That’s why I’m super excited to share something truly game-changing with you today. We’re going to dive deep into 10 advanced n8n nodes that are going to blow your mind and supercharge your automation workflows. Think of these as your secret weapons, the kind of tools that turn you from a workflow builder into an automation wizard! ✨
These aren’t just random picks, by the way. These techniques are battle-tested, forged from my own journey building over 150 client automations. I’ve iterated, I’ve tested, I’ve pulled my hair out (just kidding, mostly!), and what you’re getting here is the distilled essence of what truly works. We’re talking about solutions that hit that sweet spot between efficiency and rock-solid reliability. My goal? To empower you to build sophisticated automations with unprecedented ease. Let’s get started, shall we?
Required Resources List & Cost-Benefit Analysis
Alright, before we jump into the fun stuff, let’s talk shop. To really unleash the power of these advanced n8n nodes, you’ll need a few tools and platforms in your arsenal. And because I’m all about smart choices, we’ll also do a quick cost-benefit analysis. It’s like deciding whether to build your own LEGO castle or buy a pre-built one – both have their pros and cons, right?
Resource List
Here’s a quick rundown of the essential tools and platforms we’ll be talking about. Don’t worry, I’ll explain what each one does and why it’s super handy.
| Tool/Platform | Description | Purpose | Cost (Approx.) |
|---|---|---|---|
| n8n (Self-Hosted) | An open-source workflow automation platform. Think of it as your personal automation command center. | This is our core platform for building automations and installing those awesome community nodes we’re about to explore. | Free (you just pay for your hosting, like a small server or cloud space) |
| Tesseract.js | A JavaScript library for Optical Character Recognition (OCR). | This lets us extract text directly from images without needing external services. Super useful for digitizing documents! | Free |
| ConvertAPI | A powerful API for converting files. | Need to turn a PDF into a Word doc, or an image into a different format? This is your go-to. | 250 free requests, then paid tiers |
| Airtop | An AI-powered browser automation tool. | Imagine telling a browser what to do using plain English. That’s Airtop! Great for tricky web scraping. | 5,000 free credits, then paid tiers |
| Apify | A web scraping and automation platform. | It’s like a giant library of pre-built ‘robots’ (called actors) that can extract data from almost any website. | Up to $5/month free, then paid tiers |
| Perplexity AI | An AI-powered research engine. | Need to quickly research a topic and get cited answers? Perplexity is your smart assistant. | API key required, free tier available |
| Firecrawl | A tool for scraping website data. | This one’s special because it turns website content into a format that Large Language Models (LLMs) love. | API key required, free tier available |
| Superdata | A service for web and YouTube data extraction. | Specifically, it’s amazing for getting YouTube video transcripts and channel details. | 100 free requests, then paid tiers |
| Google Drive | Cloud storage. | Handy for storing files before we process them, like images for OCR. | Free (with storage limits) |
| Gmail | Email service. | For monitoring your inbox or sending automated emails. | Free |
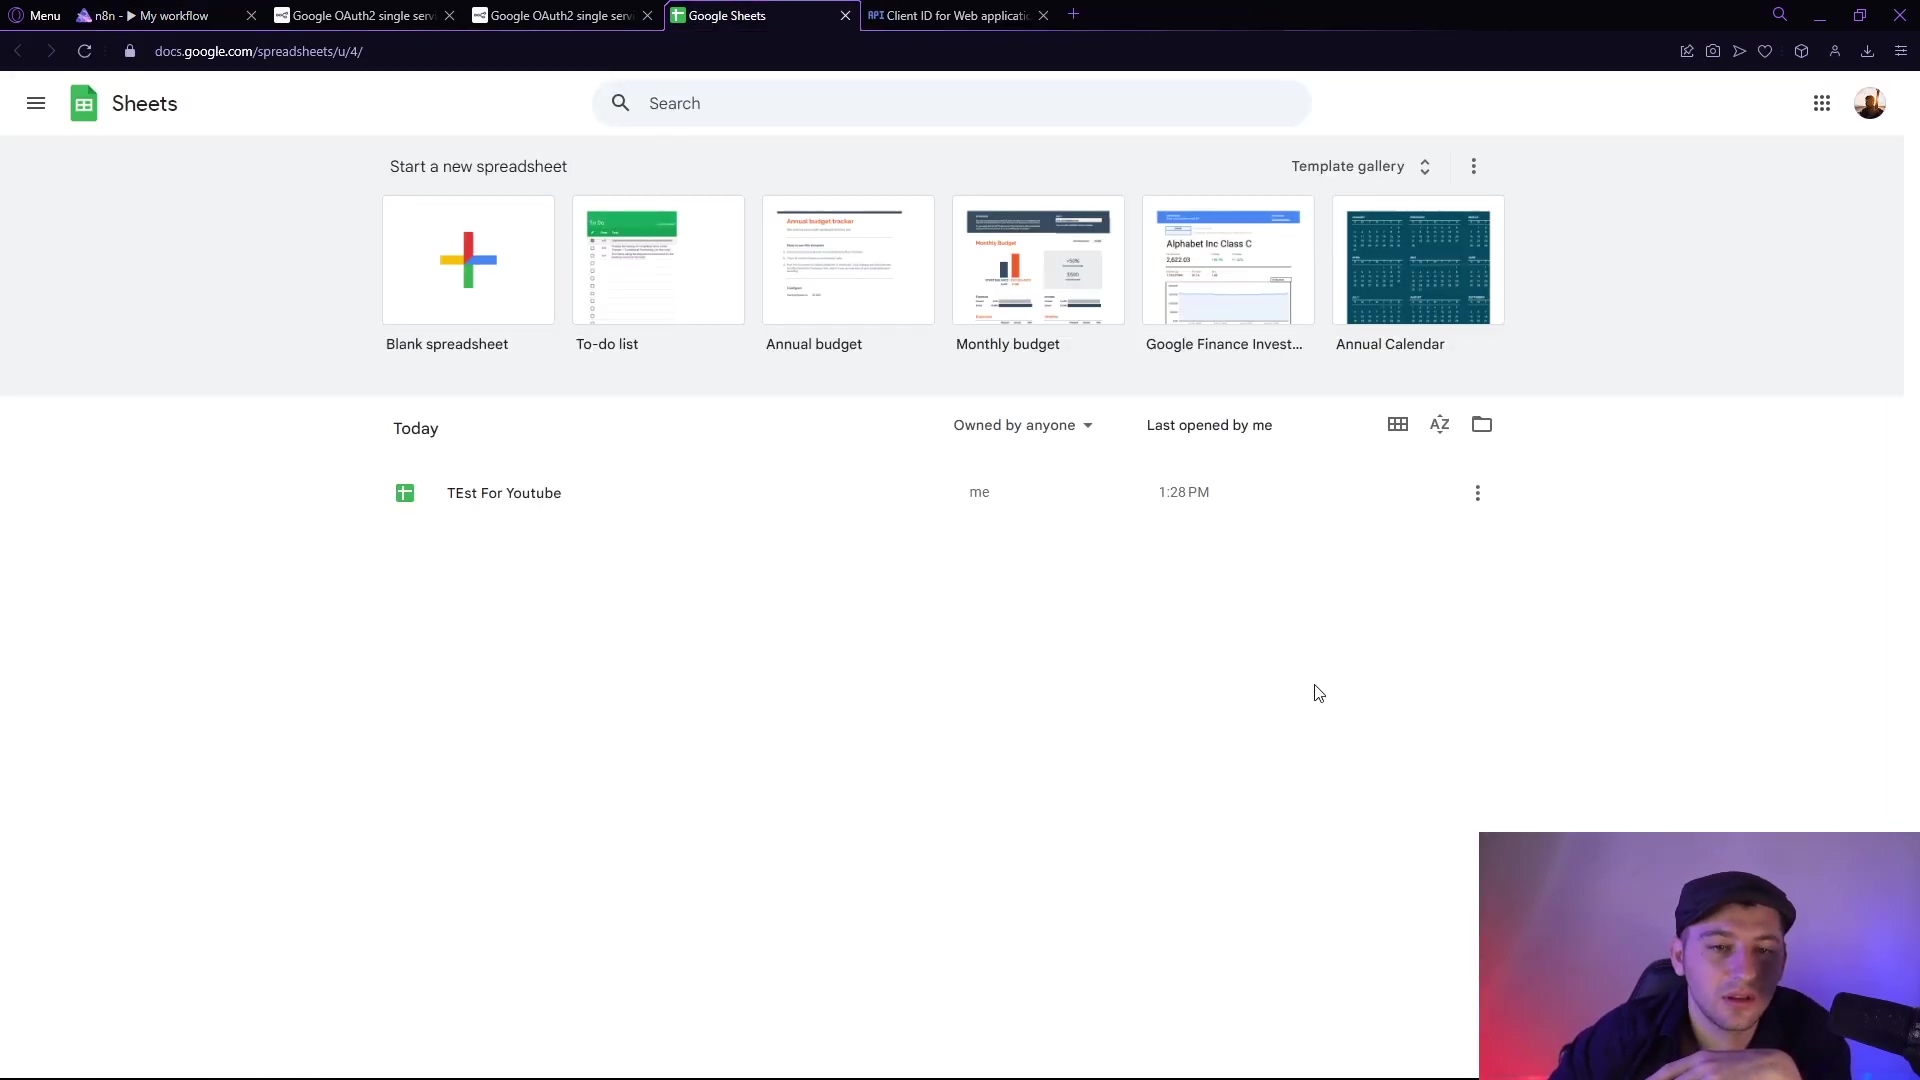
| Airtable / Google Sheets | Database/Spreadsheet tools. | Perfect for logging your workflow data, managing inputs, or storing outputs. | Free (with limits) |
DIY Solution vs. Commercial Product Comparison
Now, let’s talk strategy. Should you go the DIY route with self-hosted n8n, or opt for a commercial platform like Zapier or Make.com? It’s a classic build-vs-buy dilemma. Here’s how they stack up:
| Feature | DIY Automation with n8n (Self-Hosted) | Commercial Automation Platform (e.g., Zapier, Make.com) |
|---|---|---|
| Initial Setup | Requires a bit of technical know-how to get n8n up and running on your own server and configure nodes. It’s like assembling your own furniture – takes effort but you learn a lot! | Super user-friendly, often drag-and-drop interfaces. Less technical expertise needed, you just sign up and go. |
| Cost | Minimal! You’re mainly paying for your server hosting fees. Some external APIs might have costs, but the core n8n platform is free. | Subscription-based. Can get pretty pricey, especially if you have high volumes of tasks or complex workflows. |
| Customization | Highly customizable! You can integrate with almost any API, write custom code, and truly make it your own. The sky’s the limit! | Limited to pre-built integrations and features. Custom code is often restricted or not available. |
| Scalability | Scales with your infrastructure. You manage it, so you have full control, but it requires manual effort to scale up. | Managed by the provider. They handle the scaling automatically, but you’ll pay more for higher usage. |
| Data Privacy | Full control over your data! It lives on your own servers, giving you peace of mind. | Your data resides on their third-party servers. You’re relying on their security measures. |
| Maintenance | You’re responsible for updates, maintenance, and troubleshooting. It’s like owning a car – you gotta take care of it! | Managed by the provider. Less responsibility for you, they handle the heavy lifting. |
| Learning Curve | Steeper. You’ll need to understand nodes, APIs, and maybe some basic programming concepts. But hey, that’s how you become an automation wizard! | Gentler. Designed for non-developers, so you can get started quickly. |
Core Nodes for Next-Level Automation
Alright, buckle up! This is where the magic happens. We’re about to explore 10 n8n nodes that will seriously level up your automation game. Each one solves a unique problem and opens up new possibilities. Let’s dive in!
1. Tesseract.js: In-Built OCR for Image Text Extraction
Ever looked at an image with text on it and wished you could just copy that text? That’s where Optical Character Recognition (OCR) comes in! And the Tesseract.js node brings this superpower directly into n8n. No need for expensive external APIs – it’s all right there. This node is a lifesaver for tasks like processing receipts, scanning business cards, extracting data from documents, or even pulling info from tables in images. While it might not be the absolute cutting-edge OCR model out there, its native integration makes it incredibly quick and convenient for those rapid data extraction needs. It’s like having a mini-scanner built right into your workflow!
How to get it running (and a little heads-up!):
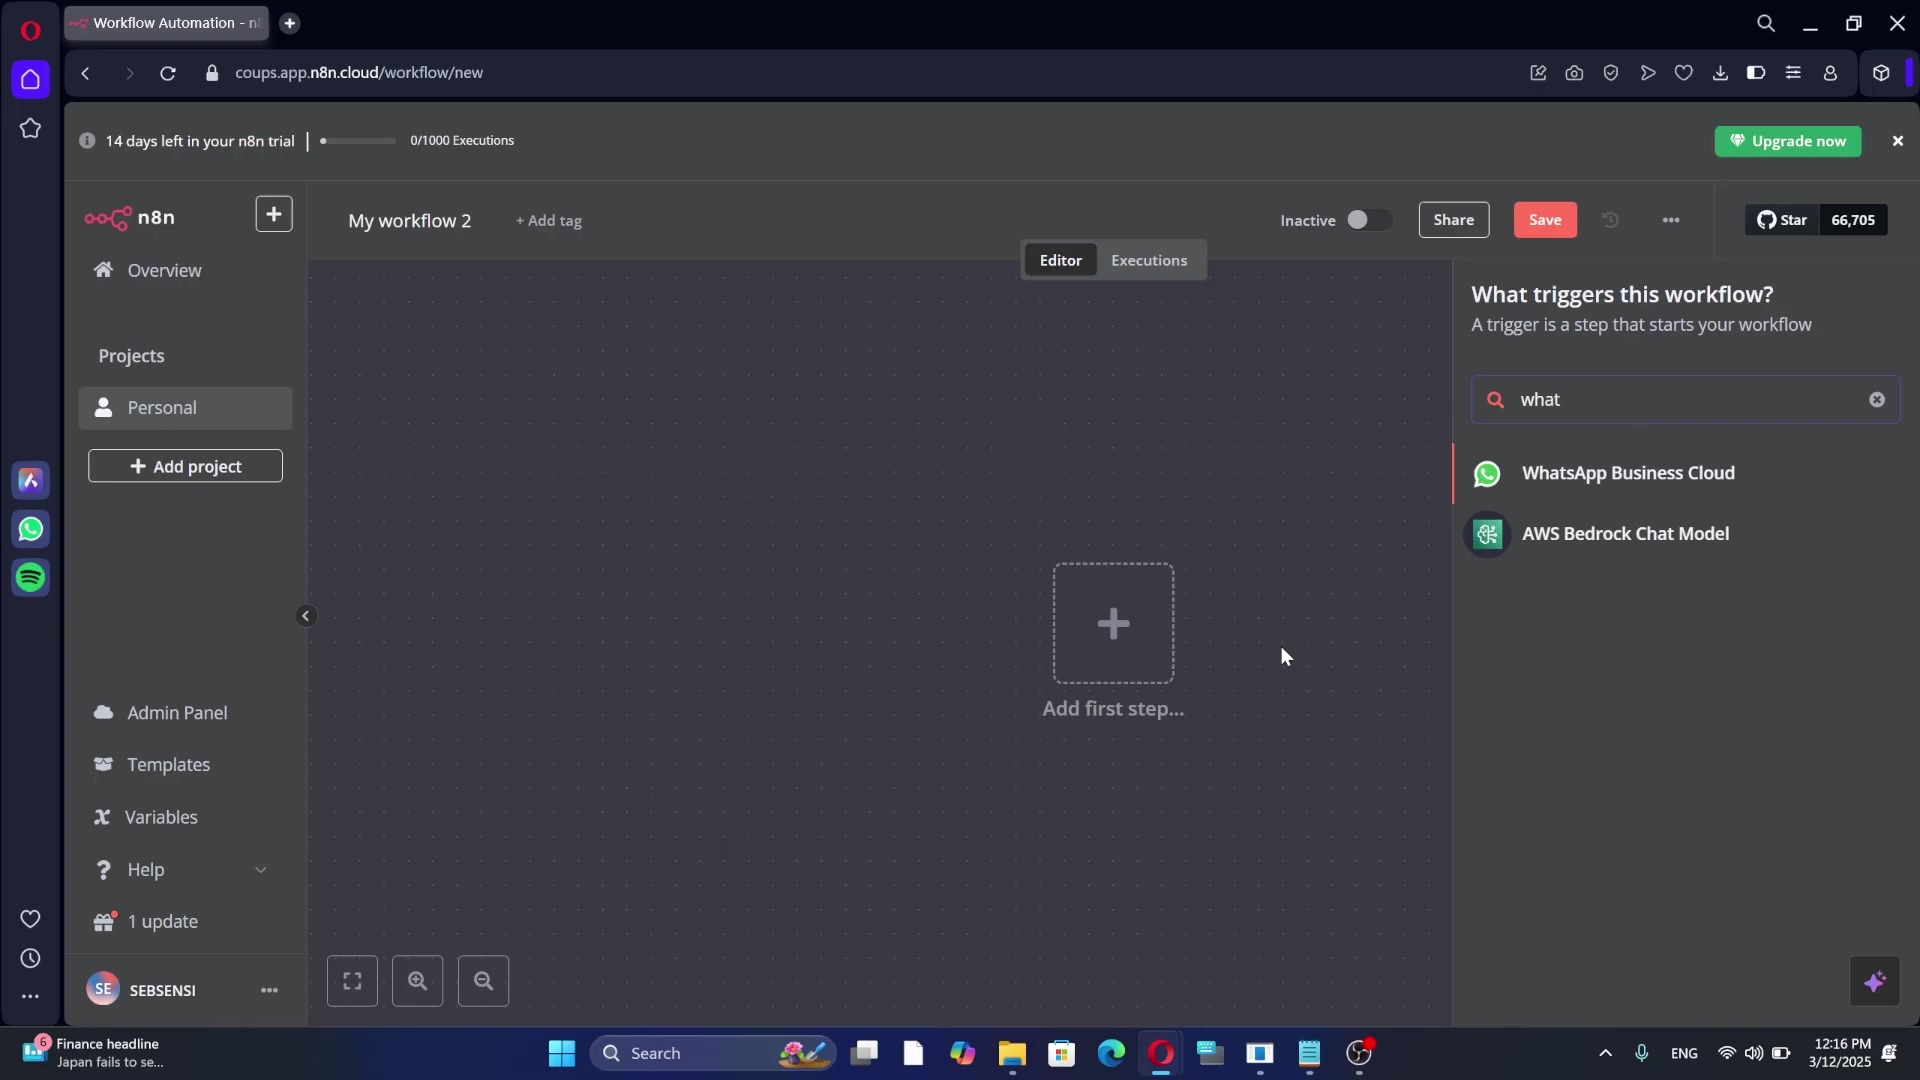
To use community nodes like Tesseract.js, you absolutely must be running a self-hosted version of n8n. If you’re using the cloud version, this won’t work. Once you’re self-hosted, here’s the drill:
- Log into your n8n instance.
- Navigate to your settings. You’ll usually find this in the left-hand sidebar or top menu, often represented by a gear icon. Look for something like ‘Settings’ or ‘Configuration’.
- Find ‘Community Nodes’. This section is specifically for nodes built by the awesome n8n community. Click on it.
- Search for the node. In the search bar, type ‘Tesseract’ (or whatever node you’re looking for).
- Click ‘Install’. You’ll see a button to install it. Before you do, n8n will give you a warning. Why? Because these nodes come from the community, not directly from n8n’s core team. This means there’s an inherent risk (like with any third-party software) that you must acknowledge before installation. Always be cautious and try to verify the source if you can!
- Restart n8n (sometimes needed). After installation, sometimes n8n needs a quick restart for the new node to appear. You’ll usually see a prompt for this.
Once installed, you’ll find the node in your workflow editor, and it’ll have a small ‘C’ icon next to it. That ‘C’ is your friendly reminder that it’s a community node. Pretty neat, right?
2. Run Node with Credentials X: Dynamic Credential Management
Okay, this one is a game-changer, especially if you’re like me and manage automations for multiple clients or accounts. Imagine you have a workflow that sends emails, but you need it to send from different Gmail accounts depending on the situation. Normally, you’d have to duplicate your entire workflow for each account, which is a nightmare to maintain! 😫
Enter the ‘Run Node with Credentials X’ node. This powerhouse revolutionizes how you handle multiple accounts for the same service. Instead of duplicating workflows, it lets you dynamically pass credentials. This is super useful for agencies managing numerous client accounts, enabling a single workflow to handle email campaigns, social media posting, or API integrations across various accounts using clever conditional logic.
How it works (the magic behind the curtain):
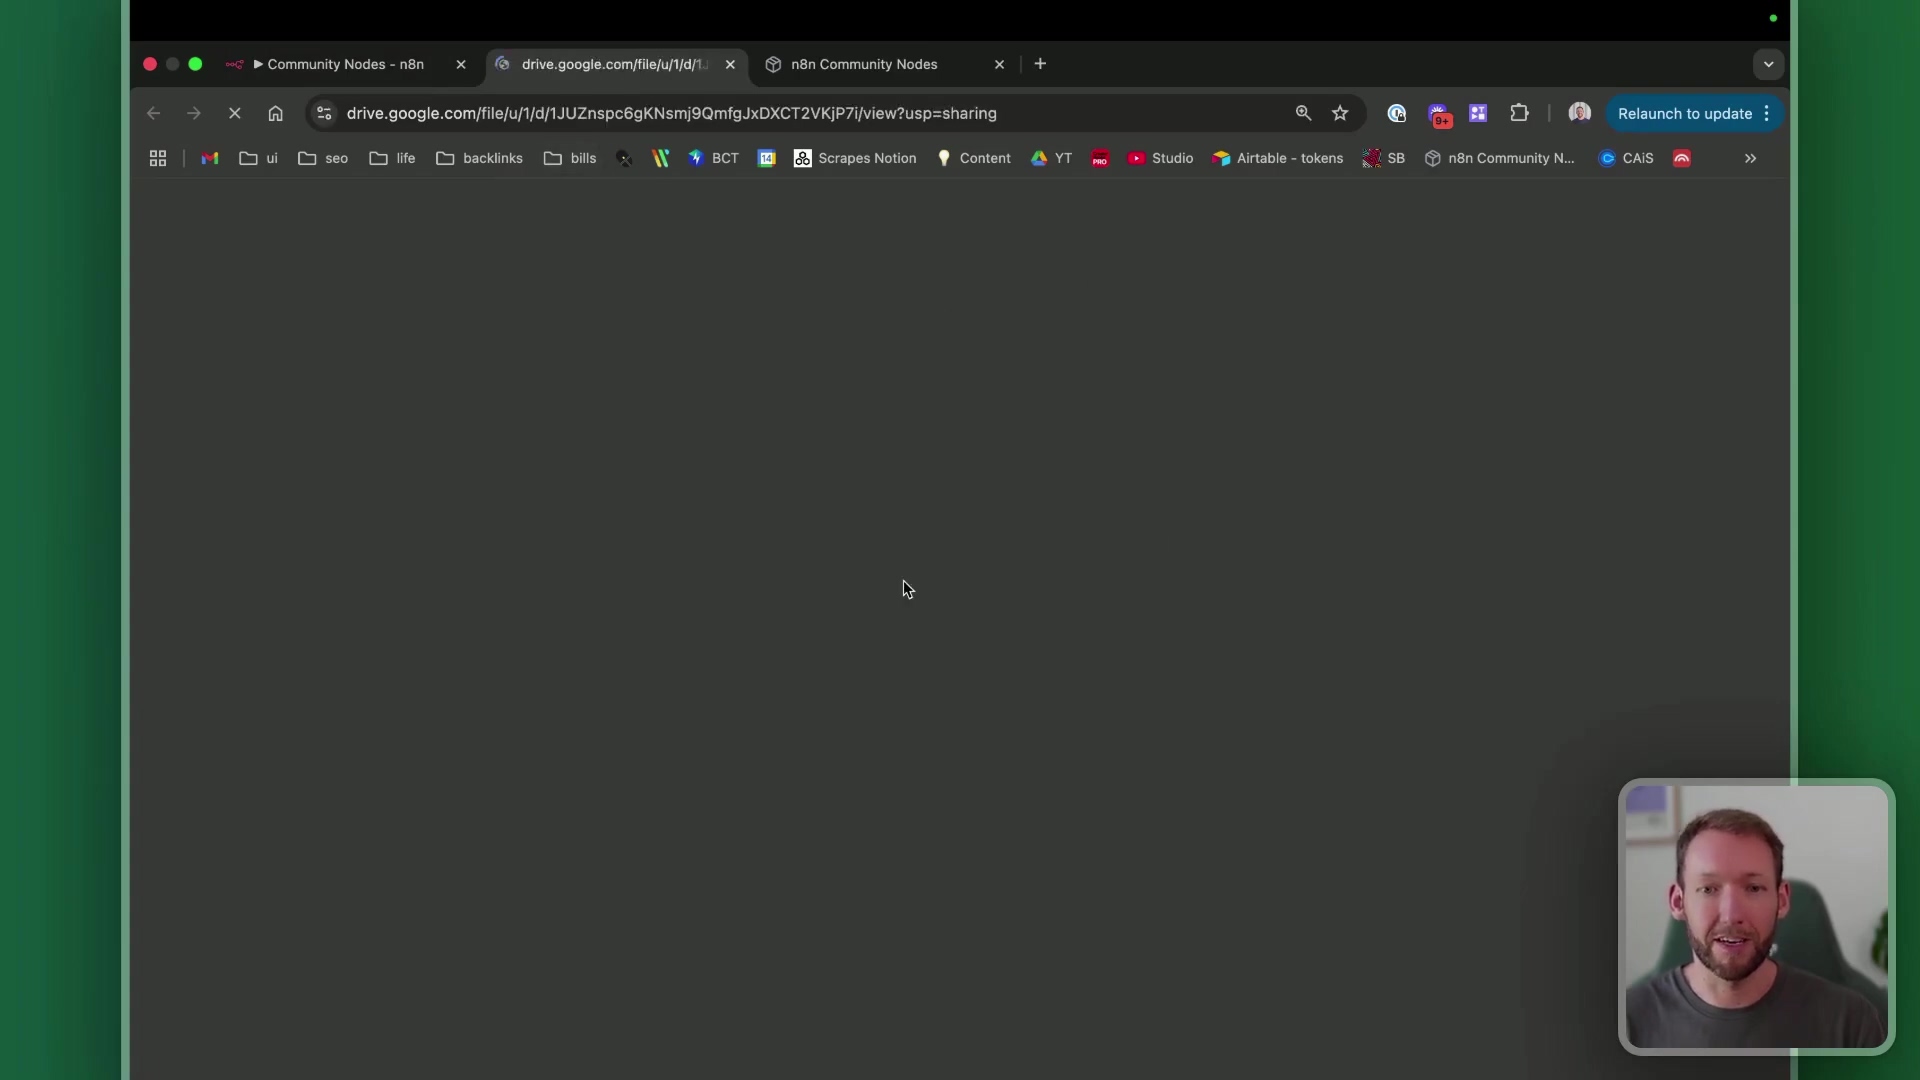
This node is a bit of a chameleon. It works by ‘pretending’ to be the node it’s going to run. So, you tell it:
- Which node to run: You provide the JSON code of the actual node you want to execute (e.g., a Gmail node, a Slack node, etc.).
- Which credentials to use: You give it a specific
credentials ID. This ID points to the set of credentials (like username/password or API key) you’ve already saved in n8n.
The real power comes from being able to dynamically change this credentials ID. You can use an if-statement node for simple choices, or a code node for more complex scenarios. This means you can switch between different accounts seamlessly within one single workflow. Think about the time you’ll save! It significantly streamlines complex automations involving multiple user profiles or client instances. No more copy-pasting workflows – just smart, dynamic credential switching. Nailed it!
3. Compare Datasets: Efficient Data Difference Spotting
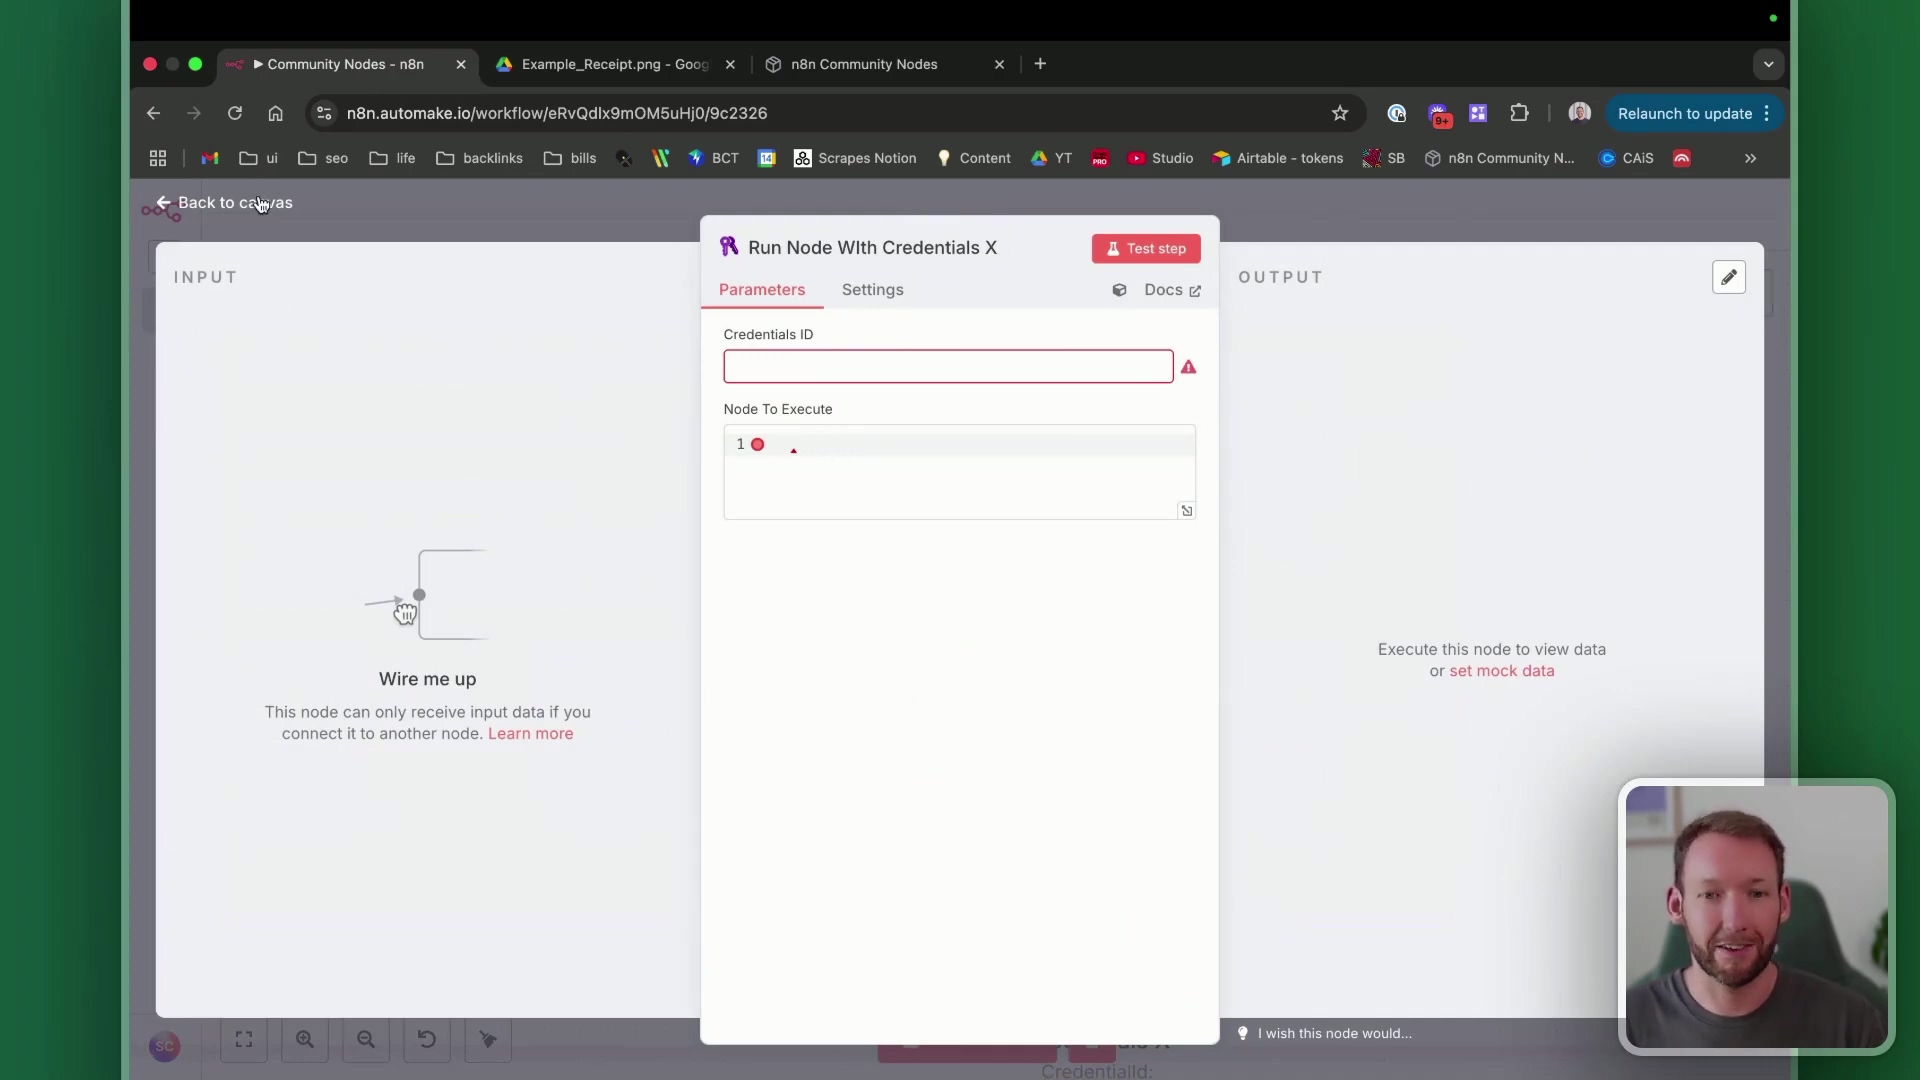
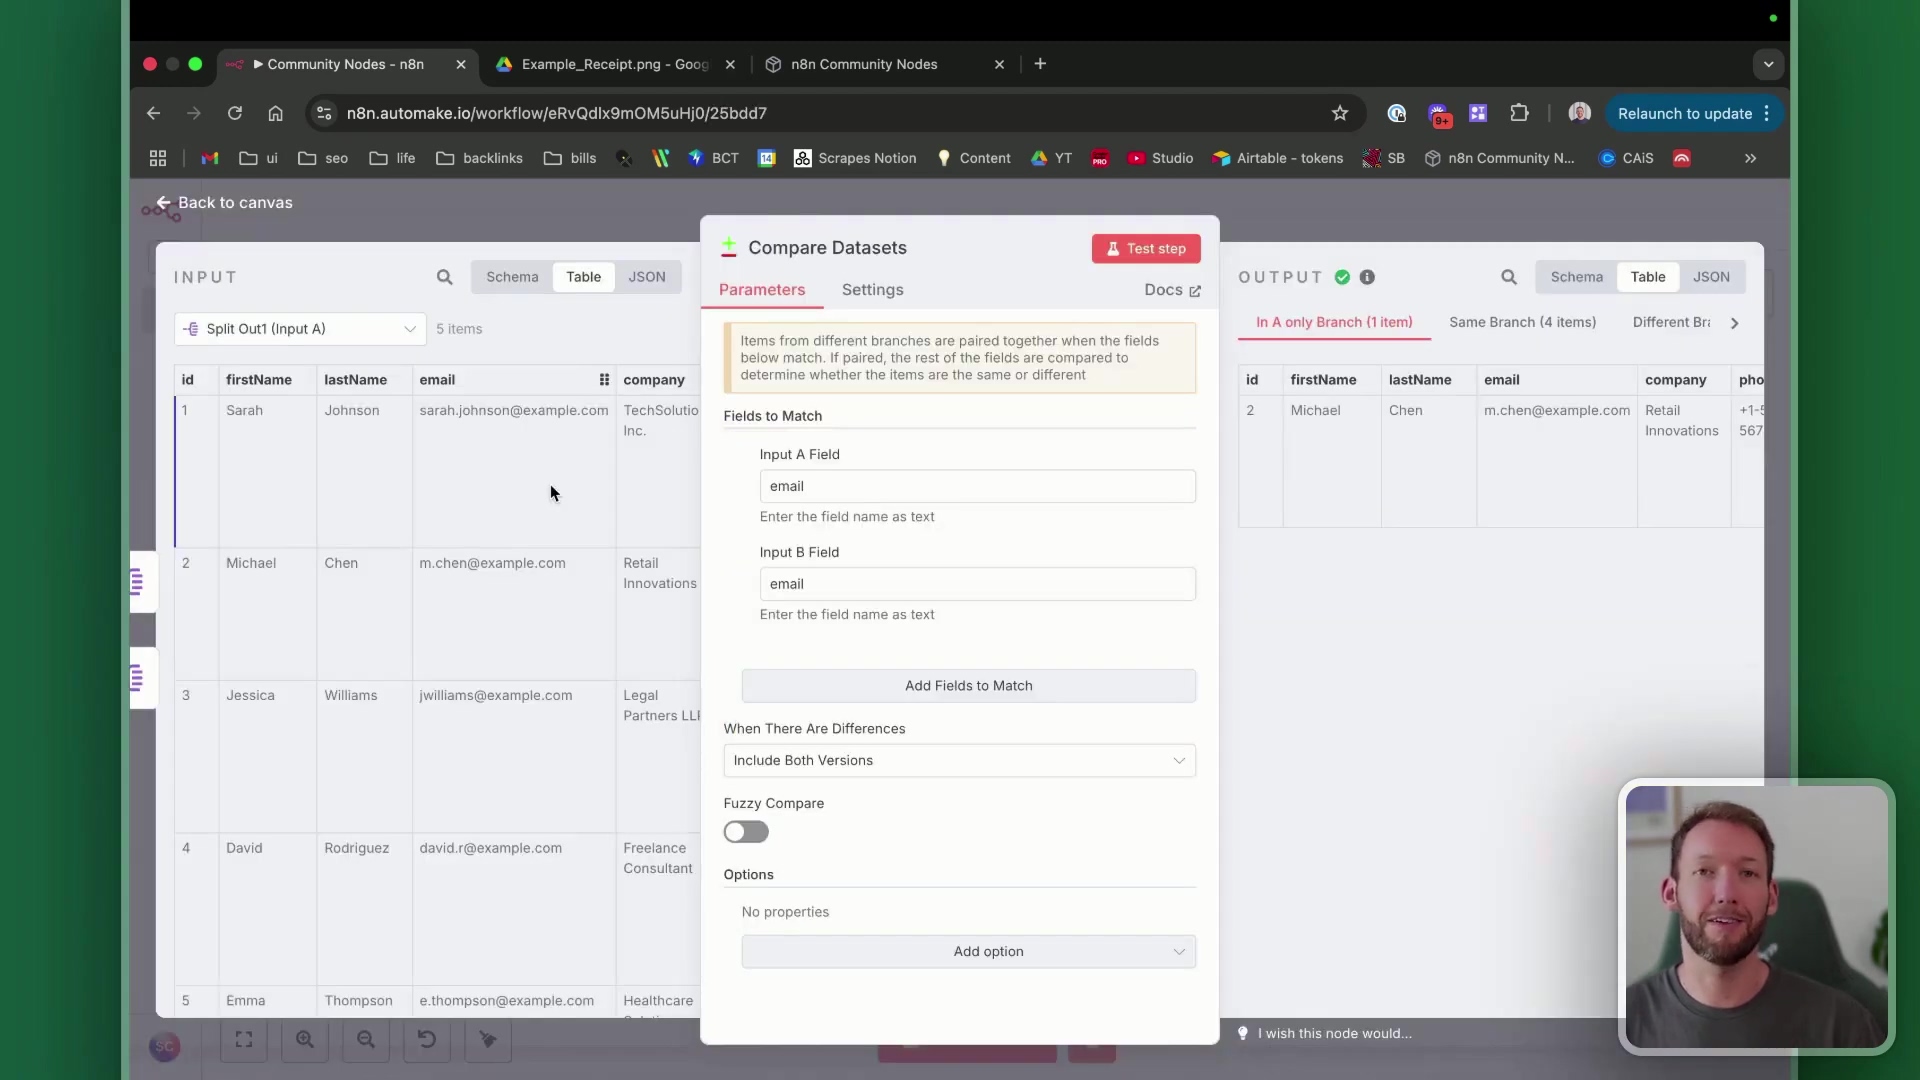
Here’s a node that’s built right into n8n, but honestly, it’s surprisingly underutilized given how incredibly powerful it is! The ‘Compare Datasets’ node is like having a super-smart detective for your data. It lets you immediately spot the differences between two sets of data. It’ll tell you which values are identical, which are unique to your first dataset (Dataset A), and which are unique to your second dataset (Dataset B). This is a huge win because it completely eliminates the need for those complex conditional logic chains (you know, all those ‘if/switch’ statements) or custom code nodes just to figure out what’s changed. Phew!
Where it shines (real-world examples):
This node is a rockstar for things like:
- Inventory tracking: Did a product’s stock level change? Are there new items in your warehouse?
- Price monitoring: Has a competitor’s price for a product gone up or down?
- Data validation: Is the data you just received from an API different from what you had before?
It’s especially handy with large datasets. For example, if you’re tracking leads, you can compare two lists and quickly highlight new entries or changes in existing ones. The best part? The node’s output is super clear, categorizing the results so you can easily process only the relevant differences. It’s like getting a perfectly organized report, ready for your next action. So simple, yet so effective!
4. ConvertAPI: High-Performance File Conversion
Ever found yourself needing to convert a file from one format to another in an automated workflow? Like, turning an email attachment PDF into a Word document, or a web page into a PDF for archiving? Manually doing that is a pain, and finding reliable third-party tools can be temperamental. That’s where ConvertAPI comes in, and thankfully, it has a built-in n8n HTTP request node that makes it super easy to use.
ConvertAPI is a high-performance file conversion API that lets you convert between tons of various file formats (PDFs, Word docs, images, web pages, you name it!) without any manual intervention. And here’s a sweet deal: the first 250 requests are free, which is awesome for getting started or for moderate usage.

How to get converting (the nitty-gritty):
- Get your API key: First things first, head over to convertapi.com and sign up to get your API key. This key is like your secret handshake to tell ConvertAPI it’s you.
- Find your endpoint: ConvertAPI has different ‘endpoints’ for different conversions. For example, if you want to convert a web page to a PDF, you’d look for the ‘web to PDF’ endpoint. Their documentation is pretty clear on this.
- Crucial step: Parameters in Query! This is where many folks (including past me!) get tripped up. When you configure the HTTP Request node in n8n to talk to ConvertAPI, you must send your conversion parameters (like the URL of the webpage to convert, or the file ID) in the query string, not in the request body. If you put them in the body, it just won’t work correctly. Remember: Query, not Body!
This node simplifies document processing workflows and bulk format conversions, providing a robust and reliable alternative to those temperamental third-party solutions. It’s a true workhorse for any workflow dealing with diverse file types!
5. Airtop: Browser Automation with Natural Language
Imagine being able to tell a web browser, in plain English, exactly what you want it to do. “Go to this website, click that button, grab the text from here.” Sounds like sci-fi, right? Well, with Airtop and its n8n integration, it’s now a reality! This is invaluable for tasks that require real browser interaction, especially when traditional web scraping tools struggle.
Think about it: scraping data from dynamically loaded pages (where content appears after the page loads), navigating behind logins, clicking specific buttons, or extracting information from complex websites like Amazon product listings – Airtop handles it all. It’s like having a tiny, obedient robot browsing the web for you.
Putting Airtop to work (examples and how-to):
Airtop is super user-friendly and even offers templates and examples for various use cases. You can find them on their website. Some cool things you can do:
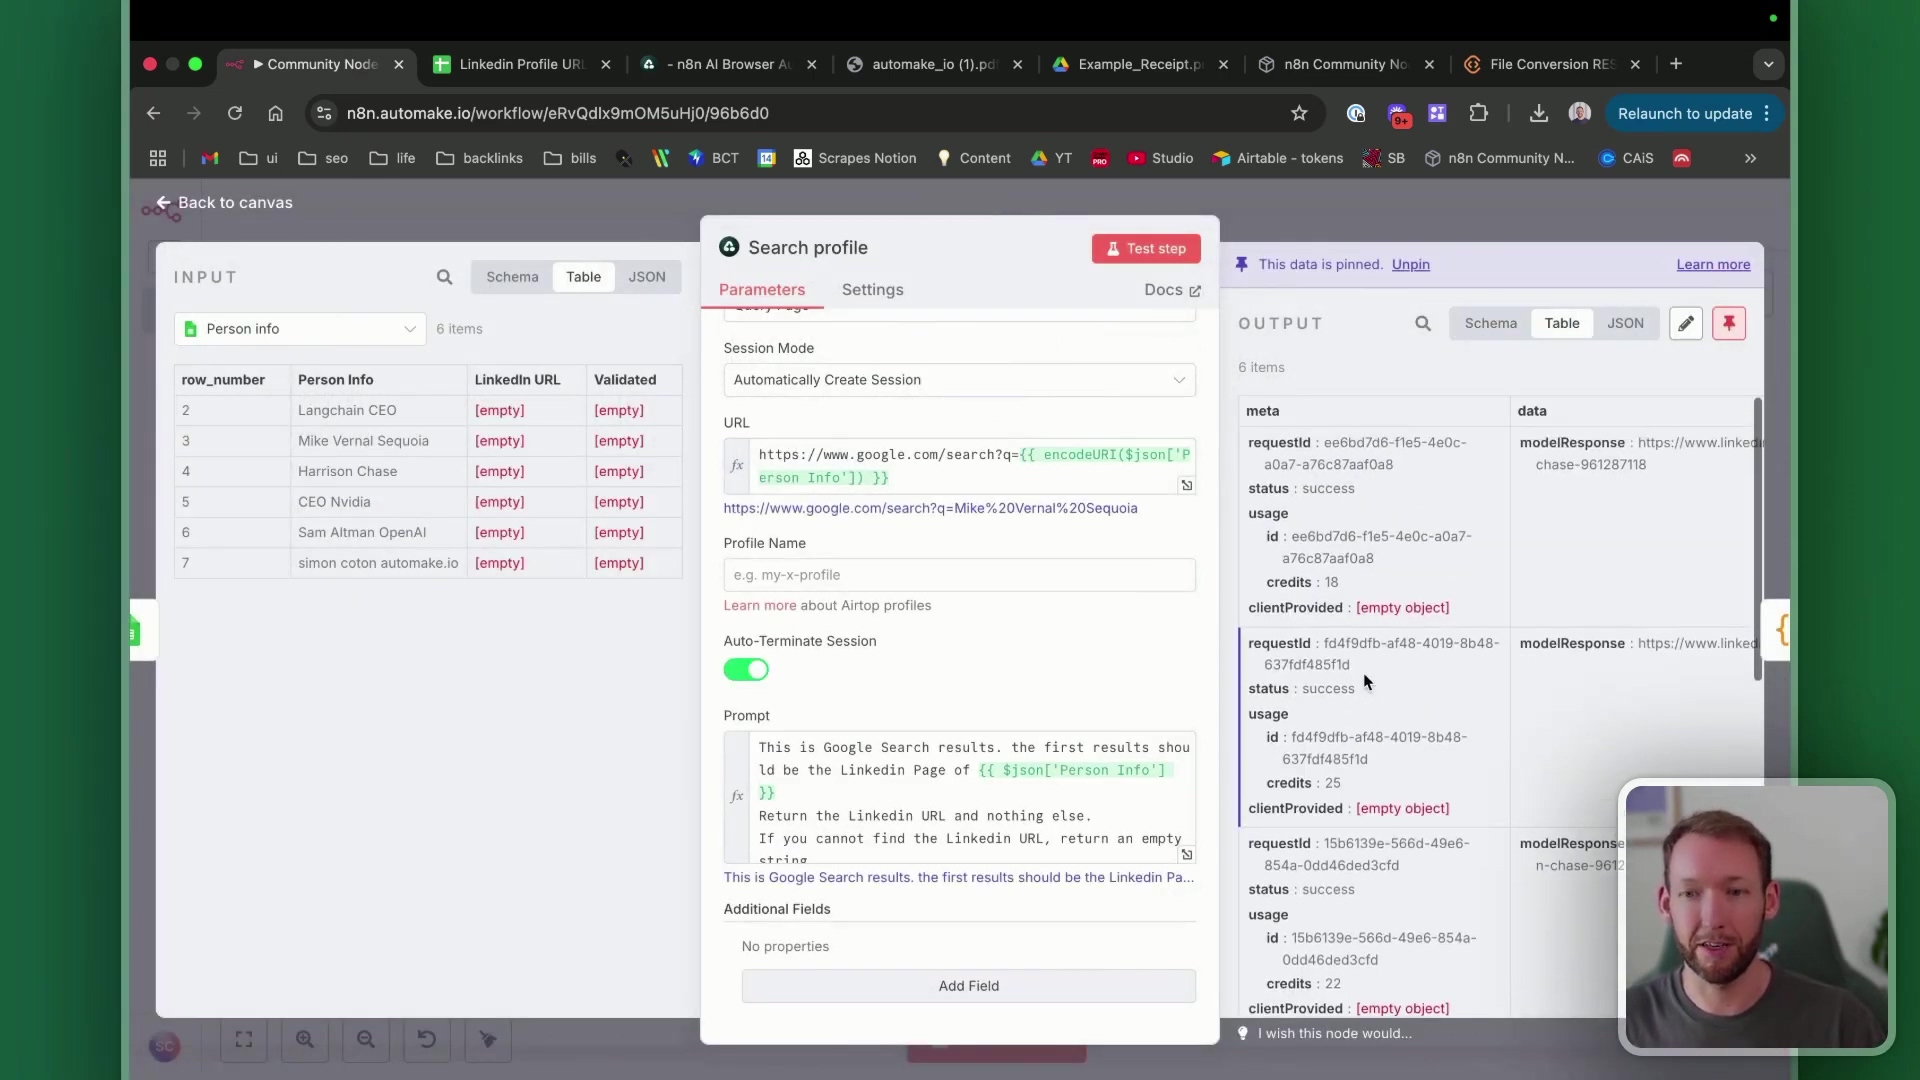
- LinkedIn profile discovery: Find someone’s LinkedIn URL based on their name.
- Monitoring product launches: Keep an eye on Product Hunt for new tools.
- Competitor price changes: Automatically check your competitors’ websites for price updates.
Here’s a common scenario: You provide Airtop with a Google search query (e.g., “John Doe LinkedIn”) and then a prompt instructing Airtop to find the LinkedIn URL from the search results. Airtop will then automatically open a browser (in the cloud, so you don’t even see it!), perform the search, and extract the requested data. It’s truly magical!
And guess what? You get 5,000 free credits to start, which is a fantastic way to test it out and see its power. It’s an excellent tool for automating web-based research and data collection, especially when you need to mimic human interaction with a website.
6. Apify: Comprehensive Web Scraping
If you’re serious about web scraping, you’ve probably heard of Apify. It’s a full-stack platform that’s basically a treasure trove of pre-built ‘actors’ – think of them as specialized robots – designed to extract data from a vast array of online services. And the best part? There’s an n8n community node that makes connecting to any of these actors incredibly easy. This can be a significantly cheaper alternative to trying to build direct API integrations for certain data extraction tasks yourself. Why reinvent the wheel when Apify has already built the whole car?
Getting started with Apify (and saving some cash!):
Apify offers a generous free tier (up to $5/month in usage), which can go a long way for many scraping needs. Here’s how to get it integrated with n8n:
- Install the Apify community node: Just like with Tesseract.js, you’ll need to be self-hosted and install the ‘Apify’ community node from your n8n settings.
- Get your API key: Head over to apify.com and grab your API key. This is how n8n will authenticate with Apify.
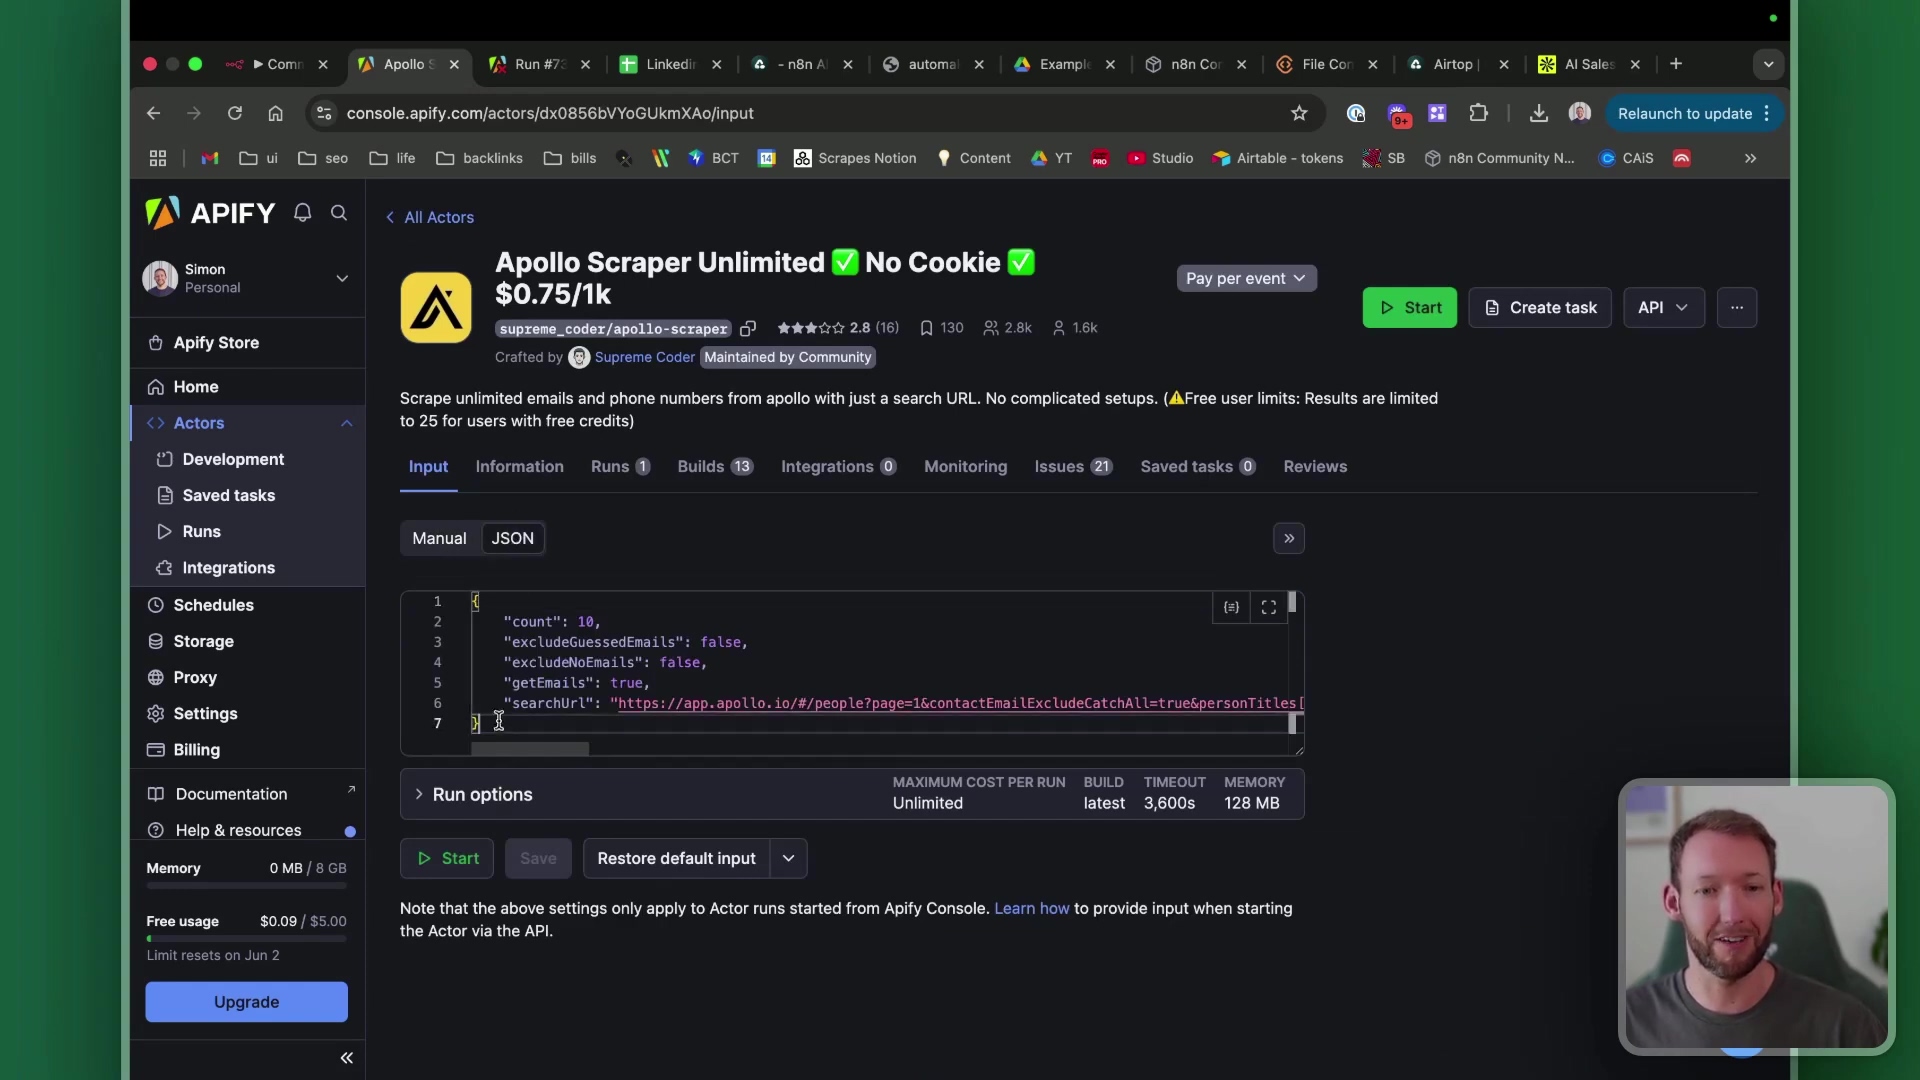
- Select your actor: Browse Apify’s extensive library of actors. For example, if you’re doing lead generation, you might look for something like ‘Apollo Scraper Unlimited’. Each actor is designed for a specific purpose.
- Configure the custom body: This is crucial. Each Apify actor has its own set of parameters that you need to pass in a JSON format. This ‘custom body’ tells the actor exactly what data to scrape, how much to return, if you want to exclude emails, etc. You’ll find these parameters in the documentation for each specific actor on the Apify website.
This node is perfect for e-commerce monitoring (tracking product prices or availability), lead generation (finding potential customers), and content extraction (pulling articles or blog posts from websites). It’s a powerful tool that puts professional-grade web scraping at your fingertips.
7. n8n-nodes-logger: Centralized Workflow Logging
Okay, let’s be real: when your automations get complex, especially in a production environment, knowing what’s going on behind the scenes is absolutely critical. You need to see if things are working, where they might be failing, and what data is flowing through. That’s where logging comes in. And while you could add logging to every single node, that gets messy fast. Enter n8n-nodes-logger – a community node that’s a total game-changer for centralized workflow logging.
This node provides a single, unified solution for tracking exactly what’s happening in your workflow without having to modify numerous individual nodes. It’s like having a central control tower for all your workflow messages. This is a huge win for maintaining large, multi-stage automations, making debugging a breeze.
How to set up your logging command center:
- Create a dedicated logger workflow: The logger node doesn’t just log to thin air. It sends its log data to another n8n workflow. So, your first step is to create a separate, simple workflow whose sole purpose is to receive and process these log messages. This could involve sending them to a Google Sheet, an Airtable base, a database, or even just a console log for quick checks.
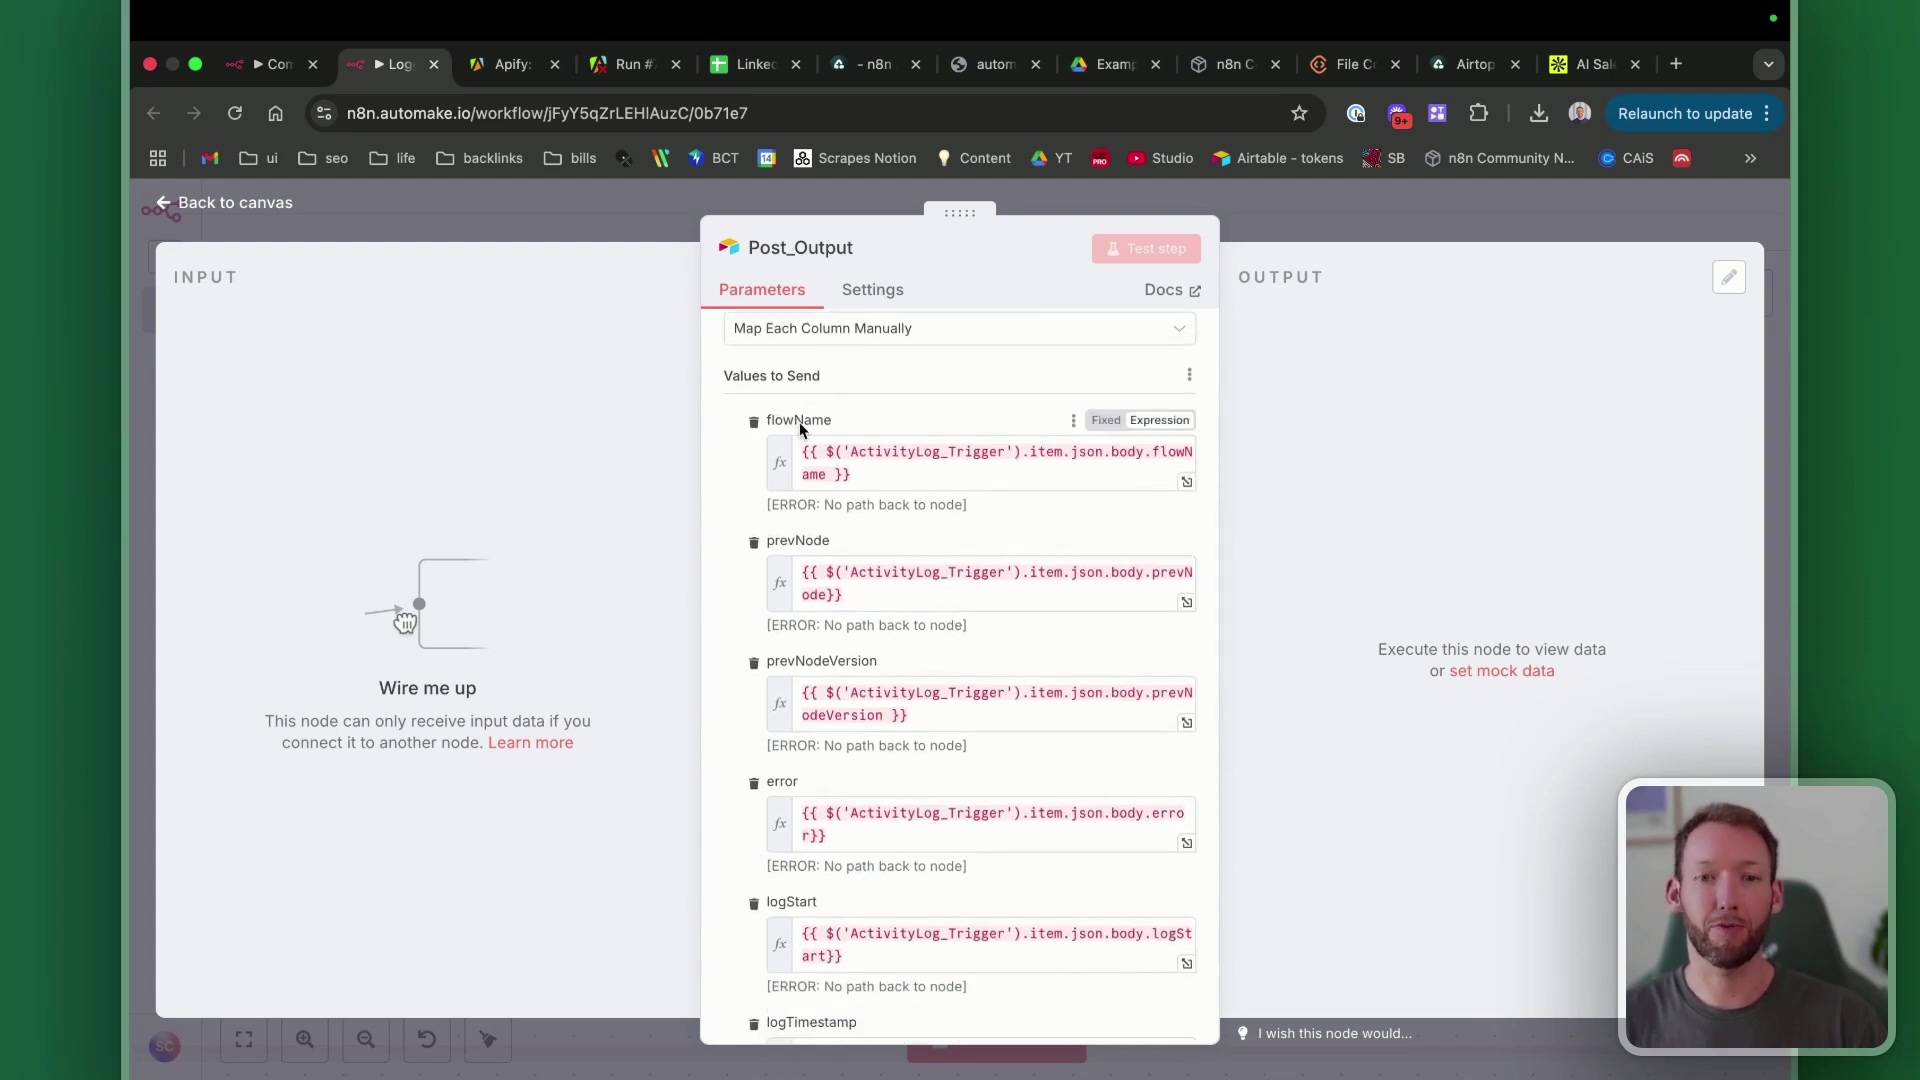
- Configure the logger node: In your main workflow, you’ll add the
n8n-nodes-loggernode. You’ll then configure it with thelogger workflow ID. This is the unique ID of that dedicated logging workflow you just created. You can find a workflow’s ID in its URL when you have it open in n8n. - Choose what to send: The logger node gives you options: send all items, just the first item, or an aggregated item. You can also specify exactly what values you want to log, like the workflow name, the execution ID (super helpful for tracing!), and any error messages.
The key benefit here is flexibility. If you ever decide to change how you log (e.g., switch from Google Sheets to a database), you only need to update that one dedicated logger workflow, not every single instance of the logger node across all your automations. This saves you tons of time and headaches in the long run. Trust me, your future self will thank you!
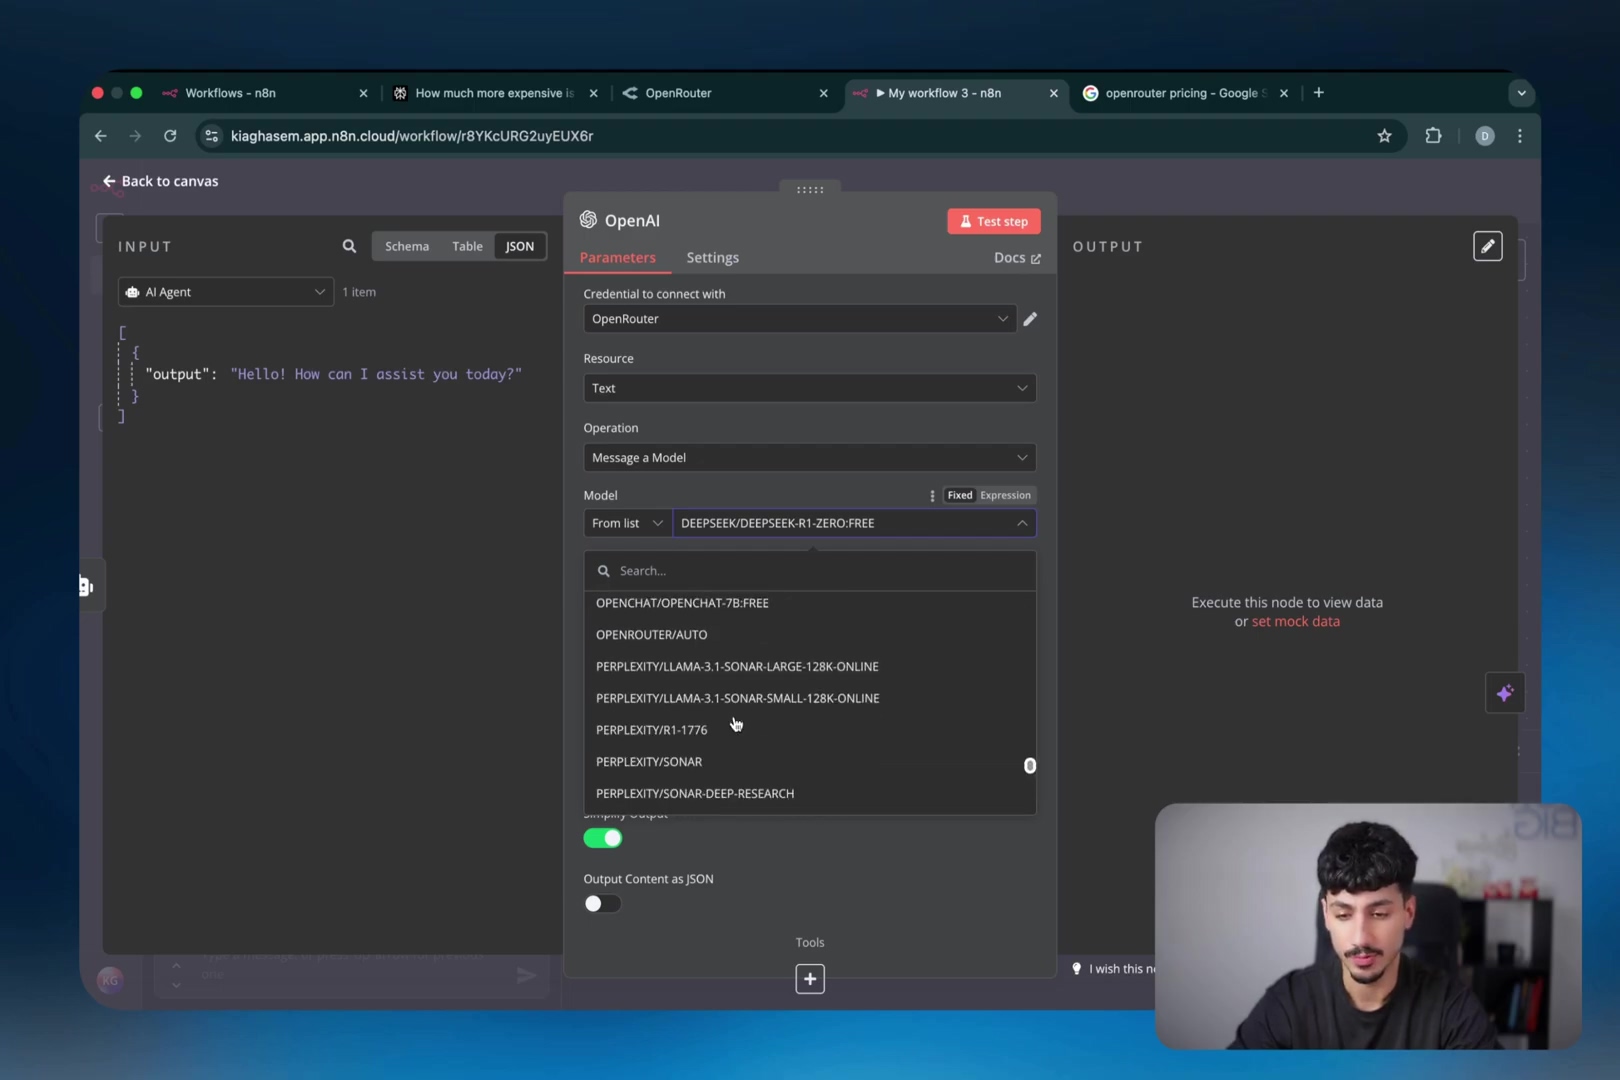
8. Perplexity: AI-Powered Research Automation
In today’s world, getting accurate, up-to-date information quickly is gold. And if you can automate that research, even better! That’s exactly what Watson’s n8n Perplexity node helps you do. Perplexity AI is an AI-backed research search engine that’s fantastic because it provides answers supported by live online data and citations. No more guessing where the info came from – it shows you!
This node allows you to perform deep research, conduct competitor analysis, or gather market intelligence directly within your n8n workflows. It’s like having a super-smart research assistant on demand.
How to automate your research (and get cited answers!):
- Get your Perplexity API key: First, you’ll need to sign up for Perplexity AI and obtain an API key. This is what allows n8n to talk to Perplexity.
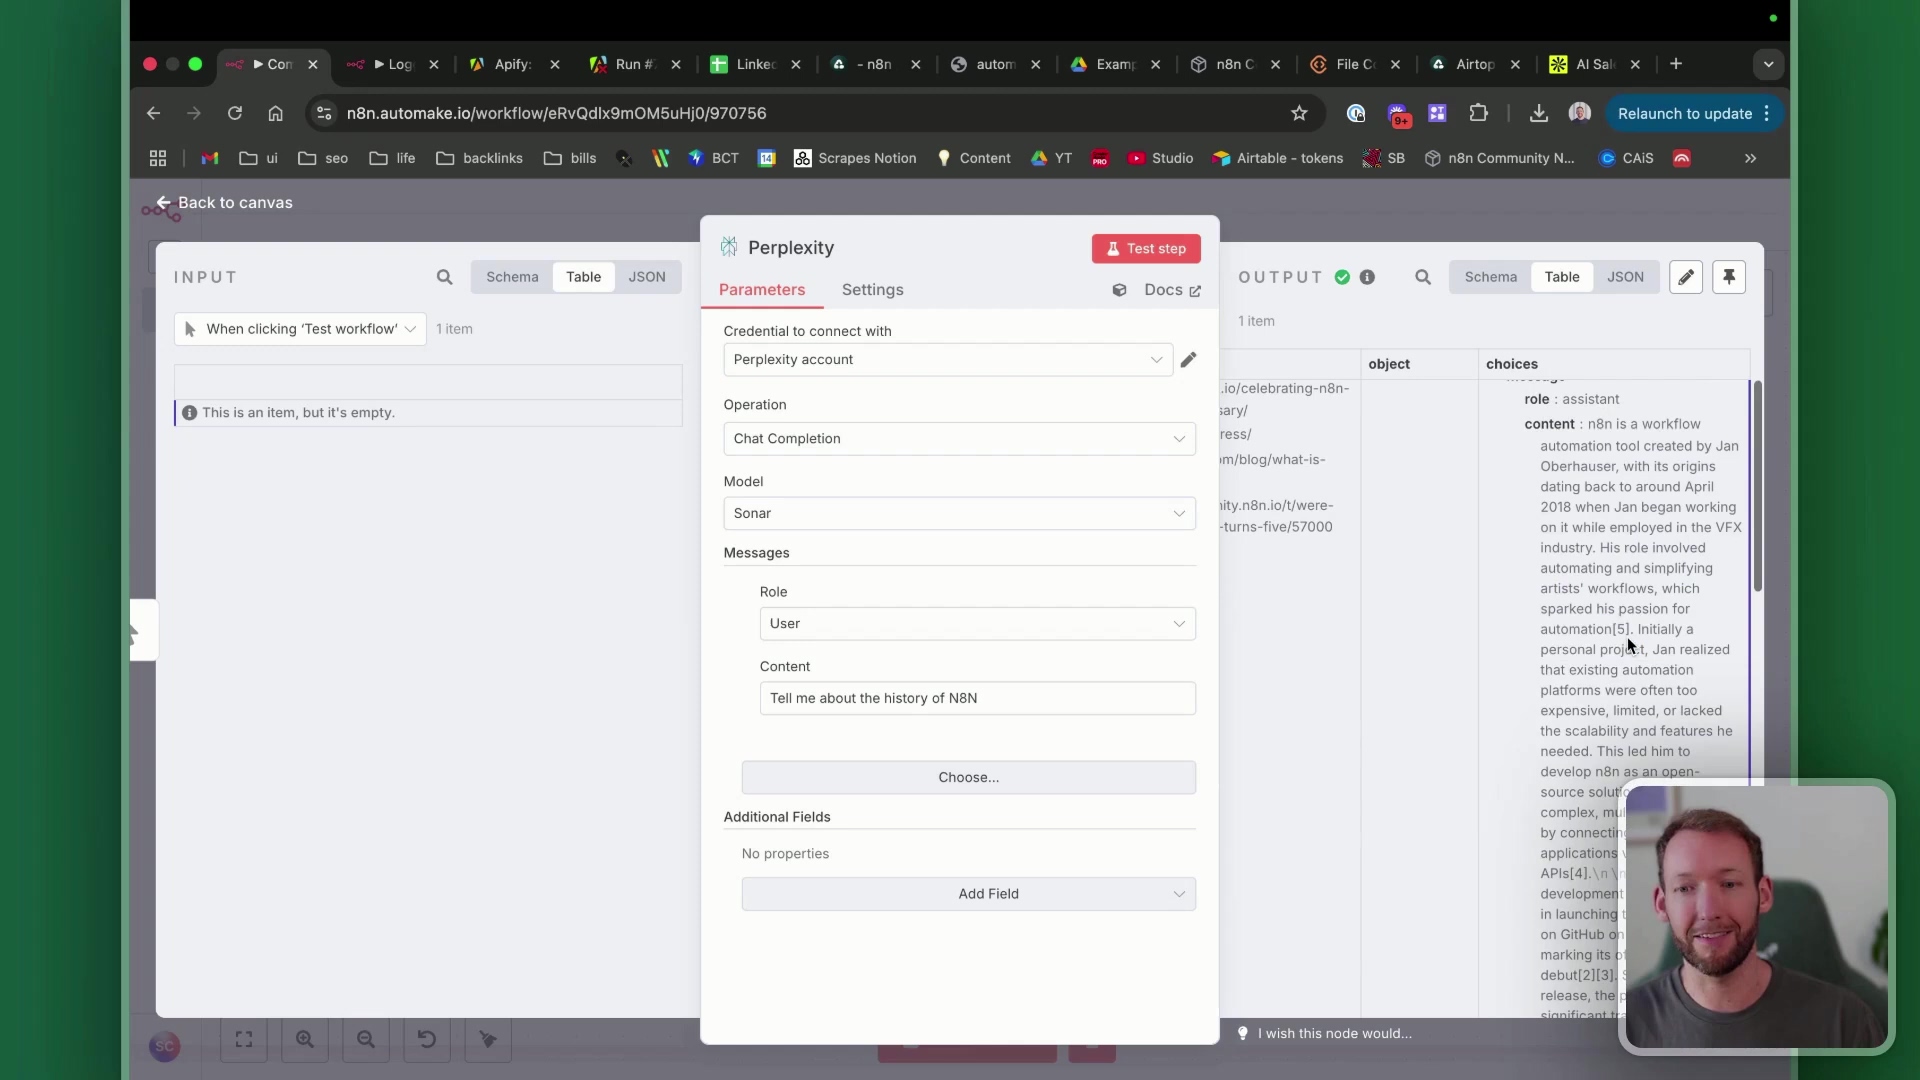
- Configure the node: In your n8n workflow, add the Perplexity node. You can then configure it to ask specific queries, just like you would type into a search engine. For example, you could ask: “Tell me about the history of N8N” or “What are the latest trends in AI automation?”
The output from the Perplexity node is truly impressive. It provides a complete answer, often with verifiable references and citations to the sources it used. This makes it invaluable for generating well-researched content, creating insightful reports, or simply getting quick, reliable answers for your automation’s needs. This node streamlines the process of getting structured data from natural language queries, significantly enhancing your automation capabilities for content creation and analysis. It’s like having a mini-library at your command!
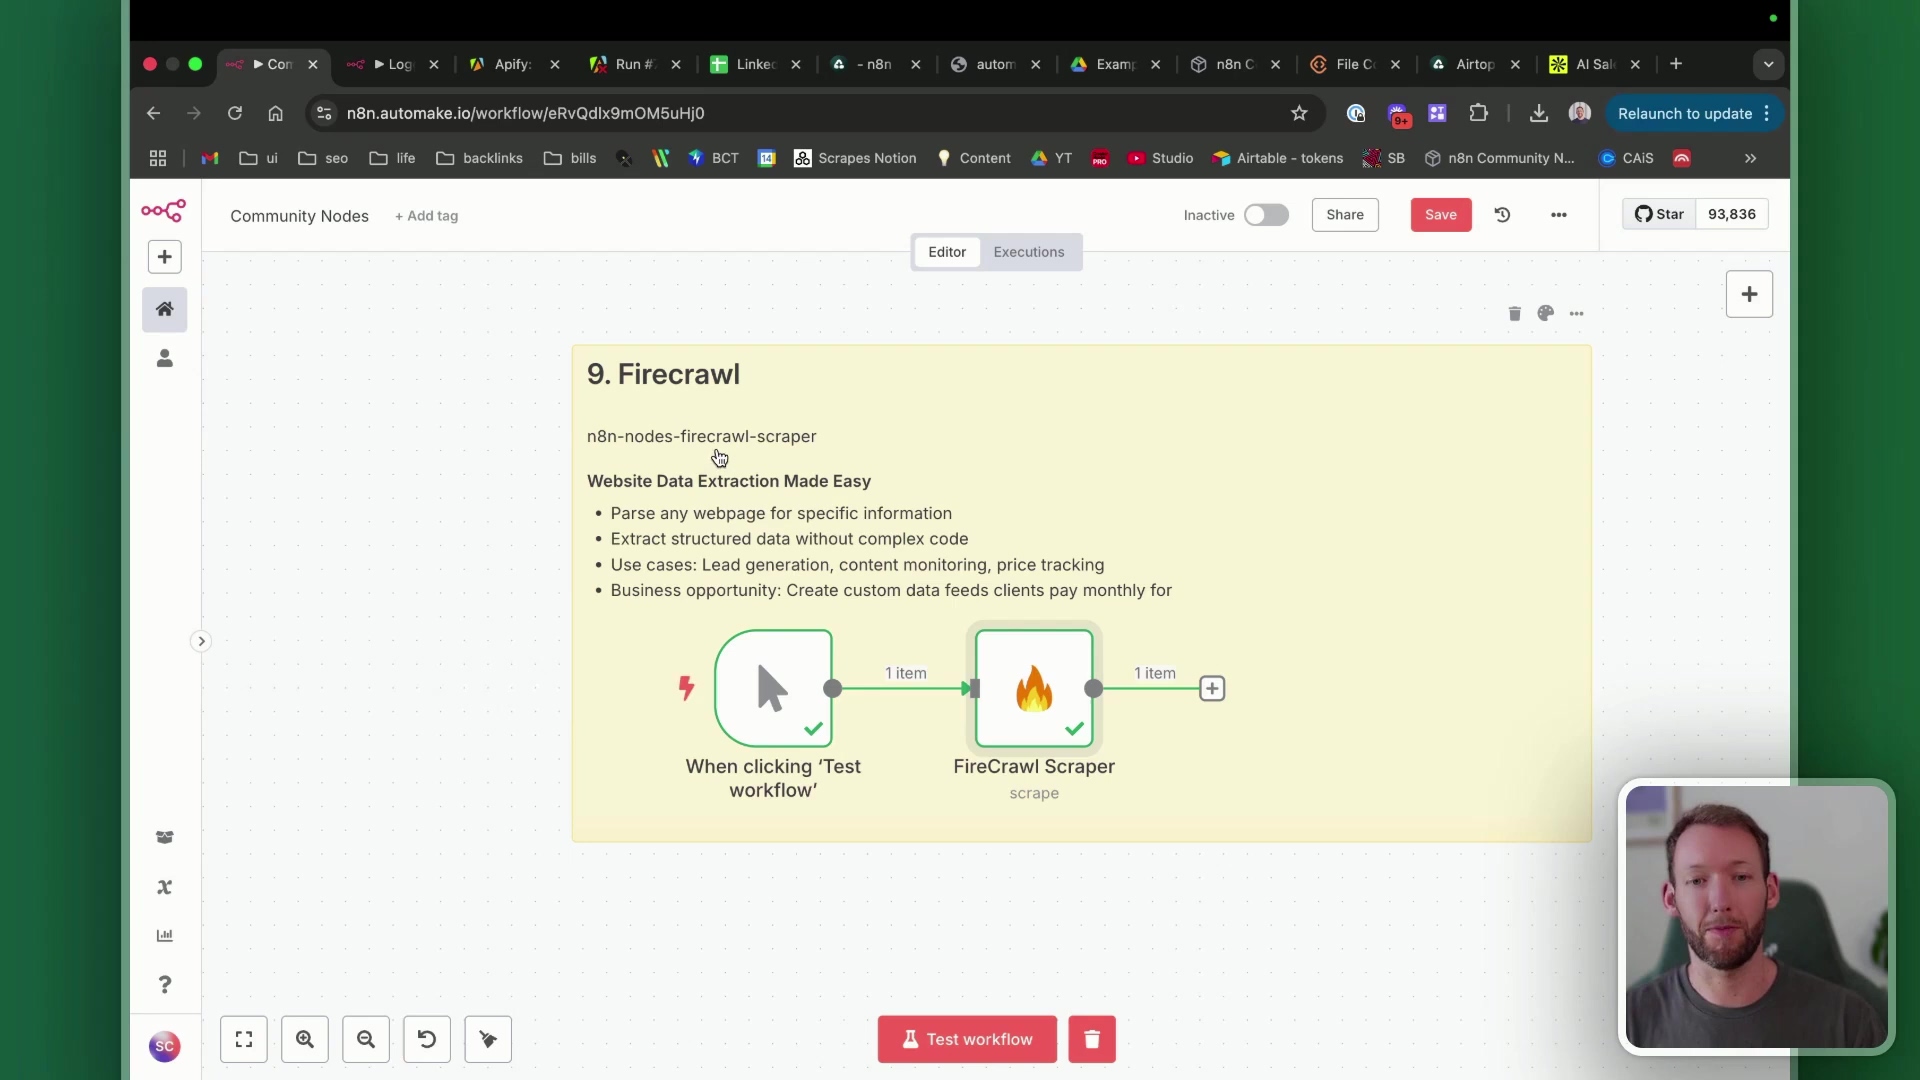
9. Firecrawl: LLM-Ready Website Data Scraping
If you’re dabbling in the world of Large Language Models (LLMs) like ChatGPT, you know how crucial it is to feed them clean, well-formatted data. Traditional web scraping often gives you raw HTML, which LLMs aren’t great at processing. That’s where Firecrawl comes to the rescue! This community node makes website data scraping easy, specifically designed to turn web content into LLM-ready data.
It allows you to parse any webpage for specific information, extracting both structured (like data in tables) and unstructured data (like plain text articles) simply. Its main advantage? It converts traditional HTML into Markdown format, which LLMs are exceptionally good at processing. It’s like translating a messy document into a perfectly organized outline for your AI assistant.
Unleashing Firecrawl’s power (crawl vs. extract):
Firecrawl offers two main functions:
- ‘Crawl’ functionality: Beyond just scraping a single page, Firecrawl can ‘crawl’ multiple URLs on a website. This means it can follow links and get data for each page it visits. Super handy for getting all the blog posts from a site, for example.
- ‘Extract’ function: This lets you specify a URL and precisely what information you want to extract. You can tell it to grab specific elements like pricing, the main content of an article, or product descriptions. It’s like having a surgical tool for web data.
This node is a powerful tool for generating clean, formatted data from websites for use in LLM applications, content monitoring, or even lead generation. If you’re working with AI and need to feed it web content, Firecrawl is an absolute must-have!
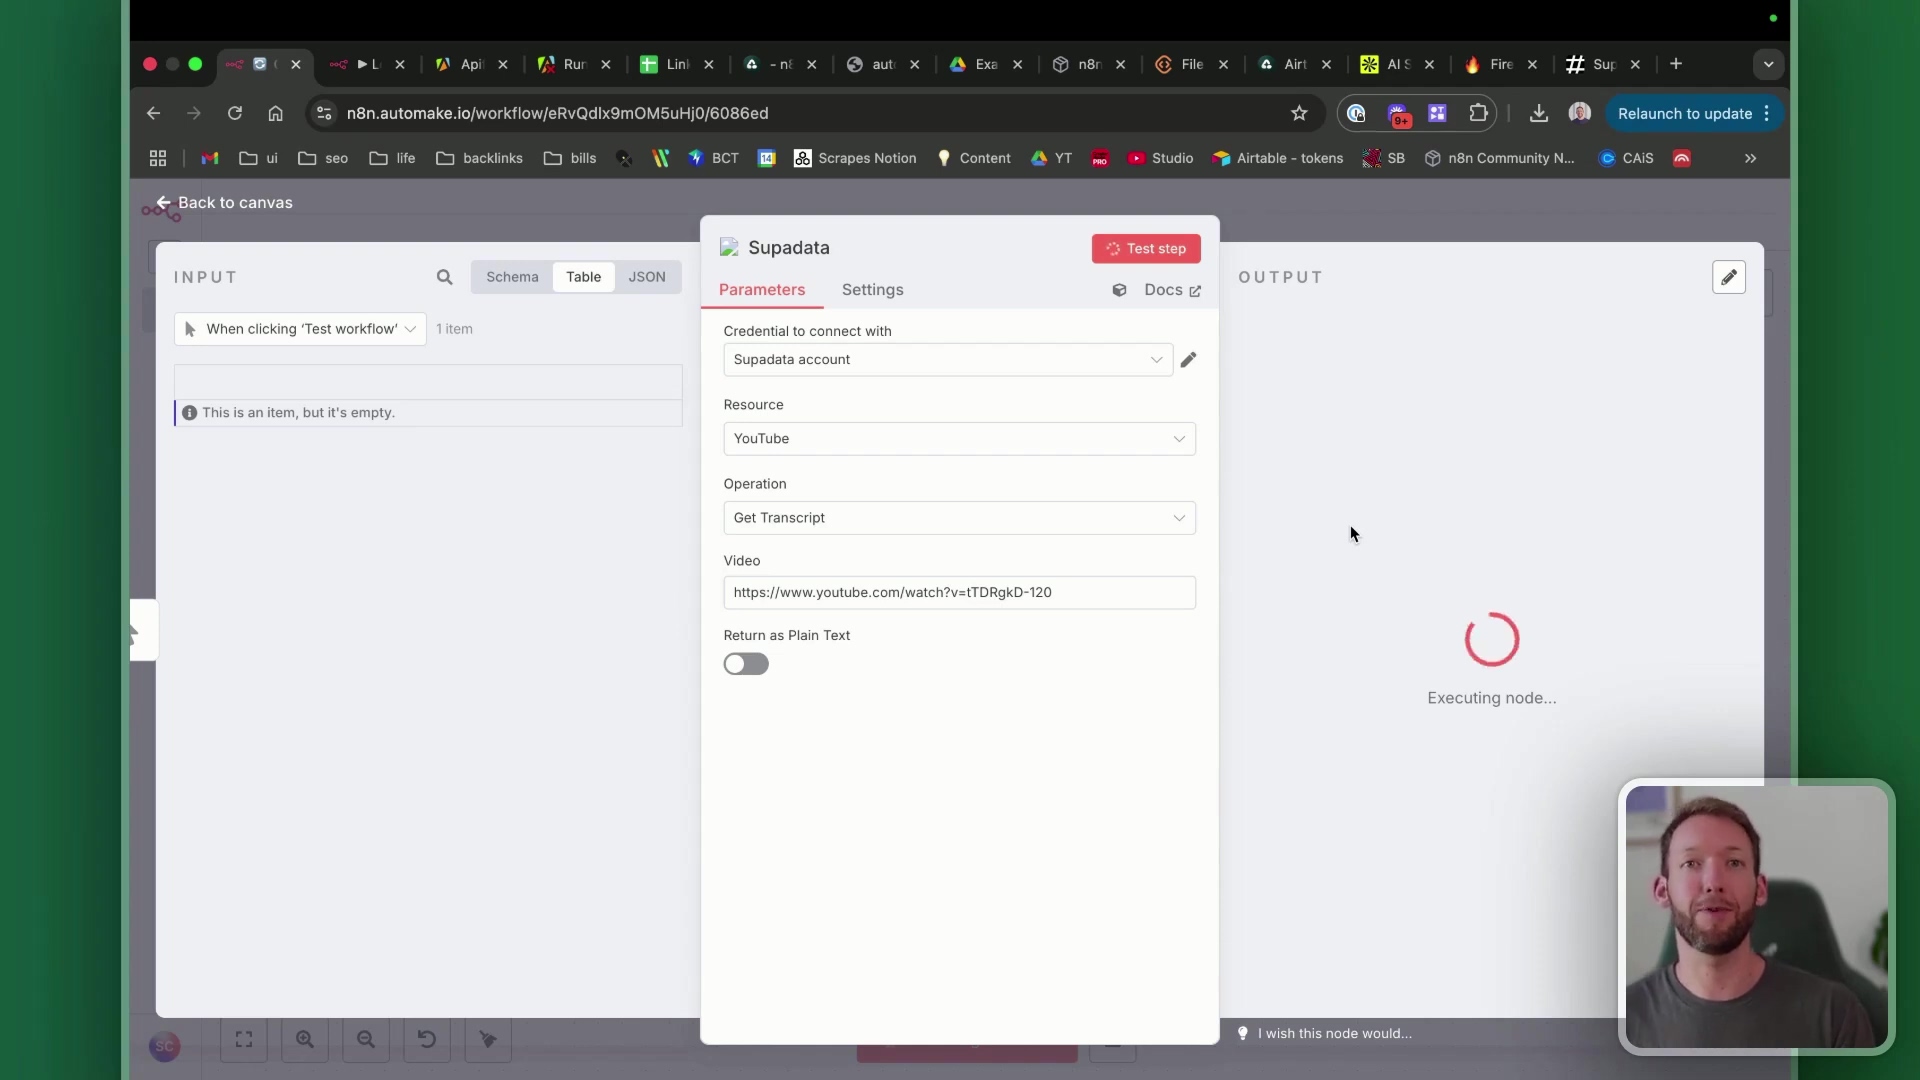
10. Supadata: YouTube Transcription and Data Extraction
YouTube is a goldmine of information, but extracting that information can be tricky. While n8n does have an inbuilt YouTube node, it has a glaring omission: it lacks transcription capabilities. That’s a problem if you want to turn video content into text! Thankfully, Supadata fills this gap beautifully. It provides a community node for extracting data from web and YouTube sources, with a particular focus on YouTube transcription.
Supadata offers 100 free requests, which is plenty to get started and get full transcripts from YouTube videos, along with other video and channel data. It’s like having a personal transcriber for every YouTube video you watch!
Repurposing content with Supadata (the possibilities are endless!):
This node is incredibly powerful for content repurposing. Think about it:
- Turn a long video into a series of social media posts.
- Convert a webinar into a detailed blog article.
- Extract key quotes or research notes from educational videos.
Supadata can return transcripts with timestamps (super useful for referencing specific parts of a video) or as plain text, offering flexibility for different applications. By providing easy access to YouTube content, Supadata enables creators and researchers to unlock new possibilities for content analysis and distribution. It’s a fantastic way to squeeze every last drop of value out of video content!
Critical Safety / Best Practice Tips
Alright, we’ve talked about all the cool stuff these nodes can do. But like any powerful tool, you gotta use them responsibly. Here are some critical safety and best practice tips from my own experience:
⚠️ Community Node Risk Assessment: I can’t stress this enough: always be aware that community nodes are developed by third parties. While they are often incredibly beneficial and fill crucial gaps, they may not undergo the same rigorous security audits as official n8n nodes. So, exercise caution! Only install nodes from trusted sources, and if you have the technical expertise, take a moment to review their code before integrating them into critical workflows. Better safe than sorry, right?
💡 Dynamic Credential Management: Remember our friend, ‘Run Node with Credentials X’? When you’re using nodes that handle sensitive information (like API keys, usernames, passwords), never hardcode them directly into your workflow. Always leverage n8n’s built-in credential management system. Dynamically passing credential IDs, as we discussed, maintains both security and flexibility. It’s like keeping your valuables in a safe, not just leaving them out in the open.
⚠️ API Usage Limits: Many of these awesome external services (ConvertAPI, Airtop, Apify, Perplexity, Firecrawl, Supadata) have usage limits, especially on their free tiers. It’s super important to be mindful of these API rate limits and free tier allowances. What happens if you hit a limit? Your workflow might break! So, implement robust error handling and retry mechanisms in your workflows. This way, if you temporarily hit a limit, your workflow can gracefully manage it, perhaps wait a bit, and then try again, ensuring continuous operation. It’s all about building resilient automations!
Key Takeaways
So, what have we learned today? A whole lot, I hope! Here are the big takeaways I want you to remember:
- Beyond Basic Nodes: The n8n ecosystem is vast and powerful, extending far beyond its basic nodes. There are specialized community and native integrations out there that can solve even the most complex automation challenges with remarkable efficiency. Don’t be afraid to explore!
- Time-Saving Potential: Nodes like ‘Run Node with Credentials X’ and ‘Compare Datasets’ are absolute lifesavers. They drastically reduce the need for repetitive workflow duplication and intricate conditional logic, saving you countless hours in development and maintenance. More time for coffee, less time for coding!
- AI Integration Made Easy: We’re living in the future, and tools like Tesseract.js (OCR), Perplexity (AI research), Airtop (browser automation), and Firecrawl (LLM-ready data) bring advanced AI capabilities directly into your workflows. The best part? Often, you don’t even need to deal with complex API calls yourself. n8n makes it accessible.
- Data Mastery: From extracting text from images to scraping web data and YouTube transcripts, these nodes empower you to acquire, process, and transform data in ways that were previously cumbersome or even impossible. You’re becoming a data ninja!
- Strategic Logging: For any complex, production-level automation, implementing a centralized logging system with nodes like
n8n-nodes-loggeris absolutely crucial. It ensures reliability and maintainability by giving you clear insights into what’s happening, making monitoring and debugging a breeze.
Conclusion
Wow, what a journey! By embracing these advanced n8n nodes, you’re not just building automations; you’re elevating your capabilities from routine tasks to sophisticated, intelligent workflows. The ability to seamlessly integrate OCR, dynamically manage credentials, compare large datasets, convert files effortlessly, automate browser interactions, and harness AI for research and data extraction opens up a world of possibilities you might not have even imagined.
These tools don’t just save you time (though they totally do!); they also enable the creation of robust, scalable solutions that can tackle a wide array of business and personal automation needs. For those of you truly looking to master n8n and unlock its full potential, delving into these specialized nodes is an indispensable step. It’s like graduating from building LEGO houses to designing entire cities!
My insights in this article come from countless hours of hands-on experience, iterating through multiple approaches, and testing various methods. This comprehensive guide synthesizes a set of best practices that prioritize both efficiency and reliability, because that’s what truly matters in the real world.
Now, armed with this knowledge, take the leap and transform your automations. Go forth and build amazing things! And hey, if you discover new possibilities or have your own favorite nodes, share your experiences in the comments below! I’d love to hear from you.
Frequently Asked Questions (FAQ)
Q: Do I need to be a programmer to use these advanced n8n nodes?
A: Not at all! While some basic understanding of concepts like APIs or JSON can be helpful, n8n is designed to be low-code. Many of these nodes abstract away the complex programming, allowing you to build powerful automations with visual drag-and-drop interfaces. Think of it as building with smart LEGO bricks – you don’t need to be an engineer to create something amazing!
Q: What’s the biggest risk when using community nodes?
A: The biggest risk is that community nodes are developed by third parties and might not undergo the same rigorous security audits as official n8n nodes. Always exercise caution: only install nodes from trusted sources, and if you’re handling sensitive data, consider reviewing the node’s code if you have the expertise. It’s like downloading an app – you want to make sure it’s from a reputable developer!
Q: How can I handle API rate limits when using external services with n8n?
A: Great question! Many external services have limits on how many requests you can make in a certain time frame. To handle this, you should implement error handling and retry mechanisms in your n8n workflows. n8n has built-in nodes for this, like the ‘Error Trigger’ and ‘Retry’ nodes. This way, if your workflow hits a rate limit, it can pause, wait, and then try again, preventing your automation from breaking down. It’s all about making your workflows resilient!
Q: Can I use these nodes with n8n Cloud, or do I need to self-host?
A: Most of the community nodes, including Tesseract.js, Apify, Firecrawl, and Supadata, require a self-hosted n8n instance. This is because they often need direct access to the underlying server environment to install and run. While n8n Cloud is super convenient, self-hosting gives you the flexibility to install any community node you want. It’s a trade-off between convenience and ultimate control!
Q: How do I find the credentials ID for the ‘Run Node with Credentials X’ node?
A: When you create a new credential in n8n (e.g., for Gmail, Slack, etc.), n8n assigns it a unique ID. You can usually find this ID in the URL when you’re editing the credential in your n8n interface. It’s a long string of characters. You’ll then use this ID in the ‘Run Node with Credentials X’ node to tell it which specific account to use. It’s like giving your workflow a specific key to unlock a particular service!