Watch the Video Tutorial
💡 Pro Tip: After watching the video, continue reading below for detailed step-by-step instructions, code examples, and additional tips that will help you implement this successfully.
Hey there, fellow automation enthusiast! Boyce here, your friendly neighborhood self-taught automation consultant. Ever felt like you’re trying to build a spaceship with LEGO bricks, but the instructions are in ancient alien? Yeah, I’ve been there. That’s why I’m super excited to walk you through integrating Apify with N8N – it’s like getting a universal translator for your data! We’re going to make web scraping and data processing feel like a breeze, I promise. No more head-scratching, just smooth, automated sailing. Let’s dive in!
Table of Contents
Open Table of Contents
- Why Apify and N8N are Your New Best Friends
- Required Resources and Cost-Benefit Analysis
- Critical Safety / Best Practice Tips
- Setting Up Your N8N Workflow
- Configuring Apify for N8N Integration
- Processing Scraped Data in N8N
- Integrating with Google Sheets
- Key Takeaways / Pro-Tips Summary
- Conclusion
- Frequently Asked Questions (FAQ)
- Q: What if my Apify Actor requires more complex inputs than a simple JSON body?
- Q: My N8N workflow is running, but no data is appearing in Google Sheets. What should I check?
- Q: Can I schedule this N8N workflow to run automatically?
- Q: Is there a limit to how much data Apify can scrape or N8N can process?
- Q: What if the website I’m scraping changes its structure? Will my Apify scraper still work?
Why Apify and N8N are Your New Best Friends
So, why are we even talking about Apify and N8N? Think of it this way: Apify is like your super-powered data-gathering robot. It can go out onto the internet and collect all sorts of information for you, from product prices to business listings. And N8N? That’s your mission control center. It connects all your different tools and services, letting them talk to each other and automate tasks. Together, they’re an unstoppable duo for getting data and putting it exactly where you need it, without you lifting a finger. Pretty cool, right?
Required Resources and Cost-Benefit Analysis
Before we jump into the fun stuff, let’s quickly chat about what you’ll need. Don’t worry, we’re not talking about breaking the bank here. One of the reasons I love this combo is how cost-effective it can be, especially if you’re just starting out.
Tool and Material Checklist
Here’s a quick rundown of the essentials. Think of it like your shopping list before a big cooking adventure:
| Tool/Material | Description | Approximate Cost (Monthly) |
|---|---|---|
| Apify Account | This is your web scraping powerhouse. It’s where the magic of data extraction happens. | Free tier available, paid plans from $49 |
| N8N Instance | Your workflow automation platform. You can host it yourself for free (which is what I usually do!), or use their cloud service. | Free (self-hosted), paid plans from $20 (cloud) |
| Google Sheet | Super handy for storing and organizing your scraped data. Plus, it’s free with a Google Account! | Free (with Google Account) |
| Internet Connection | Well, this one’s a no-brainer, right? You need to be online for all this to work. | Varies based on provider |
DIY vs. Commercial Solution Comparison
Now, you might be wondering, “Why go through all this DIY hassle when I can just pay for a service?” Great question! Let’s look at it like this:
| Feature | DIY Apify + N8N Integration | Commercial Data Scraping Service |
|---|---|---|
| Setup Time | 1-2 hours (initial) | 5-10 minutes (account setup) |
| Customization | High (full control over scraping logic and workflow) | Low (limited to service’s predefined options) |
| Maintenance | Moderate (self-managed updates, error handling) | Low (managed by service provider) |
| Cost | Low to Moderate (based on usage, self-hosted N8N is free) | High (subscription fees, per-scrape costs) |
| Scalability | High (can scale by adding more N8N instances/Apify units) | Moderate to High (depends on service plan) |
| Flexibility | Excellent (integrate with any app N8N supports) | Limited (integrations depend on service) |
See? While a commercial service might get you started faster, the DIY route with Apify and N8N gives you so much more control and flexibility. It’s like building your own custom robot versus buying a pre-made toy. For me, the power of customization always wins!
Critical Safety / Best Practice Tips
Alright, before we get our hands dirty, a quick word from your friendly neighborhood automation expert. These aren’t just suggestions; they’re like the safety rules for your data robot. Ignore them at your peril!
⚠️ Rate Limiting: Imagine knocking on someone’s door a thousand times a second. They’re probably going to get annoyed and might even call the police, right? Websites are similar. They have limits on how many requests you can send. If you hit them too hard, they might block your IP address. This is called “rate limiting.” So, be mindful of API rate limits from both Apify and the websites you’re scraping. If you’re seeing errors, try adding a delay in your N8N workflow. It’s like taking a breath between knocks.
💡 Data Validation: Scraped data can sometimes be a bit messy, like finding a few stray LEGO bricks that don’t quite fit. Always, always, always validate the data you get. Implement checks in N8N to make sure the data is clean, in the right format, and exactly what you expect before you send it off to Google Sheets or anywhere else. Trust me, a little validation upfront saves a lot of headaches later.
⚠️ API Token Security: Your Apify API token is like the key to your data robot. You wouldn’t leave your house keys lying around for anyone to find, would you? Same goes for your API token. Never, ever expose it publicly (like in your code on GitHub or in a public URL). Always use N8N’s secure credential management system for storing sensitive information. It’s like putting your keys in a super-secure vault.
Setting Up Your N8N Workflow
Okay, the moment you’ve been waiting for! We’re going to build our N8N workflow. What I’m about to show you is a super streamlined way to get data from Apify. We’re talking just two core N8N nodes to fetch and process data, which is way simpler than some of the convoluted setups I’ve seen out there. You’ll be a pro in no time!
Initial Workflow Setup
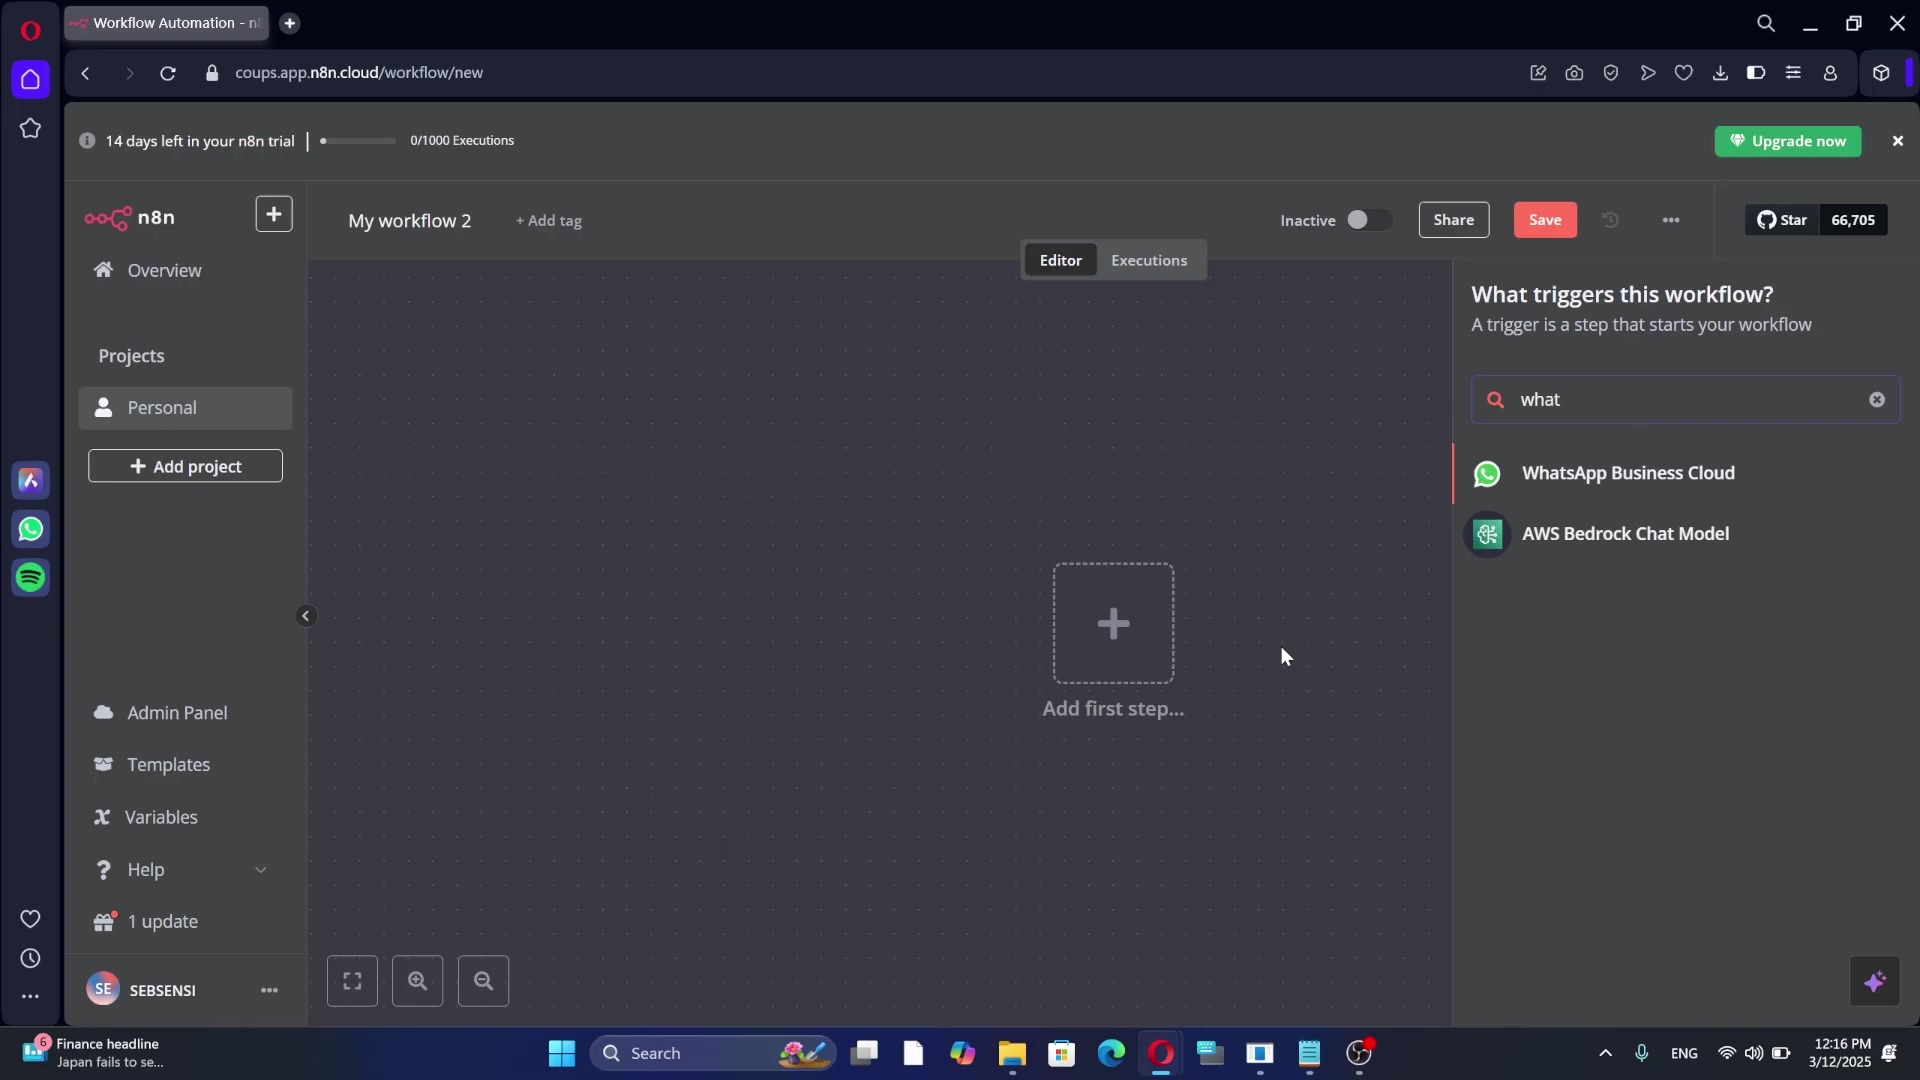
First things first, let’s get our N8N workspace ready. Open up your N8N instance (whether it’s self-hosted or cloud) and create a brand new workflow. You’ll see a blank canvas, ready for your automation masterpiece.
We’re going to start with a Manual Trigger node. This node is exactly what it sounds like: it lets you manually kick off your workflow with a click. Super handy for testing! Then, we’ll add an HTTP Request node. This is the node that will actually talk to Apify and grab our data. This simple setup means no complex custom code or a bunch of intermediary nodes. Easy peasy!
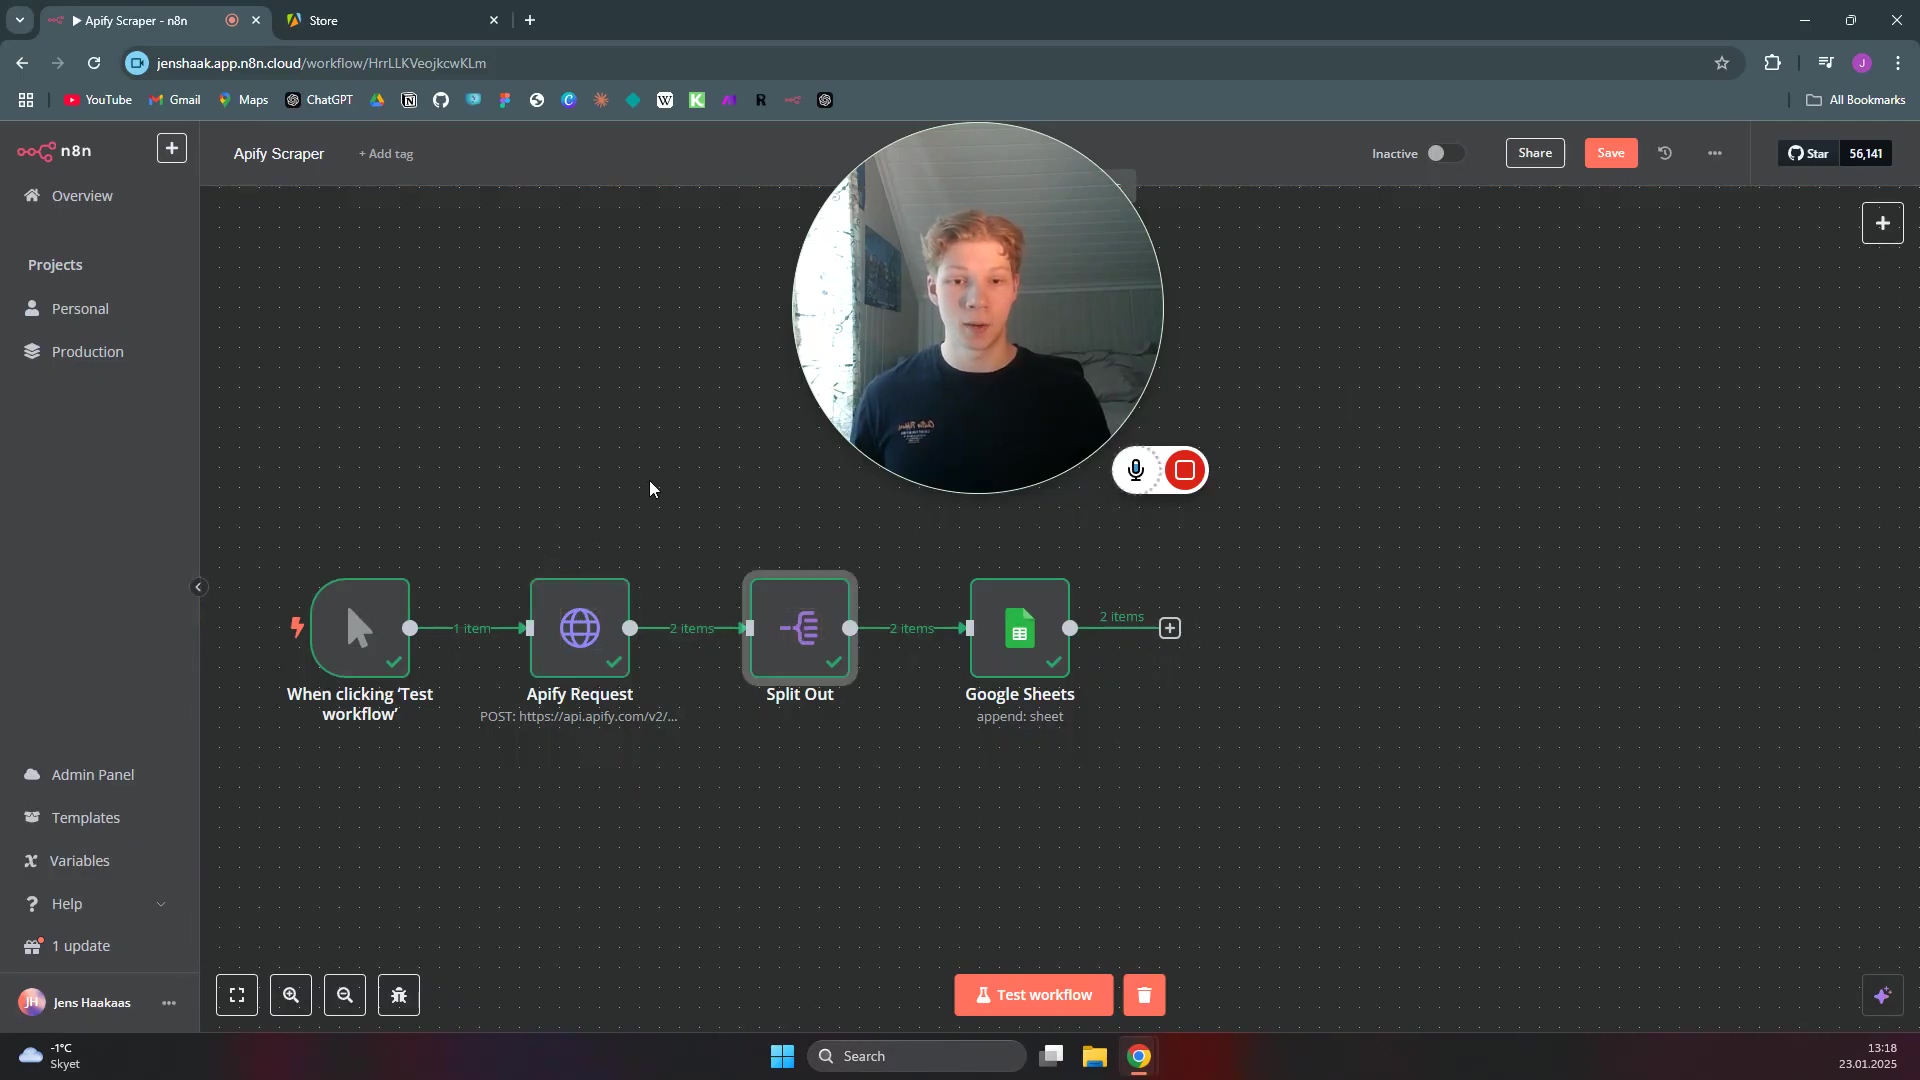
What you should see: A new, empty N8N workflow with a Manual Trigger node already on the canvas. You’ll then drag and drop an HTTP Request node onto the canvas and connect it to the Manual Trigger.
Adding the HTTP Request Node
So, you’ve got your Manual Trigger chilling there. Now, let’s bring in the HTTP Request node. This node is like the messenger that goes out and fetches information from other services (in our case, Apify). It’s going to send requests to Apify’s API and then receive all that juicy scraped data back.
To add it, just click the + button or search for “HTTP Request” in the nodes panel. Drag it onto your canvas and connect it to the Manual Trigger node. Make sure your N8N environment is ready to add new nodes by accessing the ‘What happens next?’ sidebar or the + button at the bottom of the canvas.
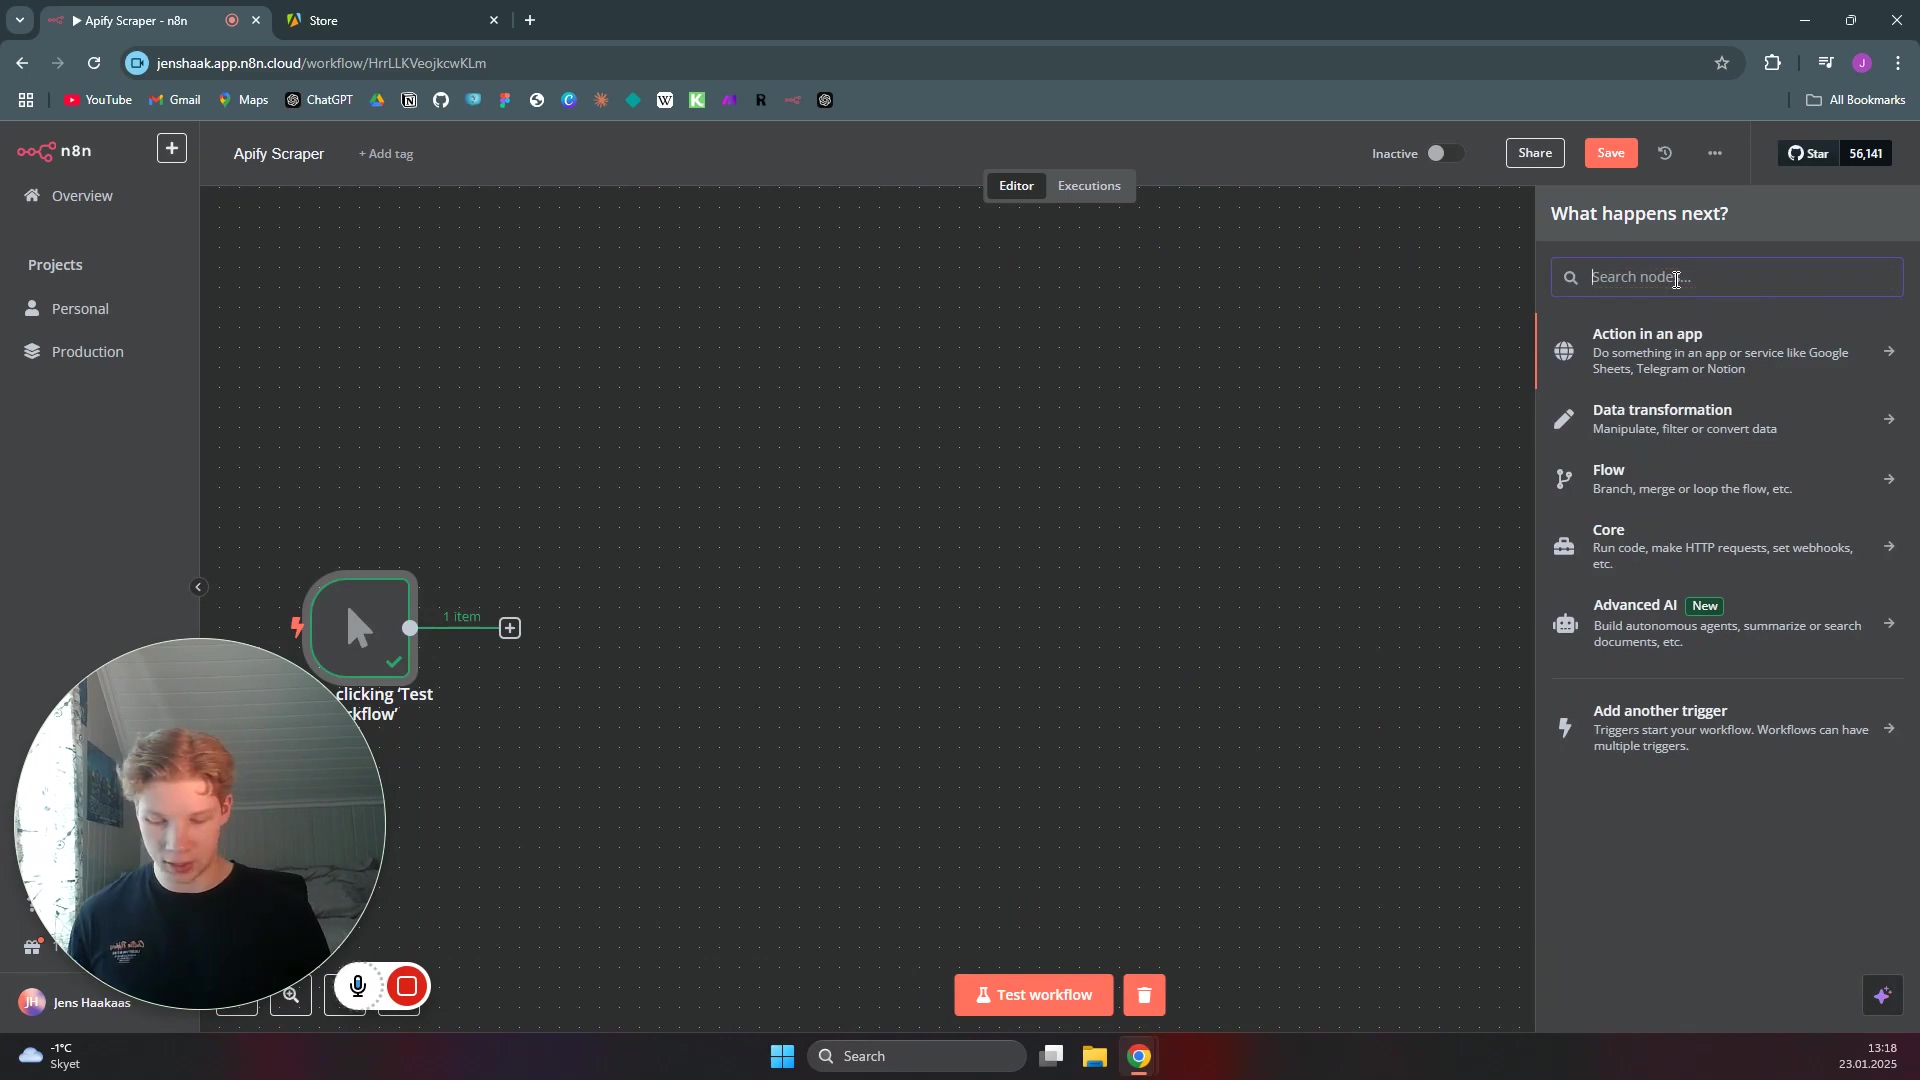
What you should see: Your Manual Trigger node connected to a new HTTP Request node. The HTTP Request node will likely have a red border, indicating it needs configuration.
Configuring Apify for N8N Integration
Now, let’s hop over to Apify for a bit. To make sure our N8N workflow can seamlessly grab data, we need to set up a specific API endpoint within your Apify account. This is where we tell Apify, “Hey, when N8N asks, send the data here!” The cool part? We’re going to pick an integration method that includes your API token right in the URL, which makes the N8N setup super simple. No extra authentication steps needed in N8N!
Selecting the Right Apify Endpoint
Head over to your Apify account. If you don’t have a scraper yet, you’ll need to set one up or use one of their pre-built Actors. For this example, let’s imagine you’re using something like their “Google Maps Extractor” or any other Actor you’ve built or found. Once you’re in your chosen Apify scraper’s page, navigate to the ‘Integrations’ section. It’s usually on the left sidebar or in a tab.
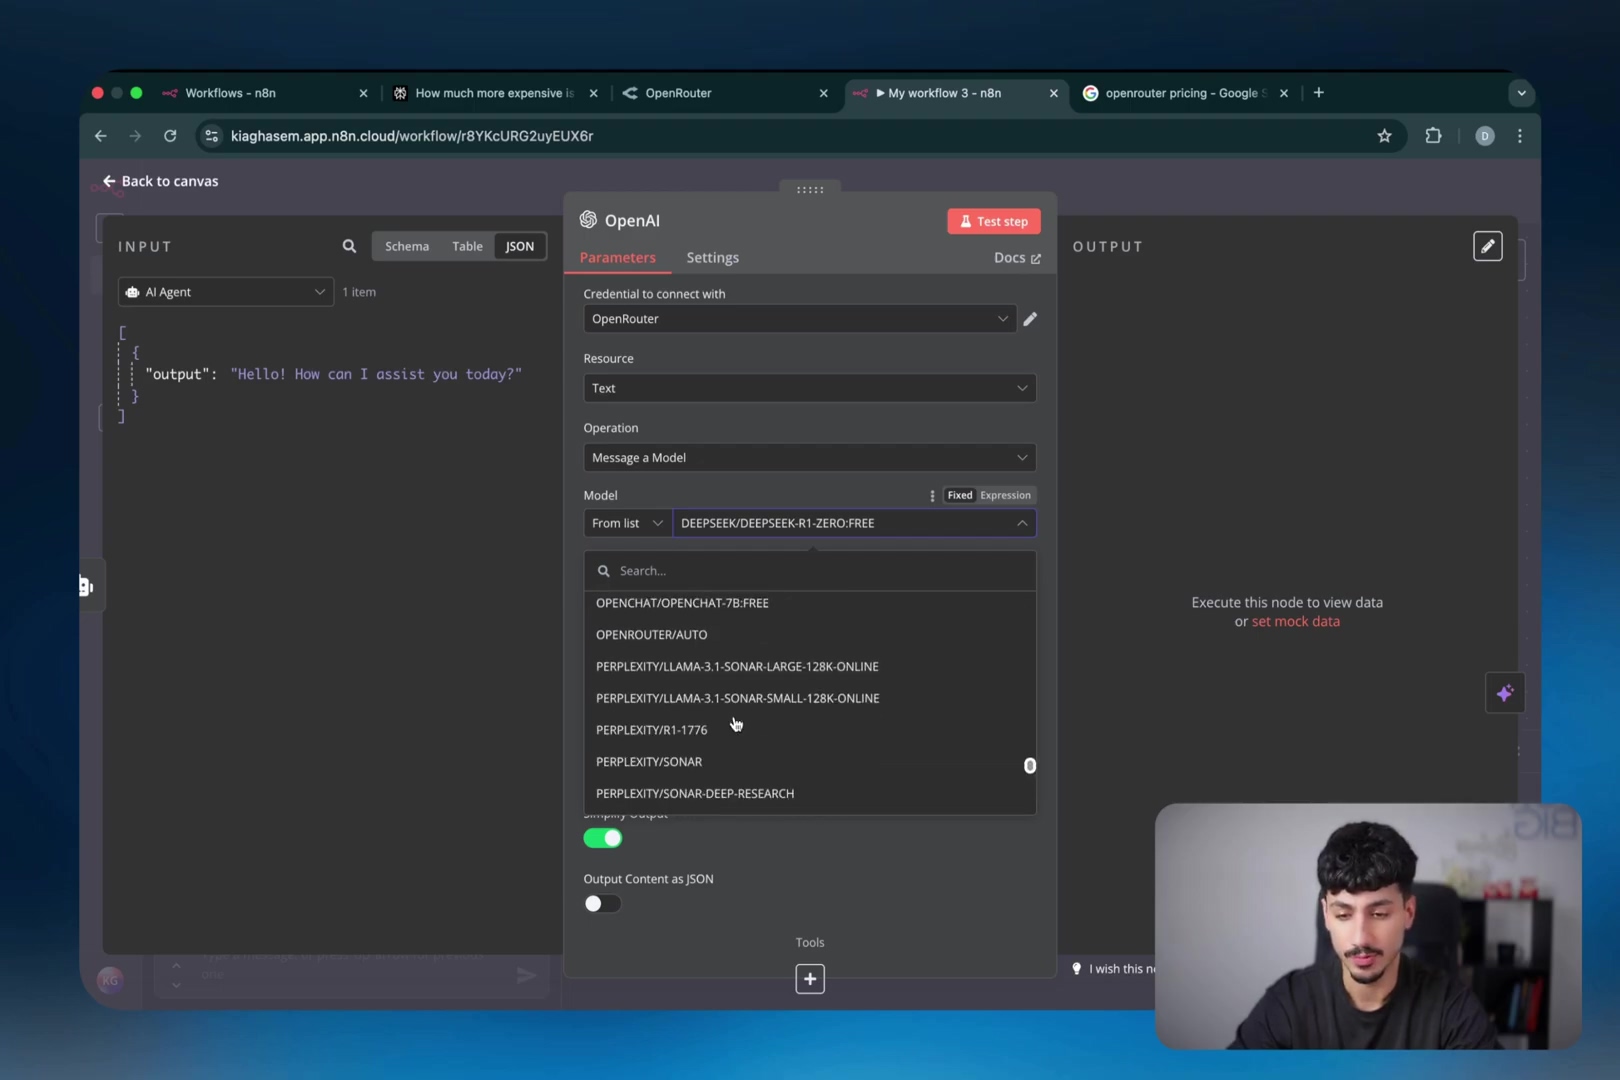
Now, this is crucial: the most efficient option for us is to use Run Actor asynchronously and get dataset items. Why this one? Because it’s a one-stop shop! It handles running your Actor (your scraper), waiting for it to finish, and then giving you the collected data. Plus, and this is the best part, your API token is pre-baked into the URL it gives you. This means N8N doesn’t need any extra authentication setup, which is a huge win for simplicity!
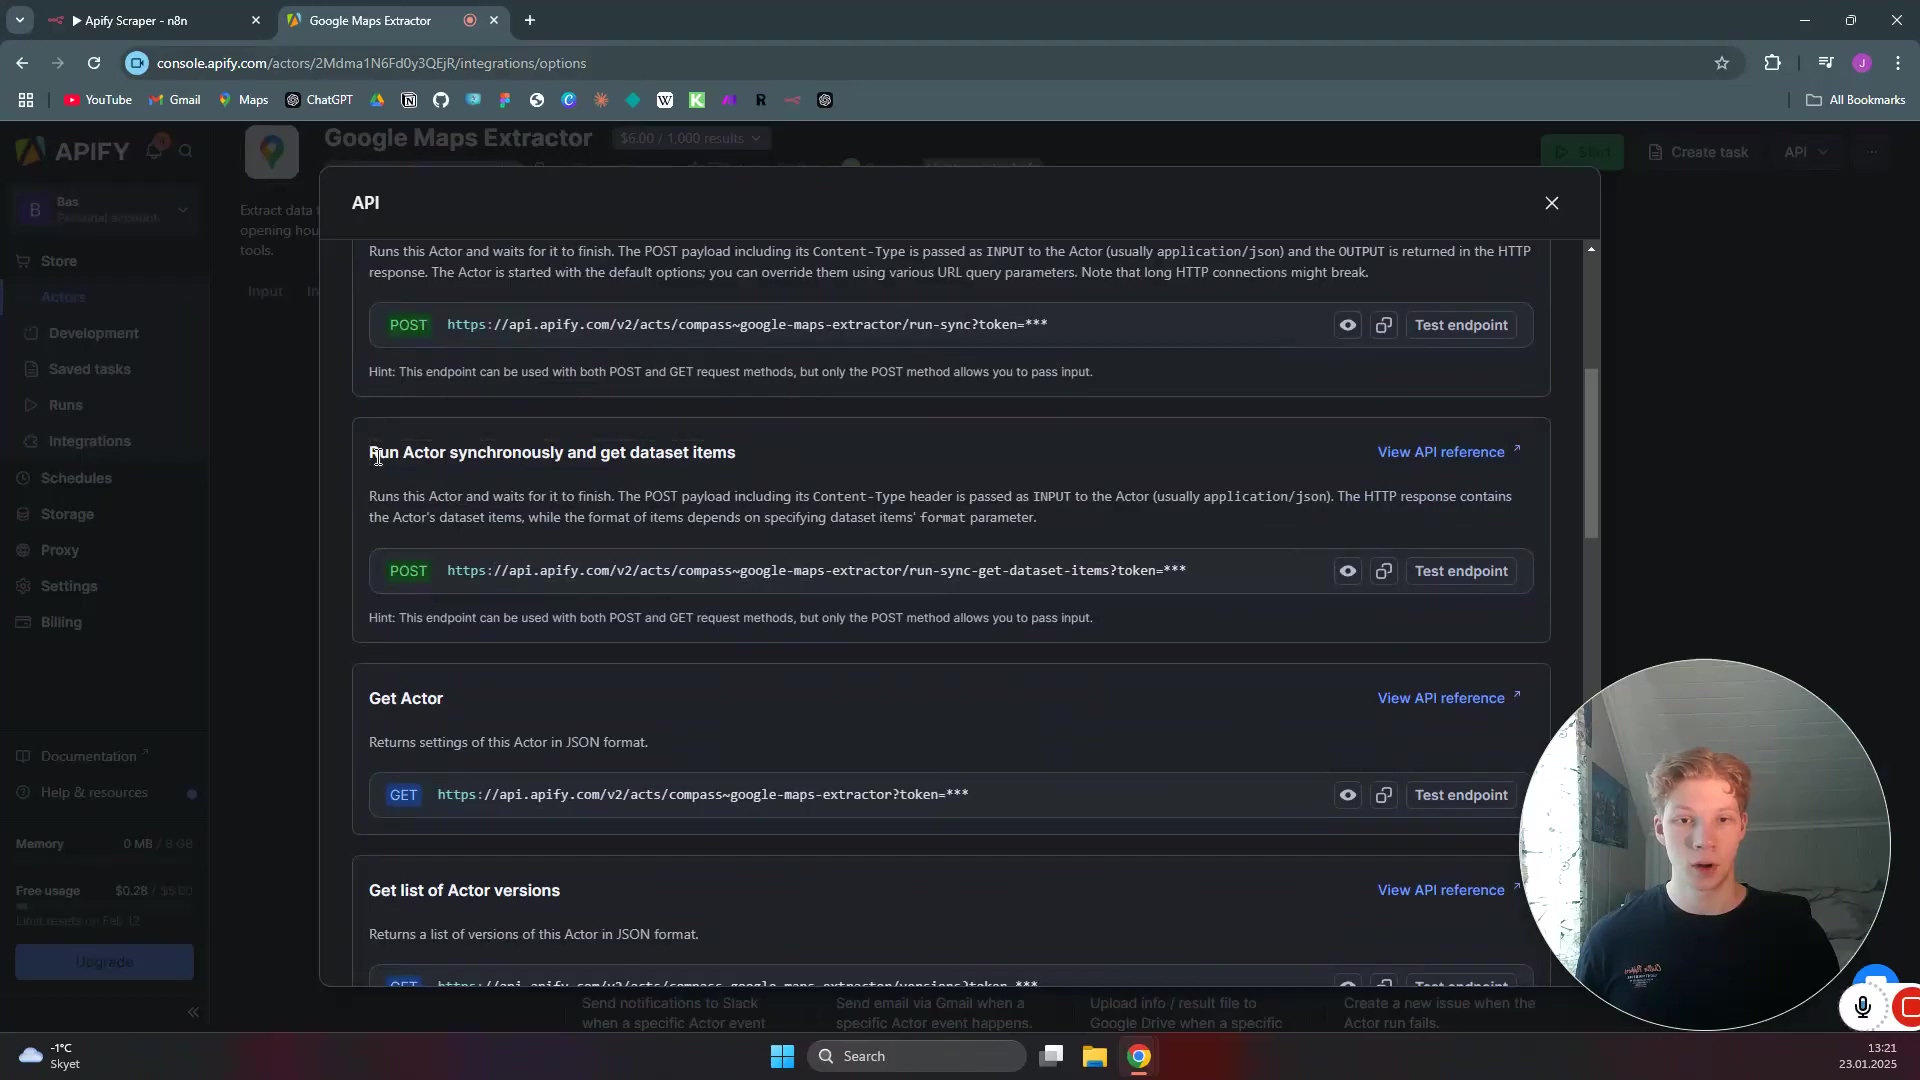
What you should see: On the Apify platform, you’ll find the ‘Integrations’ section for your Actor. Select the Run Actor asynchronously and get dataset items option, and Apify will generate a URL for you. Copy this URL – it’s your golden ticket!
Pasting the Apify URL in N8N
Alright, you’ve got that magical Apify URL copied, right? Now, let’s jump back to N8N. Click on your HTTP Request node to open its settings panel. You’ll see a field labeled ‘URL’. This is where that copied URL goes. Just paste it directly in there.
Because we chose the Run Actor asynchronously and get dataset items endpoint from Apify, your API token is already embedded in that URL. This is super handy because it means you don’t need to mess around with separate authentication headers or credentials in N8N. One less thing to worry about! It’s like Apify already packed your lunch for you.
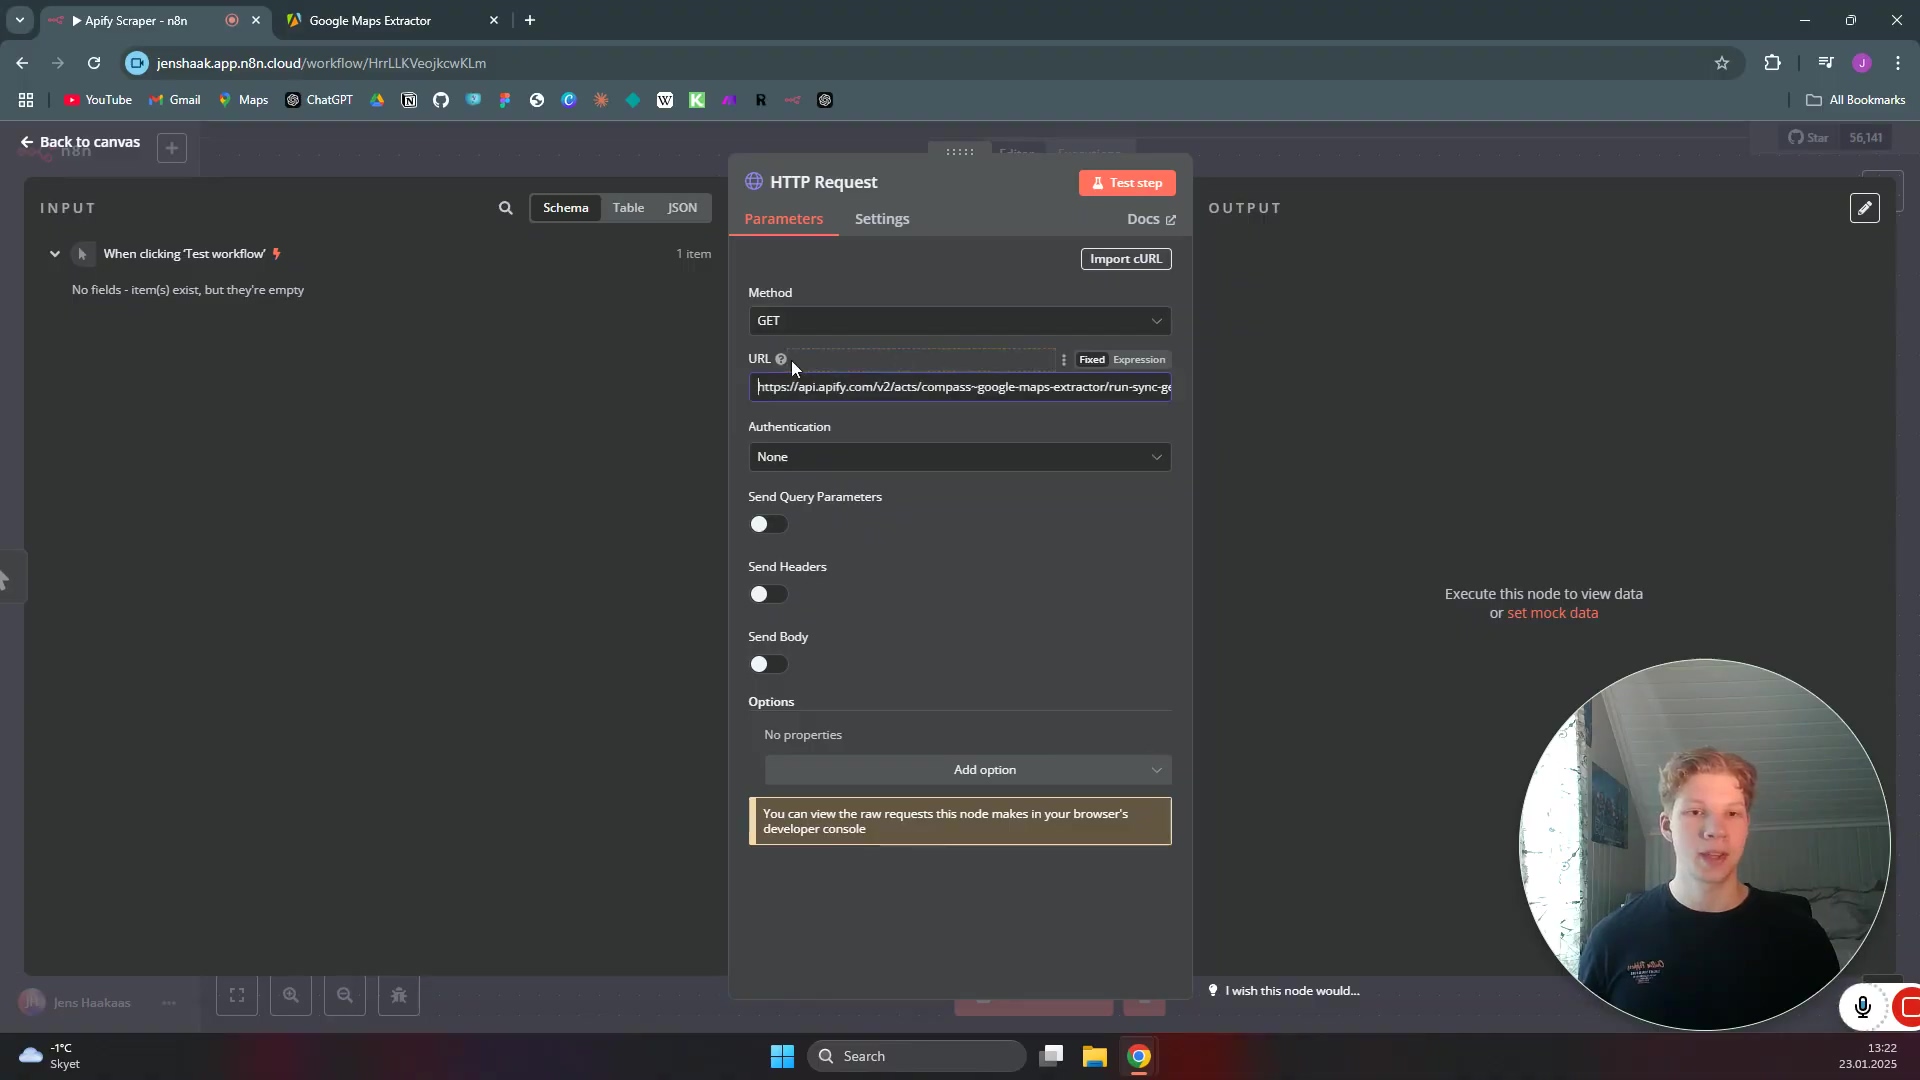
What you should see: The ‘URL’ field in your HTTP Request node in N8N should now contain the full Apify endpoint URL you copied. No red borders on the URL field anymore!
Sending Scraper Parameters via JSON Body
Now, how do we tell our Apify scraper what to scrape? We do that by sending it some instructions, or “parameters.” Think of it like giving your robot a shopping list. We’ll send these instructions as a JSON object in the ‘HTTP Request’ body.
Go back to your Apify scraper’s page (the same one where you got the integration URL). Look for the ‘Inputs’ section. This is where you usually define what your scraper should look for (e.g., “roofers in Boston,” “number of results,” etc.). Apify will show you a JSON example of these inputs. Copy that entire JSON input.
Back in N8N, in your HTTP Request node settings, find the ‘Send Body’ section. Make sure the ‘Body Content Type’ is set to ‘JSON’. Then, paste the JSON input you copied from Apify directly into the ‘Body’ field. This tells Apify exactly what to do when N8N triggers it.
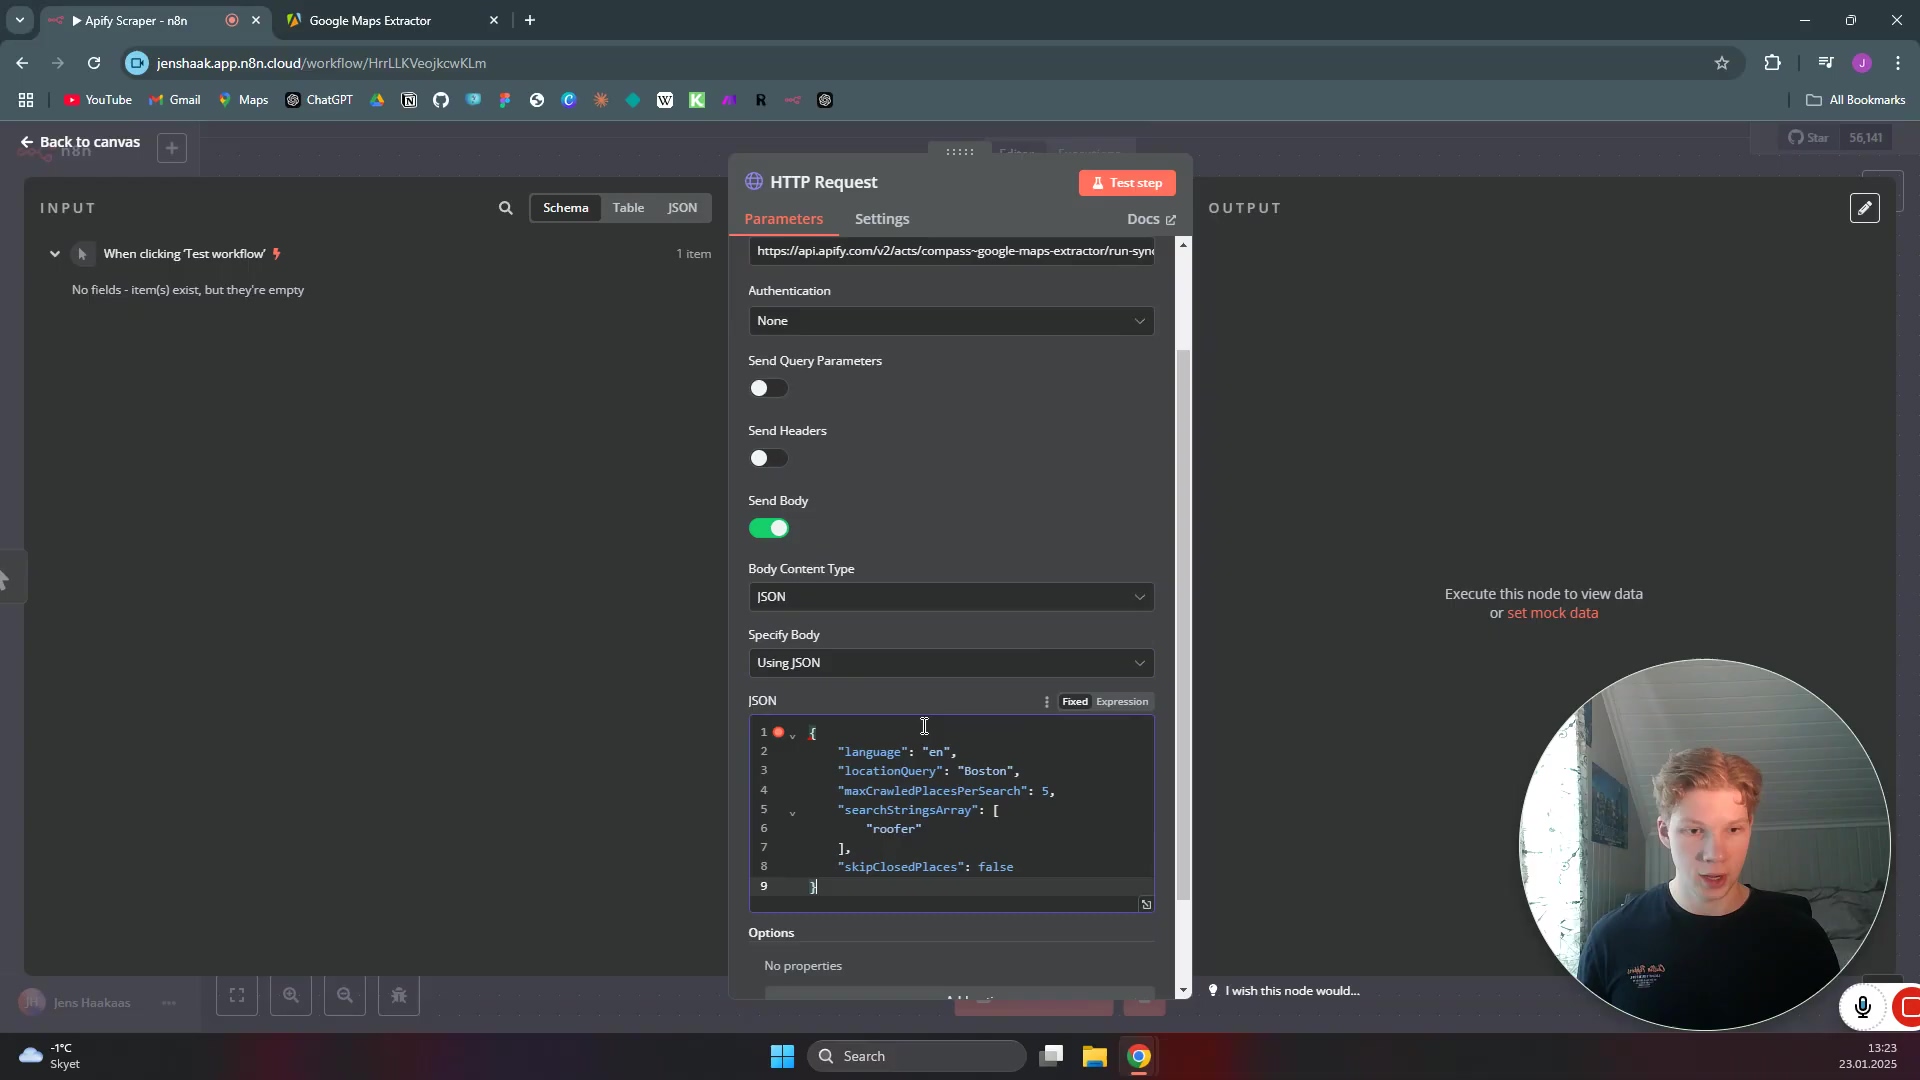
What you should see: The ‘Body Content Type’ in your HTTP Request node is set to ‘JSON’, and the ‘Body’ field contains the JSON input parameters for your Apify scraper. Now, you can click ‘Execute Node’ (or ‘Execute Workflow’ if you want to run from the trigger) to test it out! You should see a successful response in the output panel.
Processing Scraped Data in N8N
Alright, you’ve successfully told Apify what to do, and it’s sent back a bunch of data. High five! But that data usually comes in a big, raw JSON blob. Our next mission, should we choose to accept it (and we do!), is to whip that data into shape. We need to process and refine it within N8N so it’s ready for its final destination, like a Google Sheet.
Verifying Scraped Data
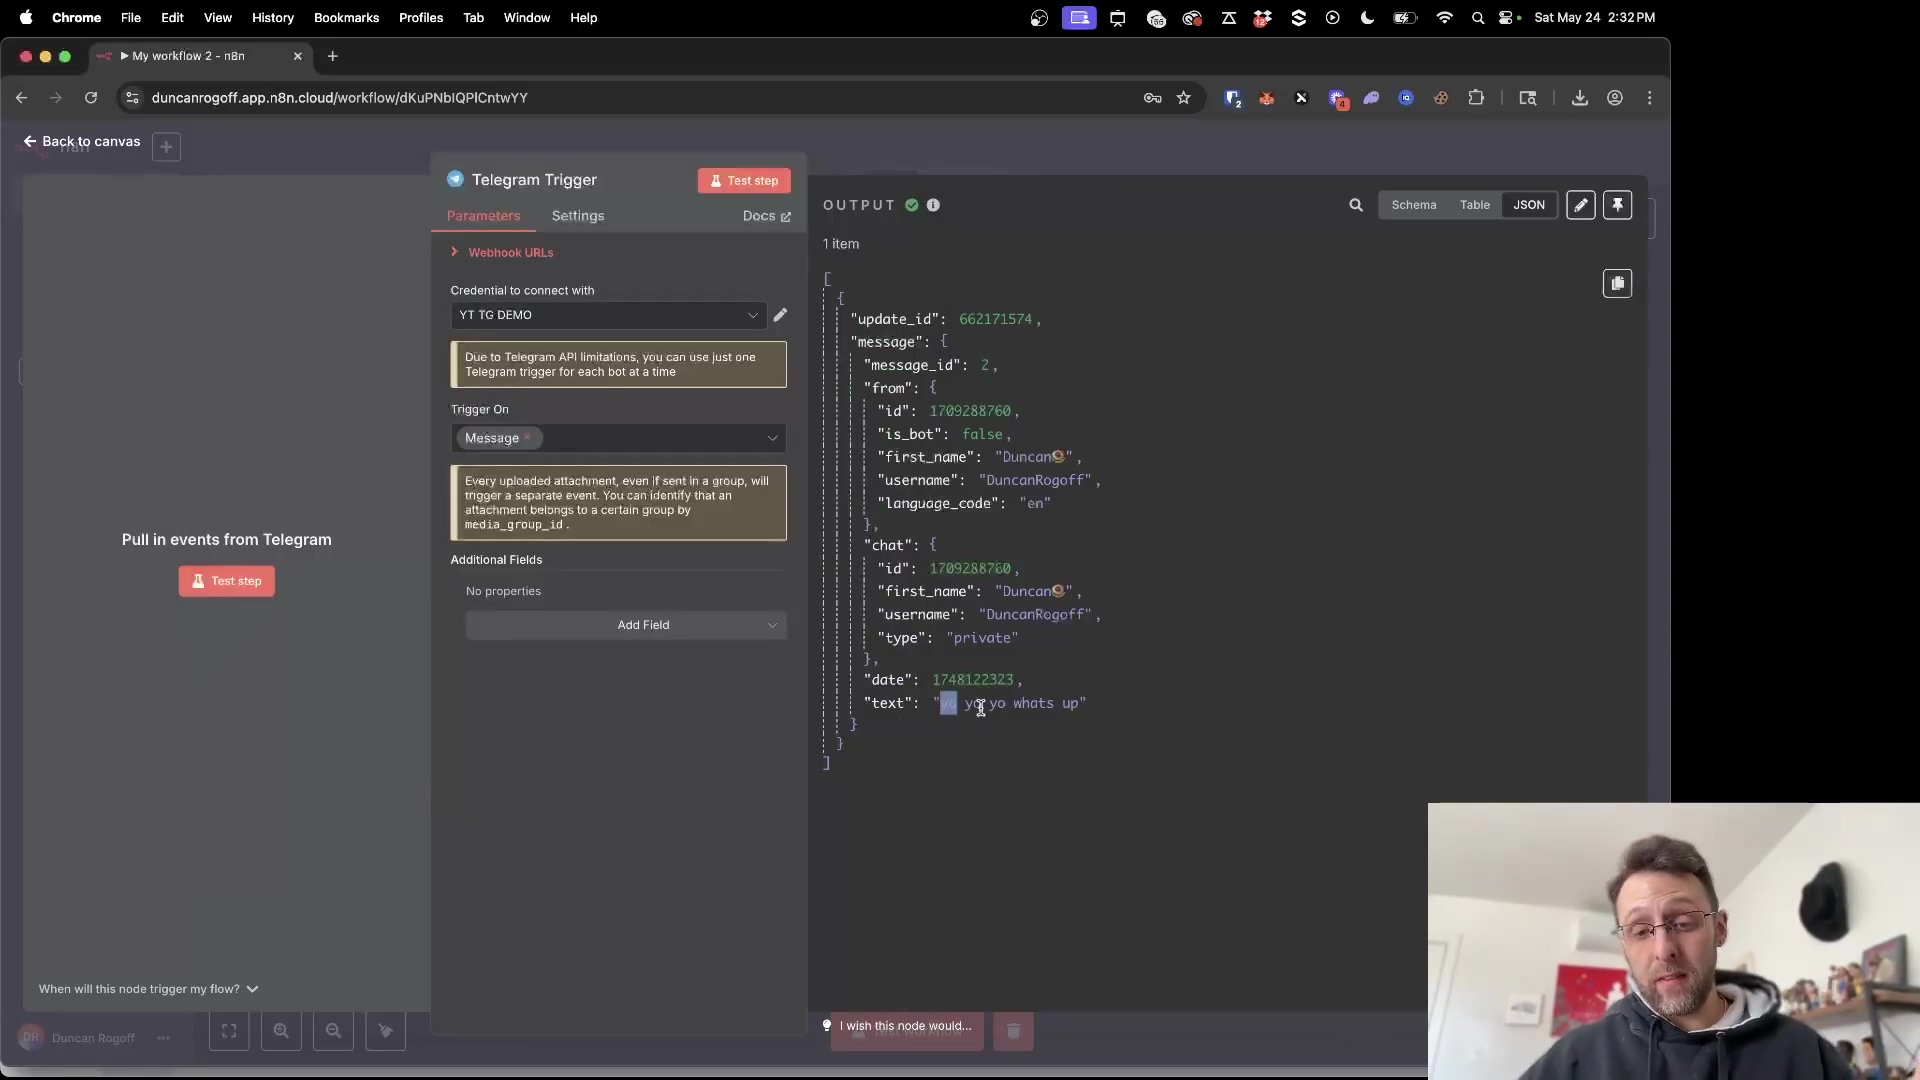
After you’ve executed your HTTP Request node (you can click the ‘Execute Node’ button on the node itself for a quick test), N8N will show you the output. This output will be in a JSON format, and it contains all the data Apify scraped for you. This is your moment of truth! If you see data here, it means your integration is working like a charm.
For example, if you asked Apify to find “roofers in Boston,” you might see five entries, each with details like the business name, address, phone number, and even a “total score.” This confirms that Apify did its job and N8N successfully received the data. Take a moment to bask in the glory of your working automation!
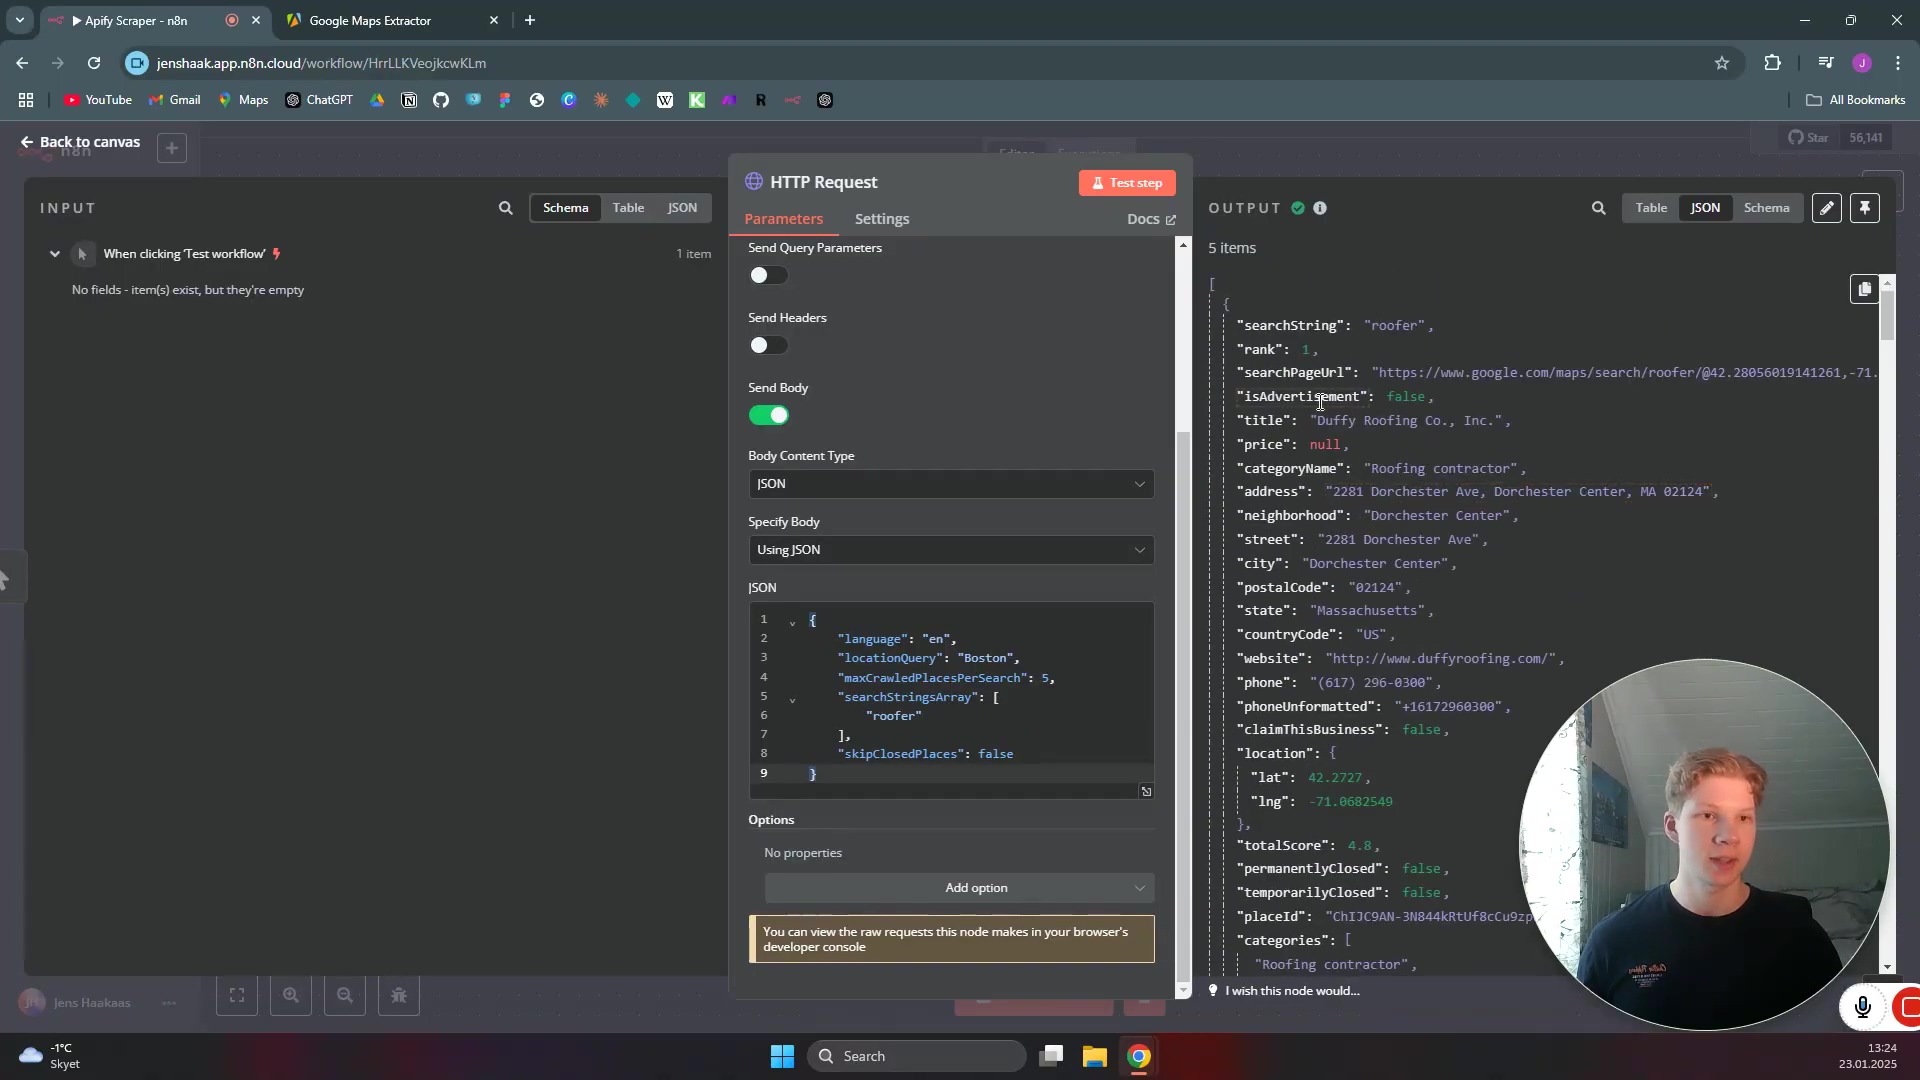
What you should see: In the output panel of your HTTP Request node, you’ll see a JSON structure containing the scraped data. It might look a bit overwhelming at first, but you should be able to identify the key pieces of information you asked Apify to collect.
Splitting Out Data Fields
That big JSON blob is great for computers, but not so much for humans or for sending to a spreadsheet. We need to pick out the specific pieces of information we care about. This is where the Split Out node comes in super handy. It’s like a data surgeon, letting you extract individual fields from that JSON output and turn them into separate, manageable data items. This makes it much easier to work with the data later on.
Add a Split Out node after your HTTP Request node and connect them. This node is a game-changer for cleaning up your data flow.
What you should see: A new Split Out node connected to the HTTP Request node. It will be waiting for you to configure which fields to extract.
Selecting Fields for Extraction
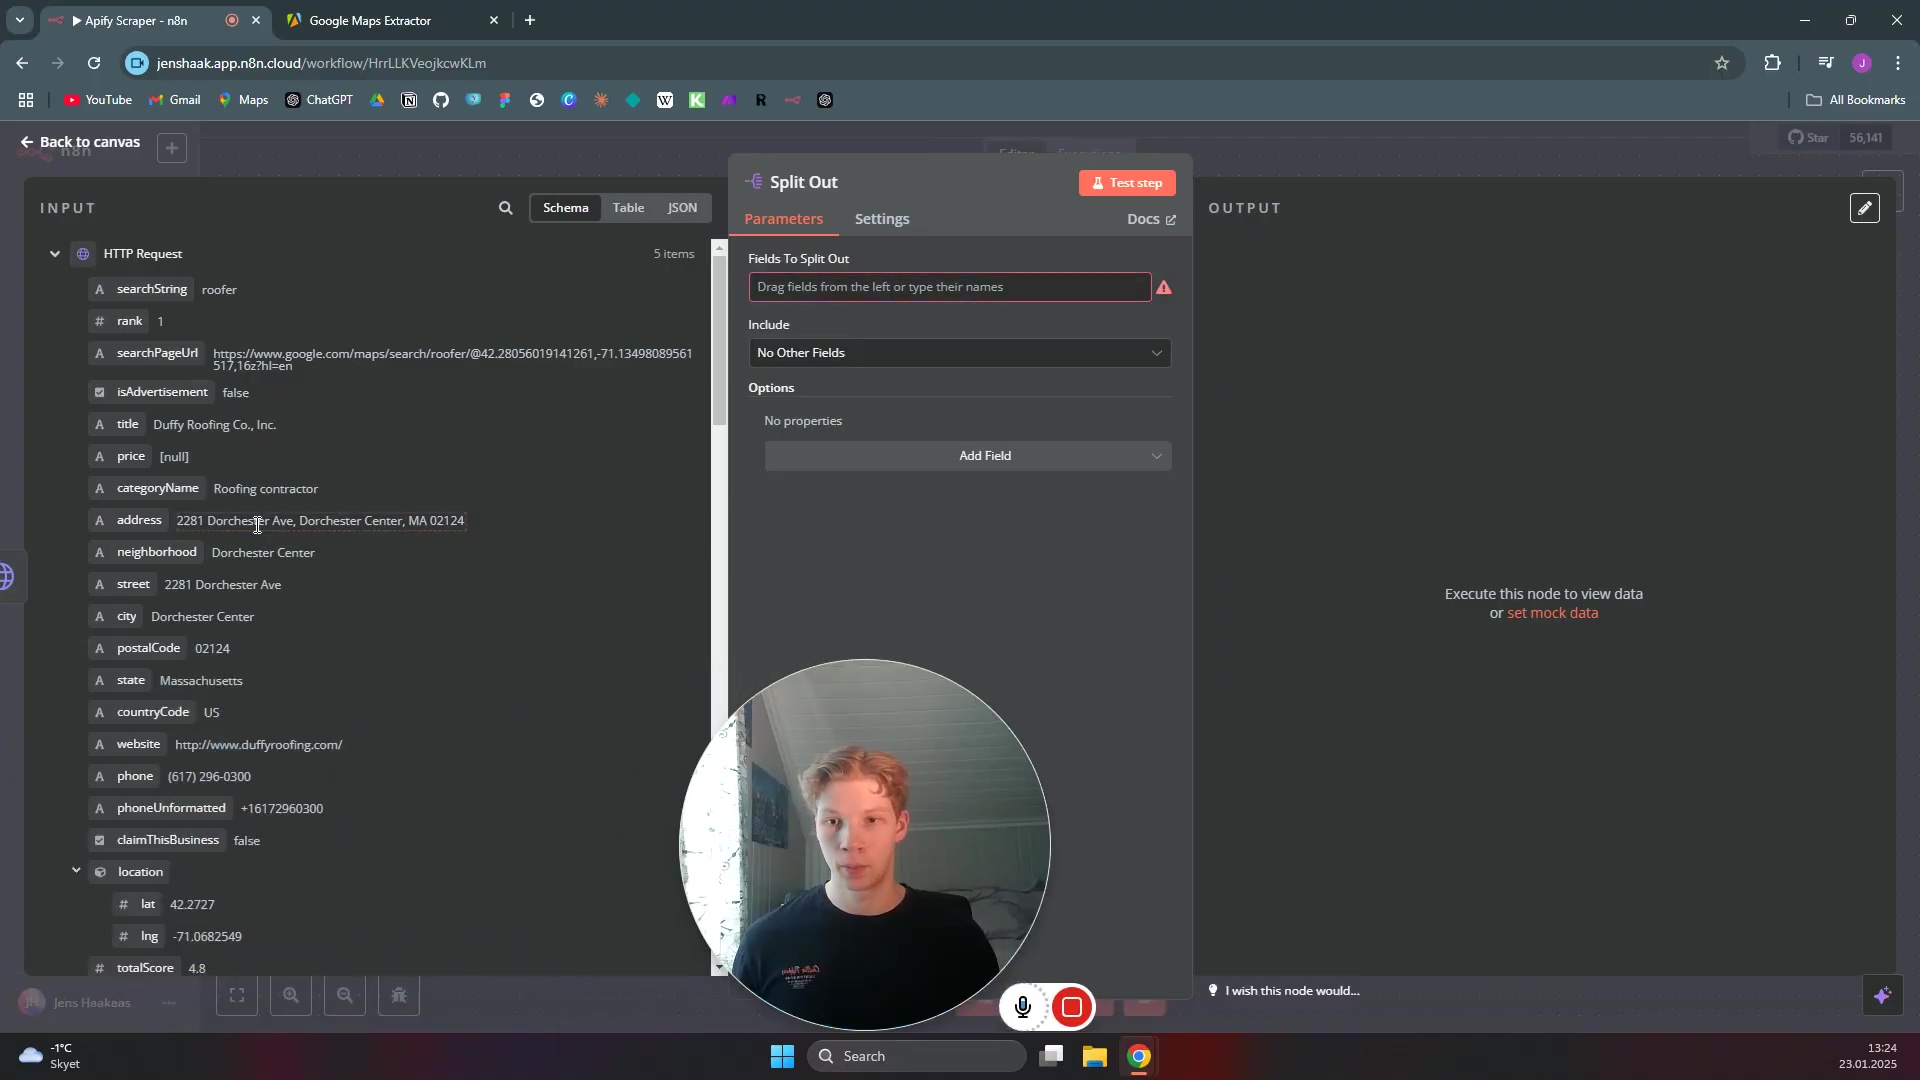
Now, let’s tell the Split Out node exactly what we want to keep. Click on the Split Out node to open its settings. On the left-hand side, you’ll see an input panel showing the structure of the data coming from the HTTP Request node. This is where you can visually pick your data points.
Simply drag the fields you want to extract from that left panel into the ‘Fields To Split Out’ section on the right. For our “roofers in Boston” example, you might want title (for the business name), address, city, website, phoneUnformatted, or totalScore. Just drag and drop! This refines the data to only what you need, making your workflow more efficient.

What you should see: The ‘Fields To Split Out’ section of your Split Out node populated with the specific data fields you dragged over. When you execute this node, the output will be much cleaner, with each selected field as its own item.
Integrating with Google Sheets
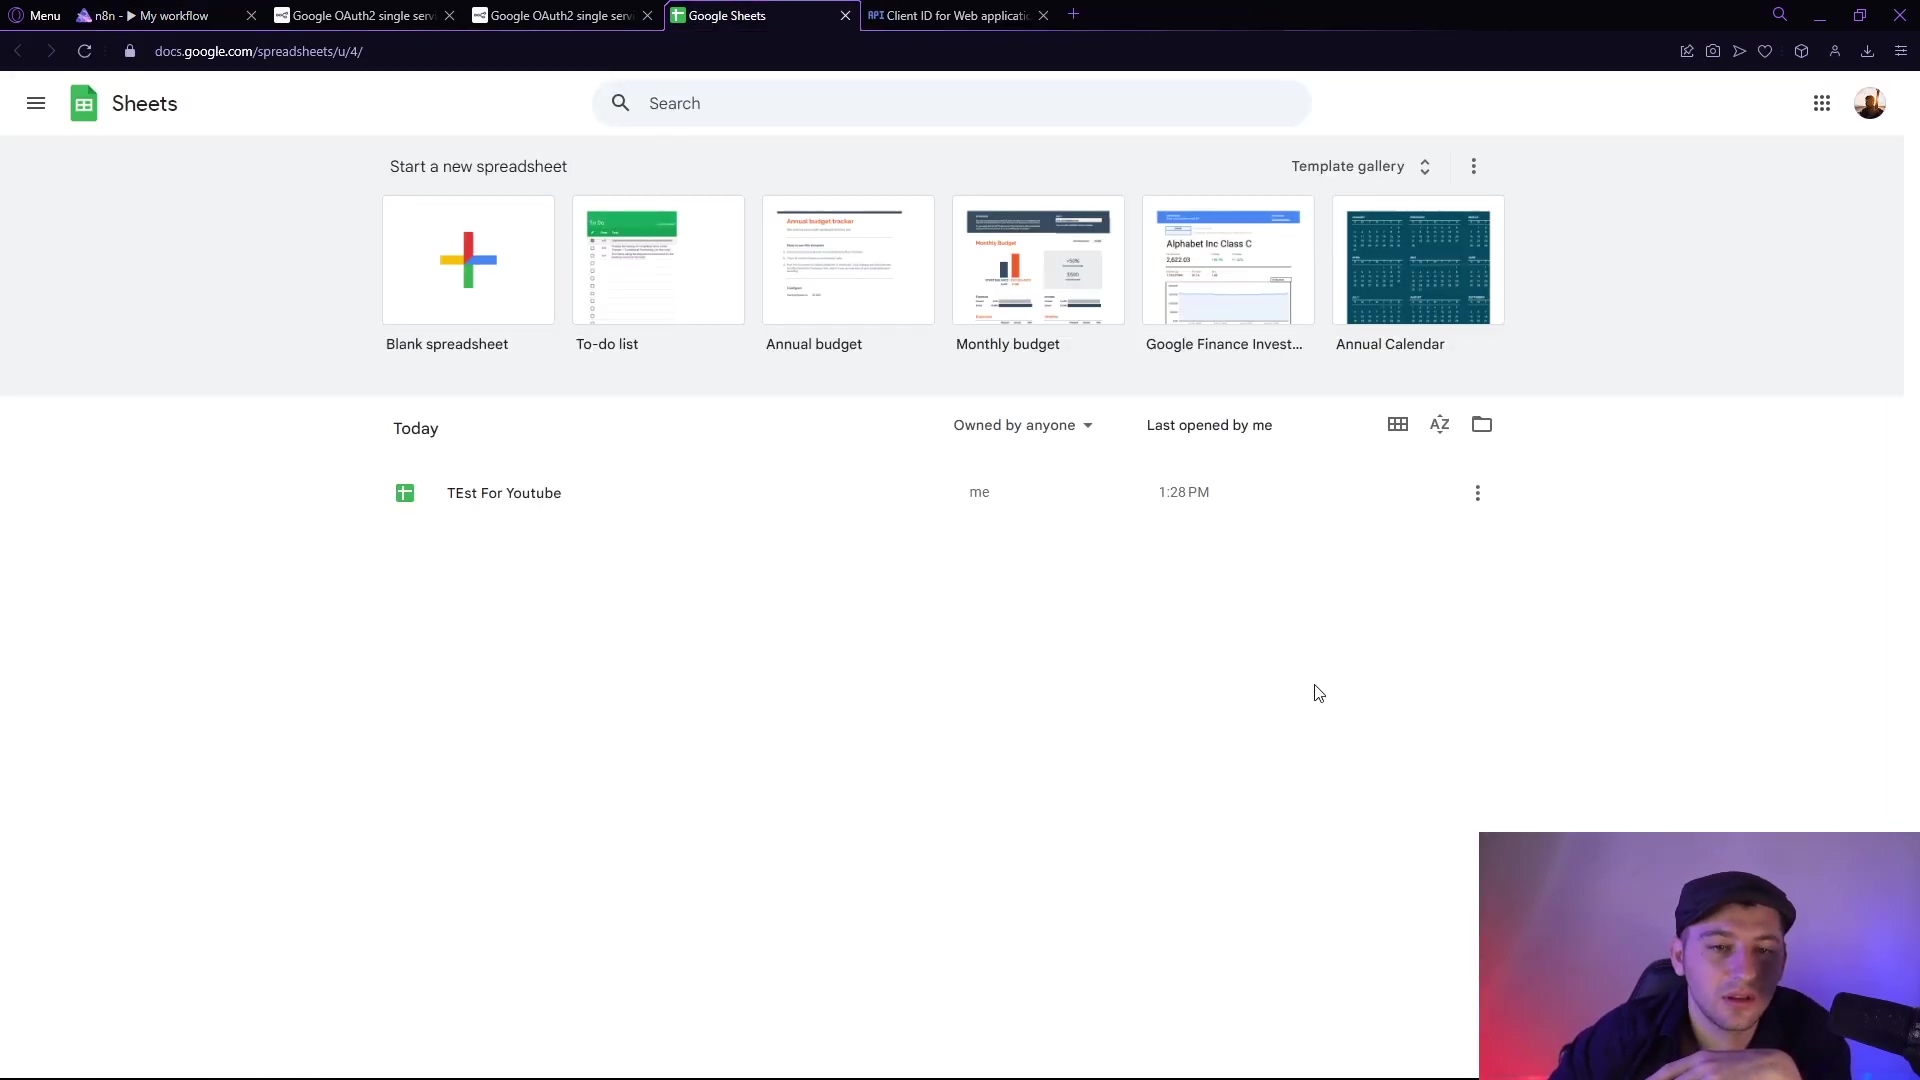
We’re almost at the finish line! You’ve scraped the data, you’ve cleaned it up, and now it’s time to put it somewhere useful. For most people, a Google Sheet is a fantastic, easy-to-use option for structured data. It’s like putting all your perfectly sorted LEGO bricks into their designated bins.
Appending Rows to a Google Sheet
Add a Google Sheets node to your N8N workflow, connecting it after your Split Out node. This node is your bridge to the spreadsheet world. You’ll need to authenticate your Google account with N8N if you haven’t already (N8N will guide you through this, it’s usually just a few clicks to grant permissions).
Once authenticated, configure the Google Sheets node to Append Row. You’ll select the specific Google Sheet and tab (or “sheet” within the file) where you want the data to go. Then, the magic happens: you’ll map the extracted fields from your Split Out node (like ‘Business Name’, ‘Address’, ‘Phone’, ‘Website’) to the corresponding columns in your Google Sheet. N8N makes this super easy with its visual mapping tool.
This final step completes your automation! Every time your workflow runs, the scraped data will be neatly organized and pushed directly into your spreadsheet. How cool is that?
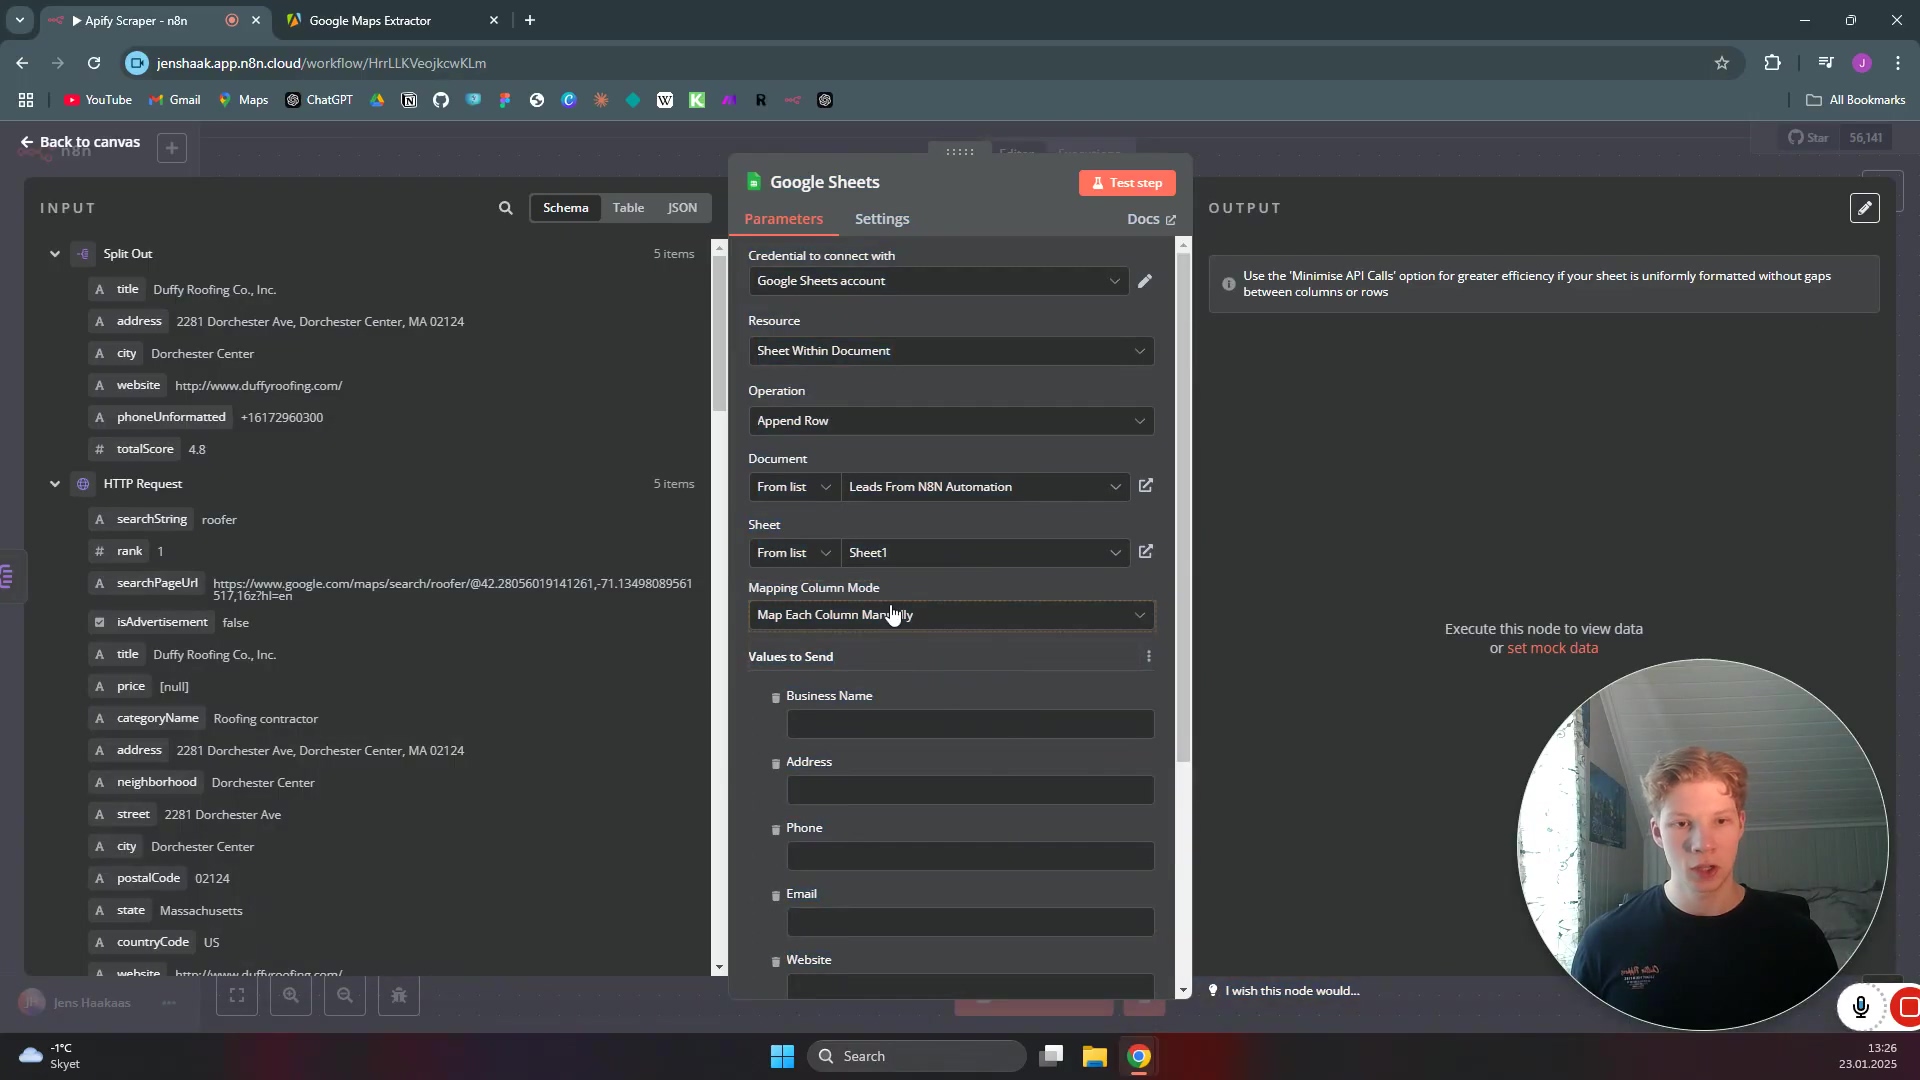
What you should see: Your Google Sheets node configured to Append Row, with your extracted fields mapped to the correct columns in your chosen Google Sheet. Execute the workflow, and then check your Google Sheet – your data should be there!
Key Takeaways / Pro-Tips Summary
Alright, let’s quickly recap the golden nuggets of wisdom from our automation journey. These are the pro-tips I wish I knew when I started:
- Simplified Integration: Remember, we kept it lean and mean! The most effective way to connect Apify and N8N uses just a
Manual Triggerand anHTTP Requestnode for the core data fetching. Then,Split OutandGoogle Sheetsnodes handle the post-processing. Simple, yet powerful! - Pre-baked API Token: Always, always, always try to use Apify’s
Run Actor asynchronously and get dataset itemsendpoint. Why? Because it includes your API token right in the URL, making authentication in N8N a non-issue. It’s a huge time-saver. - JSON for Parameters: When you need to tell your Apify scraper what to do, send those instructions as a JSON object in the
HTTP Requestbody within N8N. It’s the cleanest way to pass parameters. - Data Refinement: Don’t skip the
Split Outnode! It’s your best friend for taking raw Apify output and extracting only the specific data fields you need. This makes your data clean and ready for anything. - Direct Google Sheets Integration: Once your data is refined, seamlessly append it to Google Sheets by mapping those extracted fields to your spreadsheet columns. It’s the perfect way to store your valuable data.
Conclusion
Phew! We made it! Integrating Apify with N8N for automated data scraping doesn’t have to be a complex, hair-pulling endeavor. By leveraging Apify’s smart API endpoints and N8N’s powerful HTTP Request and data transformation nodes, you can set up incredibly efficient and reliable data extraction workflows with remarkable simplicity. Seriously, it’s like building a data-gathering superpower for yourself!
This method offers a robust alternative to more convoluted setups, providing a clear, step-by-step path for anyone looking to automate data collection. It empowers you to gain insights from web data without needing to be a coding wizard, opening up a whole universe of possibilities for your business intelligence and operational efficiency. Imagine all the time you’ll save!
Now, armed with this streamlined approach, go forth and automate! Put these techniques into practice and unlock the full potential of automated data scraping for your projects. And hey, if you hit any snags, remember, we’re all in this automation journey together. Happy scraping!
Frequently Asked Questions (FAQ)
Q: What if my Apify Actor requires more complex inputs than a simple JSON body?
A: While this guide focuses on simple JSON inputs, N8N’s HTTP Request node is super flexible. For more complex scenarios, you might need to use N8N’s Set node to construct the JSON body dynamically, or even use a Code node for highly custom logic. Always refer to the Apify Actor’s documentation for its specific input requirements.
Q: My N8N workflow is running, but no data is appearing in Google Sheets. What should I check?
A: First, check the output of your HTTP Request node in N8N to ensure Apify is returning data. If that looks good, then check the Split Out node to make sure you’ve correctly selected the fields you want to extract. Finally, verify the mapping in your Google Sheets node – ensure the N8N fields are correctly mapped to the Google Sheet columns and that you’ve selected the right spreadsheet and tab. Also, check your Google Sheet’s sharing permissions to ensure N8N has write access.
Q: Can I schedule this N8N workflow to run automatically?
A: Absolutely! While we used a Manual Trigger for testing, N8N has a fantastic Cron node (for time-based schedules) or Webhook node (to trigger from external events). Just replace the Manual Trigger with one of these, configure it, and your workflow will run on its own, like a well-oiled machine!
Q: Is there a limit to how much data Apify can scrape or N8N can process?
A: Both Apify and N8N have their own limits. Apify’s limits depend on your subscription plan (free tier has usage limits). N8N, especially self-hosted, is limited by your server’s resources (CPU, RAM, network). For very large datasets, you might need to consider batch processing or upgrading your N8N instance’s resources. Always monitor your usage on both platforms!
Q: What if the website I’m scraping changes its structure? Will my Apify scraper still work?
A: Ah, the eternal dance of web scraping! If a website changes its HTML structure, your Apify Actor (scraper) might indeed break. This is a common challenge. You’ll need to go back to Apify, update your Actor to adapt to the new website structure, and then re-test your N8N workflow. It’s part of the ongoing maintenance of web scraping projects.