Watch the Video Tutorial
💡 Pro Tip: After watching the video, continue reading below for detailed step-by-step instructions, code examples, and additional tips that will help you implement this successfully.
Table of Contents
Open Table of Contents
- Introduction
- Required Resources and Cost-Benefit Analysis
- Setting Up Google Credentials in n8n
- Critical Safety / Best Practice Tips
- Key Takeaways
- Conclusion
- Frequently Asked Questions (FAQ)
- Q: Why do I need a Google Cloud Project just to connect n8n to Google Drive?
- Q: I’m getting an “Error: redirect_uri_mismatch” message. What did I do wrong?
- Q: Do I need to enable a separate API for every single Google service I use (e.g., Drive, Gmail, Sheets)?
- Q: Is it safe to use my personal Google account for this, or should I create a separate one?
- Q: What if I want to connect to a Google service that isn’t listed in n8n’s nodes?
Introduction
Hey there, fellow automation enthusiast! Boyce here, your friendly neighborhood self-taught automation consultant. Ever felt like you’re juggling too many apps and wish they could just… talk to each other? Especially when it comes to Google services like Google Drive, Gmail, and Google Docs? Well, you’re in luck! Integrating n8n with these Google powerhouses is an absolute game-changer for building super powerful automation workflows.
This guide is all about getting you set up with Google credentials in n8n. Think of it like giving n8n the special keys to your Google kingdom, but in a super secure way. We’re going to make sure that connection is smooth, secure, and ready for action. I’ve been through the trenches with software integrations, and trust me, these techniques are refined to give you the best balance of getting things done efficiently and reliably. Let’s get this party started!
Required Resources and Cost-Benefit Analysis
Before we dive headfirst into the setup, let’s take a quick pit stop. It’s super important to know what you’ll need and why doing this yourself (DIY) with n8n is often a much smarter move than shelling out big bucks for commercial solutions. We’re all about smart automation, right?
Resource Checklist
| Resource Category | Item/Tool | Description | Estimated Cost | Availability | Notes |
|---|---|---|---|---|---|
| Software | n8n Platform | Open-source workflow automation tool. It’s like your personal automation robot builder. | Free (Self-hosted) / Paid (Cloud) | Online | Self-hosting requires a bit of server know-how, but it’s totally doable! |
| Google Cloud Account | This is where we’ll tell Google what n8n is allowed to do. Think of it as the control panel for Google’s APIs. | Free (with usage limits) | Online | You might need to set up a billing account for higher usage, but don’t worry, for most personal projects, the free tier is very generous! | |
| Information | Google Account | This is your Google account, the one you want n8n to connect to. | Free | N/A | This is what we’ll use for authentication and to access your data (like your Drive files or Gmail). |
| OAuth Redirect URI | This is a special address n8n gives you. It tells Google where to send the user back to after they’ve given permission. | Free | n8n UI | This URI is unique to your specific n8n instance. It’s super important for the security handshake! |
Cost-Benefit Comparison: DIY vs. Commercial Solutions
Why go DIY when there are ready-made solutions? Good question! Let’s break it down. Sometimes, building your own LEGO set is more rewarding (and cheaper!) than buying the pre-built one, especially when you want full control.
| Feature/Aspect | DIY Setup (This Guide) | Commercial Integration Service |
|---|---|---|
| Initial Cost | Low (primarily time) | High (service fees, subscription costs) |
| Flexibility | High (full control over APIs and scopes) | Moderate (limited by service provider’s offerings) |
| Setup Time | ~5-15 minutes (after initial learning) | Varies (can be quicker for simple tasks, slower for complex) |
| Maintenance | Self-managed (requires occasional checks for API changes) | Managed by service provider |
| Security Control | High (you manage credentials directly) | Moderate (trust in service provider’s security practices) |
| Scalability | Dependent on your n8n instance and Google Cloud limits | Dependent on service provider’s infrastructure |
See? Going DIY gives you so much more control and flexibility, and it’s often way more cost-effective in the long run. Plus, you learn a ton!
Setting Up Google Credentials in n8n
Alright, buckle up! This is where the magic happens. Connecting n8n to your Google services is like setting up a secure, secret handshake. We’ll be jumping between the Google Cloud Console (Google’s control panel) and your n8n instance. Don’t worry, I’ll guide you every step of the way.
1. Initiate Credential Setup in n8n
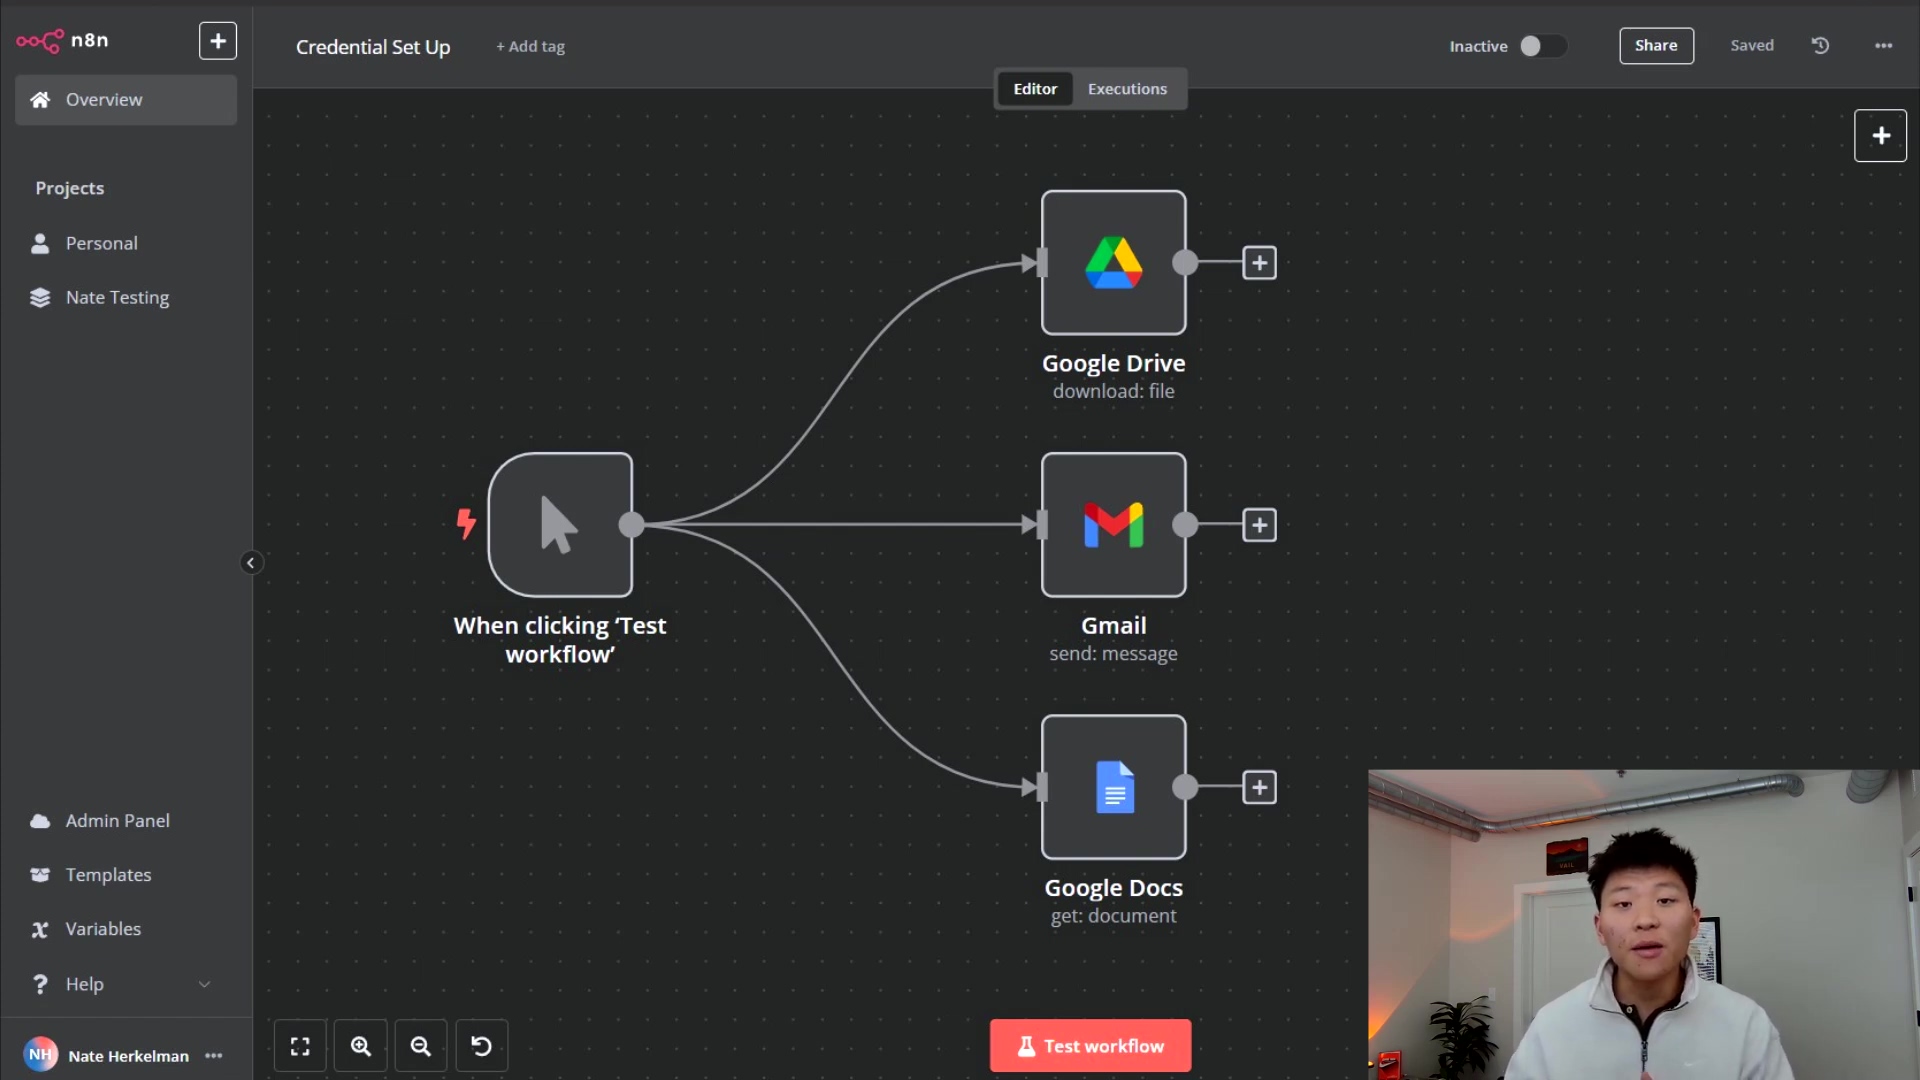
First things first, let’s tell n8n we want to connect to Google. Open up your n8n instance and create a new workflow. Drag and drop any Google service node onto the canvas – like a Google Drive node if you want to play with files, or a Gmail node if you’re automating emails. It doesn’t really matter which one, as the credential setup is the same for all Google services.
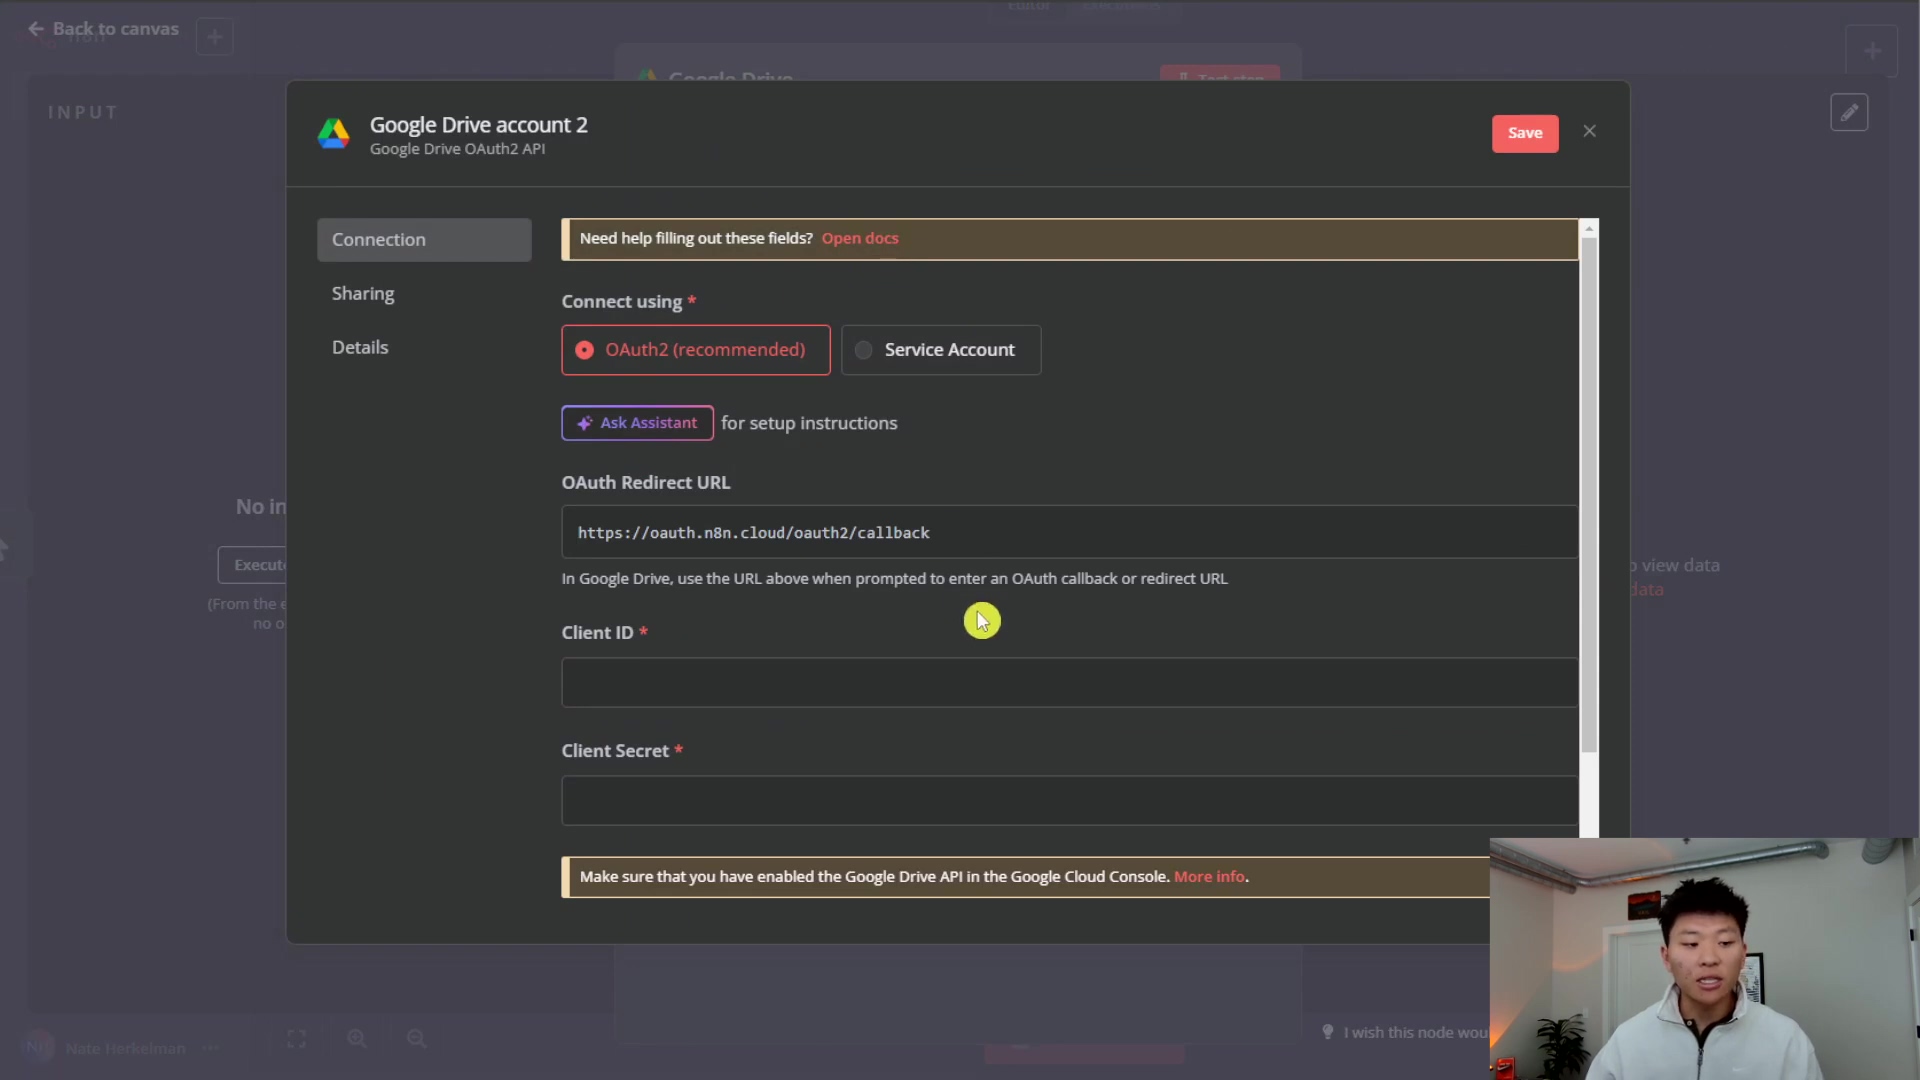
Once you’ve got your node, click on it. You’ll see a section for ‘Credentials’. Click the dropdown and select ‘Create new credential’. A pop-up window will appear, asking for a ‘Client ID’ and ‘Client Secret’. This is n8n’s way of saying, “Hey, I need some special keys from Google to make this work!” This is exactly why we need to head over to the Google Cloud Console next to get those keys.
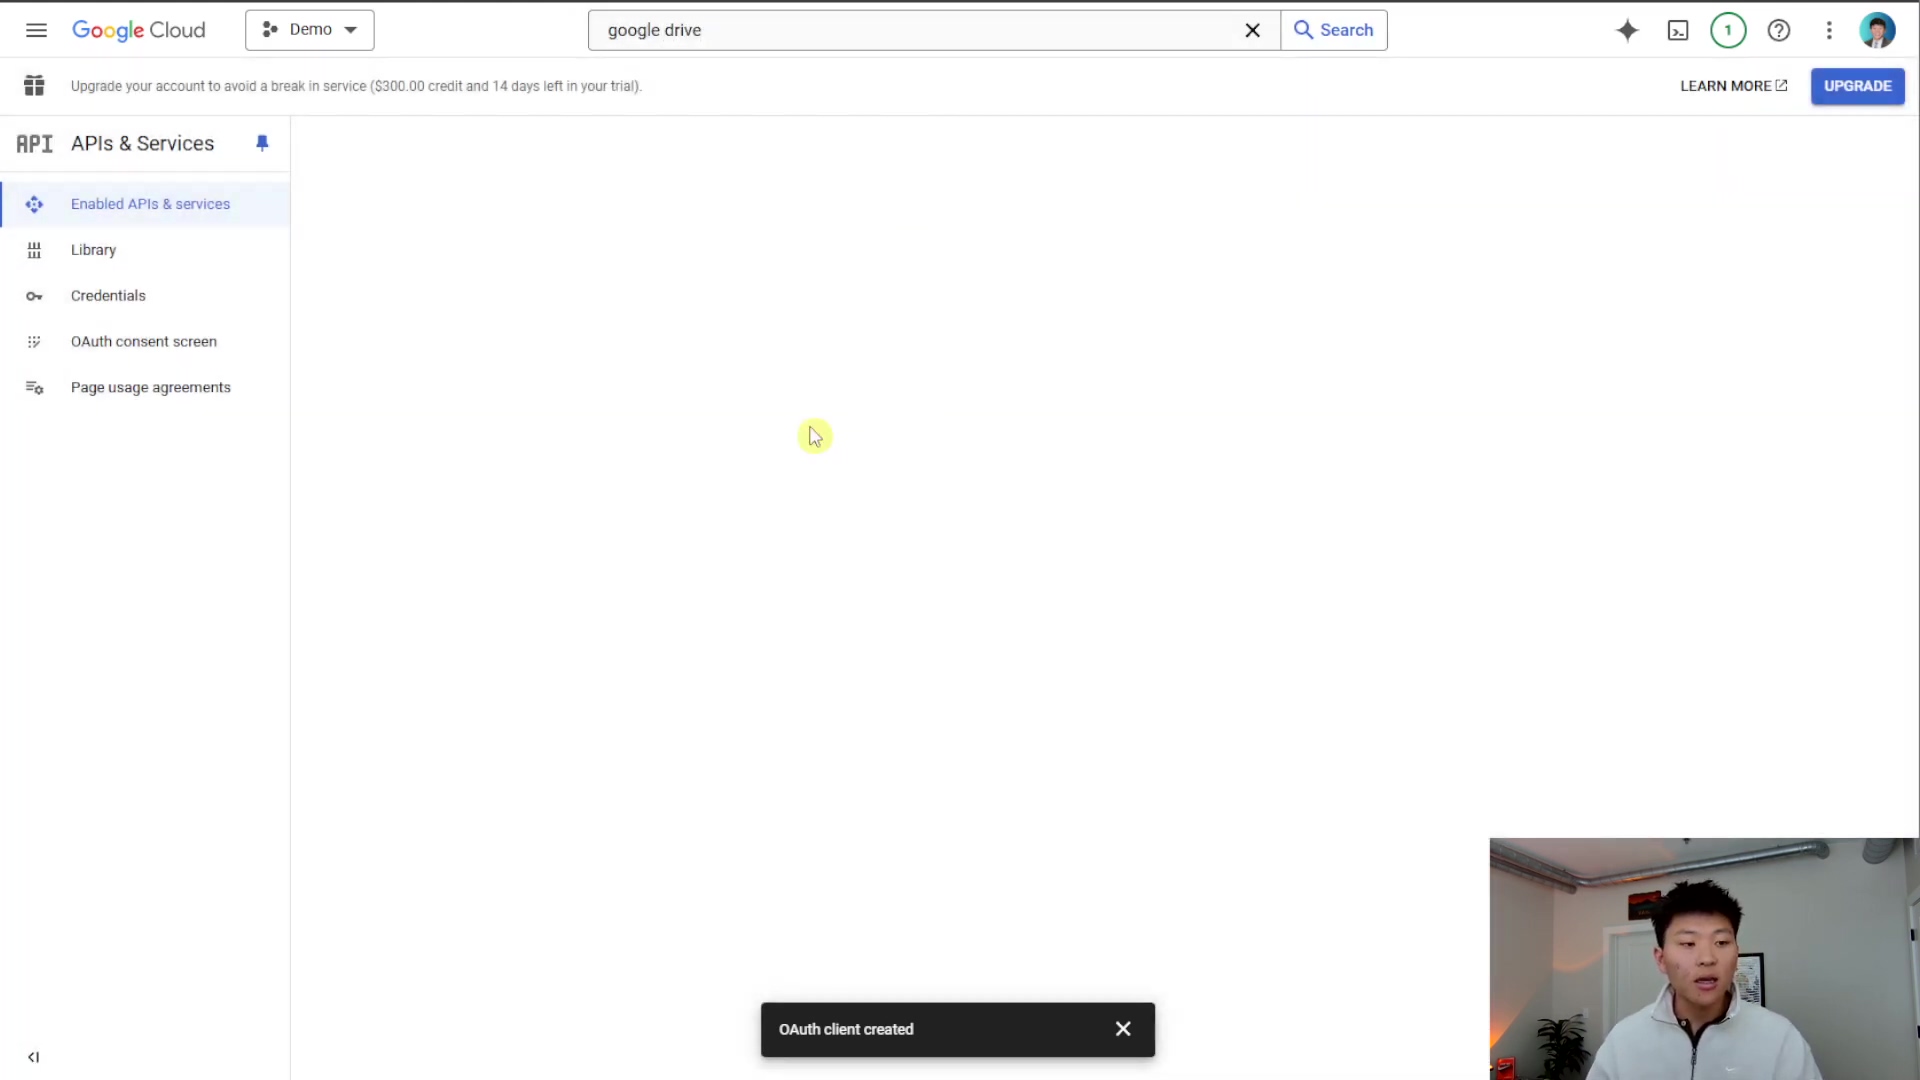
2. Create a Google Cloud Project
Now, open a new tab in your browser and navigate to the Google Cloud Console. If you’ve never been here before, it might look a bit like a spaceship cockpit – lots of buttons! Don’t be intimidated.
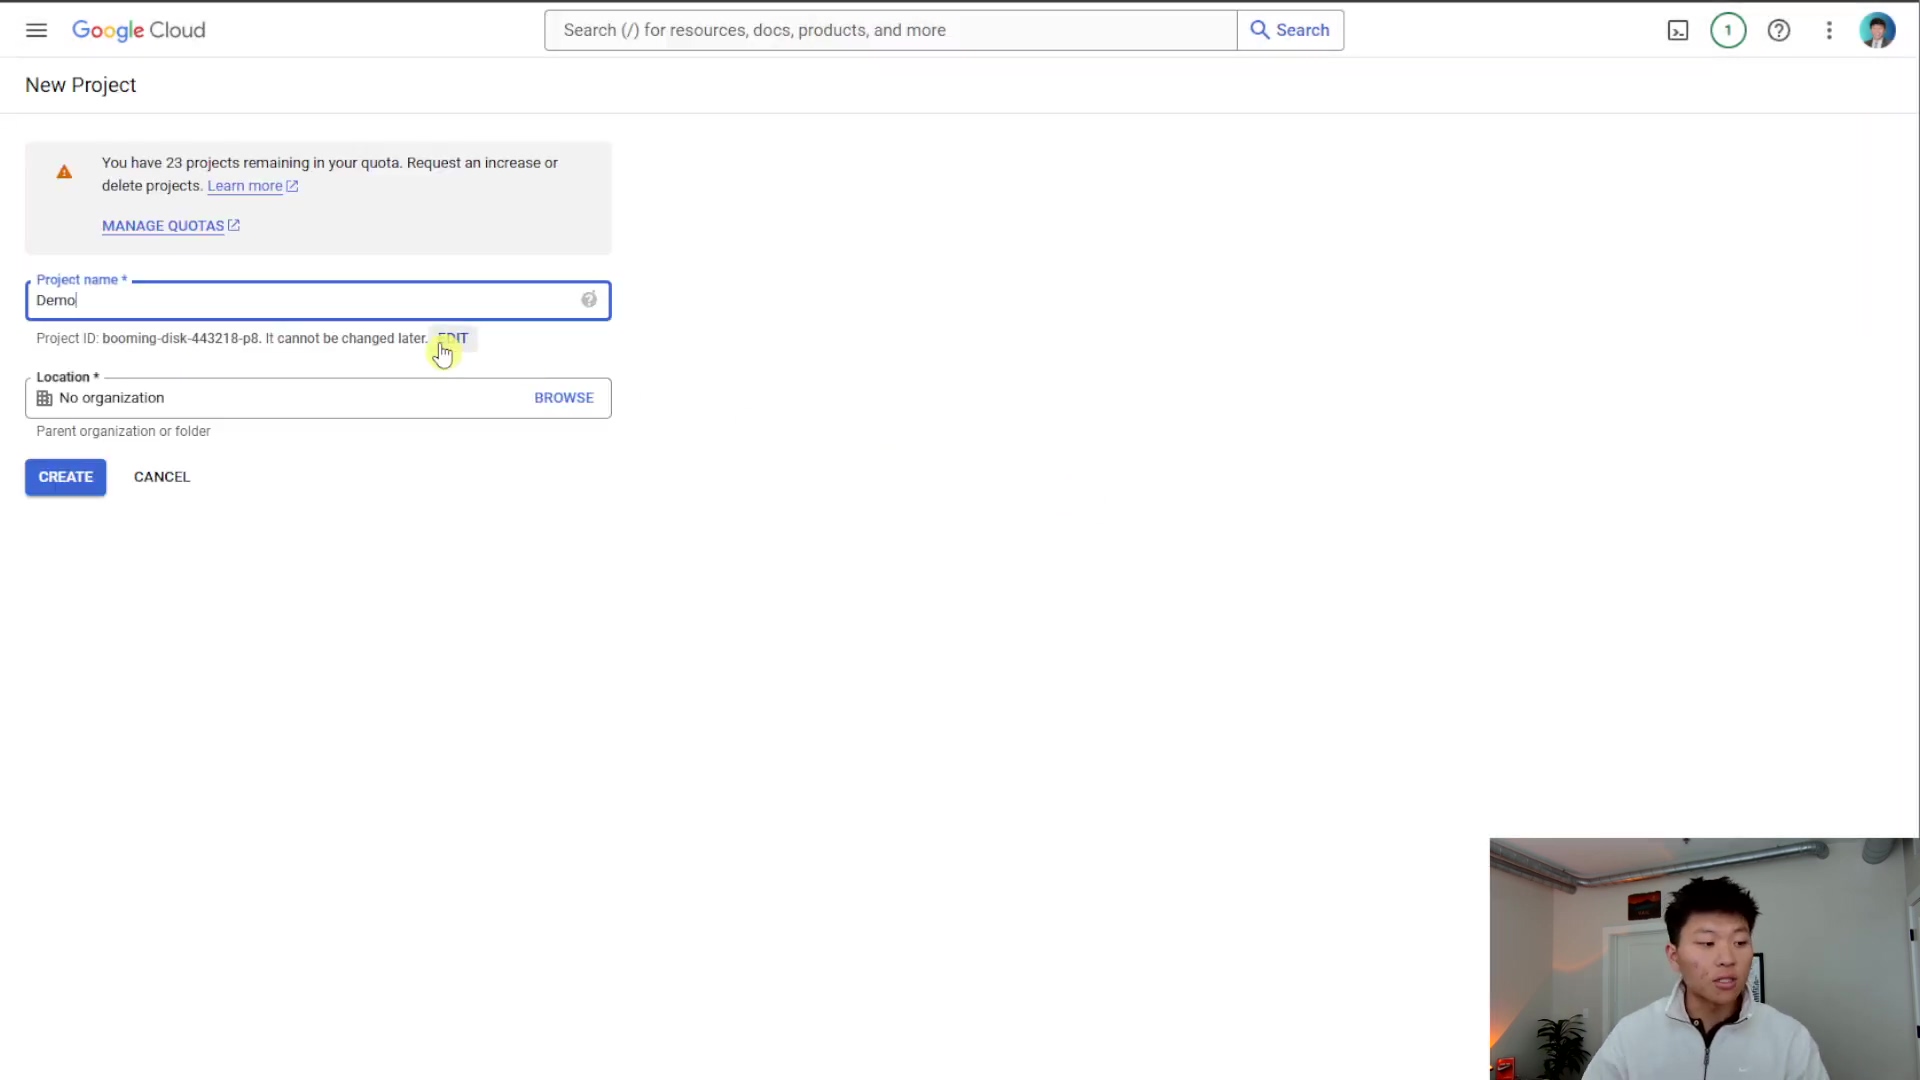
Look for the project selector at the top of the page (it usually shows your current project name or “My First Project”). Click on it, then click ‘New Project’. Give your project a super clear and meaningful name, something like “n8n Automation” or “My N8n Google Integrations”. This project is like a dedicated workspace where all your Google API configurations and credentials will live. Once you’ve named it, hit ‘Create’.
Expected Feedback: After a few moments, you should see a notification that your project has been created. You can then select it from the project dropdown to make sure you’re working within the correct project.
3. Configure OAuth Consent Screen
Okay, this step is crucial. It’s where you tell Google about your “app” (in this case, n8n) and what users will see when they’re asked to grant n8n permission to access their Google account. Think of it as setting up the welcome mat for your integration.
From your Google Cloud project dashboard, use the navigation menu (the three lines, usually on the top left) and go to ‘APIs & Services’ > ‘OAuth consent screen’.
Here’s what you need to do:
- User Type: Select ‘External’. Why external? Because n8n will be used by you, and potentially others outside of a strict internal Google Workspace organization. If your n8n instance is only for users within your specific Google Workspace organization, you could choose ‘Internal’, but ‘External’ is the safe bet for most self-hosted n8n users.
- Click ‘Create’.
- App Information: Fill in the required details:
- App name: Give it a friendly name, like “n8n Automation App” or “My n8n Integrations”. This is what users will see when they’re asked to grant access.
- User support email: Put your email here. If someone (like you!) has a question about the app, this is who they’ll contact.
- Developer contact information: Add your email again. Google uses this to contact you about your project.
- You can skip ‘App logo’ and ‘App domain’ for now if you want to keep it simple. We’re just trying to get this working!
- Click ‘Save and Continue’.
Expected Feedback: You’ll move to the ‘Scopes’ section. For now, you can just click ‘Save and Continue’ again. We’ll enable specific APIs later, which will automatically add the necessary scopes.
![The image displays a Google Cloud console interface for editing app registration, specifically the OAuth consent screen. The main panel shows 'App information' with fields for 'App name' (filled with 'demo') and 'User support email'. There's also a section for 'App logo'. On the right, a 'Learn' panel explains 'How is this info presented to users?' with a visual example of a Google sign-in prompt showing '[App Name] wants access to your Google Account'. A person is visible in the bottom right corner, looking at the screen.](https://imghub.did.fm/dfe4cf91a8ae9cca324df7c3d6404e83.jpg)
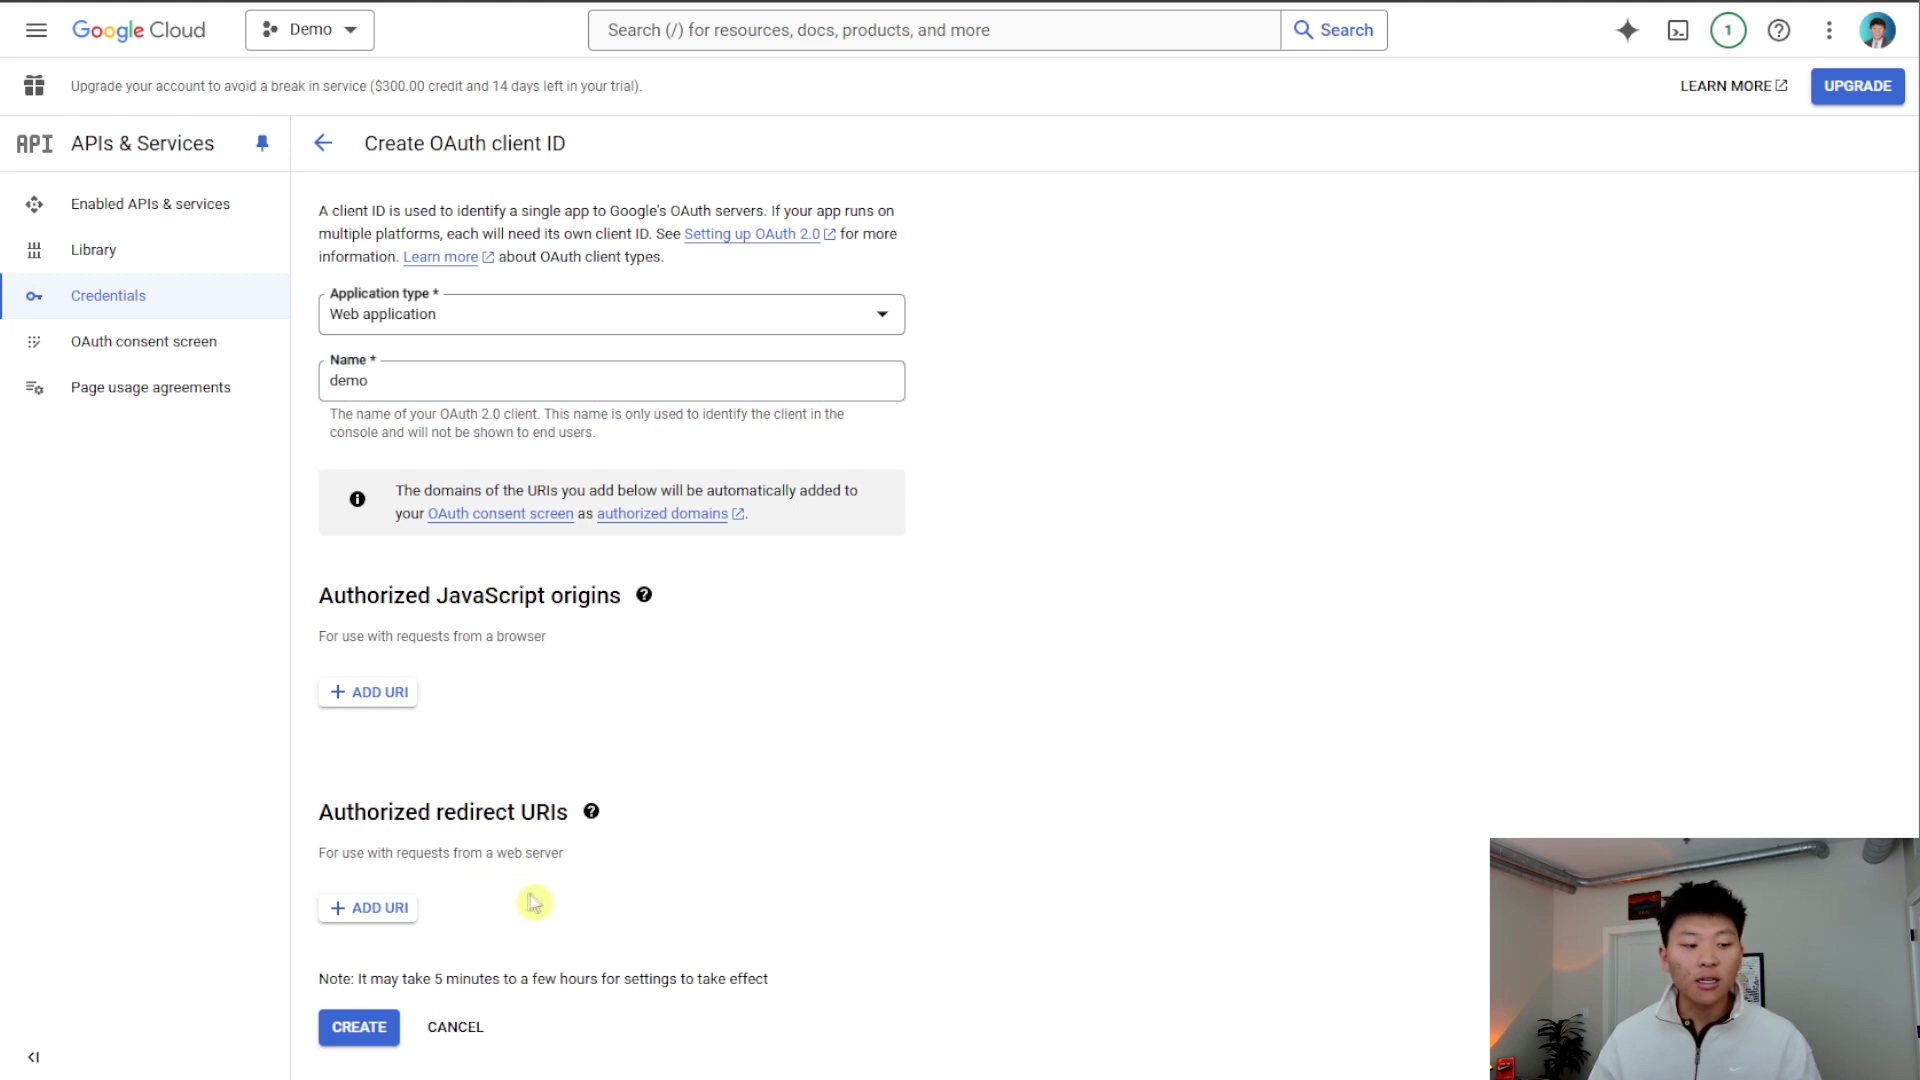
4. Create OAuth Client ID
Now for the real keys! This is where we generate the ‘Client ID’ and ‘Client Secret’ that n8n is asking for. These are like the username and password for your n8n app to talk to Google.
From the Google Cloud Console, go to ‘APIs & Services’ > ‘Credentials’.
- Click ‘Create Credentials’ at the top and select ‘OAuth client ID’.
- Application type: Choose ‘Web application’. Even though n8n is a server-side application, for OAuth purposes, it acts like a web application in this context because it uses a redirect URI.
- Name: Give it a descriptive name, like “n8n Web Client”.
- Authorized redirect URIs: This is the most critical part! Remember that pop-up in n8n where it asked for Client ID and Client Secret? It also showed you a ‘Redirect URL’ or ‘OAuth Redirect URI’. Go back to your n8n tab, copy that exact URL, and paste it here. It will look something like
https://your-n8n-url.com/rest/oauth2-credential/callbackorhttp://localhost:5678/rest/oauth2-credential/callbackif you’re running it locally. Make sure it’s exact! A single typo here will break the whole authentication process. - Click ‘Create’.
Expected Feedback: A pop-up will appear showing your ‘Client ID’ and ‘Client Secret’. Copy these immediately! You won’t see the Client Secret again after you close this window, so save it somewhere safe for a moment (like a temporary notepad, but don’t save it permanently in an insecure place!).
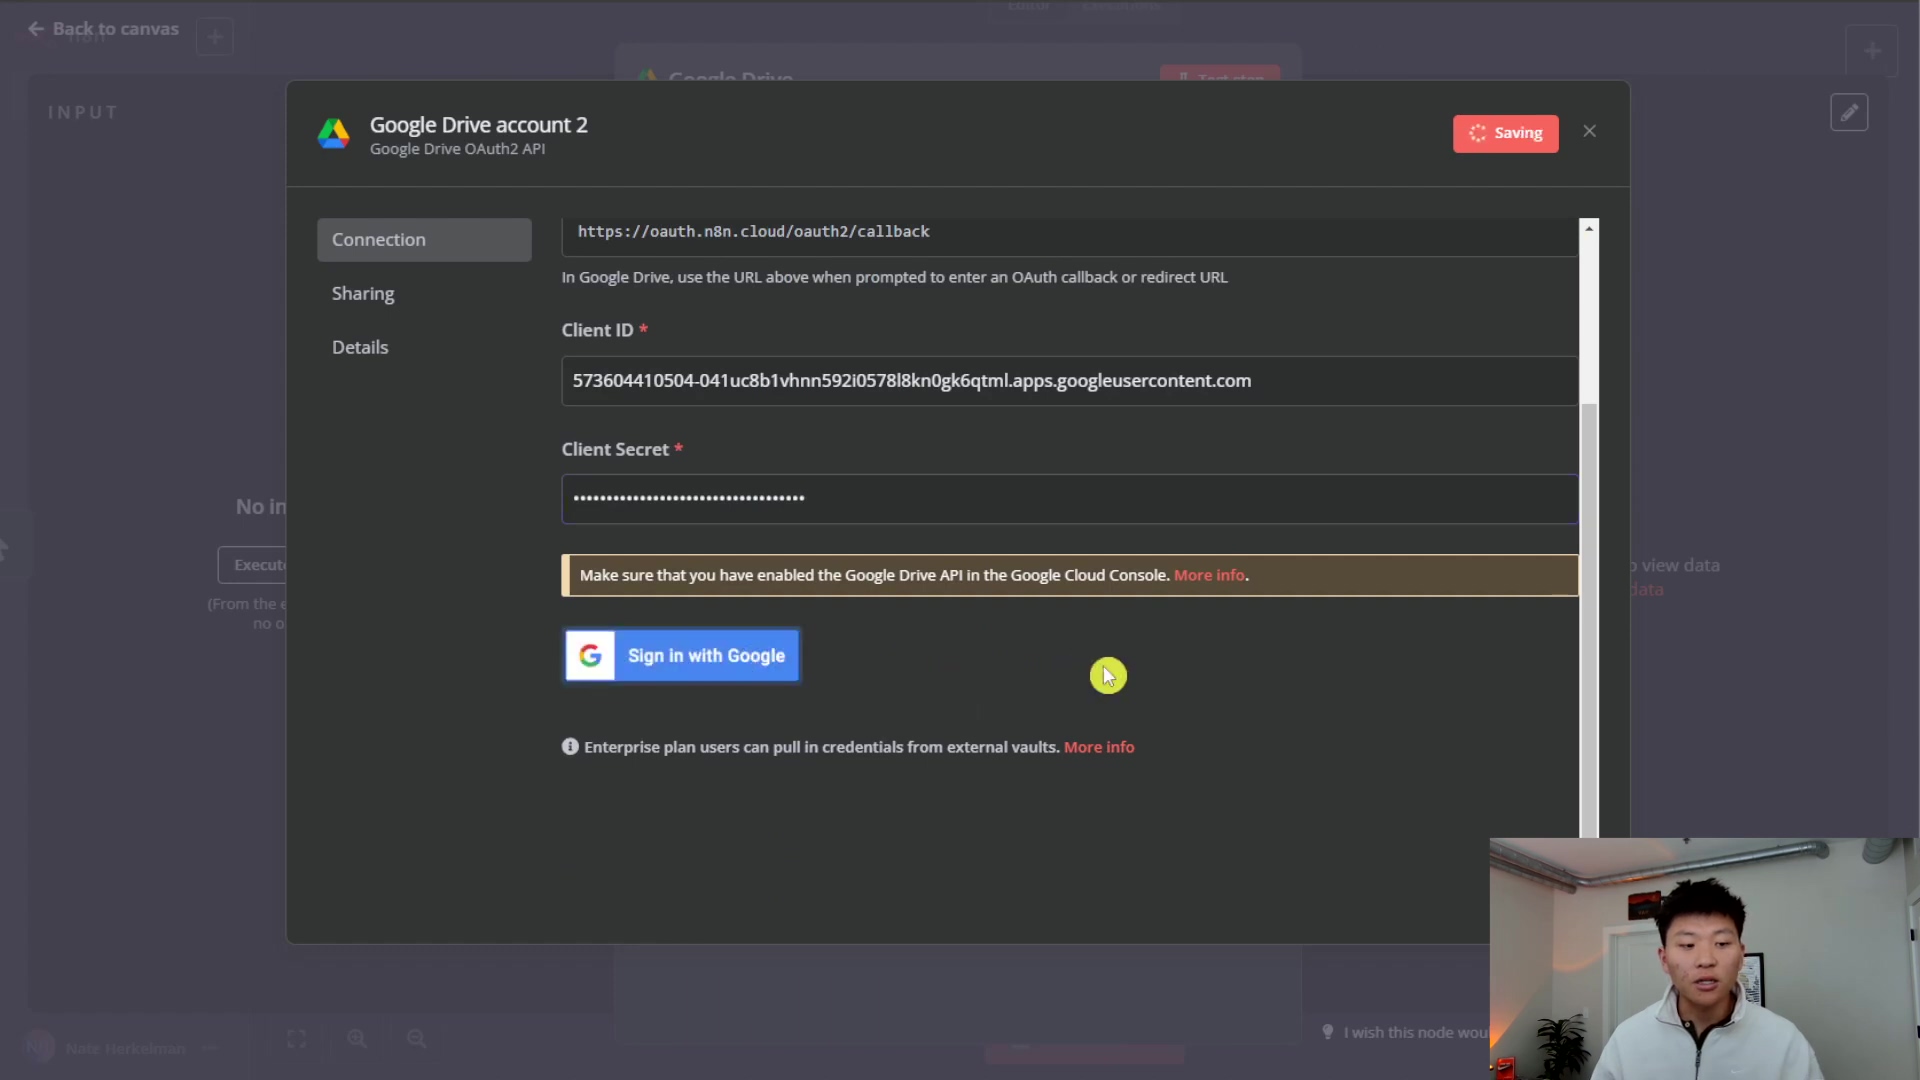
5. Input Client ID and Secret into n8n
Alright, we’ve got the keys! Now let’s give them to n8n.
Go back to your n8n tab, to that ‘Create new credential’ pop-up we left open.
- Paste the ‘Client ID’ you just copied from Google Cloud into the ‘Client ID’ field in n8n.
- Paste the ‘Client Secret’ into the ‘Client Secret’ field in n8n.
- Once both are in, click ‘Sign in with Google’ within n8n.
Expected Feedback: This is the moment of truth! A new browser tab or window should open, taking you to Google’s authentication page. You’ll be prompted to:
- Select the Google account you want to connect.
- Review the permissions n8n is requesting (e.g., “View and manage your Google Drive files”).
- Click ‘Allow’ or ‘Continue’ to grant those permissions.
After you grant permission, the window should close automatically, and your n8n credential setup modal should show a success message or simply close, indicating the credential has been saved. You’ve nailed it!
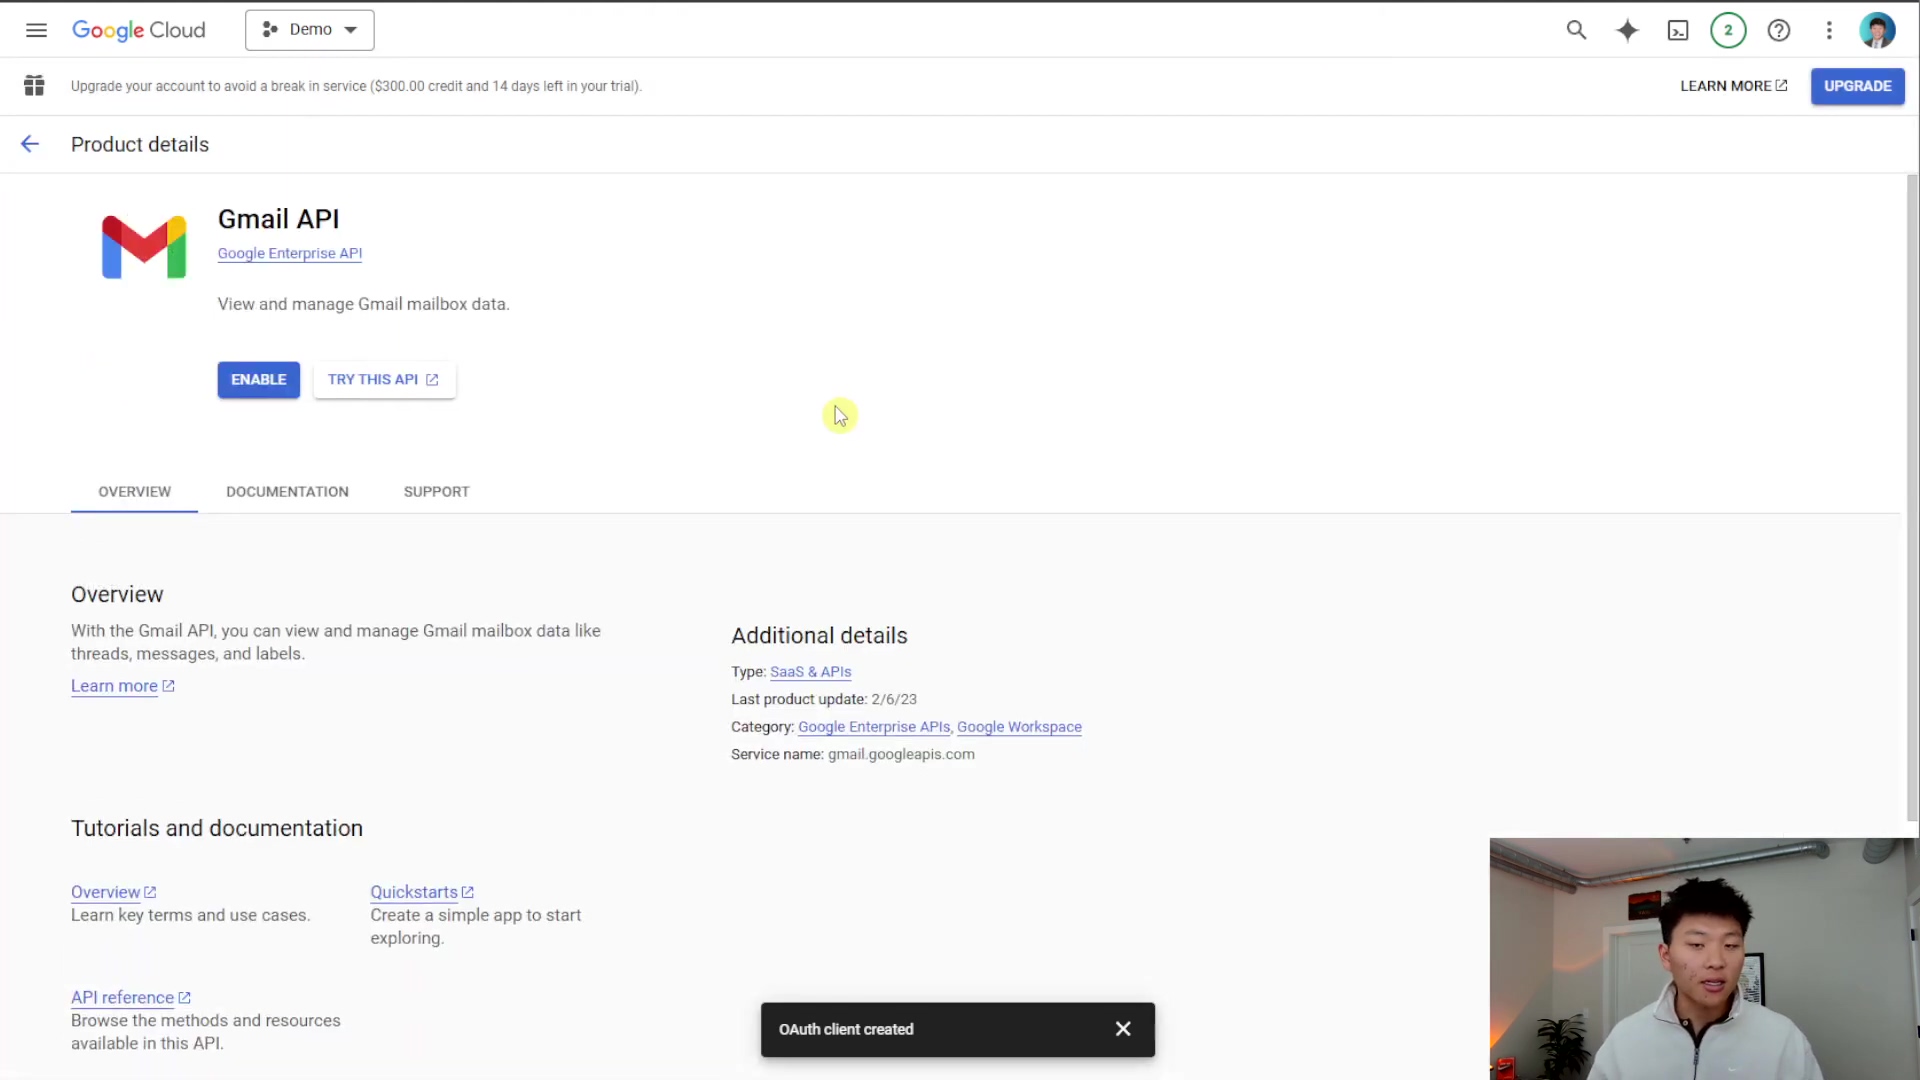
6. Enable Required Google APIs
We’re almost there! Think of it this way: you’ve given n8n the keys to the Google building, but you haven’t told Google which rooms n8n is allowed to enter yet. This is where enabling specific APIs comes in.
Even with credentials set up, n8n won’t be able to interact with Google services like Drive or Gmail until you explicitly enable their corresponding APIs in your Google Cloud project.
Go back to the Google Cloud Console. From the navigation menu, go to ‘APIs & Services’ > ‘Library’. This is like Google’s app store for developers.
- In the search bar, type the name of the Google service you want to use. For example:
- ‘Google Drive API’ for Google Drive
- ‘Gmail API’ for Gmail
- ‘Google Docs API’ for Google Docs
- ‘Google Sheets API’ for Google Sheets
- Click on the API you need from the search results.
- On the API’s page, click the ‘Enable’ button.
- Repeat this step for every single Google service you intend to use with n8n. If you want to use Drive and Gmail, you need to enable both the Google Drive API and the Gmail API.
Expected Feedback: After clicking ‘Enable’, you’ll see a spinner for a few seconds, then the button will change to ‘Manage’, indicating the API is now active for your project. You can now go back to n8n and use your newly configured Google credential with the specific nodes for the APIs you’ve enabled!
Critical Safety / Best Practice Tips
⚠️ Security Best Practices:
- Least Privilege Principle: This is a fancy way of saying: only give n8n (or any app) the minimum permissions it needs to do its job. For example, if you only need to read files from Google Drive, don’t give it permission to delete them. In Google Cloud, this means only enabling the specific Google APIs that your n8n workflows absolutely require. Avoid enabling all APIs by default – it’s like leaving all your doors unlocked! This minimizes potential security risks.
- Secure Credentials: Never, ever, ever hardcode your Client ID or Client Secret directly into your n8n workflows or share them publicly (like in a GitHub repo!). n8n’s credential management system is designed to handle these securely, storing them encrypted. Trust the system!
- Regular Review: Think of your Google Cloud project settings like your car’s oil change. Periodically review your Google Cloud project’s enabled APIs and OAuth consent screen settings. Make sure they still align with your current needs and security policies. If you stop using a certain Google service with n8n, consider disabling its API.
Key Takeaways
Let’s quickly recap the most important bits, shall we? These are the golden rules for setting up Google credentials with n8n:
- Prerequisites First: Always start by setting up a Google Cloud project and configuring the OAuth consent screen before you even think about generating credentials. It’s like building the foundation before the house.
- Redirect URI is Key: That OAuth Redirect URI from n8n? It’s not just a random URL. It’s absolutely critical for the successful authentication handshake between n8n and Google Cloud. Double-check it!
- Enable Specific APIs: This is a common gotcha! For each Google service you use (Drive, Gmail, Docs, Sheets, etc.), you must explicitly enable its corresponding API in the Google Cloud Console. Just having the credentials isn’t enough.
- One-Time Setup: The initial setup of the OAuth consent screen and client ID is definitely the most involved part. But here’s the good news: once that’s done, connecting additional Google services afterward is significantly simpler. You just enable the API and use the existing credential. Sweet!
Conclusion
Whew! We made it! Setting up Google credentials in n8n might have seemed a bit like rocket science at first, but by following these structured, step-by-step instructions, you’ve established a robust connection in minutes. You’ve basically given your n8n workflows superpowers to interact seamlessly with Google’s vast ecosystem, automating tasks that were once manual and time-consuming. How cool is that?
While this guide focused on a direct DIY approach, remember that it offers unparalleled flexibility and control over your integrations. That’s why I love it – it’s ideal for users who prioritize customization and security.
Now that you’re equipped with this knowledge, go forth and automate! Take the next step and implement these integrations to unlock new levels of automation efficiency. And hey, if you discover any advanced tips or have a cool workflow you built, share your experiences in the comments below! We’re all learning here.
Frequently Asked Questions (FAQ)
Q: Why do I need a Google Cloud Project just to connect n8n to Google Drive?
A: Think of the Google Cloud Project as your central command center within Google’s ecosystem. It’s where you manage all the permissions, credentials, and API access for any application (like n8n) that wants to interact with Google services. It provides a secure and organized way for Google to know who is requesting access and what they are allowed to do. Without it, Google wouldn’t know which ‘app’ (n8n) is trying to connect to your Drive.
Q: I’m getting an “Error: redirect_uri_mismatch” message. What did I do wrong?
A: Ah, the dreaded redirect_uri_mismatch! This is one of the most common errors, and it almost always means there’s a typo or an exact mismatch between the ‘Authorized redirect URI’ you entered in the Google Cloud Console (Step 4) and the one n8n provided. Go back to n8n’s credential setup modal, copy the redirect URI exactly, and then paste it into the Google Cloud Console. Even a missing slash or an extra space can cause this error. Double-check, triple-check!
Q: Do I need to enable a separate API for every single Google service I use (e.g., Drive, Gmail, Sheets)?
A: Yes, absolutely! This is a crucial point. Google’s APIs are modular, meaning each service (Drive, Gmail, Sheets, Calendar, etc.) has its own dedicated API. Even if you’ve set up the credentials correctly, n8n won’t be able to talk to a specific Google service until you’ve explicitly enabled its corresponding API in the Google Cloud Console’s ‘API Library’ (Step 6). It’s like having a key to the building, but not to the specific office you want to enter.
Q: Is it safe to use my personal Google account for this, or should I create a separate one?
A: For personal projects and testing, using your personal Google account is generally fine, especially if you’re the only one using the n8n instance. However, for production environments, shared n8n instances, or if you’re dealing with sensitive data, it’s a best practice to create a dedicated Google account specifically for automation purposes. This helps with security, auditing, and managing permissions more granularly, adhering to the principle of least privilege.
Q: What if I want to connect to a Google service that isn’t listed in n8n’s nodes?
A: That’s a great question! If n8n doesn’t have a dedicated node for a specific Google service, you might still be able to interact with it using n8n’s HTTP Request node. Most Google services have a REST API that you can call directly. You’d still use the same Google Cloud credentials we set up, but you’d craft the API requests manually. It’s a bit more advanced, but totally doable for custom integrations!