Watch the Video Tutorial
💡 Pro Tip: After watching the video, continue reading below for detailed step-by-step instructions, code examples, and additional tips that will help you implement this successfully.
Alright, fellow automation enthusiasts! Boyce here, your friendly neighborhood self-taught automation consultant. Today, we’re diving into something super cool and incredibly useful: learning how to import JSON to n8n. Trust me, this is a game-changer, like getting a warp drive for your automation spaceship
Table of Contents
Open Table of Contents
- TL;DR
- Quick Action Card: Import JSON into n8n
- Understanding JSON for Workflow Automation
- Why Direct JSON Import in n8n is a Game-Changer
- Preparing Your JSON Data for n8n
- Step-by-Step Guide: Importing JSON into Your n8n Workflow
- Testing and Validating Your JSON Import in n8n
- Advanced JSON Handling Techniques in n8n
- Troubleshooting Common JSON Import Issues
- Maximizing Your n8n Workflows with JSON: Tips and Best Practices
- Frequently Asked Questions (FAQ)
- Q: Can I import only a part of a JSON workflow, like a single node?
- Q: What if my JSON file is too large for direct pasting?
- Q: Do I need to be a coder to understand JSON for n8n?
- Q: My imported workflow has red nodes. What does that mean?
- Q: Can I export an n8n workflow as JSON?
- Q: How can I ensure the JSON I’m importing is secure?
- Q: After importing, my workflow doesn’t run. What should I check?
- Final Summary
TL;DR
- Paste JSON directly: Open up your n8n instance, create a brand-new workflow (think of it as a fresh canvas for your automation masterpiece!), and then just paste your copied JSON data anywhere on that canvas. Boom! The workflow structure magically appears.
- Configure credentials: See those little red indicators on some nodes (like for WhatsApp or Instagram)? Those are like warning lights on your dashboard. They mean you need to update their credential fields with your specific API keys or tokens. Don’t skip this part, or your automation won’t fly!
- Verify workflow execution: Once you’ve sorted out those credentials, it’s time for a test flight! Run the workflow to confirm everything flows smoothly, and that you’re getting the outputs you expect. Make sure all nodes execute successfully without any grumpy errors.
- Troubleshoot errors: If those red error markers are still hanging around, don’t panic! First, double-check your credentials – typos happen to the best of us. Then, peek at your API permissions and make sure your JSON structure is valid. We’ll cover all this in detail, so you’ll be a debugging pro in no time.
Quick Action Card: Import JSON into n8n
Think of this as your mission briefing – quick, clear, and to the point!
Goal
Our mission, should we choose to accept it, is to rapidly import a pre-structured JSON workflow into n8n so we can use it right now.
Steps
- Copy the JSON: First things first, get your hands on the entire JSON workflow code from wherever it lives. This could be from a template, a shared file, or an exported workflow. Just copy it all!
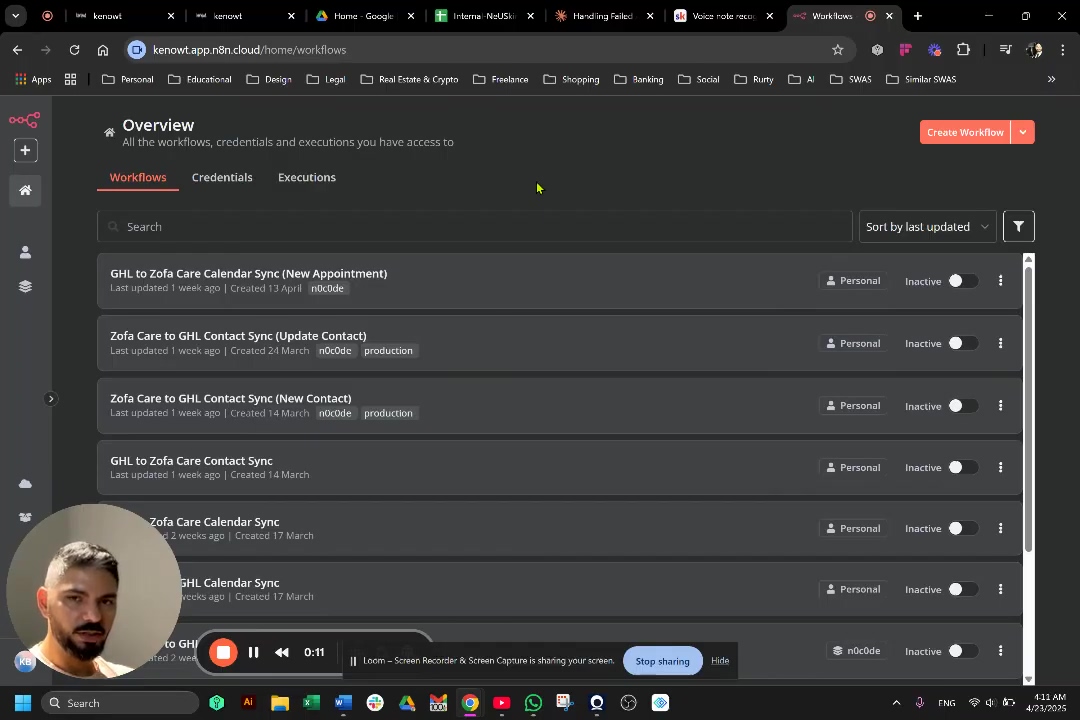
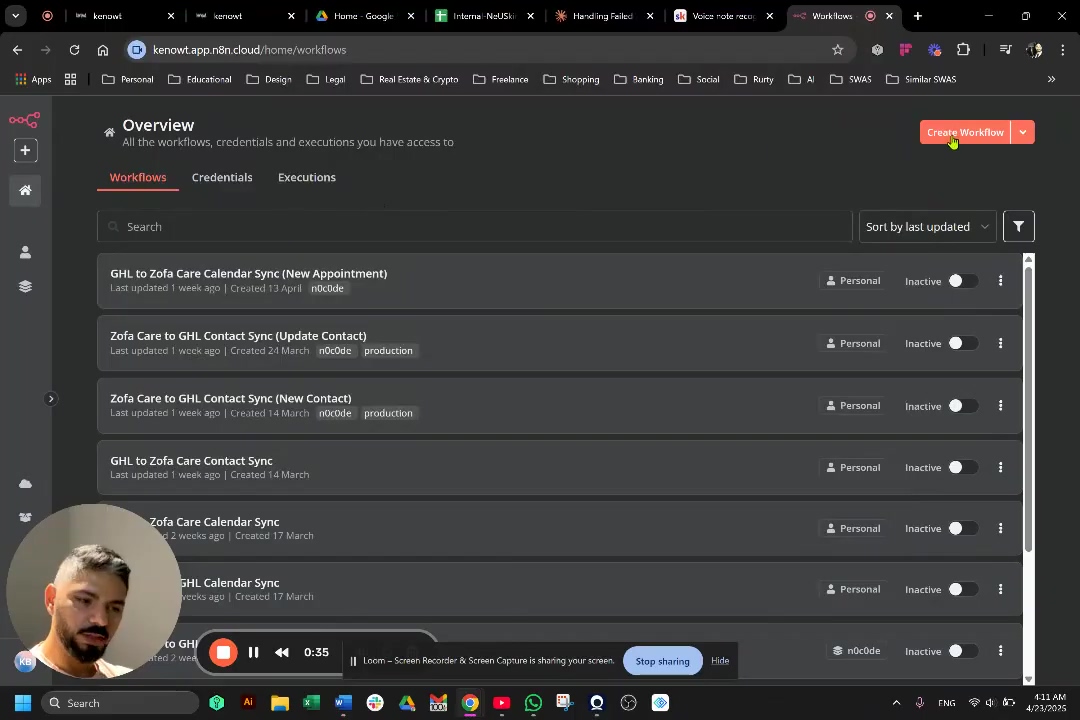
- Open n8n Workflows: Fire up your n8n instance. On the left-hand side, you’ll see a ‘Workflows’ tab. Click it!
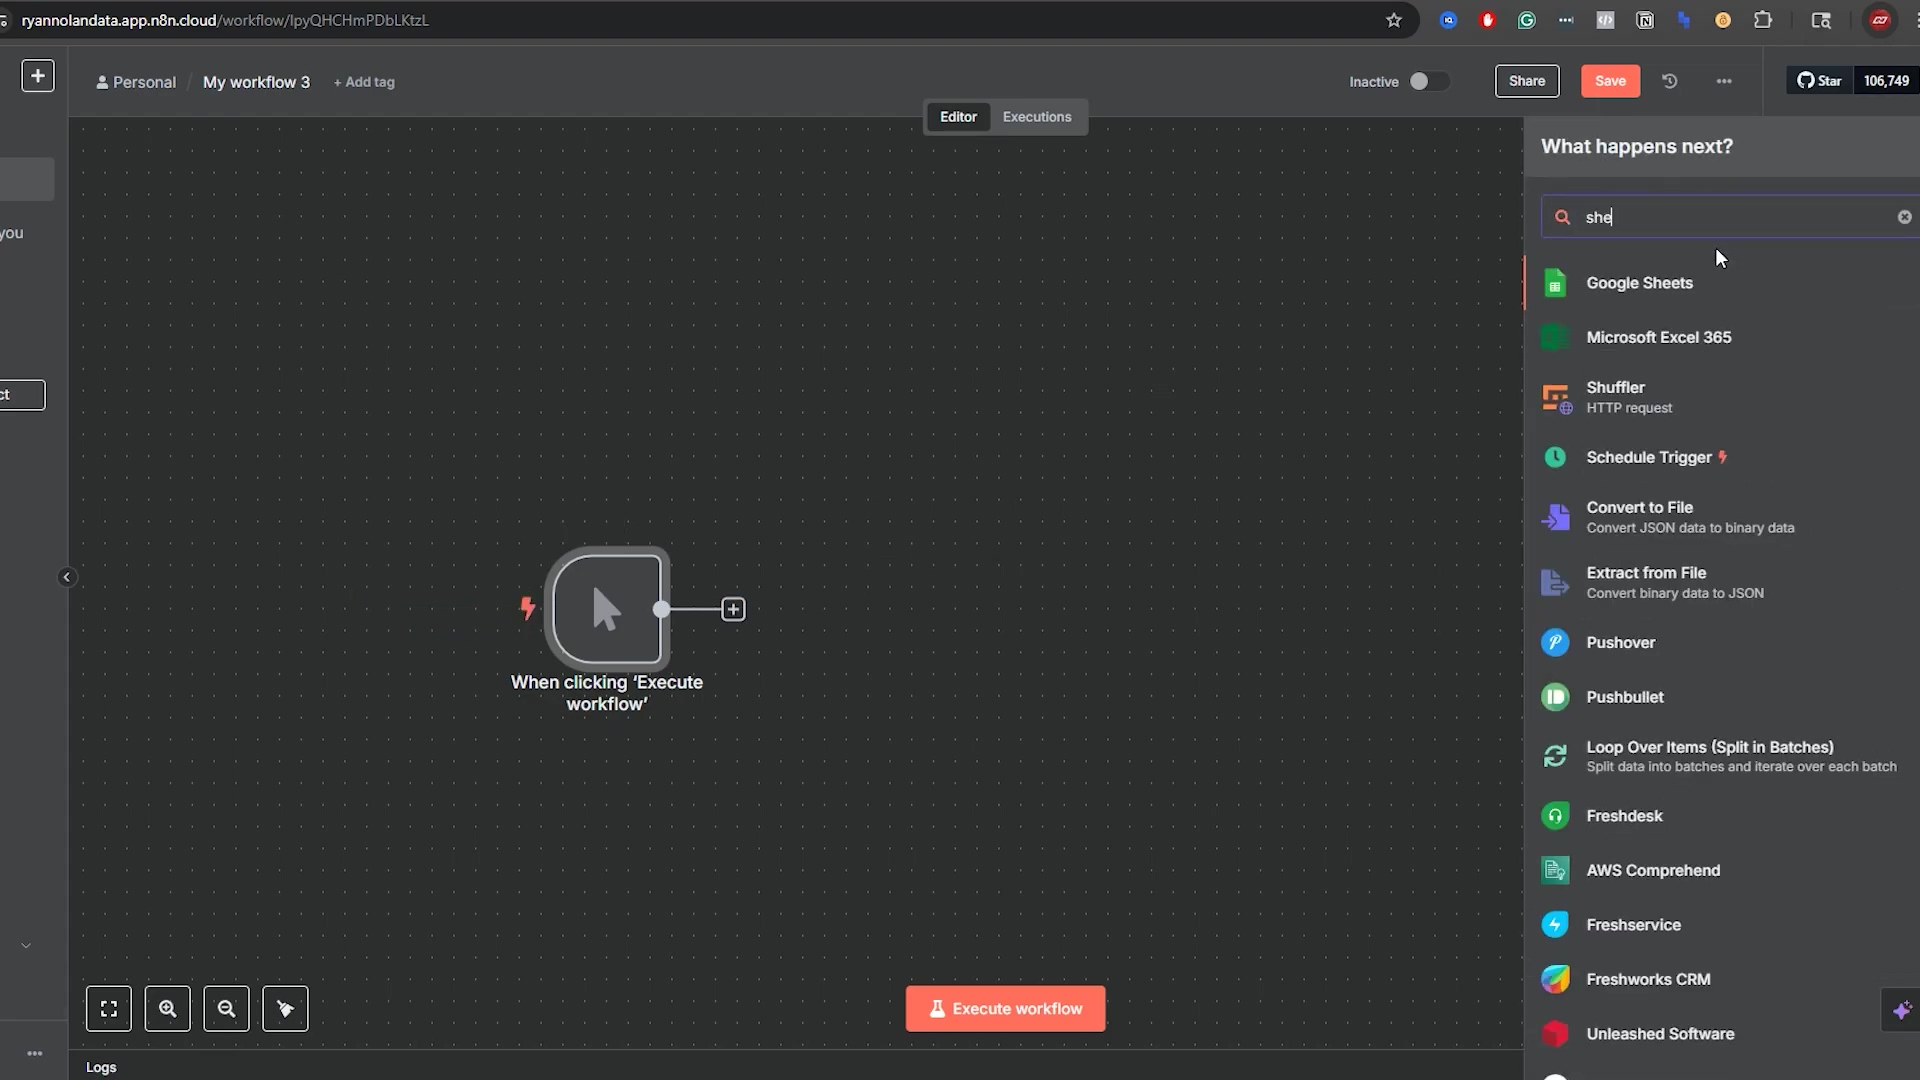
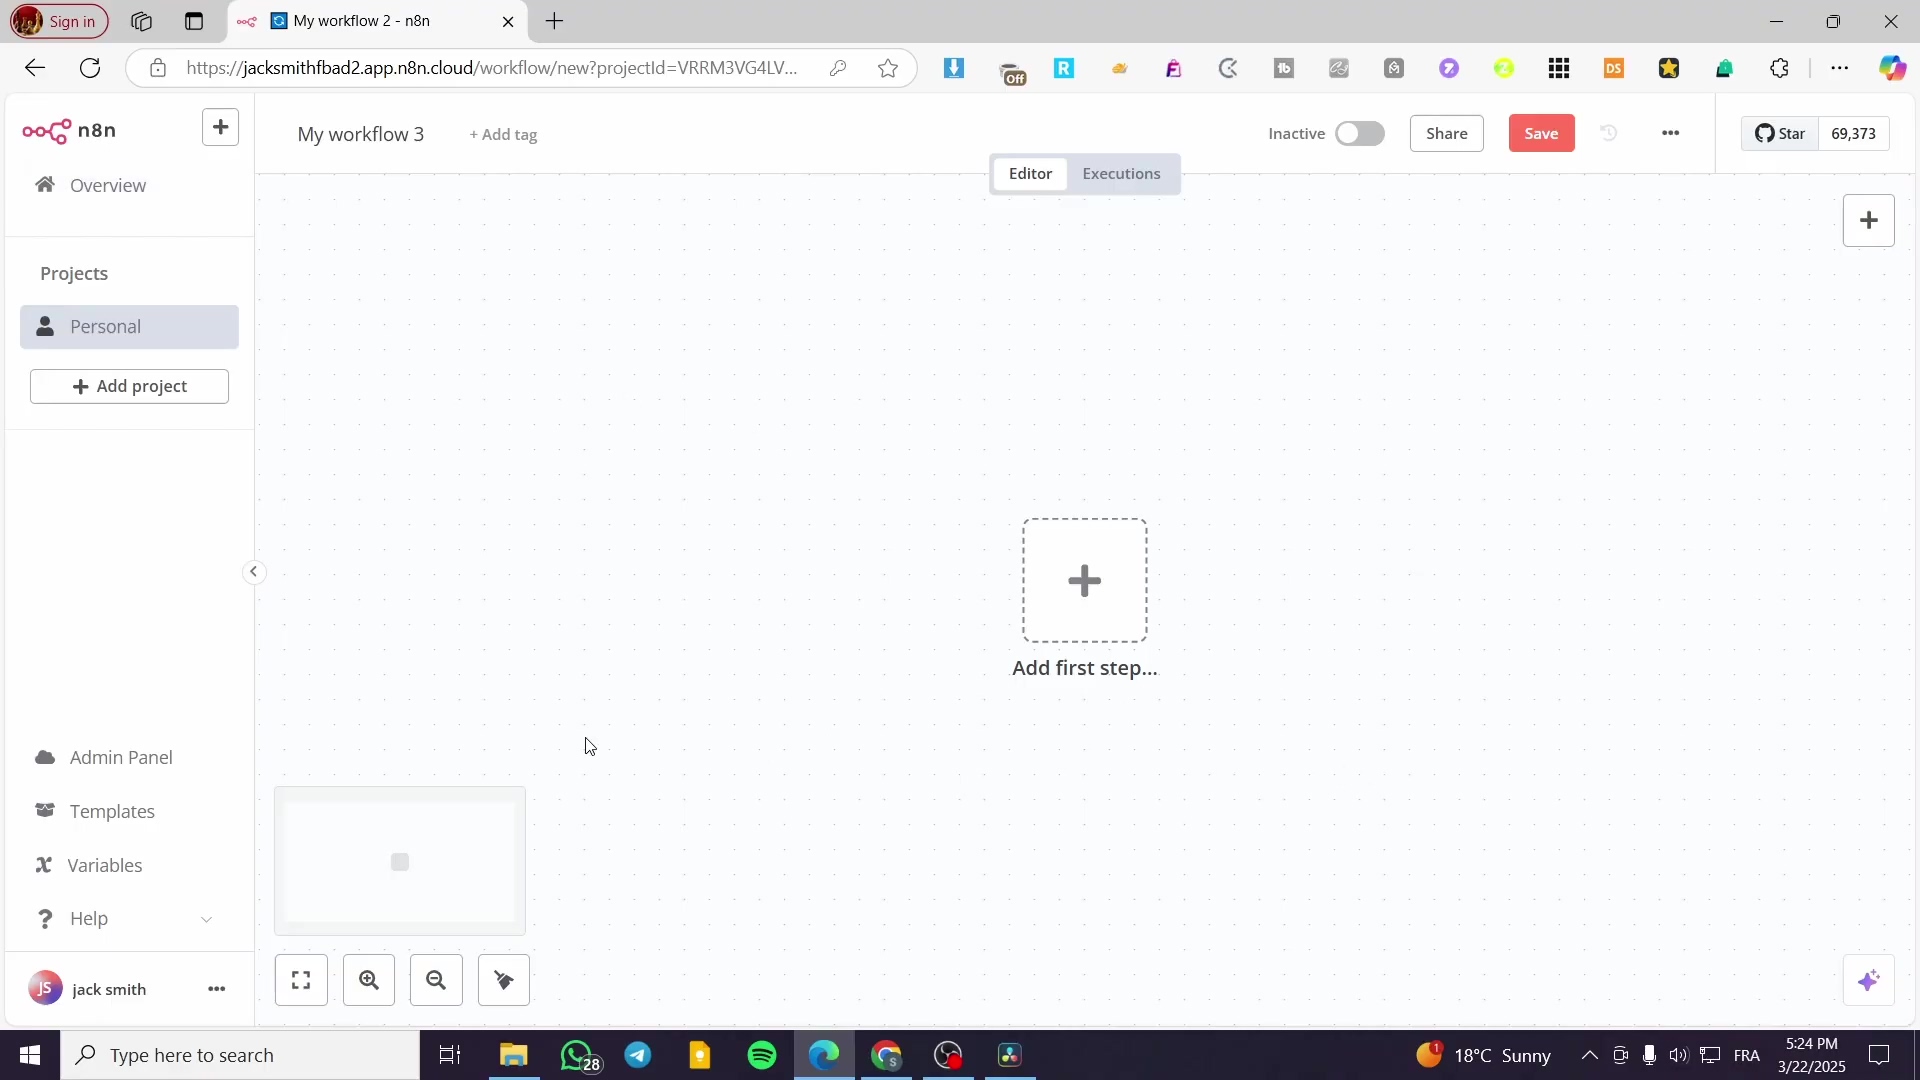
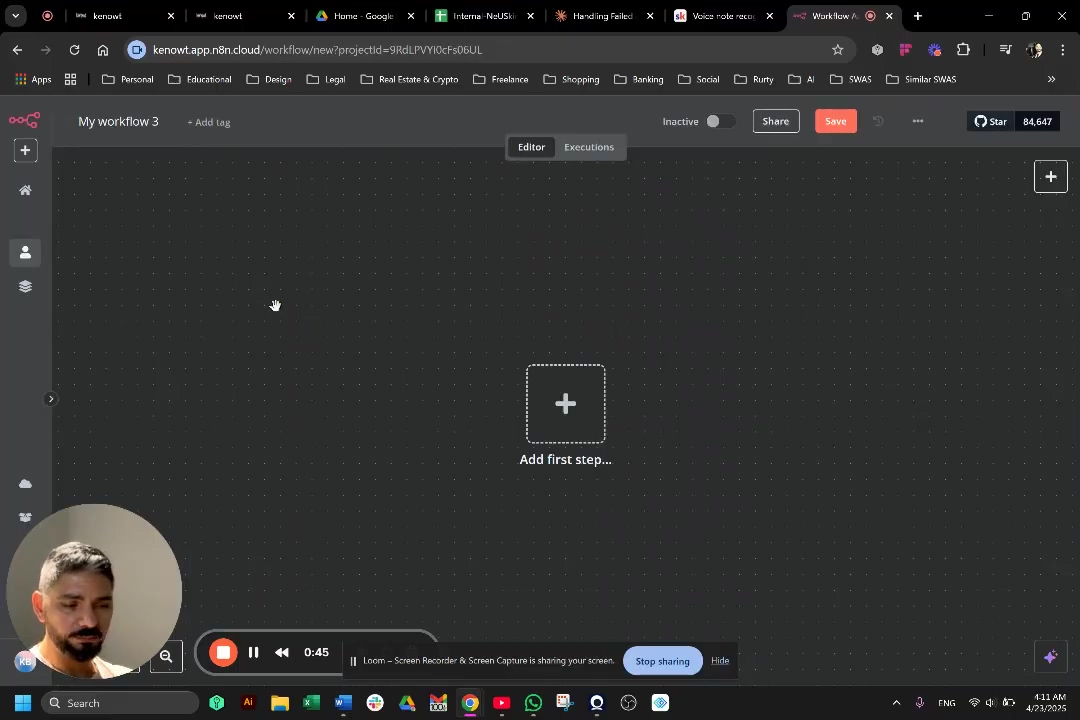
- New Workflow Canvas: Now, click on ‘Create Workflow’. This opens up a beautiful, blank canvas, ready for your automation.
- Paste the JSON: This is the magic trick! Click anywhere on that blank canvas – literally, just click the empty gray space. Then, hit Ctrl+V (if you’re on Windows or Linux) or Cmd+V (if you’re on a Mac). n8n is smart; it’ll recognize that JSON and start building your workflow.
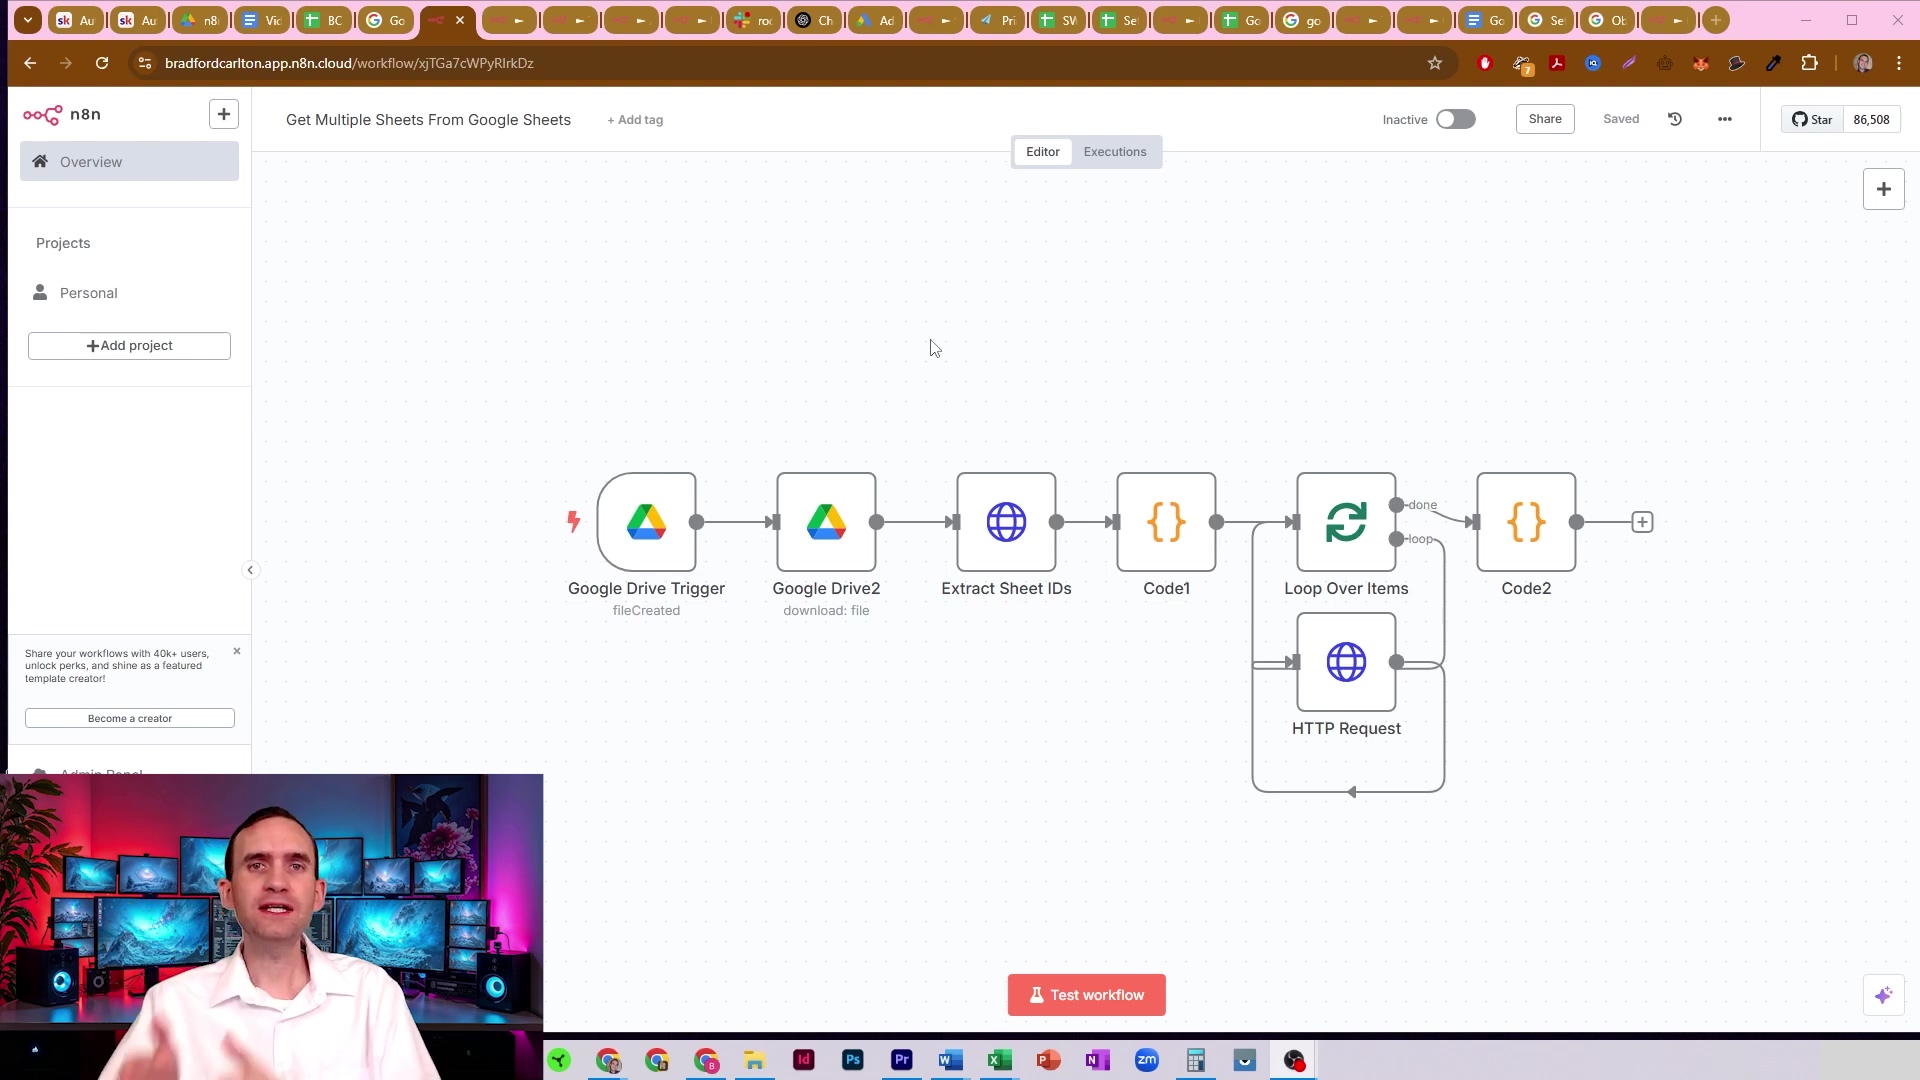
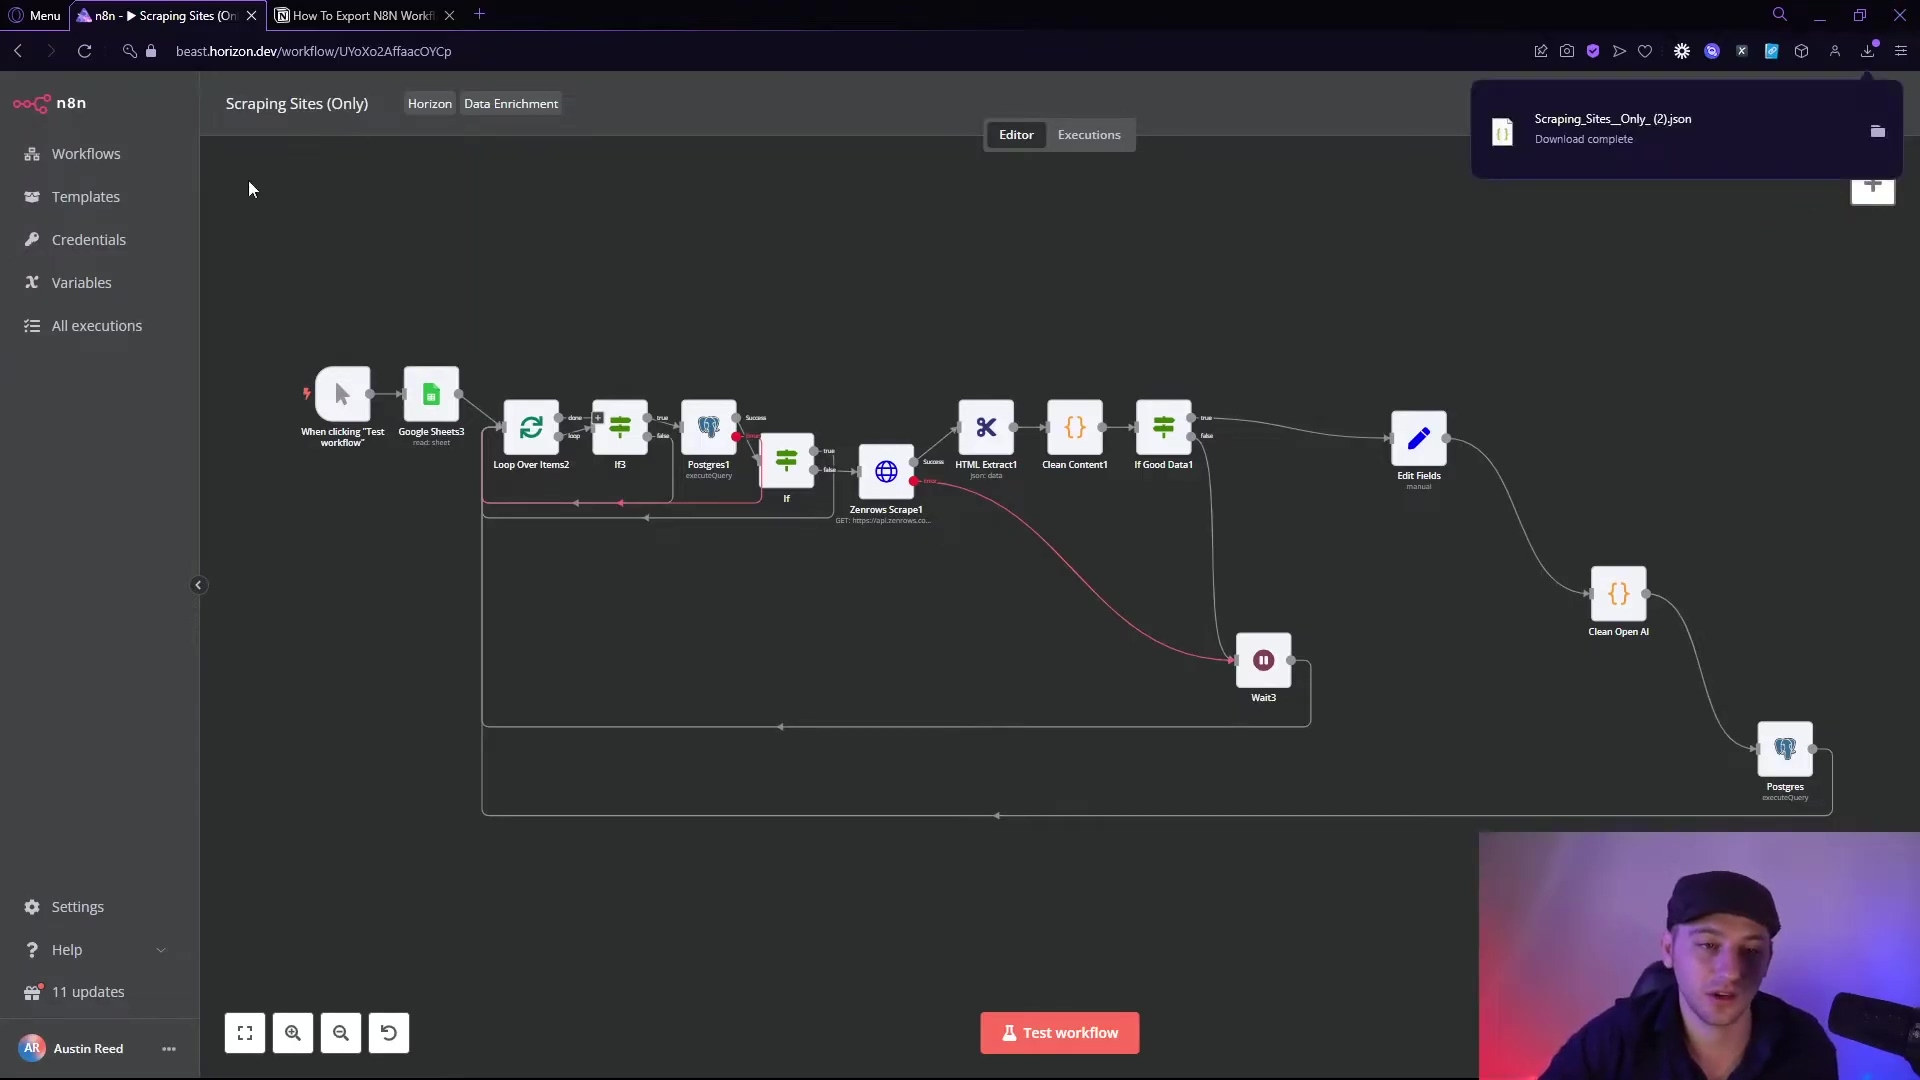
- Watch it appear: Give it a second. You’ll see the workflow nodes automatically pop up on your canvas, connected and ready to go!
Verification
After pasting, take a good look. Do the workflow nodes look visible and structured just like you expected? Keep an eye out for those red indicators on any nodes – remember, those are your cues to update credentials.
Risk
Just a heads-up: if your JSON data is incorrect or incomplete, you might end up with a partial import or some grumpy workflow errors. And here’s a big one: your workflow won’t actually run until you’ve properly configured all those credentials. It’s like trying to drive a car without gas!
Understanding JSON for Workflow Automation
Okay, let’s talk about JSON. Don’t let the fancy name scare you! JSON, which stands for JavaScript Object Notation, is basically a super-efficient way for computers to talk to each other and share information. Imagine it like a universal language for data. It’s designed to be easy for us humans to read and write, but also super easy for machines to understand and process. It’s a text-based format, totally independent of any specific programming language, and it’s everywhere in web applications – kind of like XML’s cooler, younger sibling.
Key Concepts of JSON Structure
Think of JSON as building with LEGOs. There are a few basic shapes:
- Objects: These are like big LEGO containers, represented by curly braces
{}. Inside, they hold ‘key-value pairs’. A ‘key’ is always a string (like a label), and its ‘value’ can be pretty much anything: a string, a number, a true/false statement (boolean), a list (array), another object, or evennull(meaning nothing). It’s like having a label “color” and its value “blue”. - Arrays: These are like ordered lists, represented by square brackets
[]. They just hold a sequence of values. So,[“apple”, “banana”, “cherry”]is an array of fruits. - Data Types: JSON is pretty flexible! It supports: strings (always in double quotes, like
"hello"), numbers (no quotes needed), Booleans (trueorfalse),null, and, as we just saw, objects and arrays.
Why JSON is Crucial for Automation
In automation platforms like n8n, JSON isn’t just important; it’s the primary language for data exchange. It’s how different services and even the internal nodes within n8n chat with each other. Its structured-yet-flexible nature means we can easily build, tweak, and pass around complex chunks of data through every step of our automation workflow. If you want to debug, customize, or build robust integrations, understanding JSON is absolutely fundamental.
For instance, when an API sends you a response (like when you ask a weather service for today’s forecast), it almost always comes back in JSON format. Then, n8n’s nodes automatically parse and process that data for you. Because JSON is so widely adopted across pretty much all web services, it’s an indispensable tool for making different systems play nicely together. It’s like the universal translator of the data world!
Why Direct JSON Import in n8n is a Game-Changer
Let me tell you, the direct JSON import feature in n8n is like hitting the fast-forward button on your workflow development. It makes building and deploying automations so much more efficient! This awesome feature lets you instantly move complex workflow structures – we’re talking node configurations, connections, and all the logical paths – from one n8n instance to another. Or, even better, you can easily share pre-built templates with the n8n community. This is a huge leap forward compared to manually rebuilding workflows, which is not only super error-prone but also a massive time sink. Who has time for that, right?
Benefits of Direct JSON Import
- Rapid Deployment: You can deploy super complex workflows from JSON in a flash, cutting down setup time from hours to mere seconds. This is especially handy when you need to replicate configurations across different environments – like your development, staging, and production setups. Think of it as cloning your perfect workflow instantly!
- Simplified Collaboration: Want to share your brilliant workflow with a colleague or a fellow community member? Just exchange a JSON file! No more step-by-step rebuilding or awkward screen-sharing sessions. It’s like handing over the blueprints to your automation masterpiece.
- Version Control: You can manage different versions of your workflows by saving them as JSON files. This makes it way easier to track changes and, if something goes sideways, roll back to a previous, working state. It’s like having a time machine for your automations!
- Error Reduction: By importing a verified, functional JSON definition of a workflow, you drastically minimize those pesky manual configuration errors. Less head-scratching, more automating!
- Community Leverage: This is one of my favorite parts! You get to tap into a massive library of pre-built n8n workflows shared as JSON. This means you can quickly adopt best practices and common automation patterns without reinventing the wheel. It’s like having access to a treasure trove of automation wisdom!
Preparing Your JSON Data for n8n
Alright, before we start importing, a little prep work goes a long way. Properly preparing your JSON data is absolutely critical for a smooth, seamless integration into your n8n workflows. If your JSON is unformatted or invalid, you’re just asking for errors during import or unexpected, frustrating behavior within your workflow. So, before you even think about importing, make sure your JSON plays by the rules – strict structural and syntactical rules, that is.
Common JSON Formatting Requirements
Think of these as the basic grammar rules for your JSON:
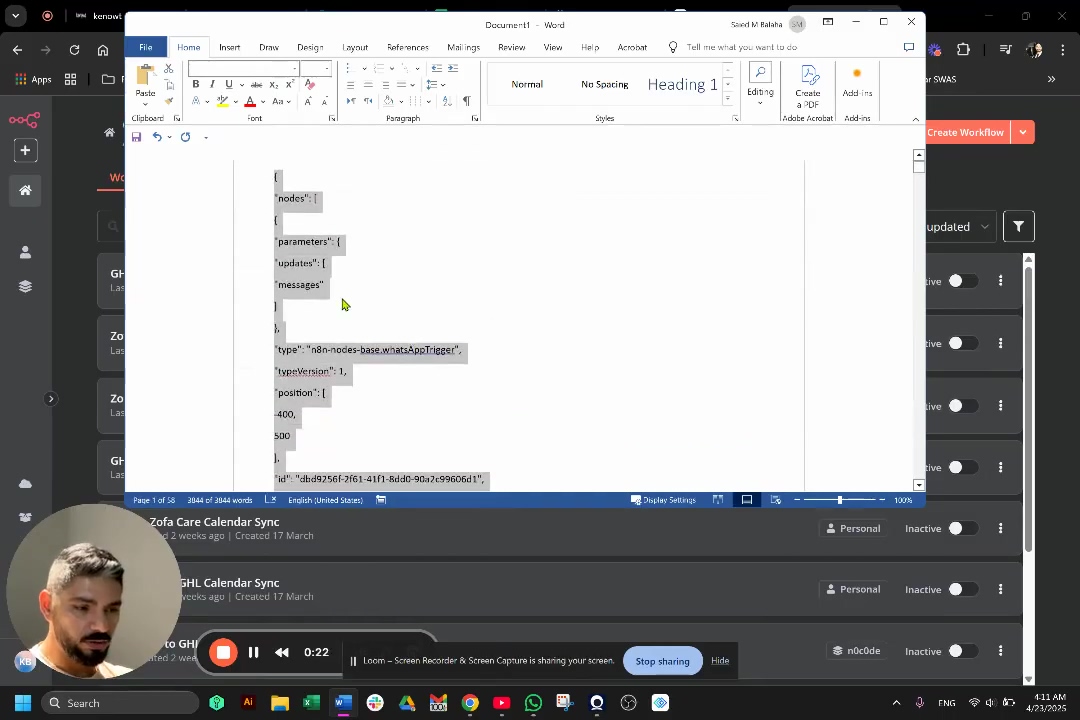
- Valid JSON Syntax: This is non-negotiable. Every single key must be a string and enclosed in double-quotes (e.g.,
"myKey"). Similarly, all string values must be double-quoted. And if you have any special characters within your strings (like a new line or a double quote that’s part of the text), they need to be properly ‘escaped’ (e.g.,\nfor a newline,\"for a double quote). It’s like putting a backslash in front of a character to tell the computer, “Hey, this isn’t code, it’s just text!” - Structure Consistency: For n8n workflows, your JSON typically represents a collection of nodes. Each node is defined with specific properties like its
id,name,type,parameters, and how itconnectionsto other nodes. It’s like a blueprint for each component of your automation. - Workflow Metadata: If your JSON represents an entire workflow (and not just a snippet), make sure it includes essential workflow-level information. This includes things like the workflow’s
name, whether it’sactiveor not, and itsversion. This helps n8n understand the bigger picture.
Tools for JSON Validation and Formatting
Don’t try to be a hero and spot every tiny syntax error yourself! Using online JSON validators is a lifesaver. They can quickly pinpoint and correct syntax errors before you even try to import into n8n. These tools are like your personal JSON grammar checker – they’ll highlight missing commas, unclosed brackets, or incorrect data types, saving you a ton of debugging time later on. Trust me, this is a super handy step!
Popular JSON Tools
| Tool Name | Purpose | Features |
|---|---|---|
| JSONLint | Validation | Checks for strict JSON syntax errors |
| JSON Formatter & Validator | Formatting & Validation | Beautifies, minifies, and validates JSON |
| Visual Studio Code | Editing & Validation | Built-in JSON schema validation and formatting |
Best Practices for JSON Data
- Minify JSON: If you’re sharing or storing your JSON, ‘minifying’ it (which just means removing all the unnecessary whitespace) can reduce its file size. n8n is smart enough to handle both minified and ‘pretty-printed’ (nicely formatted) JSON, but smaller files are always a win!
- Schema Definition: For really complex data, defining a JSON schema is a fantastic idea. It helps you enforce a consistent structure and data types, ensuring that your data looks the same across different sources. It’s like setting up a strict template for your data.
- Backup Original: This is a golden rule for anything technical! Always, always keep a backup of your original JSON before you start making any changes. Just in case!

Step-by-Step Guide: Importing JSON into Your n8n Workflow
Alright, let’s get to the fun part! Importing a JSON workflow into n8n is actually a pretty straightforward process, and it’s going to seriously speed up your development. This section is your detailed, hand-holding walkthrough. We’re assuming you’ve got your JSON file or code snippet ready, representing an n8n workflow. Let’s do this!
1. Obtain Your JSON Workflow Code
First things first, you need to get your hands on the actual JSON code that defines your n8n workflow. Where does this come from? It could be:
- A shared template from the n8n community.
- A workflow you previously exported from another n8n instance.
- Or maybe even a custom-generated JSON snippet you’ve cooked up yourself.
Action: Copy the entire JSON code. Make sure it’s complete and correctly formatted. If you’re unsure, run it through one of those JSON validators we talked about earlier!
2. Navigate to n8n Workflow Editor
Now, let’s get into n8n itself.
- Open your n8n interface: This is usually
http://localhost:5678if you’re running it locally, or your cloud n8n URL. - Click ‘Workflows’: Look at the left sidebar. You’ll see ‘Workflows’. Give that a click.
- Select ‘Create Workflow’: This will open up a beautiful, blank workflow canvas. Think of it as your digital whiteboard, ready for your automation ideas!
3. Paste the JSON Code
This is where the magic happens, folks!
- Click on the empty canvas: With that blank canvas staring back at you, simply click anywhere on the empty gray background. You don’t need to select a node or anything, just the background.
- Use the keyboard shortcut: Now, hit Ctrl+V (if you’re on Windows or Linux) or Cmd+V (if you’re on a macOS machine).
Expected Feedback: What you’ll see is n8n being super smart! It will automatically detect that you’ve pasted a workflow definition in JSON format. Within a few seconds, your canvas will populate with all the corresponding nodes and their connections, just like they were built by hand. It’s pretty satisfying to watch!
4. Configure Credentials and Parameters
Okay, your workflow is imported, but we’re not quite done. This is a crucial step!
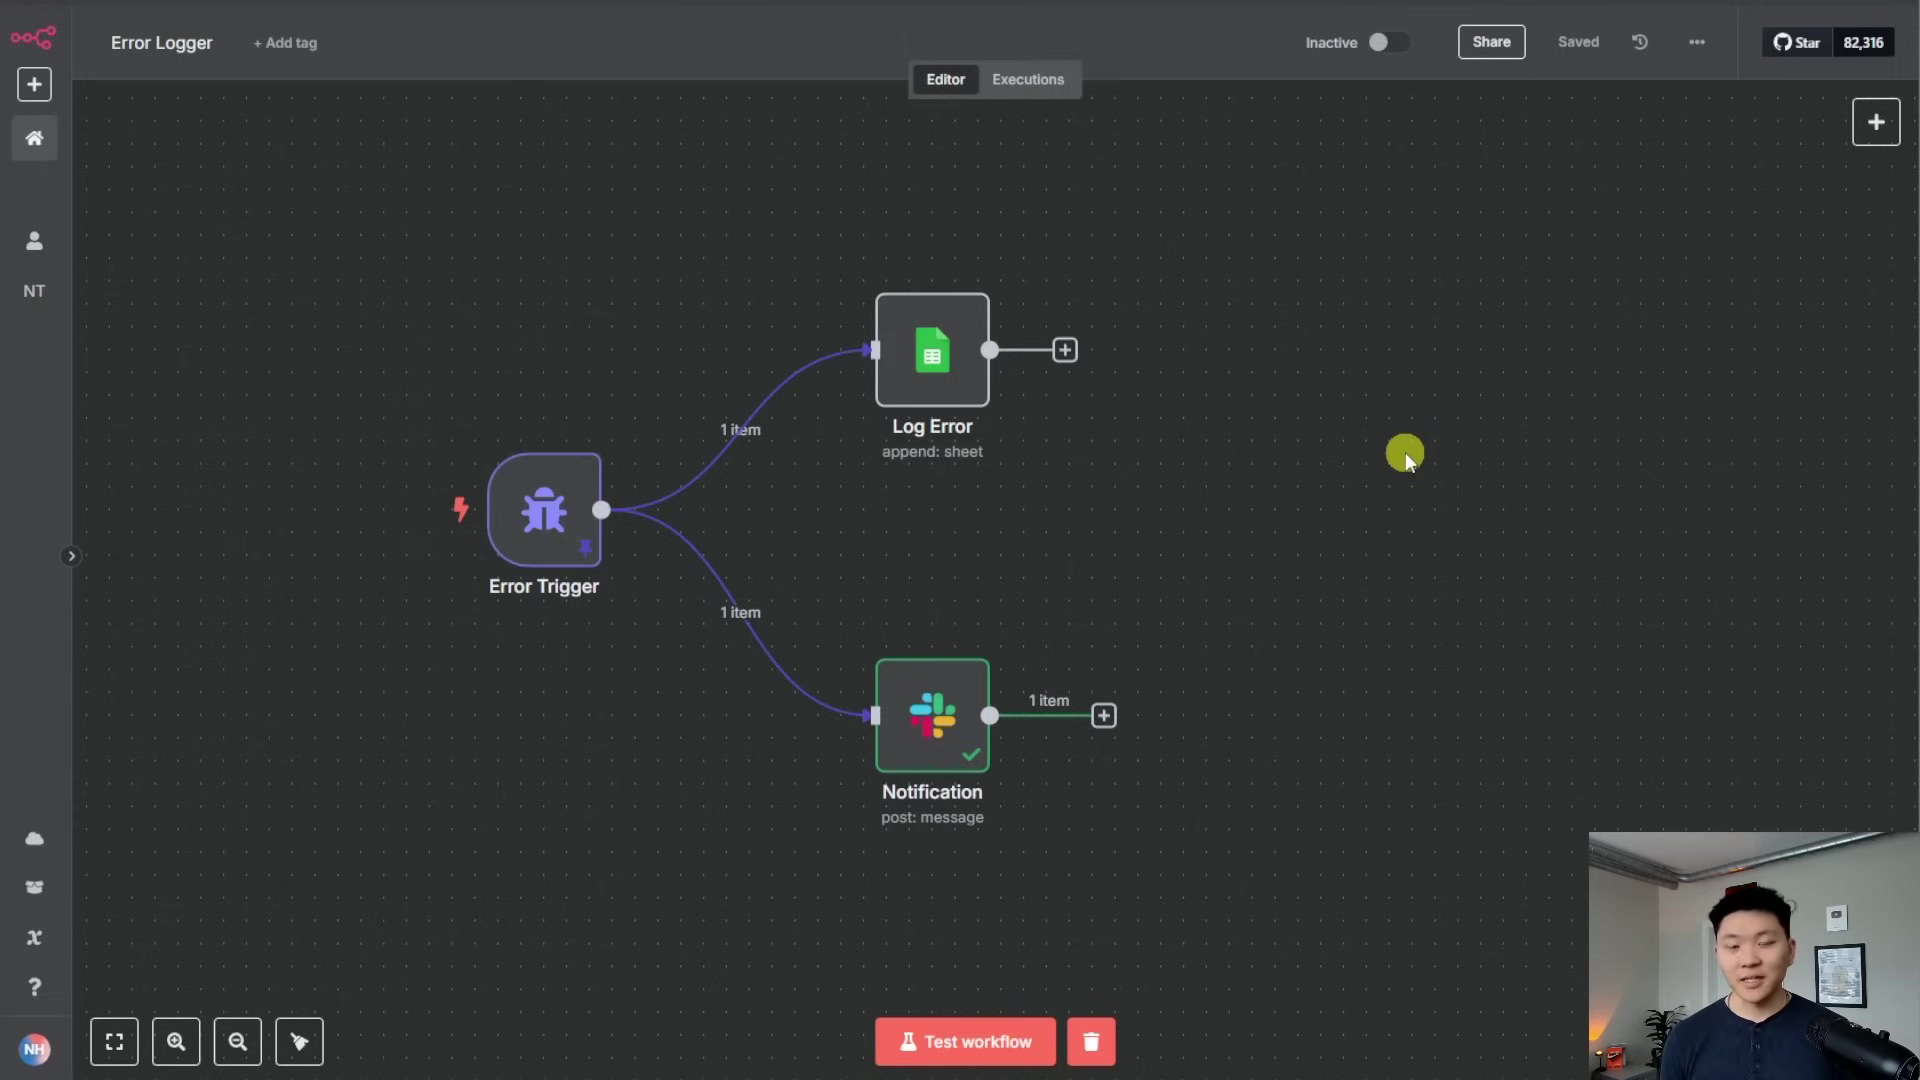
What to look for: After a successful import, take a close look at your workflow. Do you see any nodes that have a little red warning indicator? These are like the “check engine” lights of your workflow. They almost always mean that credentials are either missing or incorrect.
Action: Click on each affected node. Inside the node’s settings panel, you’ll usually find a ‘Credentials’ or ‘Parameters’ section. This is where you need to update them with your your specific API keys, access tokens, or whatever other authentication details that particular service requires.
Example: Let’s say you imported a workflow that integrates with WhatsApp. You’d need to provide your WhatsApp Business API credentials here. Similarly, if you have Instagram or Telegram nodes, you’ll need to set up your respective API tokens or connection details. The video highlights this necessity at 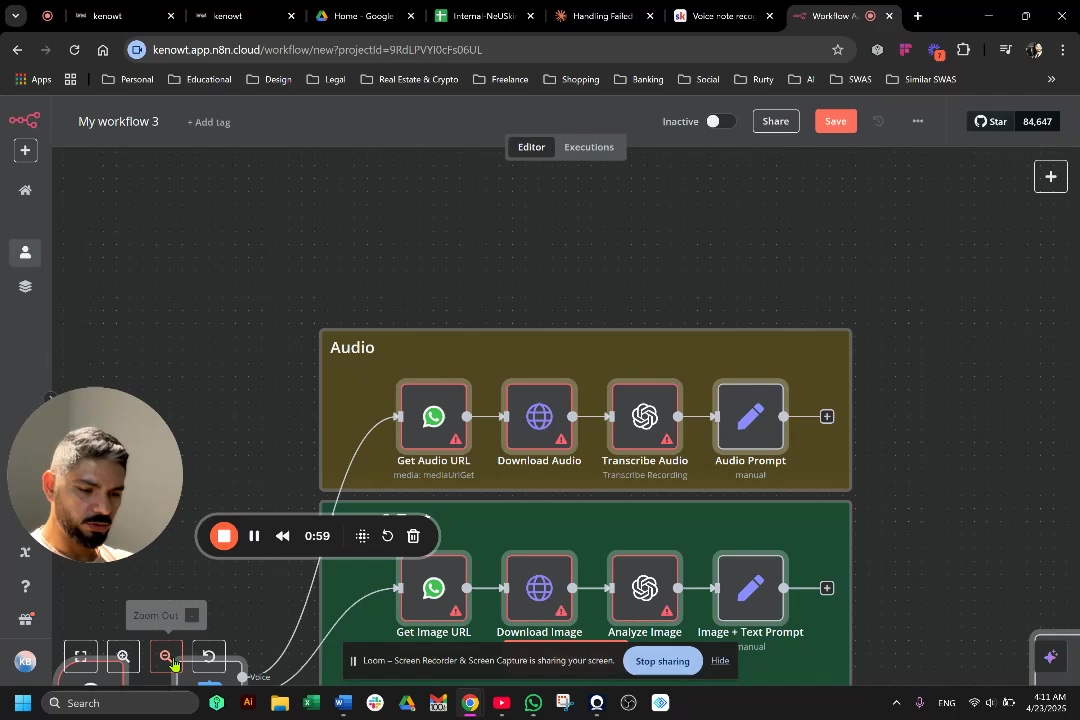 .
.
Expected Feedback: Once you’ve correctly configured the credentials, that annoying red indicator on the node should disappear! This tells you that n8n can now properly authenticate with that service.
5. Rename Your Workflow (Optional)
After importing, n8n often gives your workflow a generic, default name. While functional, it’s not very descriptive, especially when you start having dozens of workflows.
Action: Click on the workflow name at the very top of the canvas. Then, rename it to something clear, descriptive, and relevant to what it does (e.g., ‘JSON Data Processor’, ‘Automated Daily Report’, ‘My Daily Weather Alert’).
Why this matters: This simple step dramatically improves organization, especially as your collection of workflows grows. Future you (and any collaborators) will thank you!
Testing and Validating Your JSON Import in n8n
Alright, you’ve imported your workflow and configured everything. But how do you know it actually works? That’s where testing and validation come in! After importing and setting up your JSON workflow, thorough testing is absolutely essential. It’s how you make sure all the components are playing nicely together, that your data is flowing correctly, your credentials are spot-on, and the overall logic of your automation is sound. Don’t skip this part – it’s like test-driving your new car before a long trip!
Initial Workflow Execution
- Activate the Workflow: Look at the top right of your workflow editor. You’ll see a toggle switch labeled ‘Active’. Flip that switch to enable your workflow. It’s like turning the power on!
- Manual Test Run: Now, find the ‘Execute Workflow’ button (it usually looks like a play icon ▶️). Click it! As the workflow runs, keep an eye on the nodes. Green borders around nodes mean they executed successfully – yay! Red borders, however, signify errors – time to investigate.
Expected Feedback: You should see nodes light up green as they process data. If you see red, n8n will usually give you an error message in the execution log, which is your first clue for debugging.
Validating Data Flow
- Check Node Outputs: After an execution, click on each individual node. In its settings panel, you’ll find an ‘Output’ section. This is gold! Inspect it to make sure the data being passed out of that node is in the format you expect and contains the correct values. Is it what you thought it would be?
- Inspect Event Log: If your workflow is triggered by external events (like a webhook), head over to the ‘Executions’ tab. This log will show you all the past runs. Confirm that the incoming data from your trigger node matches what you were expecting. Sometimes, the external service sends data in a slightly different format than you anticipated.
Debugging Strategies
When things go wrong (and they sometimes do, it’s part of the journey!), here are my go-to strategies:
- Credential Review: If a node keeps failing, especially with authentication errors, go back and re-verify its credentials. Seriously, double-check every character! Incorrect API keys, expired tokens, or simply not having enough permissions (like your API key doesn’t have access to certain features) are super common culprits.
- Error Messages: n8n is pretty good about telling you what’s wrong. Always read the error messages it provides. They often contain specific details about the issue, which will point you directly to the problematic node or configuration setting. It’s like a little hint from the system!
- JSON Data Inspection: If you suspect your data isn’t quite right (maybe it’s malformed or missing fields), use ‘Set’ or ‘Transform’ nodes. You can temporarily insert these into your workflow to inspect the intermediate JSON data at different points. This helps you pinpoint exactly where the data might be getting messed up.
- Step-by-Step Execution: For those really complex workflows, use the ‘Execute Workflow’ button in ‘Test’ mode. This awesome feature lets you execute nodes one by one. After each step, you can review the outputs, which makes debugging much easier because you’re isolating each part of the process.
Example Error Scenarios and Debugging Tips
Here’s a quick cheat sheet for common problems:
| Problem Description | Potential Cause | Debugging Tip |
|---|---|---|
| Node shows red error | Invalid credentials or API key | Double-check API docs for required scopes/permissions. |
| Data missing or malformed | Incorrect JSON path expression | Use ‘Expression Editor’ to test paths; inspect previous node’s output. |
| Workflow stuck or times out | Rate limits or external service issues | Check external service status page; implement retry logic in n8n. |
| Workflow does not trigger | Incorrect trigger configuration | Verify webhook URL, authentication, and external service setup. |
Advanced JSON Handling Techniques in n8n
Once you’ve got the basics down, n8n offers some seriously powerful tools for manipulating JSON data. This isn’t just about importing anymore; it’s about making your data dance! Mastering these techniques is crucial for building robust, dynamic, and complex workflow automations. Let’s level up!
1. Parsing and Transforming JSON Data
- JSON Node: This node is your best friend when you’re dealing with JSON that’s stuck as a string. Sometimes, data comes into n8n as a single, long JSON string, and n8n doesn’t automatically turn it into a usable object. That’s where the ‘JSON’ node comes in! It’s essential for parsing a stringified JSON into a proper object, or conversely, for stringifying an object back into a JSON string.
- Goal: Convert a JSON string (like
"{\"name\":\"Boyce\"}") into a structured n8n object ({ "name": "Boyce" }). - Path: Add a ‘JSON’ node to your workflow. In its settings, set the ‘Operation’ to ‘Parse’. Then, in the ‘JSON String’ field, provide the expression that points to your JSON string (e.g.,
{{ $json.myJsonStringField }}). - Verification: After running, check the node’s output. It should now be a beautifully structured object, ready for you to use!
- Goal: Convert a JSON string (like
- Set Node: The ‘Set’ node is incredibly versatile. It allows you to add, modify, or even remove data fields within an item’s JSON structure. This is invaluable for mapping data to the exact format required by subsequent nodes or external APIs. Think of it as your data sculptor!
- Goal: Add a brand new key-value pair to an existing JSON item.
- Path: Add a ‘Set’ node. In its settings, click ‘Add Value’ under ‘Values to Set’. Define the ‘Name’ for your new field (e.g.,
newField) and then its ‘Value’ (e.g.,{{$json.existingField}}to pull data from another field, or a static string like"Hello World"). - Verification: The output of the ‘Set’ node should now contain your new field, perfectly placed.
2. Using Expressions for Dynamic Data Access
n8n’s expression language is incredibly powerful. It lets you dynamically access and manipulate JSON data throughout your entire workflow. This is typically done using syntax like {{ $json.fieldName }} to grab data from the current item, or {{ $node["PreviousNodeName"].json.anotherField }} to pull data from a specific node earlier in your workflow. It’s like having a super-smart pointer that can fetch any piece of data you need, exactly when you need it!
Troubleshooting Common JSON Import Issues
Even with all our careful preparation, sometimes things don’t go exactly as planned. Issues can pop up during JSON import or workflow execution in n8n. But don’t worry, that’s totally normal! This section is here to help you tackle those common problems head-on, with actionable solutions to get you back on track.
1. Invalid JSON Syntax Errors
- Problem: n8n throws a fit, indicating syntax errors, or simply refuses to import your JSON altogether. It’s like trying to read a book with missing pages and jumbled words.
- Solution: This is where your trusty online JSON validator comes in! Tools like JSONLint.com are your best friends here. Copy your problematic JSON and paste it in. Common errors they’ll catch include:
- Missing commas between key-value pairs or array items.
- Unclosed brackets (
{}or[]). - Unescaped double quotes within strings (remember,
\"for a literal double quote). - Or incorrect data types for keys (keys must be strings in double quotes).
- Goal: Correct those pesky JSON syntax issues.
- Path: Copy your JSON that’s causing trouble. Paste it into an online JSON validator. Review and meticulously correct any syntax errors the validator points out. Once it’s clean, re-attempt the import into n8n.
- Verification: The workflow should successfully import, and all your nodes should appear on the canvas as expected. Success!
2. Missing or Incorrect Credentials
- Problem: You’ve imported your workflow, but some nodes are glowing red, or you’re getting ‘authentication failed’ errors. This is a classic!
- Solution: What’s happening here is that the imported workflow likely came with placeholder credentials. You absolutely must replace these with your actual, valid API keys or authentication tokens. Every node that needs credentials will typically have a ‘Credential’ field right in its configuration panel.
- Goal: Establish the correct API authentication for your workflow nodes.
- Path: Click on that red-highlighted node. In its settings, find the ‘Credentials’ section. You’ll usually see an option to ‘Select Credential’ or ‘New Credential’. Choose ‘New Credential’ if you haven’t set it up before, or update an existing invalid one. Then, carefully input your valid API token, key, or login details.
- Verification: Once you’ve done this correctly, the red indicator on the node should vanish! To be extra sure, try a test execution of just that node (if possible) or the entire workflow. It should now succeed.
3. Data Flow or Transformation Errors
- Problem: Your workflow runs, no red errors, but the output is all wrong! Or, data seems to disappear or get mangled between nodes. It’s like sending a package and it arrives empty or damaged.
- Solution: This usually points to an issue with how data is being accessed or transformed within your workflow. Time to put on your detective hat and use n8n’s debugging features to inspect the intermediate data.
- Goal: Identify and fix those data processing errors within your workflow.
- Path: Insert ‘Set’ nodes at various points in your workflow, or use ‘Execute Workflow’ with ‘Test’ mode. This allows you to inspect the ‘Output’ of each node sequentially. Pay close attention to your expressions – verify if
{{ $json.fieldName }}expressions are correctly referencing data from the previous steps. Sometimes, a field name might be slightly different than you thought! - Verification: The output of each node should match the expected data structure and values, and most importantly, your final output should be exactly what you wanted.
4. Imported Workflow Does Not Match Expectations
- Problem: You imported a workflow, but its structure or logic isn’t quite what you expected. It’s like ordering a pizza and getting a salad instead.
- Solution: First, double-check the source of your JSON. Is it possible you used an outdated or incorrect version of the workflow JSON for the import? If you have the original source (like a screenshot or another n8n instance), compare the imported workflow visually with it. You might need to manually adjust some things or, if it’s way off, re-import a verified, correct JSON.
- Goal: Ensure the imported workflow’s structure and logic are 100% accurate.
- Path: Review the original JSON source file or snippet. Compare the node types, connections, and parameter values on your n8n canvas with that source. If there are discrepancies, you can either manually adjust the nodes on the canvas or, if it’s a big difference, re-import a JSON that you’ve confirmed is correct.
- Verification: The workflow on your canvas should now visually match the expected structure and logic. Phew!
Maximizing Your n8n Workflows with JSON: Tips and Best Practices
Alright, you’re becoming a JSON import pro! Now, let’s talk about taking your n8n workflows to the next level. Optimizing your workflows, especially when you’re dealing with JSON, can significantly boost their performance, reliability, and how easy they are to maintain. By implementing these expert tips and best practices, you’ll ensure your automations are not just functional, but robust and super efficient. Let’s make your workflows shine!
1. Standardize JSON Structure
This is a big one! Whenever possible, try to enforce a consistent JSON structure for all the data flowing into your workflows. Why? Because it makes accessing that data so much simpler and reduces the need for complex, messy transformations later on.
- Tip: Define a common data schema for data types or API responses you use frequently. Then, use ‘Set’ nodes early in your workflow to actively map any incoming data to this standardized format. It’s like having a universal adapter for all your data inputs!
2. Leverage n8n Expressions Effectively
n8n’s expression language is incredibly powerful – it’s like having a mini-programming language built right in! Use it to dynamically access specific data fields, perform basic calculations, or even construct dynamic URLs and payloads. This is where your workflows truly become smart.
- Tip: Always favor expressions (like
{{ $json.fieldName }}) over hardcoded values. This makes your workflows much more flexible and adaptable. For example, instead of typing a static user ID, dynamically get it from a previous node’s output. Future you will thank you when requirements change!
3. Implement Error Handling and Fallbacks
Even the best-laid plans can hit a snag. Robust workflows anticipate potential failures. Integrate error handling mechanisms to gracefully manage unexpected JSON structures or those inevitable API errors.
- Tip: Utilize the ‘On Error’ workflow setting (it’s in the workflow settings panel!) or ‘IF’ nodes to create alternative paths. This means if data isn’t what you expected, or an API call fails, your workflow doesn’t just crash. For example, you could log the error to a separate service or send yourself a notification so you know something went wrong.
4. Use Sub-Workflows for Modularity
Don’t let your workflows become giant, sprawling spaghetti monsters! Break down complex workflows into smaller, more manageable ‘sub-workflows’. This makes them easier to read, easier to reuse in other automations, and a dream to debug, especially when different parts of your workflow handle distinct JSON processing tasks.
- Tip: Encapsulate specific JSON parsing or transformation logic into its own sub-workflow. Then, call it using the ‘Execute Workflow’ node in your main workflow. This promotes a beautiful, modular design approach, just like building with LEGOs!
5. Document Your JSON Workflows
While n8n workflows imported via JSON are somewhat self-describing, adding comments and clear, descriptive node names will make your life (and the lives of your collaborators) so much easier. It’s like leaving helpful notes for yourself in a complex project.
- Tip: Use the ‘Note’ node (it’s a simple node you can add!) to include contextual information about complex JSON processing steps or specific data requirements. And please, rename your nodes to reflect their actual function (e.g., ‘Parse Incoming Webhook JSON’, ‘Format User Data for CRM’) instead of just ‘Function1’ or ‘HTTP Request2’.
6. Version Control Your JSON Exports
Treat your n8n workflow JSON exports like precious code! Store them in a version control system, like Git, which is super popular. This lets you track every change, collaborate effectively with a team, and easily revert to previous versions if something goes wrong. It’s your safety net!
- Tip: Make it a habit to regularly export your n8n workflows as JSON and commit them to a Git repository. This serves as a robust backup and a historical record of all your automation logic. You’ll thank yourself later!
Frequently Asked Questions (FAQ)
Q: Can I import only a part of a JSON workflow, like a single node?
A: Absolutely! You totally can. If you just need a specific node or a small group of nodes, you can copy them in JSON format directly onto your canvas. Just select the desired node(s) in an existing workflow (or even from a JSON snippet), copy them (Ctrl+C/Cmd+C), and then paste them into your target workflow. n8n is smart enough to handle that!
Q: What if my JSON file is too large for direct pasting?
A: That’s a great question! For very, very large JSON workflows, direct pasting might indeed be a bit slow or even cause issues. In those cases, I recommend importing it as a .json file. You can do this via the ‘Workflow’ menu (usually the three dots or a menu icon at the top of your workflow) -> then look for an ‘Import from file’ or ‘Upload Workflow’ option. This method is typically more robust for handling larger files.
Q: Do I need to be a coder to understand JSON for n8n?
A: Not at all! While having a basic understanding of JSON structure is definitely helpful (and we’ve covered the basics here!), n8n is designed to be very visual. It shows you the data in a clear, structured way and provides ‘expressions’ that abstract away much of the underlying JSON complexity. This makes it super accessible even if you’re not a seasoned coder. You’ll pick it up as you go!
Q: My imported workflow has red nodes. What does that mean?
A: Ah, the dreaded red nodes! Don’t worry, it’s a common sight. Red nodes almost always indicate that credentials are either missing or invalid, or that there’s some other configuration error that needs your attention. You’ll need to click on each affected node and update its credentials (like API keys or tokens) or fix any other highlighted configuration issues. Once you do, the red should disappear!
Q: Can I export an n8n workflow as JSON?
A: Yes, absolutely! This is how we get those awesome shareable workflows. You can export any existing n8n workflow as a JSON file. Just go to the workflow you want to export, click on the three dots menu (often called ‘Workflow Options’ or similar) -> then select ‘Export’ -> and finally, ‘Download JSON File’. Super easy!
Q: How can I ensure the JSON I’m importing is secure?
A: This is a critical point! Always, always ensure that the source of your JSON is trusted. Malicious JSON could potentially contain harmful configurations or unexpected actions. Before importing, it’s a really good practice to review the JSON structure yourself, looking for any unexpected nodes or parameters, especially if you’re getting the workflow from an untrusted or unknown source. A quick scan can save you a lot of headaches.
Q: After importing, my workflow doesn’t run. What should I check?
A: If your workflow isn’t running after import, here’s a quick checklist:
- Credentials: First and foremost, ensure all credentials for all nodes are correctly configured. Are there any red nodes left? Fix those!
- Active Switch: Is the workflow ‘Active’? Check the toggle switch at the top right of the workflow editor. It needs to be ON.
- Manual Execution: Try a manual ‘Execute Workflow’ (the play button). This will often reveal specific error messages in the execution log that can guide you to the problem.
Final Summary
So, there you have it! Direct JSON import in n8n is a fantastic feature that truly streamlines your workflow deployment. It lets you rapidly transfer pre-configured automations, cutting down on manual setup and those annoying configuration errors. To make sure everything runs perfectly, remember to configure credentials for all your imported nodes and give your workflows a thorough test run. And for those of you looking to really customize and supercharge your automations, dive into n8n’s advanced JSON manipulation tools – adding ‘JSON’ or ‘Set’ nodes will let you transform data structures exactly as you need them. Happy automating, space cadets!