Watch the Video Tutorial
💡 Pro Tip: After watching the video, continue reading below for detailed step-by-step instructions, code examples, and additional tips that will help you implement this successfully.
Trying to figure out how to store a file to a local n8n disk running locally? Boyce here, and you’ve found the definitive guide. That “invisible wall” between your Docker container and your computer is the #1 roadblock for self-hosters, but today, we’re going to smash right through it. This tutorial gives you the exact steps to master Docker paths and file permissions, turning that frustration into your new automation superpower.
Table of Contents
Open Table of Contents
- TL;DR
- Setting Up Your n8n Environment for Local File Operations
- Creating and Saving Files to Your Local Disk with n8n
- Managing File Content: Conversion and Dynamic Data Handling
- Reading Existing Files from Your Local File System
- Troubleshooting Common n8n Local File System Issues
- Advanced File Operations and Best Practices
- Enhancing Your n8n Workflows with Local File Capabilities
- Best Practices and Performance Optimization for Local File Nodes
- Final Summary
- Frequently Asked Questions (FAQ)
- Q: Why do I need to configure Docker volumes for local file access?
- Q: I’m getting ‘Permission Denied’ errors even after setting up the volume. What gives?
- Q: Can n8n create new folders dynamically on my local disk?
- Q: What’s the difference between ‘Convert to File’ and ‘Write & Read Binary File’ nodes?
TL;DR
- Objective: Automate local file operations (create, save, read) within n8n workflows. We’re talking about making your n8n a local file system ninja!
- Establish Path: Configure n8n for local file access by ensuring correct workspace/Docker setup, verifying
FILE_BASE_PATHinn8n/config. This is like setting up the secret handshake between n8n and your computer. - Create & Save File: Use a ‘Set’ node to define JSON data, ‘Convert to File’ to transform it, and ‘Write & Read Binary File’ node (set to ‘write file’ operation) to save it with a specified path like
/shared/data/test.json. Verify by checking the file at the specified local path. It’s like baking a digital cake and then putting it in your fridge. - Read File: Use the ‘Write & Read Binary File’ node (set to ‘read file’ operation) and input the full local file path (e.g.,
/shared/data/test.json). Verify the file content is loaded into the n8n workflow by checking output data. This is how n8n ‘eats’ that digital cake later.
This guide provides a comprehensive overview for n8n users, automation engineers, and IT professionals aiming to integrate local file system operations directly into their n8n workflows. Automating file handling, from saving workflow outputs to reading existing data, is crucial for robust automation solutions. This document details the setup, processes, and best practices for managing local files using n8n.

Setting Up Your n8n Environment for Local File Operations
Alright, before we start making n8n do its local file magic, we need to set up its environment. Think of this as preparing the spaceship for launch – gotta make sure all systems are go! To enable n8n to interact with your local file system, proper environment configuration is essential. This involves ensuring n8n has the necessary permissions and path mappings to access desired directories. Without this, n8n will be like a superhero without their powers – not very effective.
Configure n8n Container Paths
- Objective: Allow the n8n Docker container to access specific host file system directories. This is where we tell Docker, “Hey, n8n needs to see this folder on my computer!” It’s like giving your container a window into your host machine’s file system.
- Path: Edit your
docker-compose.ymlfile or Docker run command. This is the blueprint for your Docker setup, so we’re going in to make some tweaks.-
Step 1: Locate the
volumessection for your n8n service. In yourdocker-compose.ymlfile, you’ll find a section under yourn8nservice (or whatever you named it) that looks something likevolumes:. This is where we define how your container’s storage connects to your host machine. -
Step 2: Add a bind mount, mapping a host directory (e.g.,
./data/shared) to a container directory (e.g.,/shared). This might look like- ./data/shared:/shared. What this line does is create a direct link. On your host machine, the folder./data/shared(relative to where yourdocker-compose.ymlfile is) will be accessible inside the n8n container at/shared. You can pick any names you like, but/sharedis a pretty common convention for, well, shared stuff! For more on Docker volumes, check out the official Docker documentation on bind mounts. -
Step 3: Restart your n8n Docker container to apply changes. After modifying
docker-compose.yml, you need to bring down and then bring up your Docker containers again for the changes to take effect. You’ll typically do this with commands like:docker-compose down docker-compose up -dThe
-dflag runs it in detached mode, so it runs in the background, leaving your terminal free.
-
- Verification: After restarting, attempt a simple file operation or inspect the container’s file system to confirm the mount point exists. You can even shell into your container to peek around! Try running
docker exec -it <your_n8n_container_name> /bin/bashand thenls -l /sharedto see if your host files are there. If you see your files, you’ve nailed it! - Risk: Incorrect volume mapping can lead to permission errors or files being saved to unintended locations within the container. It’s like giving someone the wrong address for a package – it’ll either not arrive or end up somewhere weird.
Verify File Access Permissions
- Objective: Ensure the user running the n8n process within the container has read/write permissions to the mounted directory. Even if the path is correct, if n8n doesn’t have permission to touch the files, it’s a no-go. Think of it as having the right key, but the door is still locked from the inside.
- Path: Check host system user permissions and container user context.
- Step 1: On the host, verify that the directory mounted into the container has appropriate read and write permissions for the user or group that owns the n8n process. This is often the trickiest part! If your Docker daemon runs as root, then the files created by n8n inside the container (which might run as a non-root user like
node) will appear on your host as owned by root. You might need to adjust permissions on your host directory. For example,sudo chmod -R 777 ./data/shared(use with caution, this is very permissive and generally not recommended for production) orsudo chown -R 1000:1000 ./data/sharedif thenodeuser inside the container has UID/GID 1000. It’s a bit of a dance between host and container permissions. - Step 2: If running n8n as a different user within Docker, ensure that user has access to the
/shareddirectory inside the container. Sometimes, Docker containers run processes as a specific user (likenodein n8n’s case) for security reasons. This user needs to have the right to read and write to/sharedinside the container.
- Step 1: On the host, verify that the directory mounted into the container has appropriate read and write permissions for the user or group that owns the n8n process. This is often the trickiest part! If your Docker daemon runs as root, then the files created by n8n inside the container (which might run as a non-root user like
- Verification: Execute a test workflow that attempts to write a small file. If successful, permissions are likely correct. If you get a
Permission Deniederror, you know exactly where to look!
Creating and Saving Files to Your Local Disk with n8n
Alright, now that our n8n environment is all set up, let’s get to the fun part: creating and saving files! This section guides you through generating new files within an n8n workflow and saving them to a specified local directory. This process typically involves defining data, converting it to a file format, and then using a dedicated node to write it to disk. It’s like having a digital printing press right in your workflow!
Generate Data in n8n
- Objective: Create the initial data payload that will be converted into a file. Before you can save a file, you need something to save, right? This is where we conjure up the data.
- Paths:
-
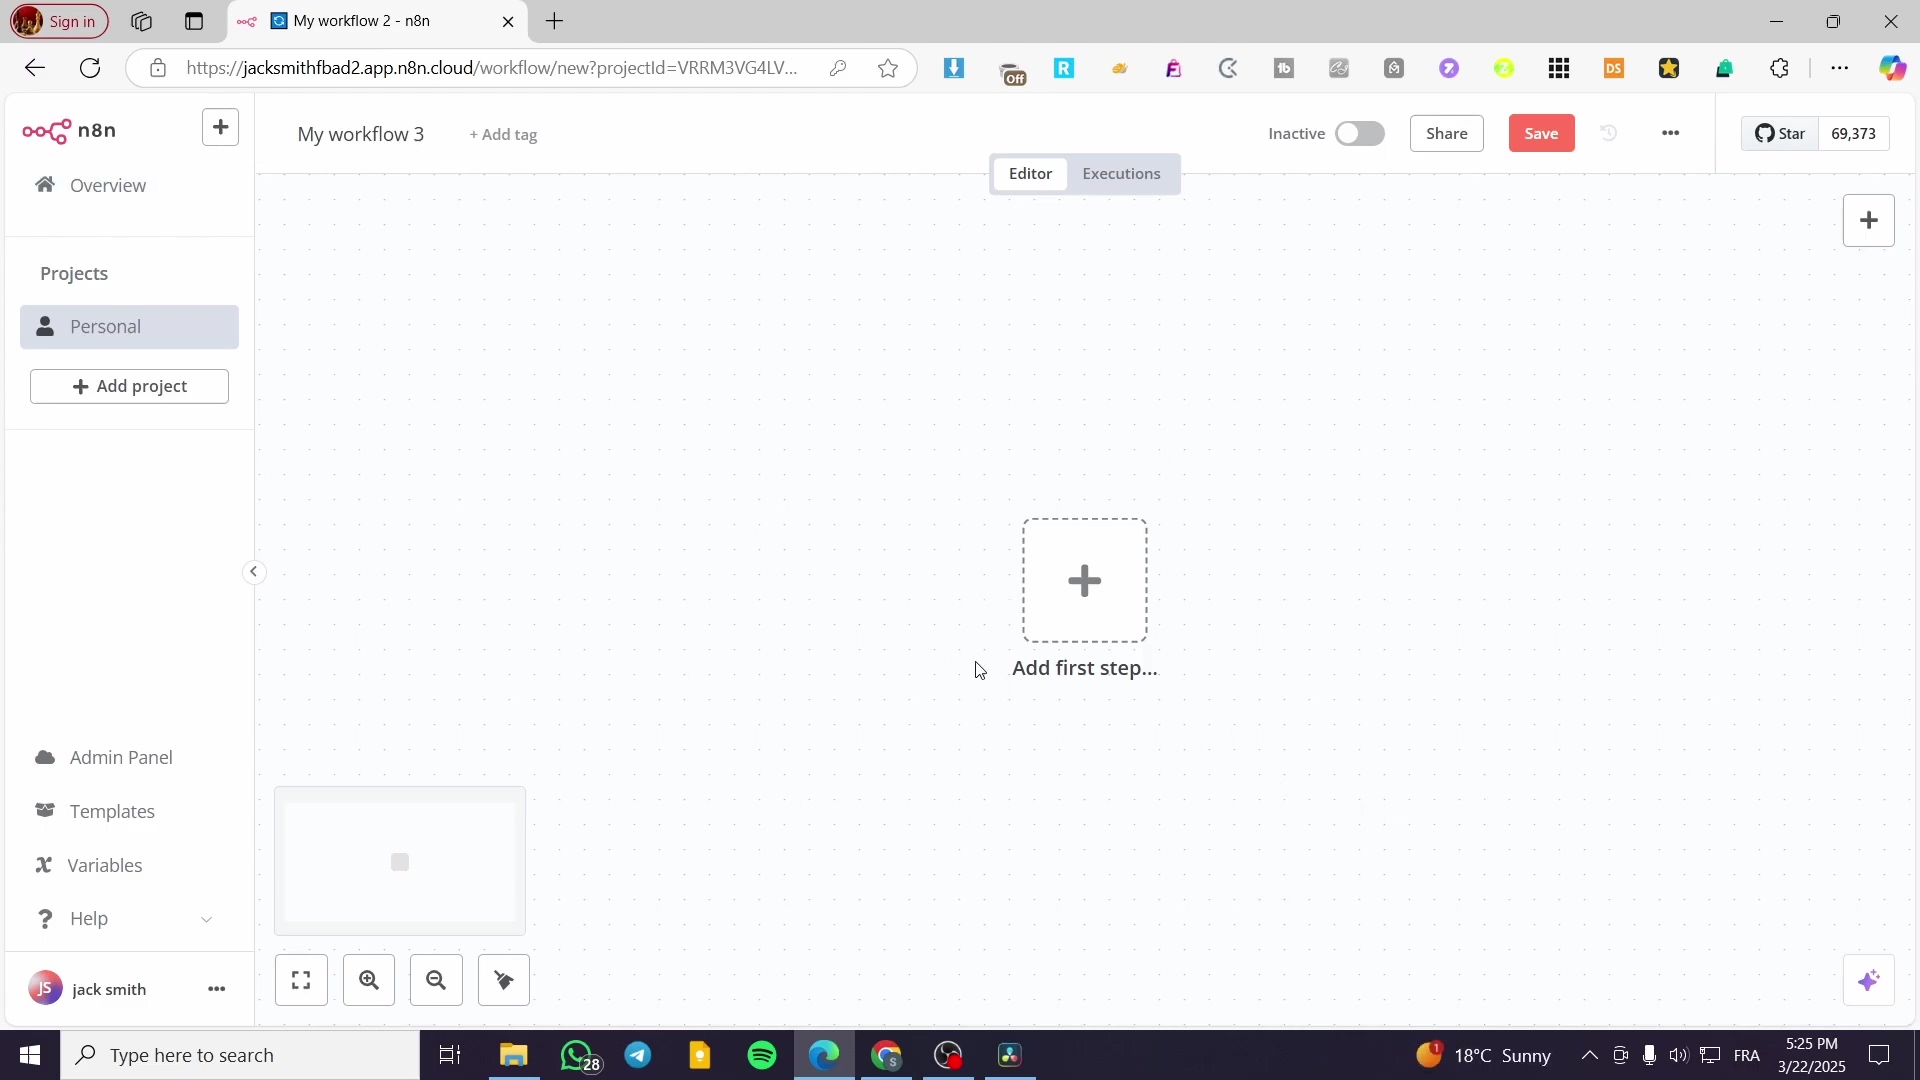
Step 1: Add a ‘Start’ node to your workflow. Every n8n workflow needs a starting point, and the ‘Start’ node is usually it. Just drag and drop it onto your canvas.
-
Step 2: Add a ‘Set’ node (from ‘Core’ category) connected to the ‘Start’ node. The ‘Set’ node is super handy for creating or modifying data within your workflow. You can find it by searching for ‘Set’ in the nodes panel.
-
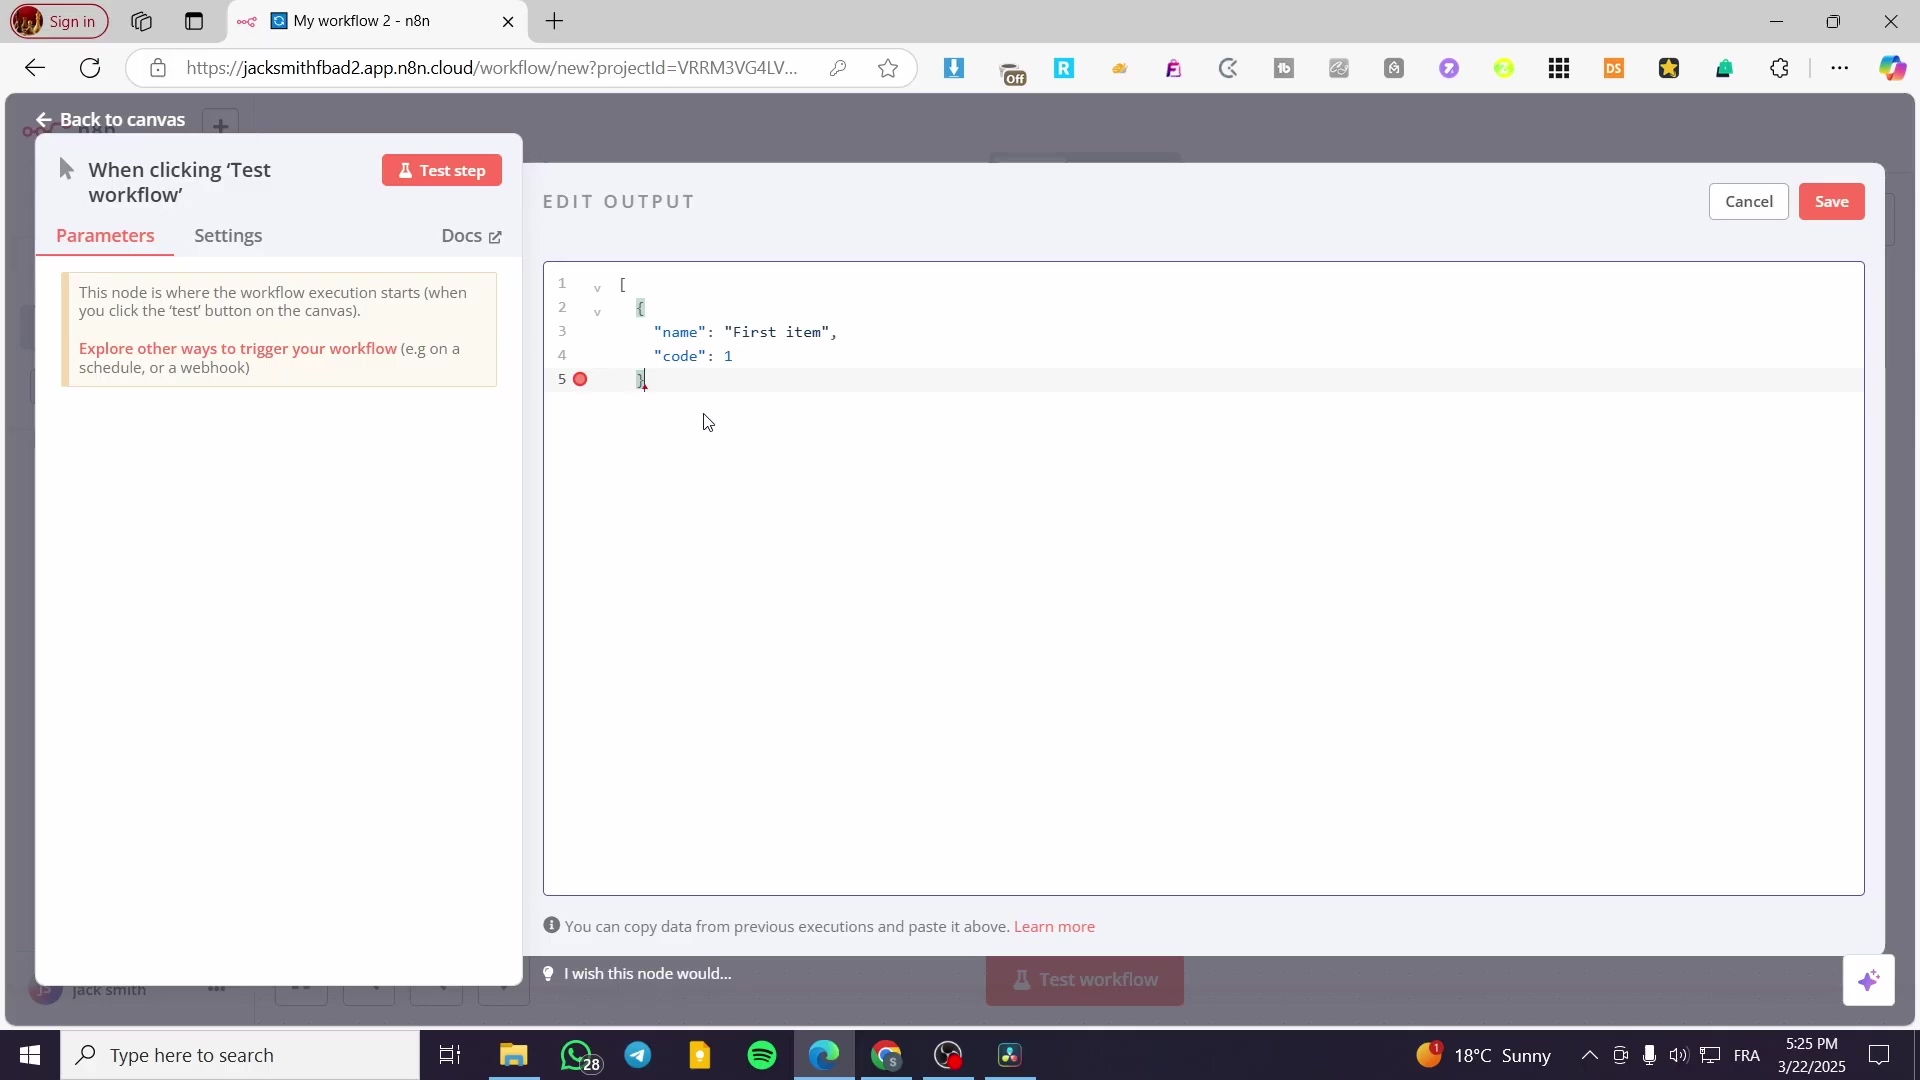
Step 3: In the ‘Set’ node, define your data using expressions. For example, to create JSON data, set the ‘Name’ to
jsonItemsand the ‘Value’ to:[ { "code": 1, "value": "First Data" }, { "code": 2, "value": "Second Data" } ]Here, we’re creating an array of two JSON objects. The
jsonItemsname is what we’ll use to reference this data later in our workflow. You can name it anything you like, butjsonItemsis clear for this example.
-
- Verification: Execute the ‘Set’ node. The output should display the defined JSON data. You’ll see the JSON structure you just created in the output panel. If it looks good, you’re on the right track!
The ‘Set’ node is used to define dynamic data, here showing two items with name and code fields. (Oops, looks like the image description has name and code, but our example uses code and value. No worries, the concept is the same – defining structured data!)
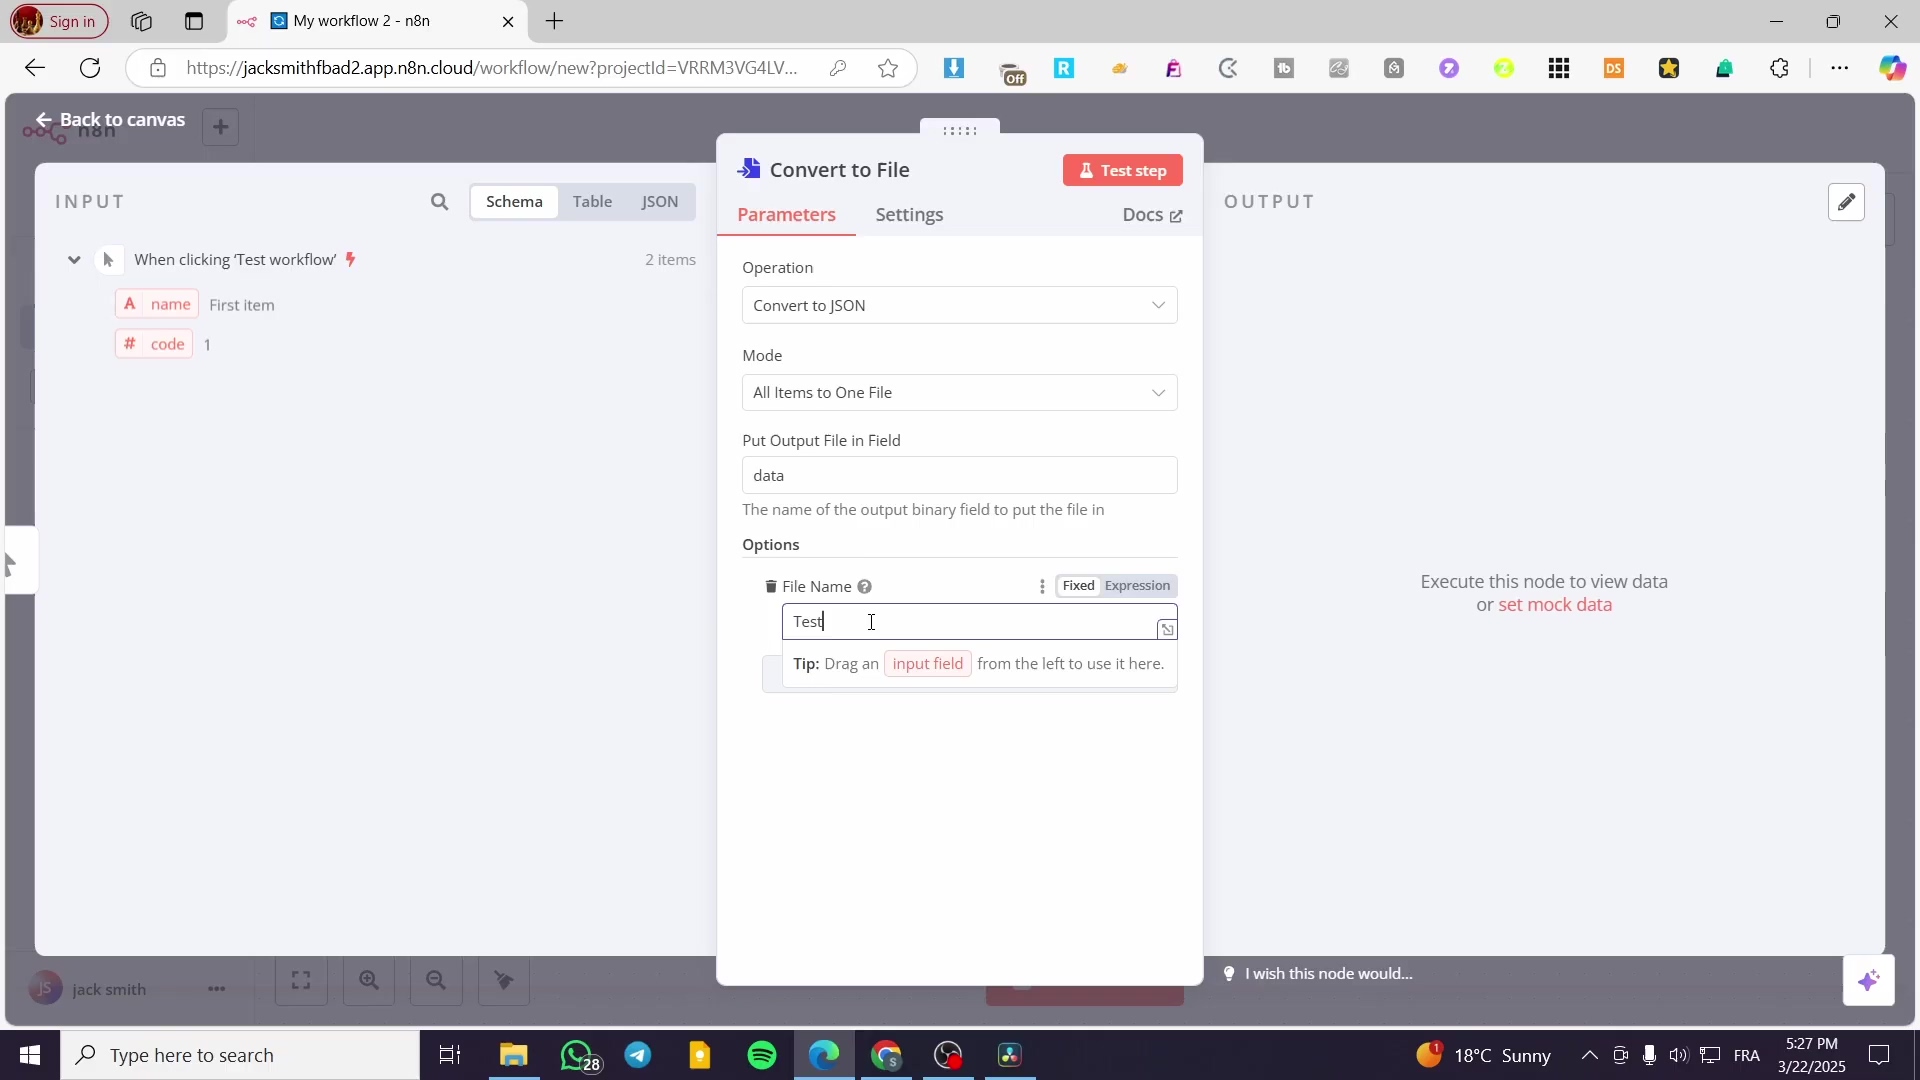
Convert Data to File Format
- Objective: Transform the structured data into a binary file format (e.g., JSON, CSV, XLSX) for saving. Our data is currently just raw JSON in the workflow. To save it as a file, we need to package it up nicely. This is where the ‘Convert to File’ node comes in – it’s like our digital packaging machine!
- Path: Use the ‘Convert to File’ node.
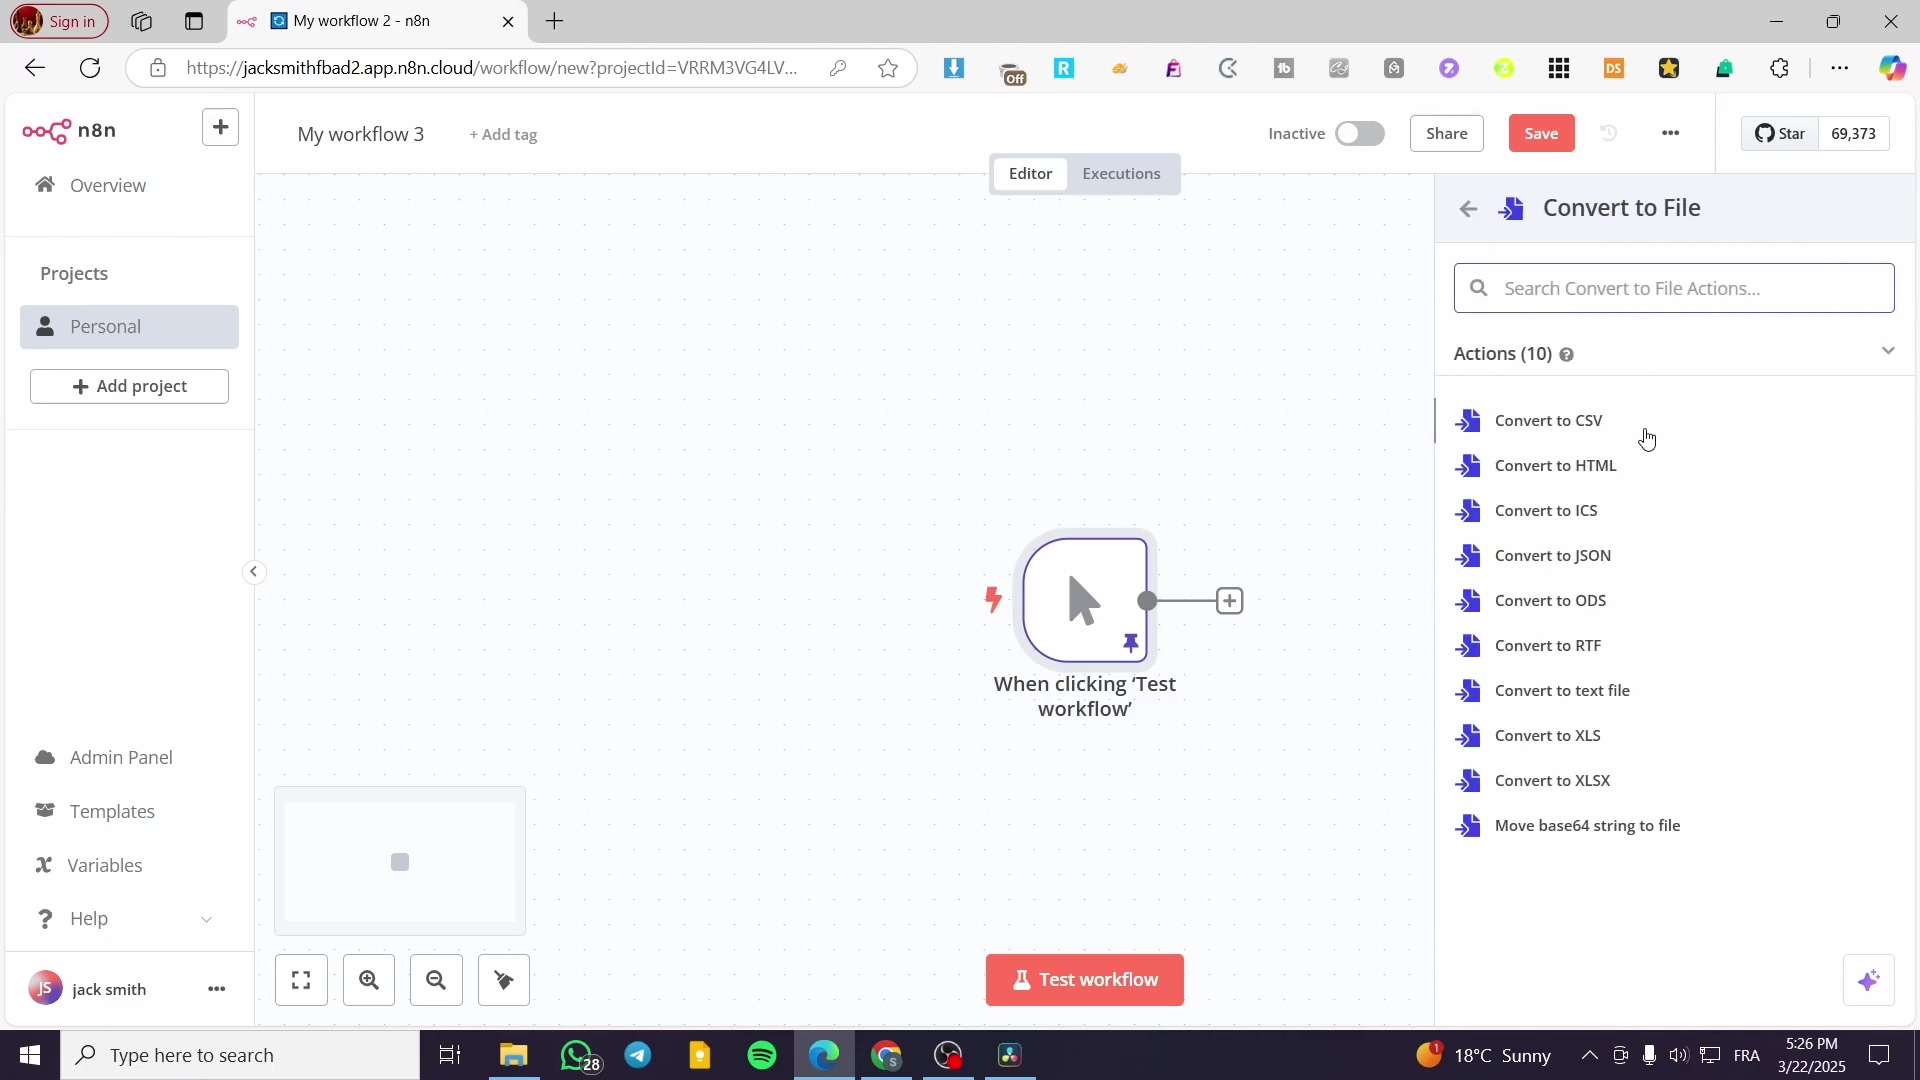
- Step 1: Add a ‘Convert to File’ node (from ‘Core’ category) and connect it to the ‘Set’ node. Drag it onto the canvas and link it up.
- Step 2: Configure the ‘Convert to File’ node:
- Source Data: Select ‘jsonItems’ if that’s the field created in the ‘Set’ node. This tells the node which data from the previous step it should convert.
- Convert To: Choose your desired file format (e.g., ‘JSON’, ‘CSV’, ‘XLSX’). For our example, ‘JSON’ makes the most sense since our source data is JSON. But you could convert it to CSV or even an Excel file if you wanted!
- Mode: Select ‘All items to one file’. This means all the items in our
jsonItemsarray will be combined into a single output file.
- Step 3: (Optional) Add an ‘Option’ for ‘File Name’ and set its value (e.g.,
test.json). While optional, it’s super helpful to give your file a name here. Otherwise, it might get a generic name. Click ‘Add Option’ and select ‘File Name’, then typetest.json.
- Verification: Execute the ‘Convert to File’ node. The output should be a binary file, downloadable within the n8n interface. You’ll see a new output item, and if you click on it, you should see a ‘Download’ button. This confirms the conversion worked and n8n now has a file-like object ready to be saved.
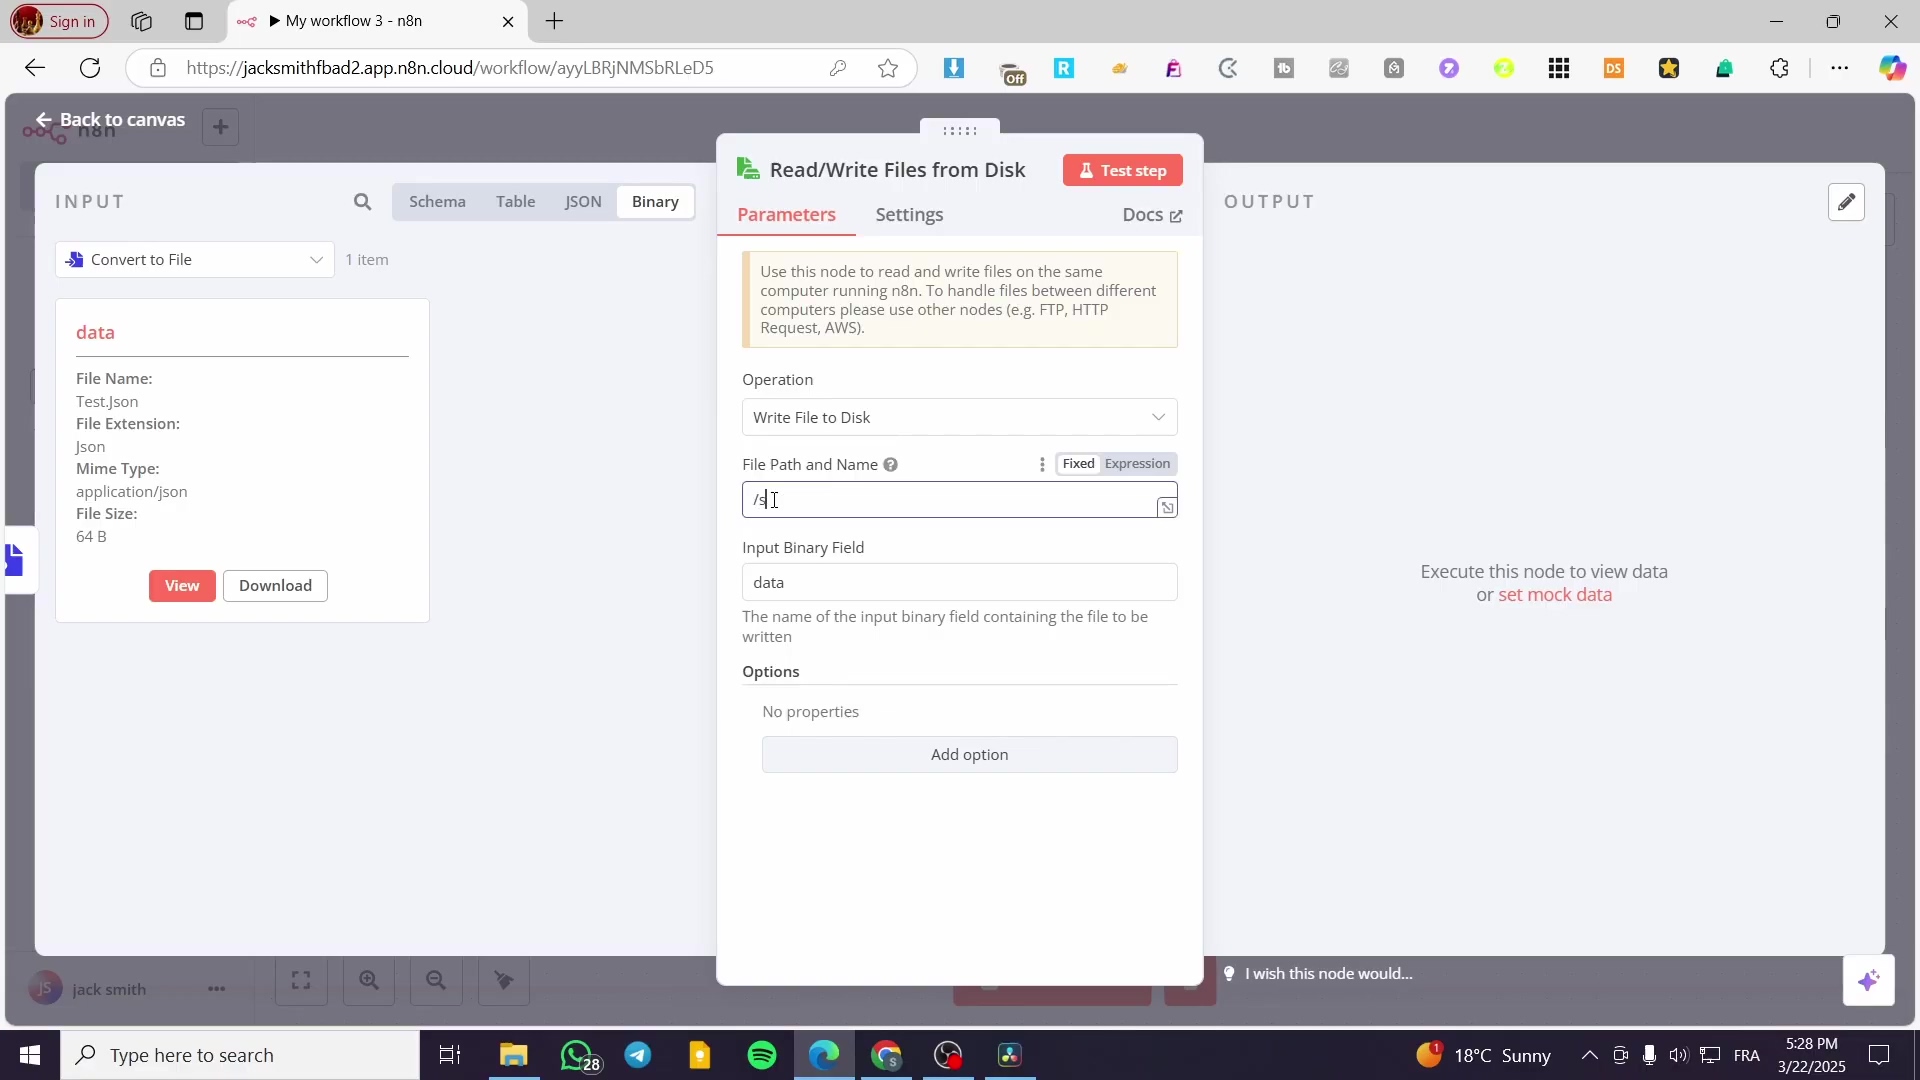
Save File to Local Disk
- Objective: Write the generated binary file to a specific directory on your local file system. This is the grand finale of our file creation journey – actually putting the file onto your computer! We’ll use a special node for this.
- Path: Use the ‘Write & Read Binary File’ node.
- Step 1: Add a ‘Write & Read Binary File’ node (from ‘FileSystem’ category) and connect it to the ‘Convert to File’ node. This node is your gateway to the local file system.
- Step 2: Configure the ‘Write & Read Binary File’ node:
- Operation: Select ‘Write file’. This tells the node we want to save something.
- Path: Specify the full target path, including the desired filename (e.g.,
/shared/data/test.json). This path must align with yourdocker-compose.ymlvolume mapping. Remember that/sharedpath we set up earlier? Now we’re using it! So, if you want to save it in adatasubfolder within your shared volume, the path would be/shared/data/test.json. Make sure thedatafolder actually exists on your host machine inside./data/sharedor n8n might complain (or you can use the ‘Execute Command’ node to create it dynamically, which we’ll touch on later!). - Binary Field: Select the field containing the binary file data, typically
datafrom the ‘Convert to File’ node. The ‘Convert to File’ node outputs the actual file content in a field usually nameddata(or similar, depending on your n8n version). We need to tell the ‘Write & Read Binary File’ node where to find that content.
- Verification: Execute the entire workflow. Then, navigate to the specified
Pathon your host system (e.g.,./data/shared/data/test.json) to confirm the file has been created and contains the correct data. Go to your host machine’s file explorer, browse to./data/shared/data/, and opentest.json. If you see your JSON data, you’ve successfully written a file locally with n8n! High five!
Managing File Content: Conversion and Dynamic Data Handling
Beyond just saving, effectively managing file content involves not just saving, but also transforming data before it’s written to disk. The ‘Convert to File’ node is central to this, allowing various data types to be encapsulated into a storable file format, incorporating dynamic naming. This is where your n8n workflows get really smart and flexible!
Dynamic File Naming
- Objective: Assign file names dynamically based on workflow data or timestamps. Hardcoding filenames is so last century! We want our files to have smart, descriptive names that change based on when they were created or what data they contain. This is super useful for reports or logs.
- Path: Configure the ‘Convert to File’ node’s ‘File Name’ option.
- Step 1: In the ‘Convert to File’ node, click ‘Add Option’ and select ‘File Name’. This opens up the field where we can get creative with expressions.
- Step 2: Use expressions to generate a dynamic filename. For example
={{ $now().toFormat('yyyyMMdd_HHmmss') }}_report.csvcreates a timestamped file. This expression uses n8n’s$now()function to get the current date and time, formats it nicely, and then appends_report.csv. So, you might get20231027_143005_report.csv. Pretty neat, huh? You can use any data from previous nodes here too, making filenames incredibly flexible.
- Verification: Run the ‘Convert to File’ node. The output should show the binary file with the dynamically generated name. Check the output of the ‘Convert to File’ node – the filename should reflect your dynamic expression.
Data Type Conversion Options
- Objective: Understand the various conversion capabilities of the ‘Convert to File’ node. This node isn’t just for JSON! It’s a versatile transformer that can turn your workflow data into many different file types.
- Path: Access the ‘Convert To’ dropdown in the ‘Convert to File’ node.
- Step 1: Select the ‘Convert to File’ node in your workflow.
- Step 2: Click the ‘Convert To’ dropdown. Options include ‘JSON’, ‘CSV’, ‘XLSX’, ‘HTML’, ‘TXT’, and more. Choose the format that best suits your data and downstream requirements. Need a spreadsheet? Pick XLSX. A simple text file? TXT it is! This flexibility is a game-changer for integrating with different systems.
- Verification: Test converting the same data with different ‘Convert To’ options and inspect the generated binary output to ensure integrity. Try converting your JSON data to CSV, then save it and open it in a spreadsheet program. Does it look right? If so, you’re a conversion master!
Reading Existing Files from Your Local File System
Okay, we’ve learned how to write files. Now, what if you have existing files on your local disk that you want n8n to read and process? Reading existing files from the local file system into an n8n workflow is crucial for processing external data or re-using previously generated files. The ‘Write & Read Binary File’ node (configured for reading) facilitates this. It’s like giving n8n the ability to pick up a book and understand its contents!
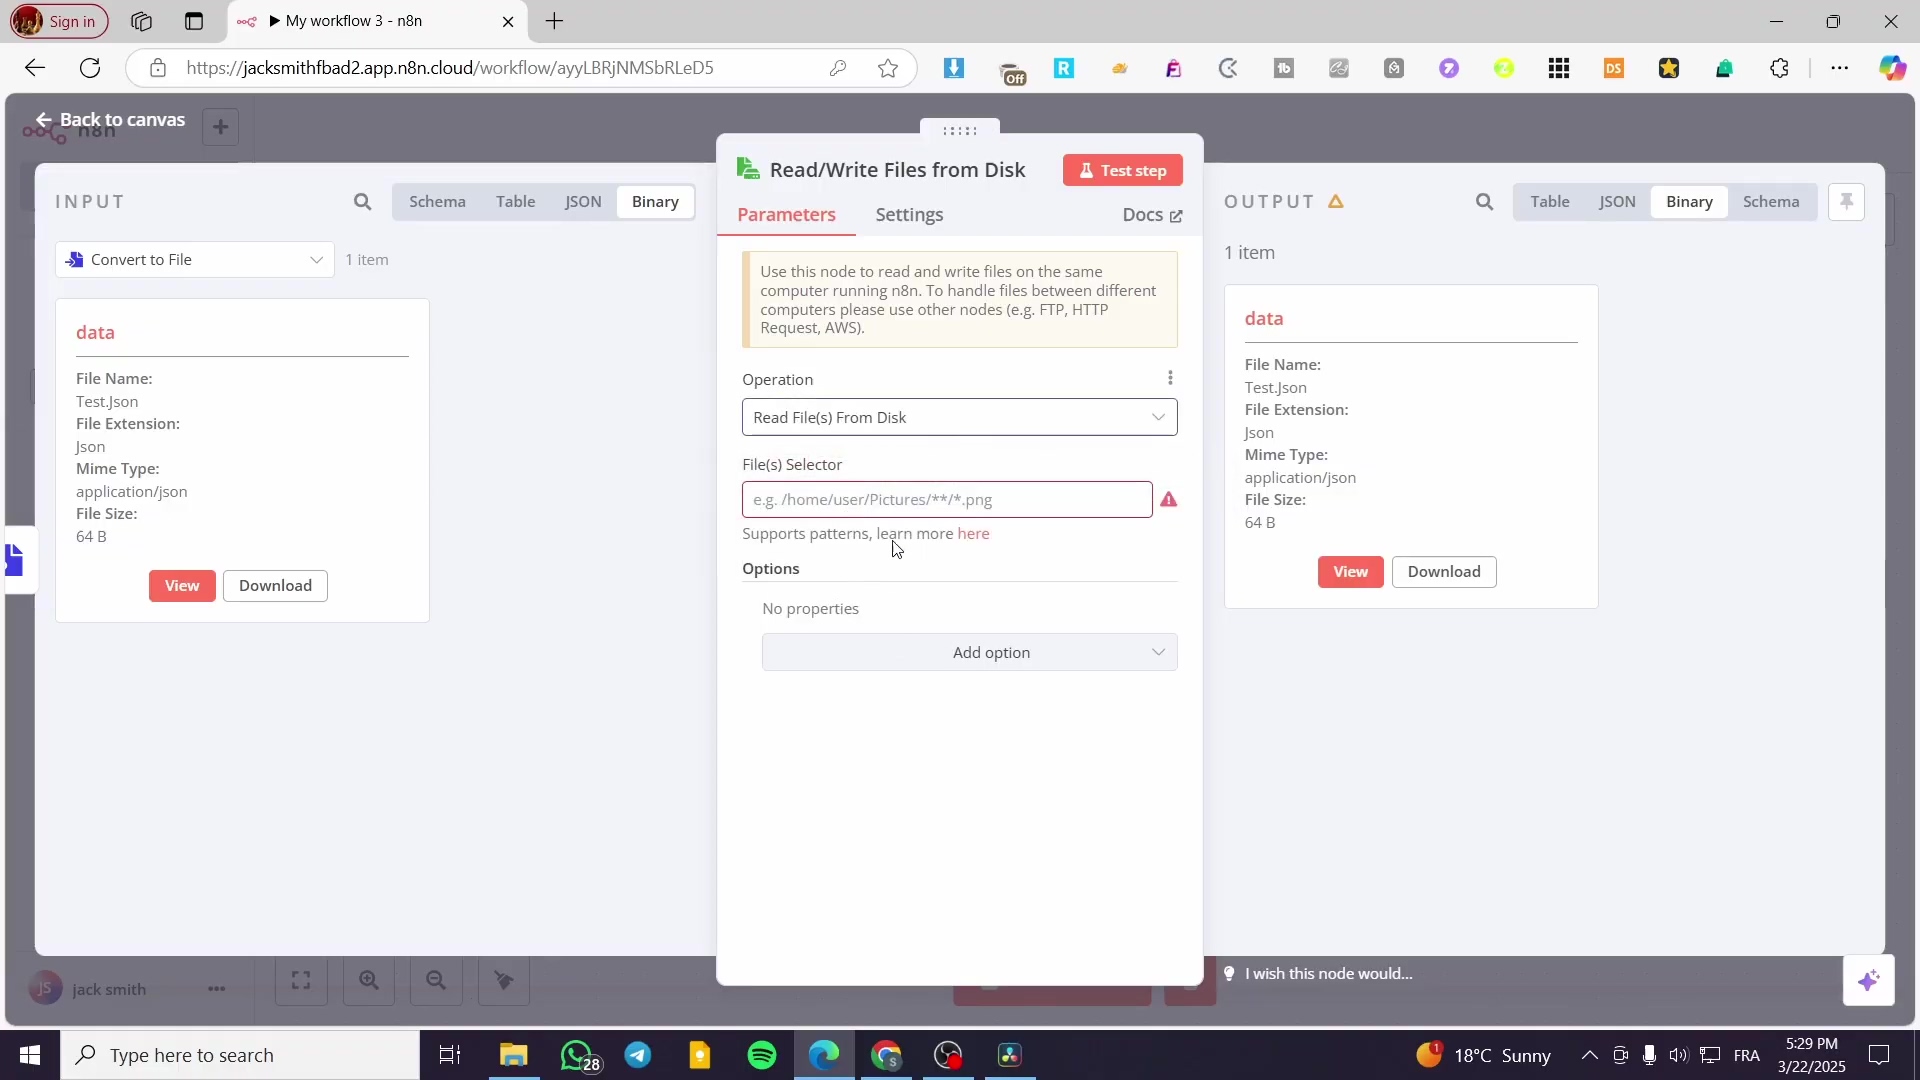
Configure Node for Reading
- Objective: Set up the n8n node to retrieve content from a specified local file. We need to tell n8n exactly which file to open and what to do with it.
- Path: Use the ‘Write & Read Binary File’ node, configured for ‘read file’ operation.
- Step 1: Add a ‘Write & Read Binary File’ node (from ‘FileSystem’ category) to your workflow. Yes, it’s the same node we used for writing, but it’s got a dual personality!
- Step 2: Set the Operation to ‘Read file’. This is the crucial switch that changes its behavior from writing to reading.
- Step 3: In the Path field, provide the absolute path to the local file you wish to read (e.g.,
/shared/data/report.csv). Ensure this path corresponds to a volume mounted in your n8n Docker container. Just like when writing, this path needs to be accessible via your Docker volume mapping. So, if you savedtest.jsonearlier, you’d put/shared/data/test.jsonhere.
- Verification: Execute the ‘Write & Read Binary File’ node. The output should contain the file’s content as binary data. Note: The content itself might not be directly human-readable in the n8n interface if it’s a binary format like XLSX. You’ll see a binary object in the output. If it’s a text-based file like JSON or CSV, you might see a preview, but for things like images or PDFs, it’ll just look like gibberish – which is totally normal!
Handling Read File Content
- Objective: Process the binary content of the read file within the workflow. Reading the file is just the first step. Now we need to make sense of that binary data, especially if it’s a structured format like CSV or JSON.
- Path: Use subsequent nodes like ‘Convert From File’ or ‘Split In Batches’.
- Step 1: After the ‘Write & Read Binary File’ node (read operation), add a ‘Convert From File’ node (from ‘Core’ category). This node is the counterpart to ‘Convert to File’ – it takes a binary file and turns it back into structured data that n8n can easily work with.
- Step 2: Configure ‘Convert From File’ to match the format of the file you read (e.g., ‘CSV’, ‘JSON’). If you read a JSON file, set this to ‘JSON’. If it was a CSV, set it to ‘CSV’. This tells the node how to parse the binary data.
- Step 3: Connect further processing nodes (e.g., ‘Split In Batches’, ‘Code’, ‘Google Sheet’ node) to manipulate or use the extracted data. Once your file content is converted back into structured data, the sky’s the limit! You can filter it, transform it, send it to a database, or even upload it to a Google Sheet. This is where your automation truly shines!
- Verification: Run the workflow until the ‘Convert From File’ node. Verify that the output of this node correctly displays the parsed content of your local file. If you read
test.jsonand converted it, you should now see your original JSON data ({ "code": 1, "value": "First Data" }, etc.) in the output of the ‘Convert From File’ node. Success! You’ve completed the full circle: data -> file -> data!
Troubleshooting Common n8n Local File System Issues
Let’s be real, technology can be a bit finicky sometimes. When integrating n8n with local file systems, users often encounter common issues related to paths, permissions, and data handling. Addressing these systematically ensures smooth operation. Don’t worry, we’ve all been there, staring at an error message wondering what went wrong. Let’s tackle these head-on!
Path Not Found Errors
- Objective: Resolve issues where n8n cannot locate the specified file or directory. This is like trying to find a treasure chest but having the wrong map. The file simply isn’t where n8n is looking.
- Path: Verify the
Pathspecified in the ‘Write & Read Binary File’ node and review Docker volume mounts.- Step 1: Double-check the path entered in the ‘Path’ field of the ‘Write & Read Binary File’ node. Ensure it is an absolute path within the n8n container’s file system (e.g.,
/shared/data/my_file.txt). Remember, n8n sees the path inside the container, not directly on your host machine. So,/shared/data/my_file.txtis correct, notC:\Users\YourName\data\shared\data\my_file.txt. - Step 2: Confirm that the mounted volume in your
docker-compose.ymlor Docker run command is correctly configured. For example, if your host path is./host_dataand your container path is/shared_data, then any file operations within n8n must refer to/shared_data/your_file.txt. If yourdocker-compose.ymlsays- ./my_local_folder:/container_folder, then n8n needs to use/container_folder/your_file.txt. - Step 3: Use the ‘Execute Command’ node in n8n to test directory existence (e.g.,
ls -l /shared) for debugging within the container. This is a super powerful trick! You can add an ‘Execute Command’ node, set the command tols -l /shared(or/shared/data), and run it. The output will show you what the n8n container actually sees in that directory. If it’s empty or the directory doesn’t exist, you’ve found your problem!
- Step 1: Double-check the path entered in the ‘Path’ field of the ‘Write & Read Binary File’ node. Ensure it is an absolute path within the n8n container’s file system (e.g.,
- Verification: Rectify the path and re-execute the workflow. Success confirms the path issue is resolved. If the
ls -lcommand shows your files, and your n8n node path matches, you should be good to go.
Permission Denied Errors
- Objective: Address errors preventing n8n from reading or writing files due to insufficient permissions. This is like having the right map, but the treasure chest is locked, and you don’t have the key. N8n knows where the file is, but it’s not allowed to touch it.
- Path: Adjust host file system permissions and verify the container’s user context.
- Step 1: On the host machine, ensure the user running Docker (or the specific user configured for the n8n container) has read and write permissions to the mounted folder. Use
chmodandchowncommands (e.g.,sudo chmod -R 777 ./data/sharedfor temporary testing, then refine to more secure permissions). A word of caution:chmod 777gives everyone full permissions, which is a big security risk in production. It’s good for quick testing, but ideally, you’d want tochownthe directory to the user/group ID that the n8n process runs as inside the container (oftennodeuser with UID 1000) or use more restrictive permissions like755or775. - Step 2: Check Docker container logs for more specific permission-related messages. The user inside the container attempting to access the mounted volume might not have the expected UID/GID. You can view Docker logs with
docker logs <your_n8n_container_name>. Look for messages likeEACCESorPermission deniedwhich will give you clues.
- Step 1: On the host machine, ensure the user running Docker (or the specific user configured for the n8n container) has read and write permissions to the mounted folder. Use
- Verification: After adjusting permissions, re-run the relevant n8n workflow. A successful file operation indicates the permission issue is resolved. If it works, you’ve found the right key!
Corrupted or Incomplete Files
- Objective: Diagnose and prevent files from being saved incompletely or with incorrect content. Ever tried to open a file only to find it’s gibberish or half-empty? That’s what we’re trying to avoid here.
- Path: Review ‘Convert to File’ node settings and upstream data.
- Step 1: Examine the data payload entering the ‘Convert to File’ node. Ensure the data is well-formed (e.g., valid JSON, correctly structured CSV). If the data going into the conversion node is already messed up, the output file will be too. Use a ‘NoOp’ node or simply inspect the output of the node before ‘Convert to File’ to ensure the data looks correct.
- Step 2: Verify the ‘Convert To’ setting in the ‘Convert to File’ node matches the expected output format. Mismatches can lead to malformed files. Trying to save JSON data as a CSV without proper mapping will result in a weird CSV file, for example.
- Step 3: Check the ‘Binary Field’ selection in the ‘Write & Read Binary File’ node. It must point to the field containing the converted binary data (typically
data). If you point it to the wrong field, you might save an empty file or just some metadata instead of the actual file content.
- Verification: Compare the output of the ‘Convert to File’ node with the locally saved file. If discrepancies exist, re-evaluate the conversion and writing steps. Open both the downloaded file from the ‘Convert to File’ node’s output and the file saved on your disk. They should be identical. If not, backtrack through your steps!
Advanced File Operations and Best Practices
Now that you’re a pro at basic file operations, let’s level up! Beyond basic read and write operations, n8n supports more advanced file manipulations and benefits from best practices to ensure secure and efficient local file system integration. This is where we go from simply moving files to orchestrating a symphony of data!
Dynamic Folder Creation
- Objective: Automatically create subdirectories for organizing files based on workflow logic. Imagine generating reports for different departments – you don’t want them all in one messy folder! Dynamic folder creation keeps things tidy.
- Concepts: While n8n’s ‘Write & Read Binary File’ node can create files, it typically cannot directly create intermediate directories. This requires pre-creation or external scripting. It’s like trying to put a book on a shelf that doesn’t exist yet – you need to build the shelf first!
- Approach A (Pre-create): Ensure all necessary directories exist on the host file system before n8n attempts to write to them. This is the simplest approach: just manually create the folders like
data/shared/reports/marketinganddata/shared/reports/saleson your host machine. - Approach B (Execute Command): Use the ‘Execute Command’ node to run a shell command like
mkdir -p /shared/data/{{ $json.dynamicFolderName }}before the ‘Write & Read Binary File’ node. This will dynamically create directories based on workflow data. This is the cooler, more automated way! You can get thedynamicFolderNamefrom a previous node (e.g., a ‘Set’ node). The-pflag inmkdiris super important – it means “create parent directories as needed,” so if/shared/datadoesn’t exist, it will create that too!
Error Handling for File Operations
- Objective: Implement robust error handling to manage failures during file operations. Things can go wrong: disk full, permissions revoked, file deleted. A good workflow anticipates these issues and handles them gracefully, rather than just crashing.
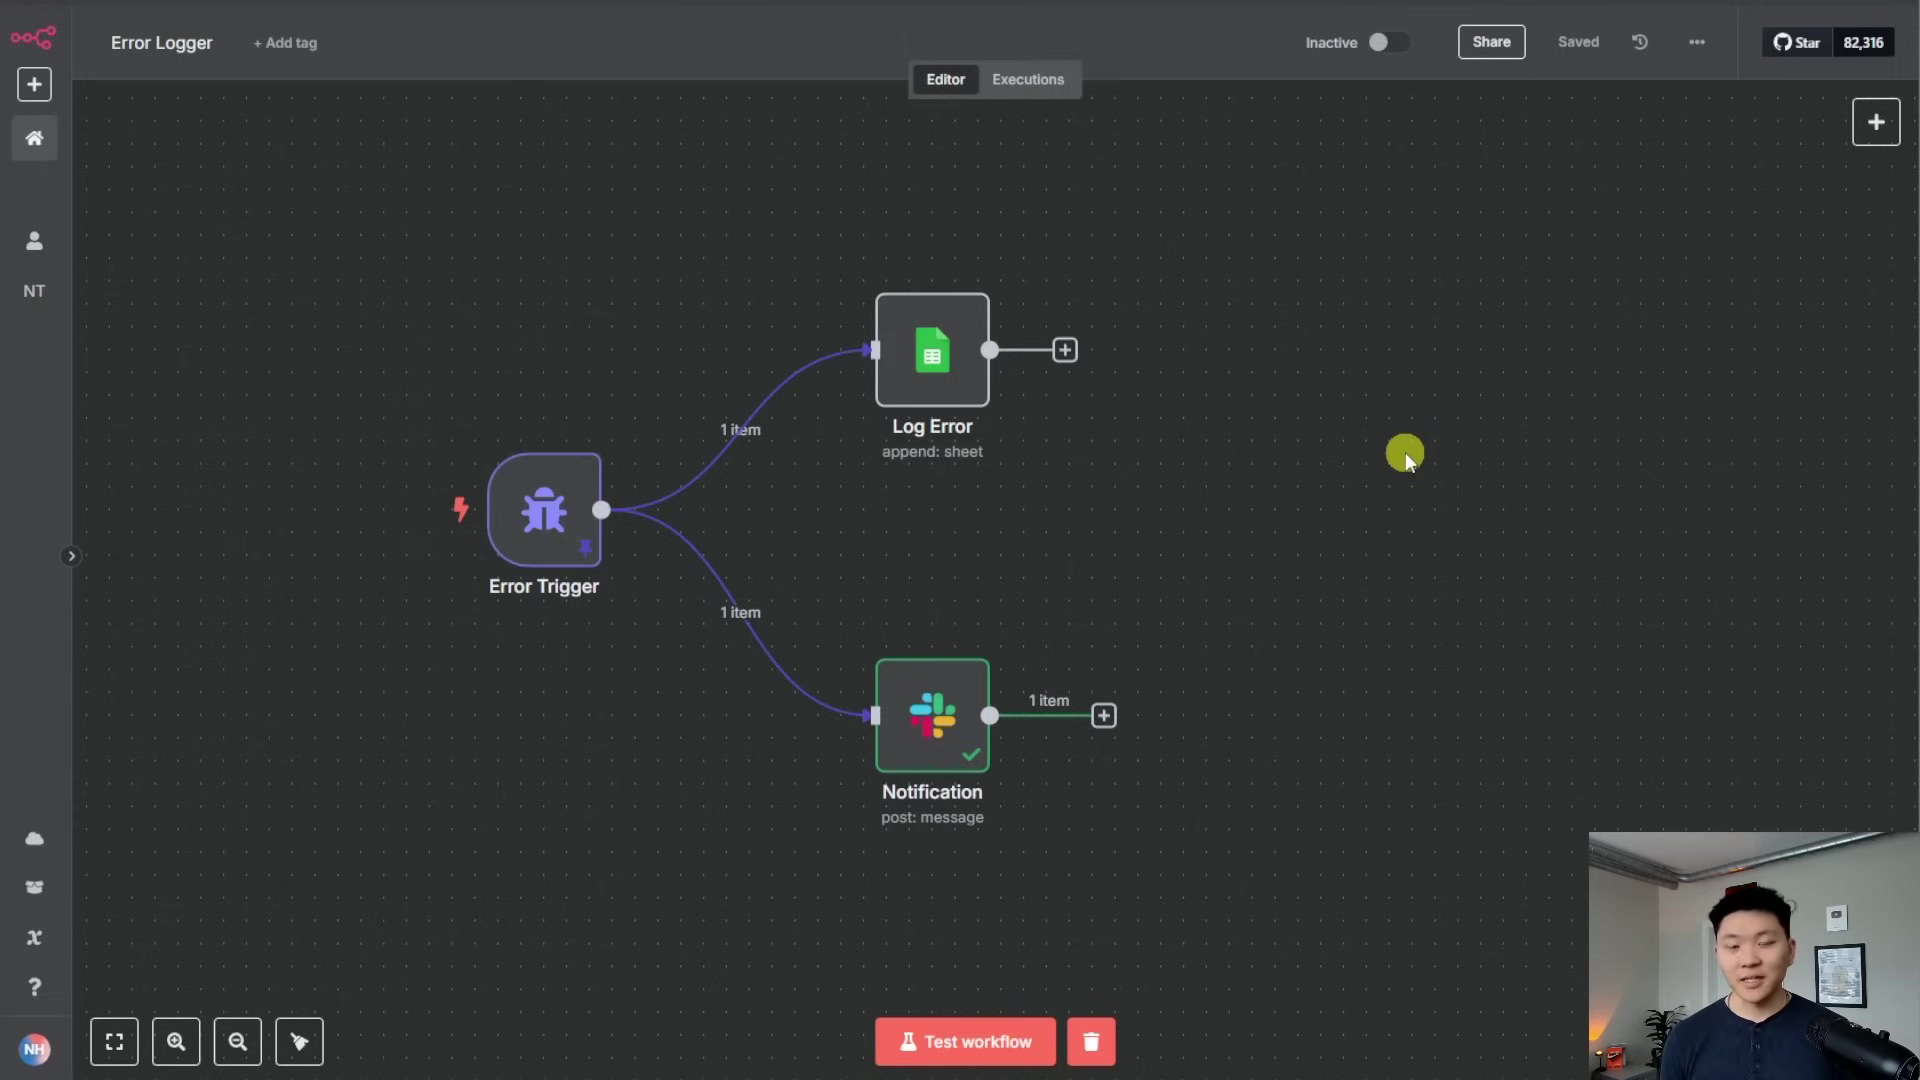
- Best Practice: Utilize n8n’s ‘Error Workflow’ feature. This is your workflow’s safety net!
- Step 1: For critical file operations, connect an ‘On Error’ branch to the ‘Write & Read Binary File’ node. You’ll see a little red dot or an ‘Error’ output on nodes. Drag a connection from there to another node.
- Step 2: In the error branch, log the error details, attempt alternative operations (e.g., save to a temporary location), or send notifications (e.g., email, Slack). For example, you could send yourself a Slack message with the error details using a ‘Slack’ node, or write the error to a log file using another ‘Write & Read Binary File’ node.
- Step 3: Consider a ‘Retry’ mechanism for transient errors (e.g., network issues affecting network-mounted storage). For some errors, simply trying again after a short delay might fix it. N8n has built-in retry options on many nodes, or you can build a custom retry loop with ‘Wait’ and ‘IF’ nodes.
Security Considerations
- Objective: Mitigate security risks associated with local file access from n8n. Giving n8n access to your local file system is powerful, but with great power comes great responsibility! We need to make sure we’re not accidentally opening up security holes.
- Best Practice: Implement principle of least privilege. This means giving n8n (or any system) only the minimum permissions it needs to do its job, and nothing more.
- Step 1: Restrict Volume Mounts: Only mount the specific directories that n8n absolutely needs access to. Avoid mounting entire root directories. Don’t just mount
/from your host into the container! Mount specific subfolders like./data/sharedto/shared. - Step 2: Limit Permissions: On the host system, set the strictest possible read/write permissions for the mounted directories. Avoid
777permissions in production environments. As mentioned before,777is a big no-no for anything serious. Aim for755for directories and644for files, and usechownto set the correct ownership. - Step 3: Sanitize Inputs: If file paths or names are constructed dynamically based on user input, sanitize these inputs to prevent directory traversal attacks (e.g.,
../../malicious_file). Imagine someone inputs../../../../etc/passwdas a filename. If not sanitized, n8n might try to write to your system’s password file! Always validate and clean any user-provided input before using it in file paths. - Step 4: Separate Environments: Run n8n in a containerized environment (like Docker) and potentially in a virtual machine to isolate its file system access from critical host directories. Docker already helps with this, but for maximum security, running n8n inside a dedicated virtual machine adds another layer of isolation.
- Step 1: Restrict Volume Mounts: Only mount the specific directories that n8n absolutely needs access to. Avoid mounting entire root directories. Don’t just mount
Enhancing Your n8n Workflows with Local File Capabilities
Integrating local file management introduces significant enhancements to n8n workflows, enabling richer data processing, storage, and exchange. This expands automation possibilities, moving beyond cloud-only solutions to leverage on-premise resources. Think of it as unlocking a whole new dimension for your automation!
Key Value Propositions
- Direct Data Integration: Seamlessly connect workflows with legacy systems or applications that use local files for data exchange. Many older systems still rely on file drops. Now n8n can talk to them directly!
- Enhanced Data Security: Keep sensitive data within your local infrastructure, adhering to compliance requirements. For highly regulated industries, keeping data on-premise is often a must.
- Offline Processing: Process and store data locally even when external cloud services are intermittently unavailable. Your automation keeps running even if the internet hiccups.
- Cost Efficiency: Utilize existing local storage infrastructure, potentially reducing cloud storage costs for large datasets. Why pay for cloud storage if you have plenty of local space?
- Performance: Reduce latency for file operations by bypassing network transfers when data is processed locally. Local operations are almost always faster than sending data over the network.
Practical Applications
- Reporting Automation: Generate complex reports (e.g., CSV, XLSX, PDF) from n8n workflows and save them directly to a local shared drive for internal teams. Imagine daily sales reports automatically appearing in the sales team’s shared folder!
- Data Ingestion: Monitor local directories for new files (e.g., FTP uploads) and trigger n8n workflows to process and ingest their content into databases or other systems. A new file drops, n8n picks it up, processes it, and updates your database – all automatically!
- Backup and Archiving: Create regular backups of critical workflow data or processed outputs and archive them to local storage. Set it and forget it!
- Local Data Synchronization: Synchronize files between local systems and cloud storage services, orchestrating the movement via n8n. Keep your local and cloud data in sync with n8n as the conductor.
By incorporating local file operations, n8n transforms into an even more versatile automation platform, bridging the gap between cloud services and your on-premise infrastructure. You’re no longer limited to just cloud-to-cloud integrations; you can now connect your digital world with your physical one!
Best Practices and Performance Optimization for Local File Nodes
Optimizing local file operations in n8n workflows ensures efficiency, reliability, and maintainability. Adhering to best practices can prevent common pitfalls and enhance workflow performance. Think of these as the golden rules for keeping your file operations smooth and speedy.
File Path Management
- Use Absolute Paths: Always specify absolute paths (e.g.,
/shared/mydata/file.txt) rather than relative paths. This prevents ambiguity and ensures consistent behavior regardless of the workflow’s execution context. Relative paths can be tricky because their meaning depends on where the command is executed from. Absolute paths are like GPS coordinates – always point to the same spot! - Consistent Naming Conventions: Establish a clear naming convention for files and directories (e.g.,
YYYY-MM-DD_report_name.csv). This simplifies file location and management both within and outside n8n. A consistent naming scheme is a lifesaver when you have hundreds or thousands of files. - Avoid Special Characters: Use only alphanumeric characters, hyphens, and underscores in file and directory names to prevent compatibility issues across different operating systems or file systems. Spaces, slashes, and other symbols can cause headaches, especially if your files are moved between Linux, Windows, or macOS.
Data Handling Efficiency
- Batch Processing: For large numbers of files or large individual files, consider processing them in batches. This prevents memory overloads and improves execution stability. Trying to load a massive file (think gigabytes!) into memory all at once can crash your n8n instance. Processing in smaller chunks is much safer.
- Use the ‘Split In Batches’ node after reading multiple file paths or before writing multiple files to disk. This node is your best friend for managing large datasets.
- Stream Processing: When dealing with extremely large files, if possible, implement stream processing instead of loading the entire file into memory. While n8n’s ‘Convert to File’ node loads data into memory, for native read/write, external scripts run via ‘Execute Command’ might offer streaming capabilities. This is a more advanced technique, but it’s crucial for truly massive files where even batching isn’t enough.
- Minimize Redundant Operations: Avoid reading or writing the same file multiple times within a single workflow unless absolutely necessary. Store file content in workflow data if it needs to be accessed multiple times. Every file operation takes time and resources. If you’ve already read a file, keep its content in a variable or a ‘Set’ node for subsequent steps instead of reading it again.
Error Handling and Logging
- Implement Error Workflows: Configure robust error handling using the ‘On Error’ functionality. This allows you to gracefully manage scenarios like file not found, permission denied, or disk space issues. We talked about this earlier, but it’s so important it bears repeating! Don’t let your workflows fail silently.
- Detailed Logging: Log detailed information about file operations, including file paths, sizes, and timestamps. This aids in debugging and auditing. When something goes wrong, good logs are like breadcrumbs leading you to the solution.
- Use a ‘Log’ node or integrate with an external logging service to record file activities. You can even send logs to a ‘Write & Read Binary File’ node to create a local log file!
Resource Management
- Monitor Disk Usage: Regularly monitor disk space on the host system where n8n is writing files. Implement alerts to prevent workflows from failing due to full disks. A full disk is a workflow killer! Set up monitoring tools (like Prometheus or Grafana) or even a simple n8n workflow to check disk space periodically and alert you.
- Clean Up Temporary Files: If your workflow creates temporary files, ensure they are eventually deleted. Use a ‘Delete Binary File’ node or an ‘Execute Command’ node (e.g.,
rm /shared/temp/{{ $json.fileToDelete }}) to clean up. Don’t be a digital hoarder! Temporary files can quickly fill up your disk if not managed.
By following these best practices, you can build reliable, efficient, and scalable n8n workflows that seamlessly interact with your local file system, whether for simple data storage or complex data pipelines. You’re now equipped to be a true automation architect!
Final Summary
Wow, what a journey! This guide provided a complete walkthrough of configuring n8n for local file operations, from setup to advanced techniques. You are now equipped to create, save, read, and manage files on your local disk directly from n8n workflows, significantly expanding your automation capabilities. You’ve basically given your n8n workflows superpowers to interact with your local machine – how cool is that?! For your next step, explore integrating dynamic reports generated in n8n with local file storage by configuring a ‘Write & Read Binary File’ node with a path like /shared/reports/monthly_report.xlsx. Keep automating, and remember: the only limit is your imagination!
Frequently Asked Questions (FAQ)
Q: Why do I need to configure Docker volumes for local file access?
A: Docker containers are isolated environments. Without configuring a volume, the n8n container has no direct access to your host machine’s file system. A Docker volume (specifically a bind mount in this case) creates a shared link, allowing a specific directory on your host to be visible and accessible inside the container. It’s like creating a secure tunnel between your computer and the n8n container.
Q: I’m getting ‘Permission Denied’ errors even after setting up the volume. What gives?
A: This is a super common headache! Even if the path is correct, the user running the n8n process inside the Docker container might not have the necessary read/write permissions for the mounted directory on your host machine. You’ll likely need to adjust the permissions (chmod) and/or ownership (chown) of the host directory to match the user ID (UID) and group ID (GID) that n8n runs as within its container (often UID 1000 for the node user). Using docker logs <your_n8n_container_name> can often give you more specific error messages to help diagnose.
Q: Can n8n create new folders dynamically on my local disk?
A: The ‘Write & Read Binary File’ node itself can’t directly create intermediate directories. However, you can absolutely achieve dynamic folder creation! The best way is to use an ‘Execute Command’ node before your ‘Write & Read Binary File’ node. You can run a shell command like mkdir -p /shared/data/{{ $json.dynamicFolderName }}. The -p flag is key, as it ensures all necessary parent directories are created if they don’t already exist. This makes your workflows much more flexible for organizing files.
Q: What’s the difference between ‘Convert to File’ and ‘Write & Read Binary File’ nodes?
A: Think of them as a two-step process. The ‘Convert to File’ node takes your structured data (like JSON objects or a table) and packages it into a binary file format (like a JSON file, CSV, or XLSX). It prepares the data to be saved. The ‘Write & Read Binary File’ node then takes that packaged binary data and actually saves it to your local disk (or reads it from your disk). So, ‘Convert to File’ is about formatting, and ‘Write & Read Binary File’ is about disk interaction.