Watch the Video Tutorial
💡 Pro Tip: After watching the video, continue reading below for detailed step-by-step instructions, code examples, and additional tips that will help you implement this successfully.
Table of Contents
Open Table of Contents
- Unlock Social Media Automation with AI Agents
- Required Resources and Cost-Benefit Analysis
- Step-by-Step Workflow Configuration
- 💡 Critical Best Practices
- Key Takeaways
- Conclusion
- Frequently Asked Questions (FAQ)
- Q: What is n8n and why should I use it for social media automation?
- Q: Do I need to be a programmer to use n8n and set up this workflow?
- Q: Why do I need separate AI models like Perplexity and OpenAI? Can’t one do everything?
- Q: What are API keys and why are they so important to keep secure?
- Q: I’m having trouble connecting to X (Twitter) or Facebook. What should I do?
- Q: How can I make my AI-generated content sound more natural or on-brand?
Unlock Social Media Automation with AI Agents
Hey there, fellow automation enthusiast! Boyce here, and let me tell you, in today’s super-fast digital world, having a killer social media presence isn’t just nice to have—it’s absolutely crucial. But, man, does it eat up your time and resources! Ever wished you had a digital assistant that could whip up social media posts, tweak them for different platforms, and then publish them, all on its own? Well, guess what? We’re about to build exactly that, powered by some seriously smart AI!
This guide is your personal roadmap to building an automated content distribution system using n8n, a fantastic no-code automation tool. Think of n8n as your central command center, connecting all these cool AI services together. It’s like building your own content-generating robot, piece by piece!
Our automated workflow is designed to be your content superpower. It will:
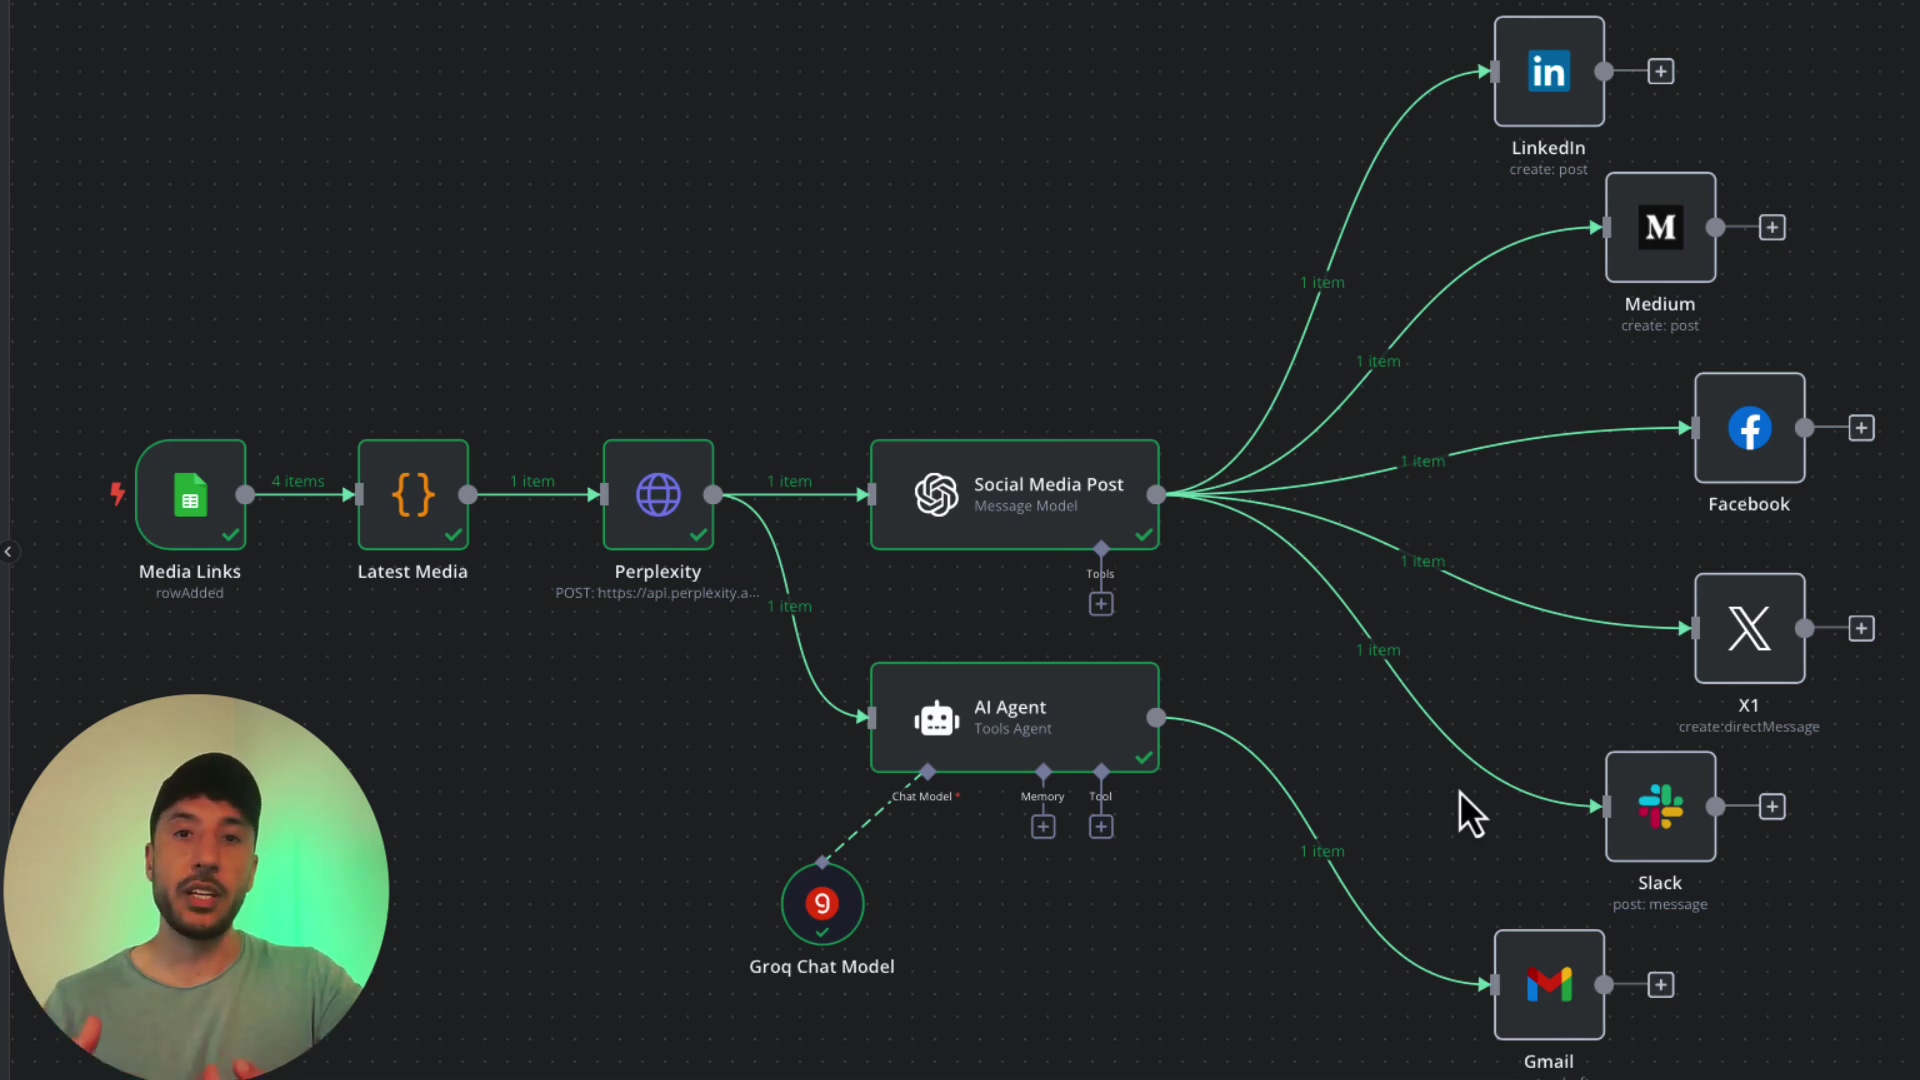
- Fetch News Articles: Automatically grab news articles or any web content you want, straight from a Google Sheet. This sheet acts as your content queue, like a conveyor belt for ideas.
- Summarize with AI: Use an AI powerhouse like Perplexity AI to condense those lengthy articles into bite-sized summaries. No more slogging through endless text!
- Generate Platform-Specific Content: This is where the magic happens! We’ll create unique social media posts, perfectly tailored for LinkedIn, Medium, Facebook, X (formerly Twitter), Slack, and even Gmail
- Automate Publishing: Once the content is ready, it’ll automatically post to your chosen platforms. Set it and forget it!
This comprehensive setup isn’t just about saving time; it’s about making sure your awesome content hits the right audience, on the right platform, with hardly any manual effort from you. How cool is that? It’s like having a whole marketing team working for you 24/7!
Required Resources and Cost-Benefit Analysis
Alright, before we dive into the nitty-gritty, let’s talk about the tools we’ll need and, more importantly, why this DIY approach with n8n and AI is often a smarter move than shelling out big bucks for commercial solutions. Think of it like building your own custom LEGO spaceship versus buying a pre-built one. Yours will be exactly what you want!
Resource Checklist
Here’s your shopping list for this automation adventure:
| Tool/Service | Purpose | Notes |
|---|---|---|
| n8n | Workflow automation | This is our central hub! You can self-host it on your own server (for ultimate control) or use their cloud version (super convenient). |
| Google Sheets | Content trigger/database | Free and easy to use with your Google account. This is where we’ll feed our content ideas. |
| Perplexity AI | Article summarization | Requires an API key and works on a credit-based system. Don’t worry, a small amount of credit can go a long way! |
| OpenAI API | AI content generation | Also requires an API key and is credit-based. This is our creative writing assistant. |
| LinkedIn Account | Social media publishing | Your personal or business account. |
| Medium Account | Blog publishing | Your personal account for longer-form content. |
| X (Twitter) Account | Social media publishing | You’ll need a Basic or Pro account for API access. This is a recent change, so be aware! |
| Facebook Account | Social media publishing | You’ll need a Facebook Page or Group for API access, not just a personal profile. |
| Gmail/Slack | Internal notifications/summaries | Free with your respective accounts. Super handy for keeping yourself or your team in the loop. |
Cost-Benefit Analysis: DIY Automation vs. Commercial Solutions
Why go DIY when there are ready-made solutions out there? Let me break it down for you. It’s like the difference between a custom-built suit and an off-the-rack one. Both work, but one fits perfectly.
| Feature | DIY Automation (n8n + AI APIs) | Commercial Social Media Management Platforms |
|---|---|---|
| Initial Setup Cost | Super low! You’re mainly paying for API credits and maybe n8n hosting if you self-host. | Can vary wildly, often subscription-based, and can hit your wallet hard upfront. |
| Recurring Cost | Usage-based API credits. For personal use, we’re talking maybe $5/month for Perplexity/OpenAI. Peanuts! | High! We’re talking $50-$500+ per month, depending on how many features and users you need. Ouch! |
| Customization | Extremely High! You’re the boss. You have full control over your workflow and how the AI responds. | Limited to what the platform gives you. You’re stuck in their box. |
| Scalability | Sky’s the limit! Can handle massive amounts of content without breaking a sweat. | Depends on your plan limits. You might hit a ceiling. |
| Integration | Super flexible! If it has an API, n8n can probably connect to it. | Limited to their pre-built integrations. If they don’t support it, tough luck. |
| Learning Curve | Moderate to High. You’ll need to wrap your head around n8n and API concepts. But hey, that’s why I’m here to guide you! | Low to Moderate. They’re designed to be user-friendly, but you sacrifice control. |
| Data Privacy | You control your data flow. You know exactly where your information is going. | Varies by platform’s policy. You’re trusting them with your data. |
| Best For | Folks like us who want highly customized, cost-effective automation for very specific needs. | People who just need a quick, out-of-the-box solution with less fuss and don’t mind the recurring cost. |
See? Building it yourself gives you incredible power and flexibility, often at a fraction of the cost. It’s an investment in your skills and your future automation empire!
Step-by-Step Workflow Configuration
Alright, buckle up! This is where we start building our content automation machine. Think of each step as adding a new, powerful module to our digital robot. We’ll go from feeding it ideas to watching it publish like a pro.
1. Setting Up the Google Sheets Trigger
Every great journey needs a starting point, right? For our automation, that’s a simple Google Sheet. This sheet will be our content queue, like a to-do list for our AI. Every time you add a new article URL here, it’ll kick off the whole process.
Action: First things first, head over to Google Sheets and create a brand new spreadsheet. Let’s call it something clear, like “Media Links.” Inside, create just one column, and label it “Article URL.” This is where you’ll paste the links to the articles you want to summarize and share.

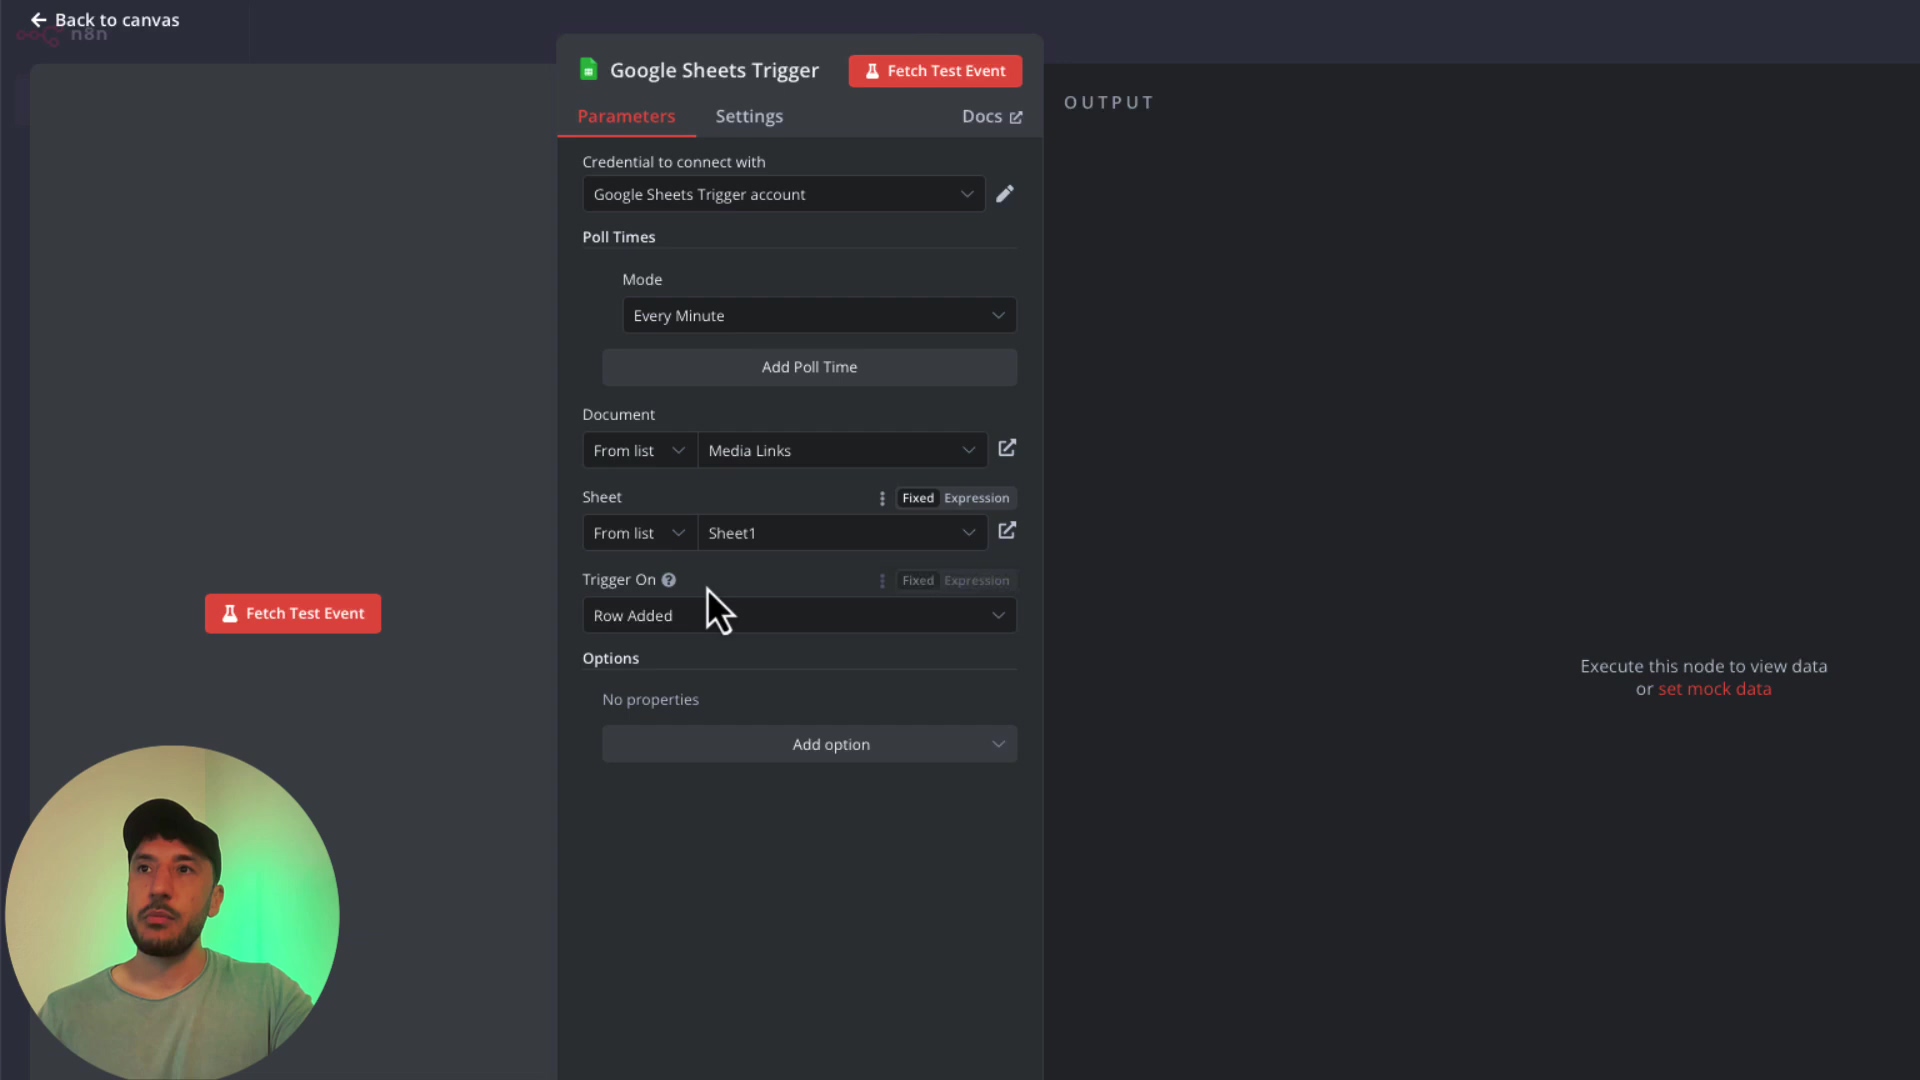
Action: Now, let’s jump into n8n. In your n8n workflow editor, search for and add a ‘Google Sheets Trigger’ node. This node is like the watchful gatekeeper of our sheet.
Configuration:
- Connect to Google: You’ll need to connect your Google account to n8n. If you haven’t done this before, n8n will guide you through the OAuth process. It’s super straightforward, just follow the prompts to grant n8n permission to access your Google Sheets.
- Select Document & Sheet: Once connected, choose your newly created “Media Links” document from the dropdown. Then, select ‘Sheet1’ (or whatever you named your sheet if you changed it).
- Set Trigger: This is crucial! Make sure the ‘Trigger On’ option is set to ‘Row Added’. This tells n8n: “Hey, whenever someone adds a new row (a new article link) to this sheet, start the workflow!”
Expected Outcome: Once configured, this node will patiently wait. The moment you add a new URL to your Google Sheet, this trigger will fire, and our workflow will spring to life! You’ll see a green checkmark on the node when it successfully triggers.
2. Isolating the Latest Article Link
Okay, so the Google Sheets trigger is awesome, but sometimes, especially if you’re adding multiple rows quickly, it might send all the rows it sees. We only want to process the newest one, right? We don’t want our AI summarizing old news!
Action: Drag and drop a ‘Code’ node right after your Google Sheets Trigger. This ‘Code’ node is like a tiny, custom filter we’re building.
Why a Code Node? Because n8n is super flexible! While many things are drag-and-drop, sometimes a little bit of JavaScript gives us precise control. Don’t worry, you don’t need to be a coding wizard. This is a common snippet.
Configuration: Inside the ‘Code’ node, you’ll paste a simple JavaScript snippet. This snippet will look at all the data coming from the Google Sheets trigger and pick out just the very last item, which is our newest article link. If you’re not sure how to write it, you can often ask an AI like ChatGPT or use n8n’s built-in custom GPTs to generate it for you. Here’s a common example:
return [
  items[items.length - 1]
];
Explanation: This little piece of code simply says: “Take all the items (the rows from your Google Sheet), find the last one (items.length - 1 gives you the index of the last item in an array), and return only that one.” Simple, yet super effective!
Expected Outcome: After this node runs, the data flowing to the next step will contain only the single, most recently added article URL. Perfect!
3. Integrating Perplexity for Article Summarization
Now for the fun part: getting our AI to read and understand the article! We’re going to use Perplexity AI for this. Why Perplexity? Because it’s fantastic at summarizing web content since it has direct, real-time access to the internet. It’s like having a super-smart research assistant!
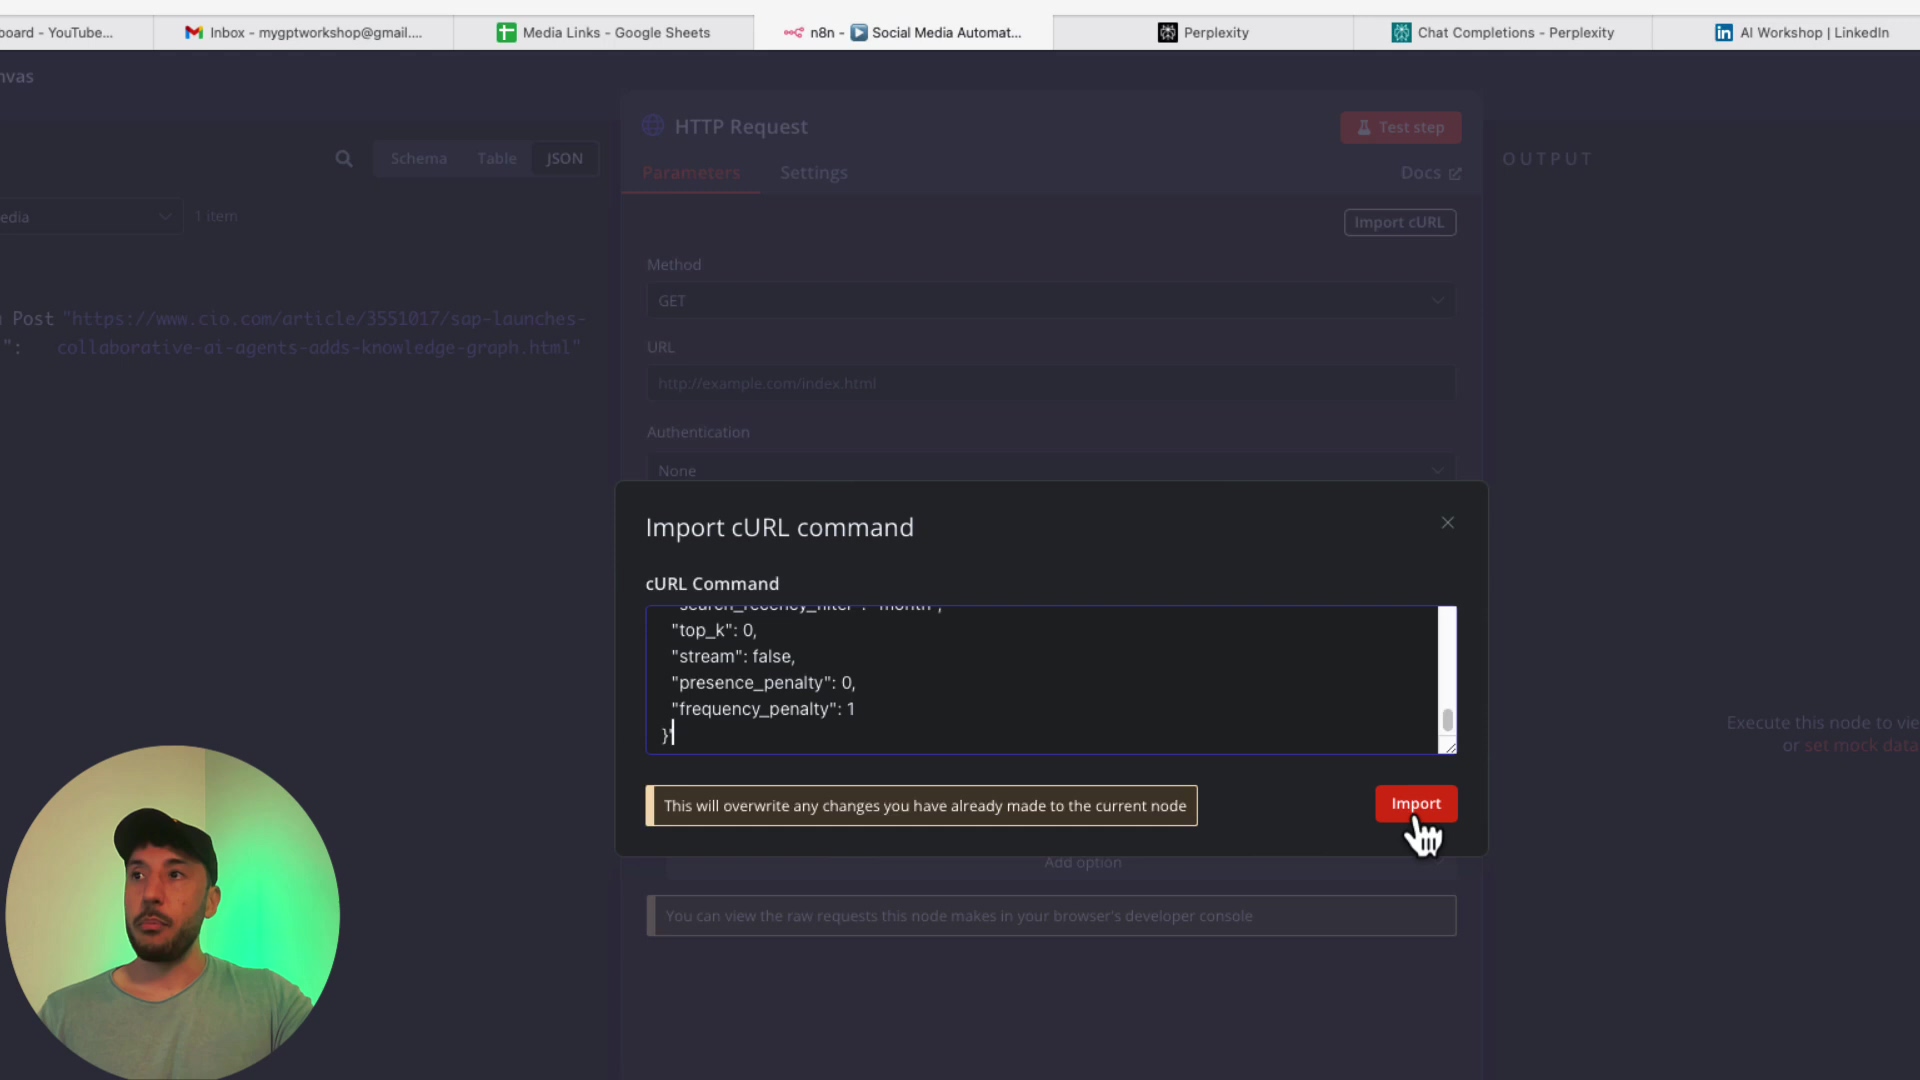
Heads Up: As of October 2024, n8n might not have a direct “Perplexity” node. No worries! This is where the ‘HTTP Request’ node comes in. It’s a universal connector for anything with an API (Application Programming Interface), which is basically how different software talks to each other.
Action:
- Get Your API Key: First, you need a Perplexity API key. Go to your Perplexity settings and generate one. Treat this key like gold – never share it publicly! Even a $5 credit can last a long, long time for personal use, so don’t be afraid to top up.
- Add HTTP Request Node: In n8n, add an ‘HTTP Request’ node right after your ‘Code’ node.
- Import cURL: This is a super handy n8n feature! Go to the Perplexity API documentation (specifically, look for their chat completion example). You’ll usually find a
cURLcommand there. Copy that entirecURLcommand. Then, in your n8n ‘HTTP Request’ node, click the ‘Import cURL’ button. n8n will magically populate all the necessary URL, headers (including where your API key goes!), and body structure for you. It’s a huge time-saver!
**Configuration (the crucial part!):
- Insert API Key: In the ‘Headers’ section of the HTTP Request node, you’ll see an
Authorizationheader. It will likely look something likeBearer YOUR_API_KEY. ReplaceYOUR_API_KEYwith the actual API key you got from Perplexity. For security, it’s best practice to store this in an n8n credential or environment variable, but for now, pasting it directly works for testing. - Modify the Prompt: This is where you tell Perplexity what to do! In the ‘Body’ section (which will be JSON format), find the
promptfield. Change it to something like: “Summarize the following article in detail: {{ $json.articleUrl }}”.- What’s
{{ $json.articleUrl }}? This is n8n’s way of saying, “Grab the article URL from the previous node’s output.” It dynamically inserts the link for each article. Super cool, right?
- What’s
- Set Max Tokens: To control the length of your summary and keep costs in check, set a ‘Max tokens’ limit, say,
500. This tells Perplexity not to write an entire novel, just a concise summary.
Expected Outcome: When this node runs, it will send the article URL to Perplexity, and Perplexity will return a detailed summary of the article. This summary will then be available for the next node in your workflow.
4. Generating Tailored Social Media Posts with OpenAI
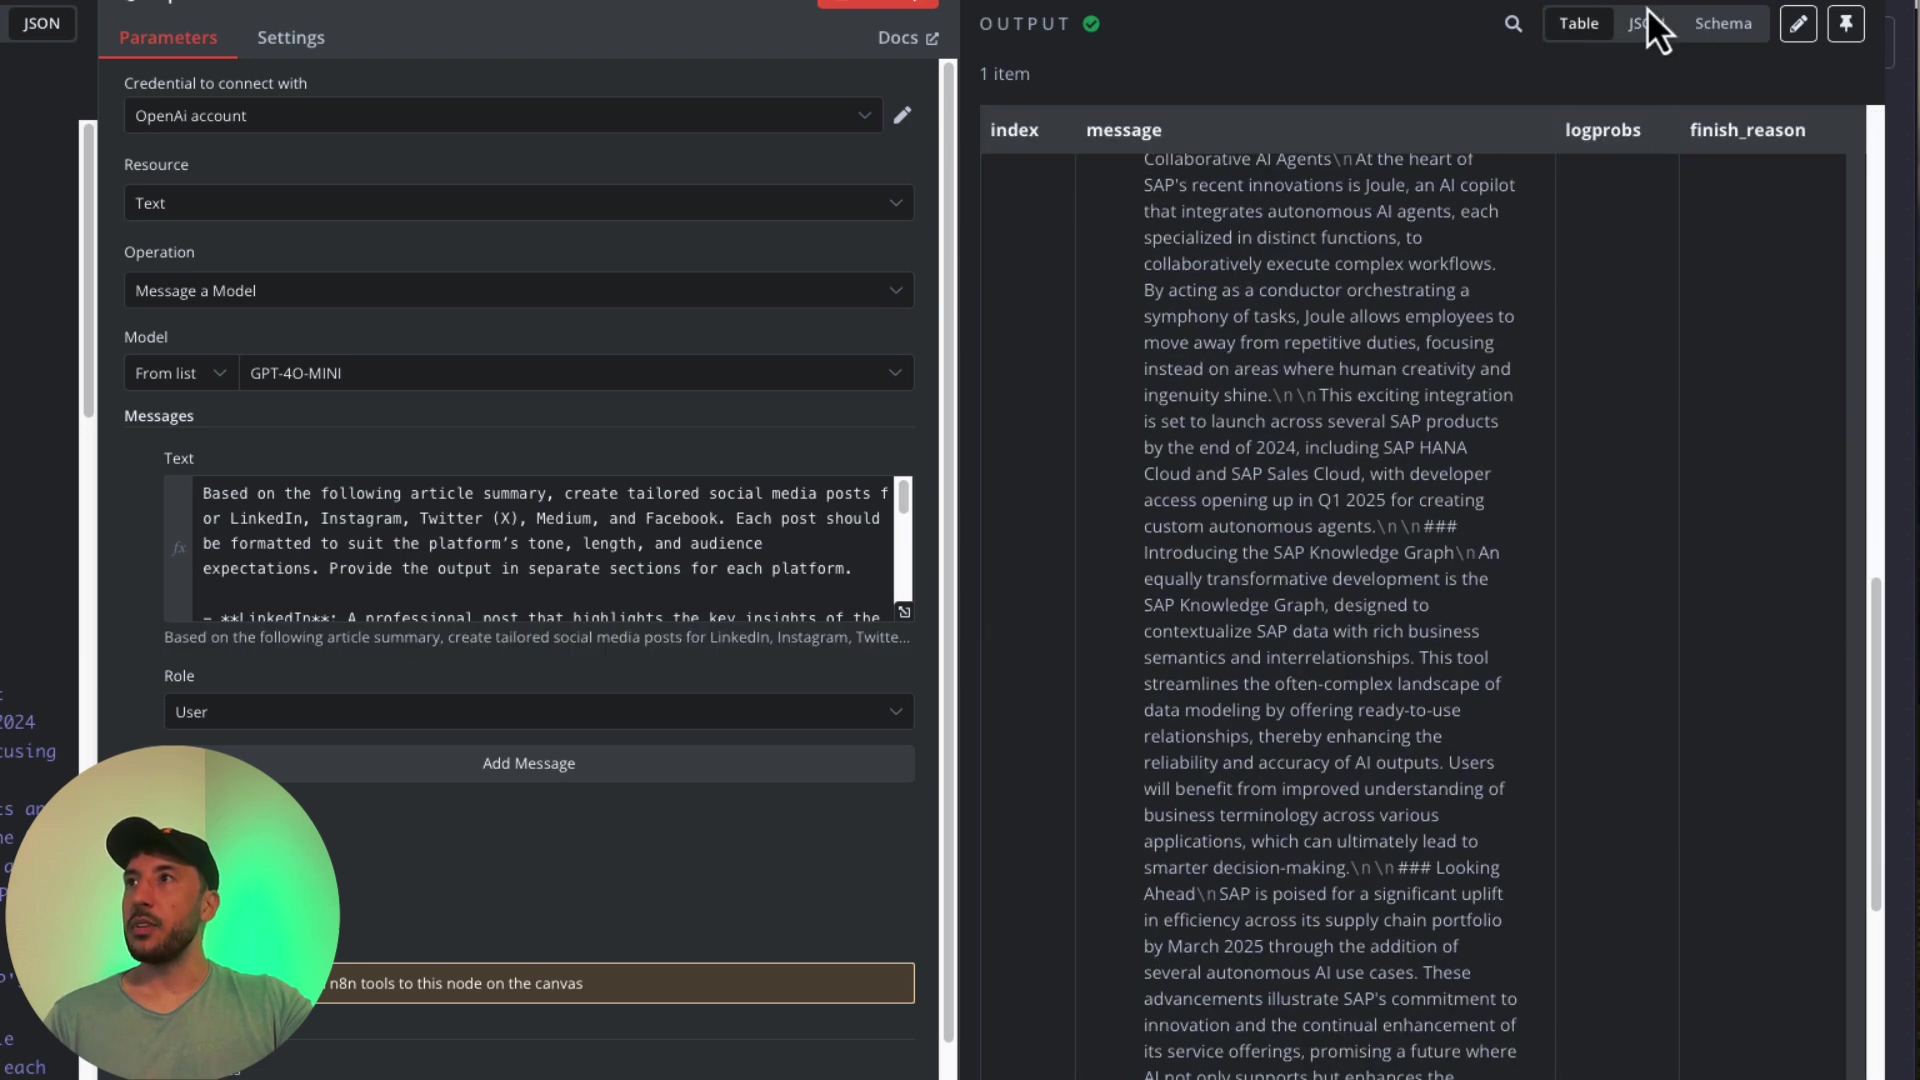
Okay, we’ve got our summary. Now, let’s turn that summary into engaging social media posts, perfectly crafted for each platform! We’ll use OpenAI’s models for this, specifically something like GPT-4o-mini, which is powerful yet cost-effective.
Action: Add an ‘OpenAI’ node right after your Perplexity ‘HTTP Request’ node. Select the ‘Message a Model’ operation.
Configuration:
-
Connect OpenAI Credentials: Just like with Perplexity, you’ll need to connect your OpenAI account and provide your OpenAI API key. Again, keep this key secret!
-
Choose Your Model: Select your desired model, like
GPT-4o-mini. This is the AI brain that will do the writing. -
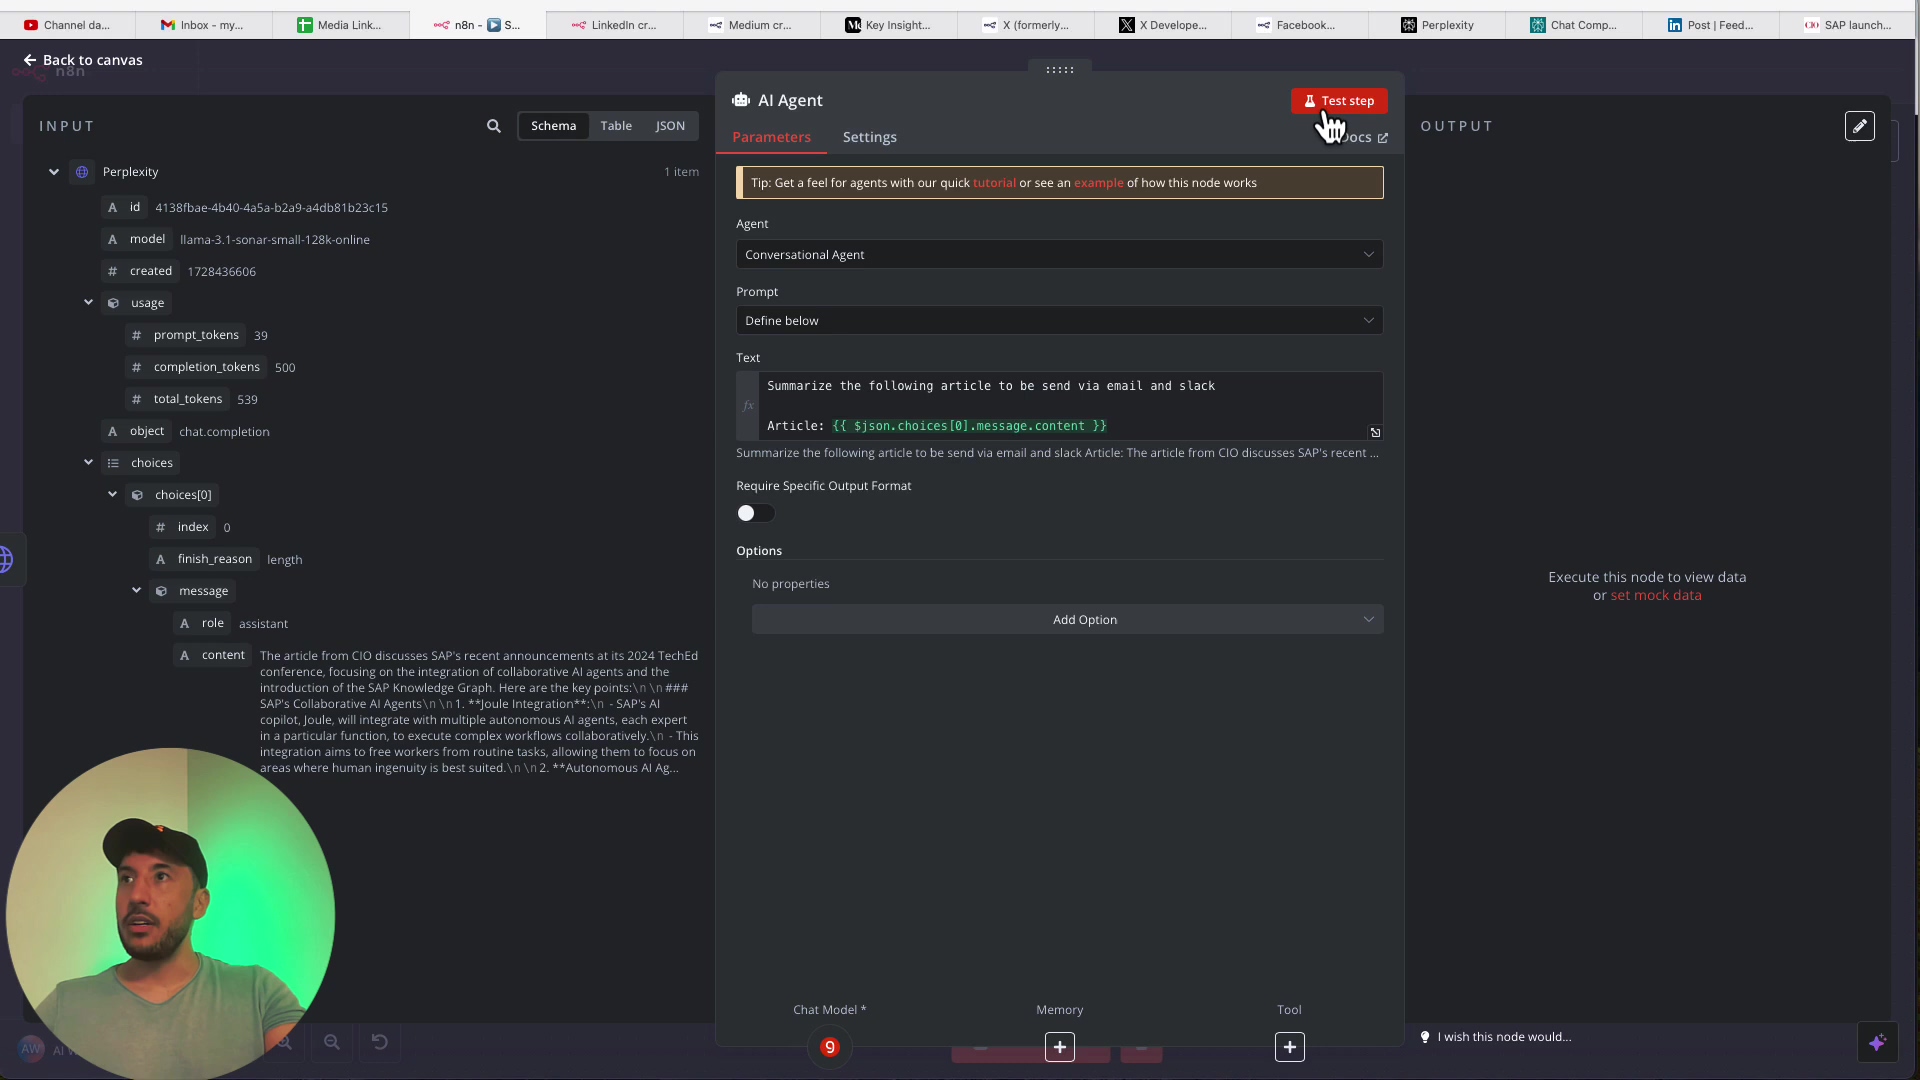
Craft the Prompt (This is Art!): This is the most critical part! Your prompt is your instruction manual for the AI. You need to be super clear about what you want for each platform. Here’s a general idea, but you’ll want to experiment and refine this (that’s called “prompt engineering,” and it’s a skill in itself!):
You are a social media content generator. I will provide you with an article summary. Your task is to create unique social media posts for LinkedIn, X (Twitter), and Medium based on this summary. The output must be in JSON format.

Here's the summary: "{{ $json.summaryFromPerplexity }}"

Please generate the following:

{
  "linkedin": {
    "title": "[Catchy LinkedIn Title]",
    "body": "[Professional post highlighting key insights from the summary, with a call to action. Max 1300 characters. Use relevant hashtags.]"
  },
  "x": {
    "tweet": "[Concise, tweet-length update based on the summary. Max 280 characters. Use 2-3 relevant hashtags.]"
  },
  "medium": {
    "title": "[Engaging Medium Article Title]",
    "body": "[A longer-form summary suitable for a blog post, expanding on the key points from the provided summary. Aim for 300-500 words. Include a clear introduction and conclusion.]"
  }
}
Important Notes on the Prompt:
{{ $json.summaryFromPerplexity }}: This is how you pass the summary from the previous Perplexity node into your OpenAI prompt. Make sure the variable name matches what your Perplexity node outputs (you can check this by running the workflow once and inspecting the output of the Perplexity node).- JSON Output: Notice how we’re explicitly asking for JSON output. This is a game-changer! It makes it super easy for n8n to parse the AI’s response and send the right content to the right platform.
- Platform-Specific Instructions: Be very specific about tone, length, and what to include for each platform. For example:
- LinkedIn: Professional, insightful, call to action.
- X: Short, punchy, hashtags.
- Medium: Longer, more detailed, blog-post style.
Expected Outcome: When this node runs, OpenAI will process the summary and return a beautiful JSON object containing perfectly tailored posts for LinkedIn, X, and Medium. This structured output is key for the next steps!
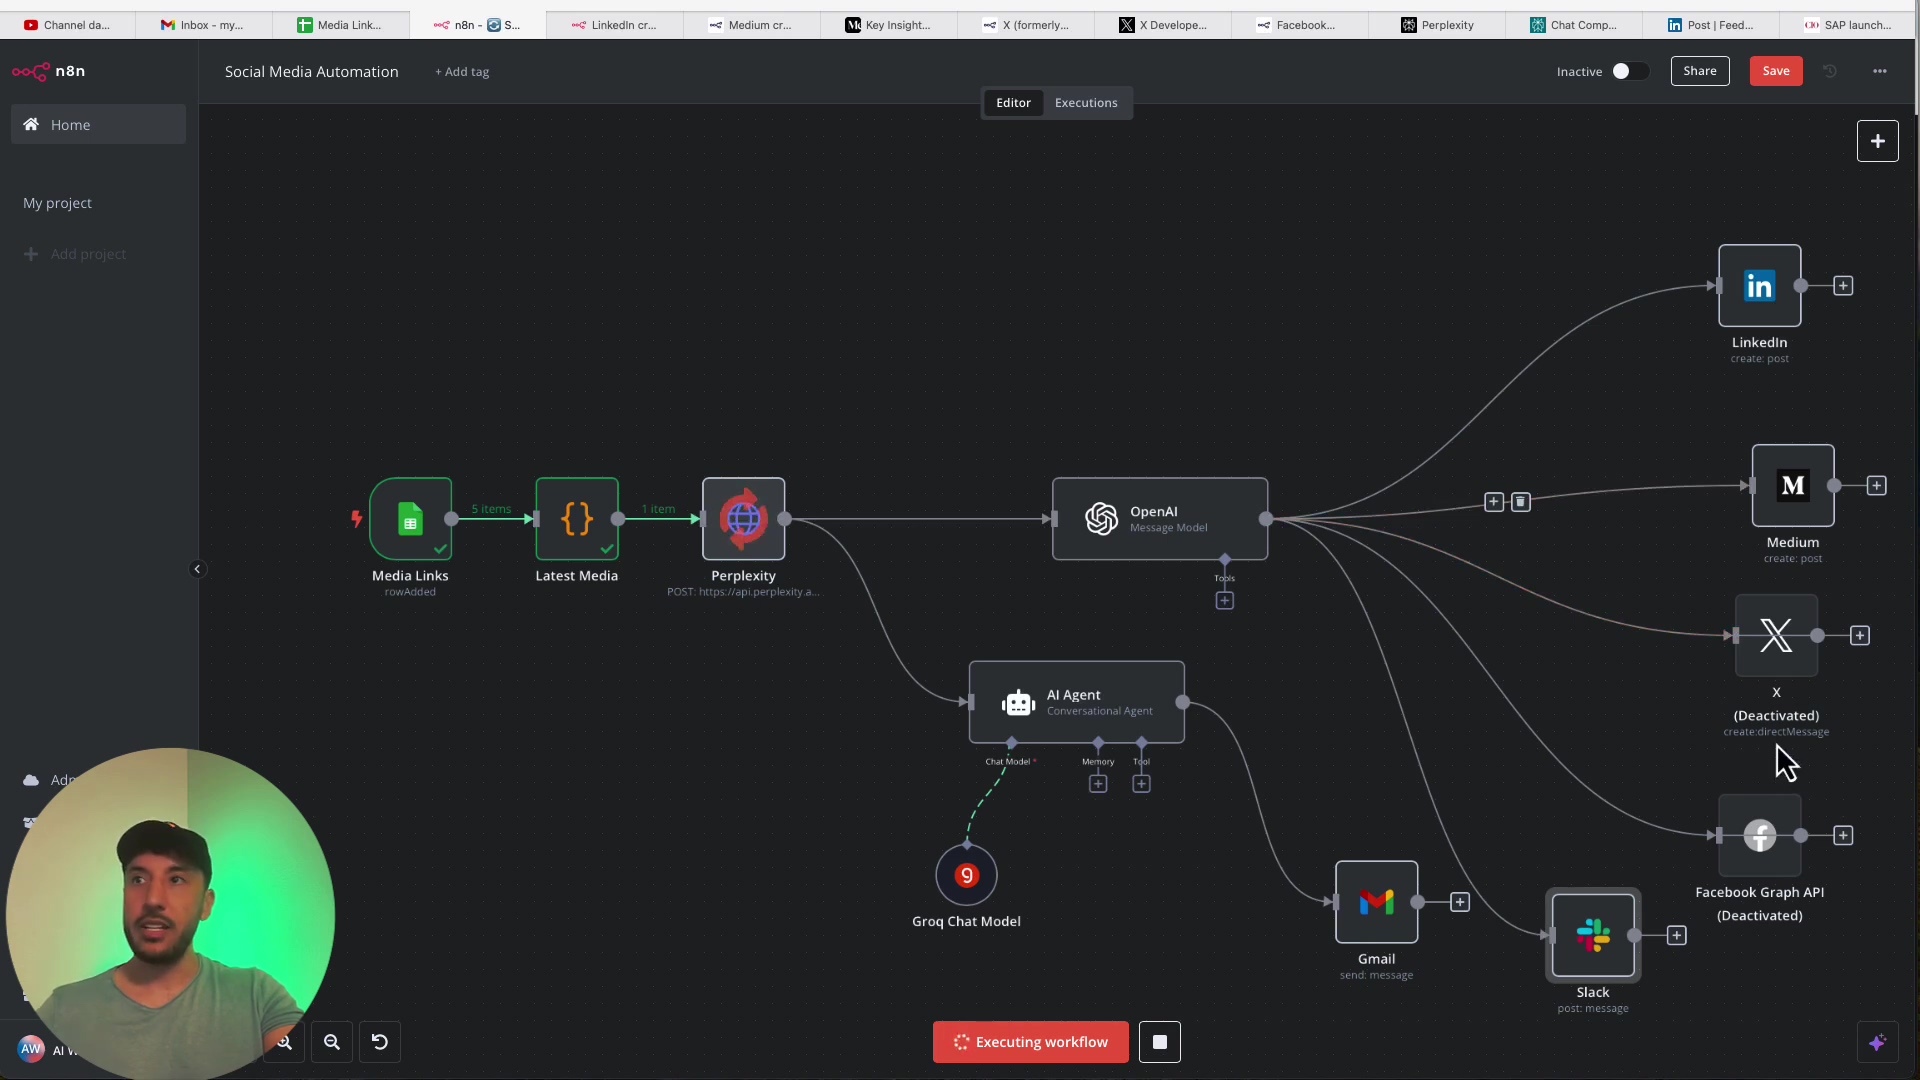
5. Automating Posts to Social Media Platforms
This is where our content finally sees the light of day! We’ll take the perfectly crafted posts from OpenAI and send them off to their respective social media homes. You’ll connect the OpenAI node to individual nodes for each platform.
LinkedIn Integration
Action: Add a ‘LinkedIn’ node. Select the ‘Create Post’ operation.
Configuration:
- Connect LinkedIn Account: You’ll need to connect your LinkedIn account to n8n. If you’re posting from a personal account, make sure ‘Organization support’ is toggled off in your n8n LinkedIn credentials. If you’re posting as an organization, you might need to jump through a few more hoops to set up a developer app on LinkedIn.
- Map Content: This is where the JSON output from your OpenAI node comes in handy! In the LinkedIn node’s fields (like ‘Text’ or ‘Content’), use n8n’s expression editor to map the correct part of the JSON. For example, you’d use something like
{{ $json.linkedin.body }}to pull the LinkedIn-specific post body. You can also append the original article link ({{ $json.articleUrl }}) for full context.
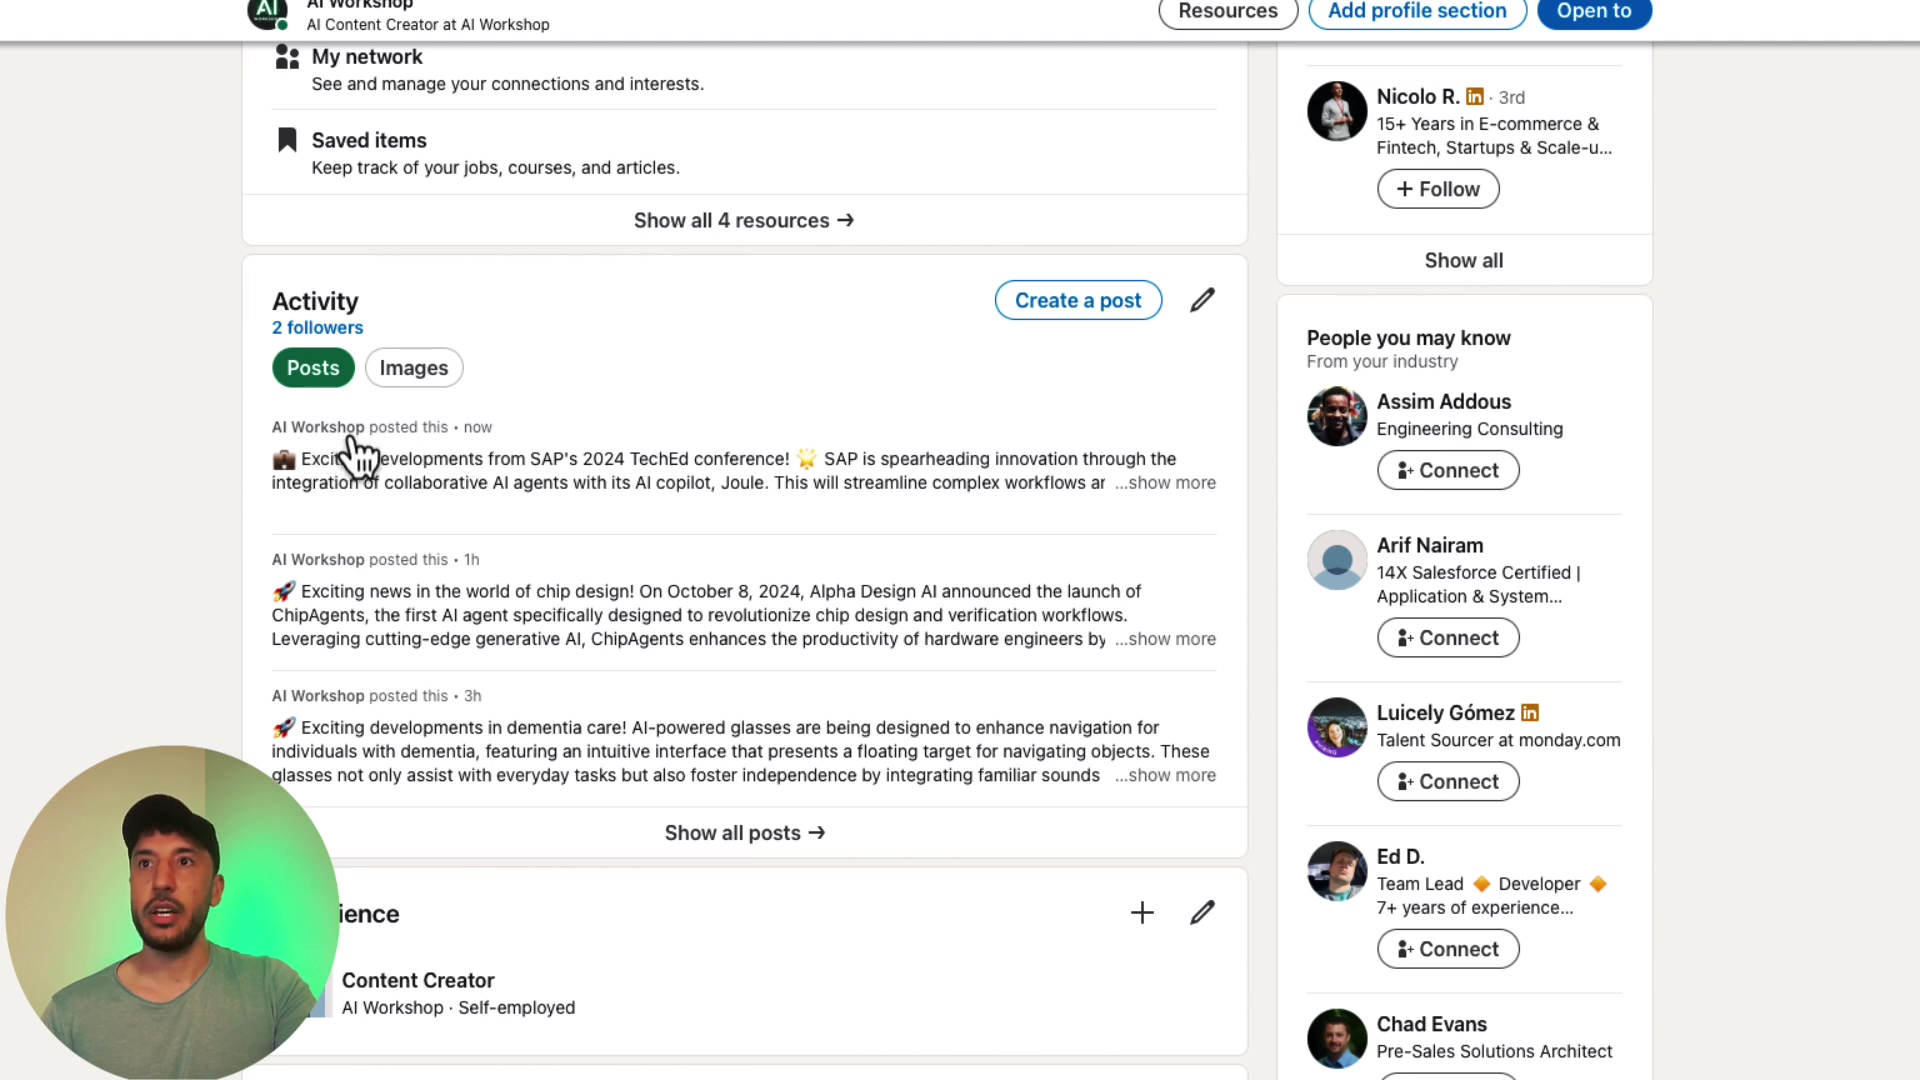
Expected Outcome: A new, professional post will appear on your LinkedIn profile or organization page, complete with the AI-generated text and a link back to the original article. Boom!
Medium Integration
Action: Add a ‘Medium’ node. Select ‘Create Post’.
Configuration:
- Connect Medium Account: Connecting Medium is usually pretty straightforward. You’ll need to generate a “self-issued access token” from your Medium account settings (look under the ‘Security and Apps’ section). Copy that token and paste it into n8n when prompted.
- Map Content: Just like with LinkedIn, map the Medium-tailored content from your OpenAI output. Use
{{ $json.medium.title }}for the title and{{ $json.medium.body }}for the main content. You can also set the ‘Content Format’ to ‘HTML’ if you want richer formatting (like bolding, italics, etc.) that the AI might generate.
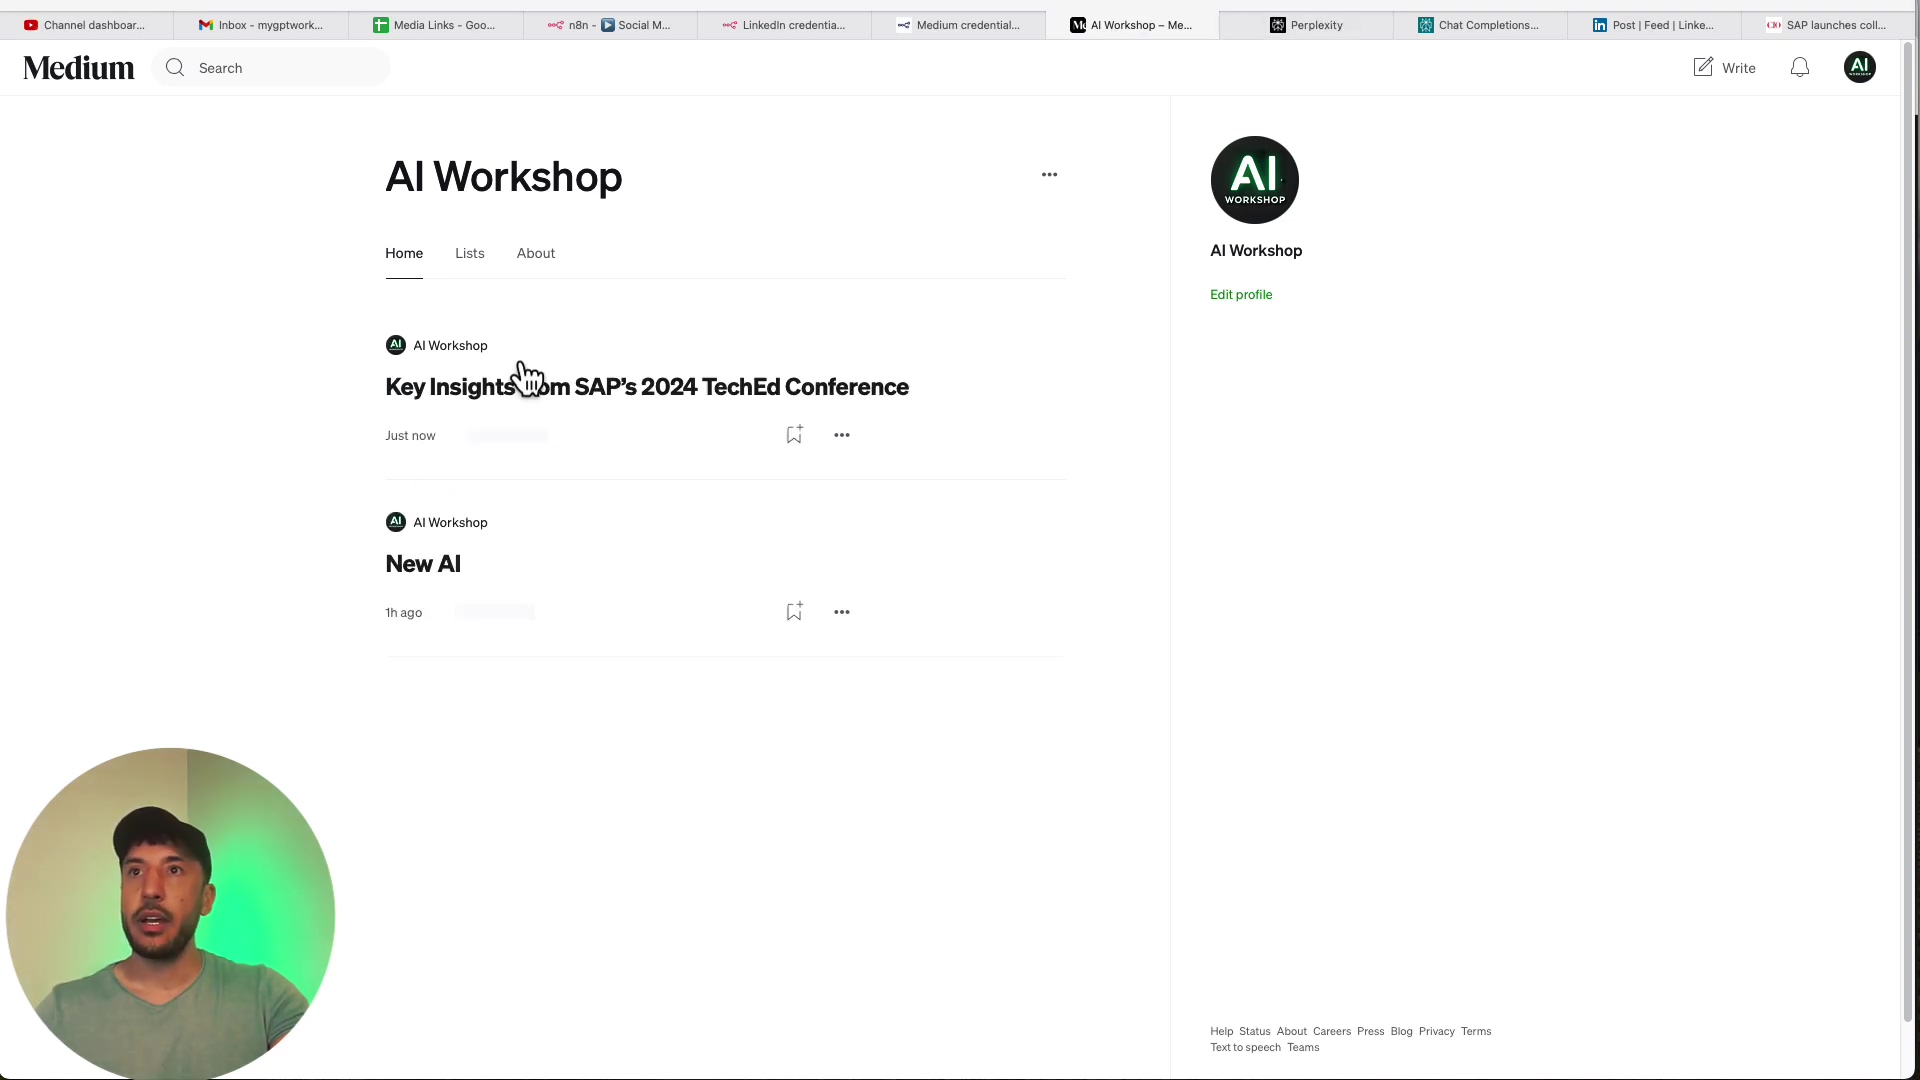
Expected Outcome: A new blog post will be published on your Medium profile, ready for your readers!
X (formerly Twitter) Integration
Action: Add an ‘X’ node. You’ll likely select ‘Create Tweet’ (or ‘Create Direct Message’ if that’s your goal).
Heads Up! Posting to X via their API has changed. You now need a Basic or Pro account to access their API. This is a crucial detail that can trip up many people.
**Configuration (This one’s a bit more involved!):
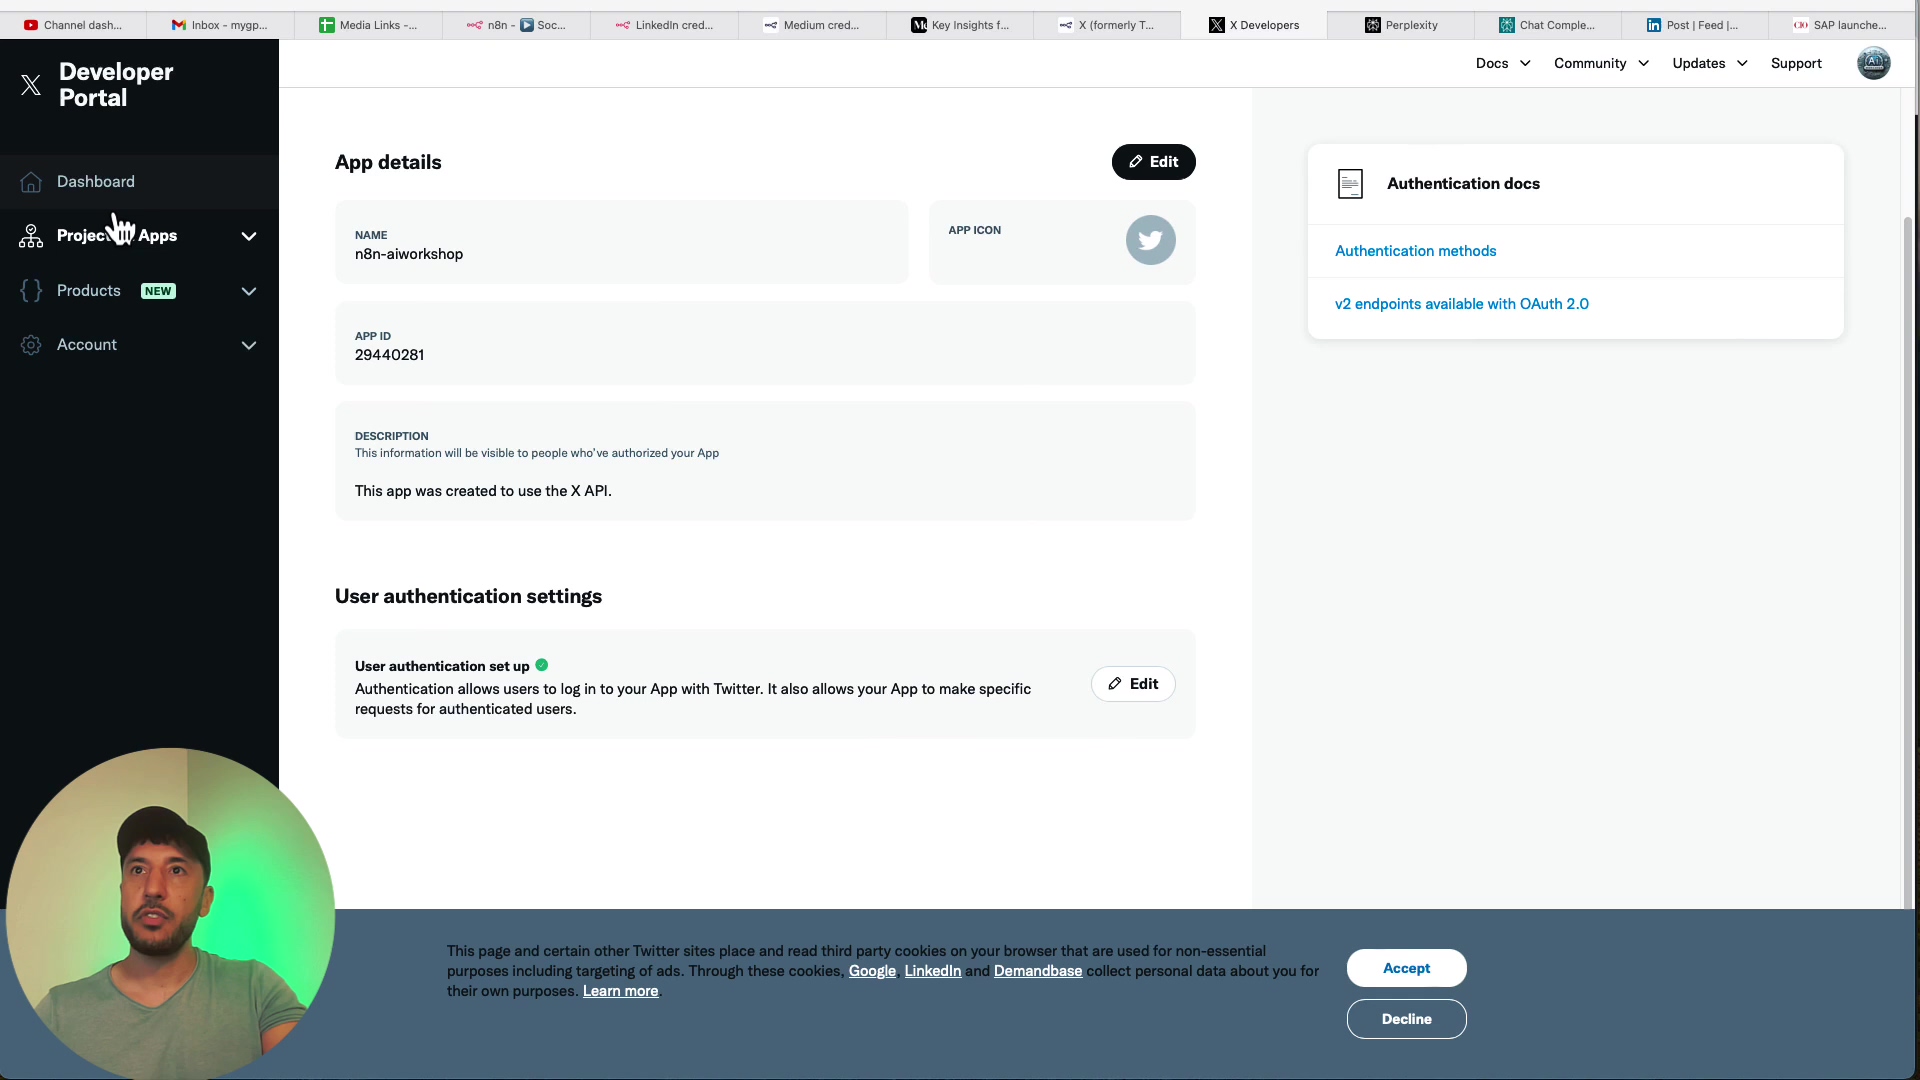
- X Developer Account: You’ll need to set up a developer account on the X Developer Portal. This is where you tell X you want to build something that interacts with their platform.
- Create an App: Within the Developer Portal, create a new “App.” This app will represent your n8n workflow.
- Configure User Authentication: This is key for getting the right permissions. You’ll need to configure “User authentication settings” for your app. This process will give you a ‘Client ID’ and ‘Client Secret’ (think of these as your app’s username and password) that you’ll use in n8n. You’ll also set up callback URLs, which tell X where to send the user back after they authorize your app.
- Connect in n8n: In your n8n ‘X’ node, use the ‘Client ID’ and ‘Client Secret’ to connect your X account. This process ensures your n8n workflow has the necessary permissions to post to your X account.
- Map Content: Map the
{{ $json.x.tweet }}from your OpenAI output to the tweet text field.
Expected Outcome: Your AI-generated tweet will appear on your X timeline, concise and ready to engage!
Facebook Integration
Action: Add a ‘Facebook Graph API’ node.
Heads Up! Similar to X, you can’t just post to your personal Facebook profile via the API. You’ll need to post to a Facebook Page or Group that you manage.
**Configuration (Another developer portal adventure!):
- Facebook Developer Portal: Head over to the Facebook Developer Portal. You’ll need to create a new “App” here, just like with X.
- Obtain Tokens and Permissions: This is the trickiest part. You’ll need to get an “Access Token” with the correct permissions (like
pages_manage_postsandpages_read_engagement) to post to your page. This often involves going through a “Business Verification” process with Facebook, which can take some time. Be patient! - Connect in n8n: Once you have your App ID, App Secret, and a Page Access Token, you can configure the ‘Facebook Graph API’ node in n8n. You’ll specify the ‘Page ID’ you want to post to.
- Map Content: Map the Facebook-tailored content from your OpenAI node to create posts on your Facebook pages or groups.
Expected Outcome: A new post will appear on your designated Facebook Page or Group, reaching your audience there.
6. Internal Communication with AI Agents, Gmail, and Slack
Our automation isn’t just for public consumption! We can also use it for internal communications, like sending summaries to your team or a personal digest to yourself. This is where an AI Agent can really shine, summarizing articles specifically for internal eyes.
Action: Add an ‘AI Agent’ node (you might find it under ‘Conversational Agent’ or similar, depending on n8n’s updates). This node is like having a dedicated AI assistant just for your internal needs.
Configuration:
- Configure Prompt: Set its prompt to something like: “Summarize the following article for an internal team email and a Slack channel. Focus on key takeaways and action items.” You can even select a different chat model for this, like Groq, if you want to experiment with different AI personalities or speeds.
- Input: Make sure this AI Agent node receives the original article summary from the Perplexity node, or even the full article content if you want a deeper internal dive.
Action: Connect this AI Agent node to a ‘Gmail’ node and a ‘Slack’ node.
**Configuration (Gmail):
- Connect Gmail: Connect your Gmail account to n8n.
- Send Email: Configure the Gmail node to send an email. Set the ‘To’ address to yourself or a team distribution list. For the ‘Subject’ and ‘Body’, use the output from your AI Agent node (e.g.,
{{ $json.aiAgentOutput.emailSummary }}).
**Configuration (Slack):
- Connect Slack: Connect your Slack workspace to n8n.
- Send Message: Set up a ‘Send Message’ action. Choose the specific channel you want to post to (e.g.,
#AI-agentsor#daily-briefing). For the message text, use the output from your AI Agent node (e.g.,{{ $json.aiAgentOutput.slackSummary }}).
Expected Outcome: You’ll receive a concise email summary in your inbox, and a message will appear in your chosen Slack channel, keeping everyone informed without lifting a finger!
💡 Critical Best Practices
Alright, you’ve built an amazing automation! But like any powerful tool, there are some best practices to keep it running smoothly and securely. Think of these as the golden rules of automation!
- API Key Security: This is non-negotiable! Your API keys are like the master keys to your AI accounts. Never, ever share them publicly or hardcode them directly into your workflow’s visible parts. Always use environment variables or n8n’s secure credential management system. It’s like locking your front door – essential!
- Prompt Engineering: Remember how we crafted those prompts for OpenAI? That’s prompt engineering! The quality of your AI-generated content entirely depends on how well you instruct the AI. Experiment with different phrasing, tell the AI what tone to use, and specify the output format. It’s an iterative process: try, see what you get, refine, and try again. It’s like being a director for your AI actor!
- Error Handling: What happens if an API goes down, or an article link is broken? Your workflow shouldn’t just crash! Implement robust error handling in your n8n workflows. This could mean sending you a notification if a node fails, automatically retrying failed steps, or logging errors to a dedicated Google Sheet. This makes your automation resilient, like a good ship weathering a storm.
- Rate Limits: AI services and social media platforms have “rate limits” – they only let you make a certain number of requests in a given time. If you hit these limits too often, they might temporarily block you. Be mindful of these! You might need to adjust how often your workflow runs or add small delays (
Waitnodes in n8n) between API calls if you’re processing a lot of content. It’s about being a good neighbor on the internet.
Key Takeaways
So, what have we learned on this epic automation journey? A whole lot, I hope!
- No-Code Power: n8n is an absolute game-changer. It empowers anyone to build incredibly complex automation workflows without needing to write a single line of code. It’s truly democratizing automation!
- AI Integration: AI agents aren’t just buzzwords; they’re incredibly powerful tools that can supercharge your content creation. Summarizing articles, generating platform-specific posts – they do the heavy lifting so you don’t have to.
- Workflow Customization: The modular nature of n8n means you can build workflows that are exactly what you need. It’s not a one-size-fits-all solution; it’s a build-your-own-adventure!
- Efficiency Gains: Automating your social media content saves you a ton of time and ensures you have a consistent, professional online presence. Think of all the hours you’ll get back!
Conclusion
By following the steps we’ve laid out, you’ve now got a robust, intelligent automation system for your social media content. This isn’t just about making your life easier (though it totally does!); it’s about making sure your message is perfectly tailored and effective across all your different platforms.
The combination of n8n’s flexibility and the raw power of advanced AI models offers an unparalleled opportunity to scale your content strategy. You’re no longer limited by manual effort; you’re limited only by your imagination!
Remember, the digital world is always changing. Keep exploring advanced prompt engineering techniques to get even more nuanced content from your AI. Look into integrating other AI models for specialized tasks. The more you refine your automation workflows, the more you’ll stay ahead of the curve in digital engagement.
Now, go forth and transform your social media presence with the power of automation! I’d love to hear about your experiences and any cool adaptations you discover. Share them in the comments below!
Frequently Asked Questions (FAQ)
Q: What is n8n and why should I use it for social media automation?
A: n8n is a powerful, open-source workflow automation tool that lets you connect different apps and services without writing any code. Think of it as a digital bridge builder. You should use it for social media automation because it gives you incredible flexibility and control over your content workflow, allowing you to integrate various AI services and tailor your posts precisely, often at a much lower cost than commercial solutions.
Q: Do I need to be a programmer to use n8n and set up this workflow?
A: Absolutely not! That’s the beauty of n8n – it’s a “no-code” tool. While we used a tiny bit of JavaScript in the ‘Code’ node, it’s a simple, copy-paste snippet, and n8n’s visual interface makes building workflows feel like connecting LEGO blocks. I’m a self-taught automation consultant, and if I can do it, you can too!
Q: Why do I need separate AI models like Perplexity and OpenAI? Can’t one do everything?
A: Great question! While some AI models are versatile, using specialized ones often gives you better results. Perplexity AI excels at summarizing web content because it has real-time internet access, making its summaries very accurate. OpenAI models, like GPT-4o-mini, are fantastic at creative text generation and tailoring content to specific tones and formats. By combining them, we leverage each AI’s strength for an optimal workflow.
Q: What are API keys and why are they so important to keep secure?
A: API keys are like unique passwords that allow your n8n workflow to communicate with and use services like Perplexity and OpenAI. They authenticate your requests and often track your usage for billing. Keeping them secure is paramount because if someone else gets hold of your API keys, they could potentially use your accounts, incur charges, or access sensitive data. Always store them securely, ideally using n8n’s built-in credential management or environment variables.
Q: I’m having trouble connecting to X (Twitter) or Facebook. What should I do?
A: Connecting to X (formerly Twitter) and Facebook via their APIs can be tricky because their developer platforms often require specific permissions, app setups, and sometimes even business verification. For X, remember you now need a Basic or Pro account for API access. For Facebook, you typically need to post to a managed Page or Group, not a personal profile, and acquire specific page access tokens. Always refer to their official developer documentation for the most up-to-date requirements, and be prepared for a bit of a setup process. It’s a common hurdle, but totally surmountable!
Q: How can I make my AI-generated content sound more natural or on-brand?
A: This is where “prompt engineering” comes in! The more detailed and specific your instructions (your “prompt”) to the AI, the better its output will be. Experiment with:
- Tone: “Write in a friendly, enthusiastic tone.”
- Audience: “Target busy professionals interested in tech trends.”
- Keywords: “Include the keywords ‘automation’ and ‘efficiency’.”
- Examples: Provide a few examples of content you like.
It’s an iterative process of trial and error, but it’s incredibly rewarding!