Watch the Video Tutorial
💡 Pro Tip: After watching the video, continue reading below for detailed step-by-step instructions, code examples, and additional tips that will help you implement this successfully.
Table of Contents
Open Table of Contents
- Introduction to n8n: The Automation Powerhouse
- Required Resources and Cost-Benefit Analysis
- Activating Your n8n Instance
- Building Your First Automation Workflow
- Advanced AI Integration with n8n
- Critical Safety & Best Practice Tips
- Key Takeaways
- Conclusion
- Frequently Asked Questions (FAQ)
- Q: Is n8n really free to use?
- Q: What’s the biggest advantage of n8n over Zapier or IFTTT?
- Q: I’m a complete beginner. Is n8n too complicated for me?
- Q: How do I find the RSS feed for a website or YouTube channel?
- Q: What if a node fails or my workflow doesn’t run as expected?
- Q: Can n8n connect to any API?
Introduction to n8n: The Automation Powerhouse
Hey there, future automation wizard! Boyce here, and let me tell you, if you’re tired of those repetitive digital tasks eating up your precious time, you’re in the right place. Imagine reclaiming dozens of hours each week by automating all that tedious stuff. With n8n, an open-source, local, private, and completely free automation tool, this vision isn’t just a dream – it’s about to become your reality. Think of n8n as your personal digital assistant, but one that never sleeps and never complains!
Now, you might have heard of other automation tools like Zapier or IFTTT. And while they’re cool, n8n stands head and shoulders above them, offering unparalleled flexibility and control over your data. Why? Because it’s open-source, meaning you own your data and your workflows. No vendor lock-in, no hidden fees, just pure automation power. From aggregating daily news digests to creating AI agents that troubleshoot your home lab, n8n can automate virtually anything you can dream up. It’s like building with digital LEGOs, but instead of a spaceship, you’re building a productivity machine!

Required Resources and Cost-Benefit Analysis
Alright, let’s talk about getting n8n up and running. You’ve got two main paths here: setting it up yourself (on-premise) or letting someone else handle the heavy lifting in the cloud. Each has its perks, but for my fellow beginners out there who want ease of setup and robust connectivity, the cloud option is what I highly recommend. Trust me, I’ve been down both roads, and for starting out, cloud is often the smoother ride.
On-Premise Installation
For those of you who love to tinker and prefer a local setup, n8n is super lightweight. It can even run on minimal hardware, like a Raspberry Pi. While it might seem a tad more complex than clicking a few buttons, using Docker simplifies the installation process immensely. Docker is like a magic box that packages up all the software your application needs to run, making it super easy to deploy. If you’re new to containerization, don’t sweat it, we’ll cover the basics.
Cloud-Based Installation (Recommended)
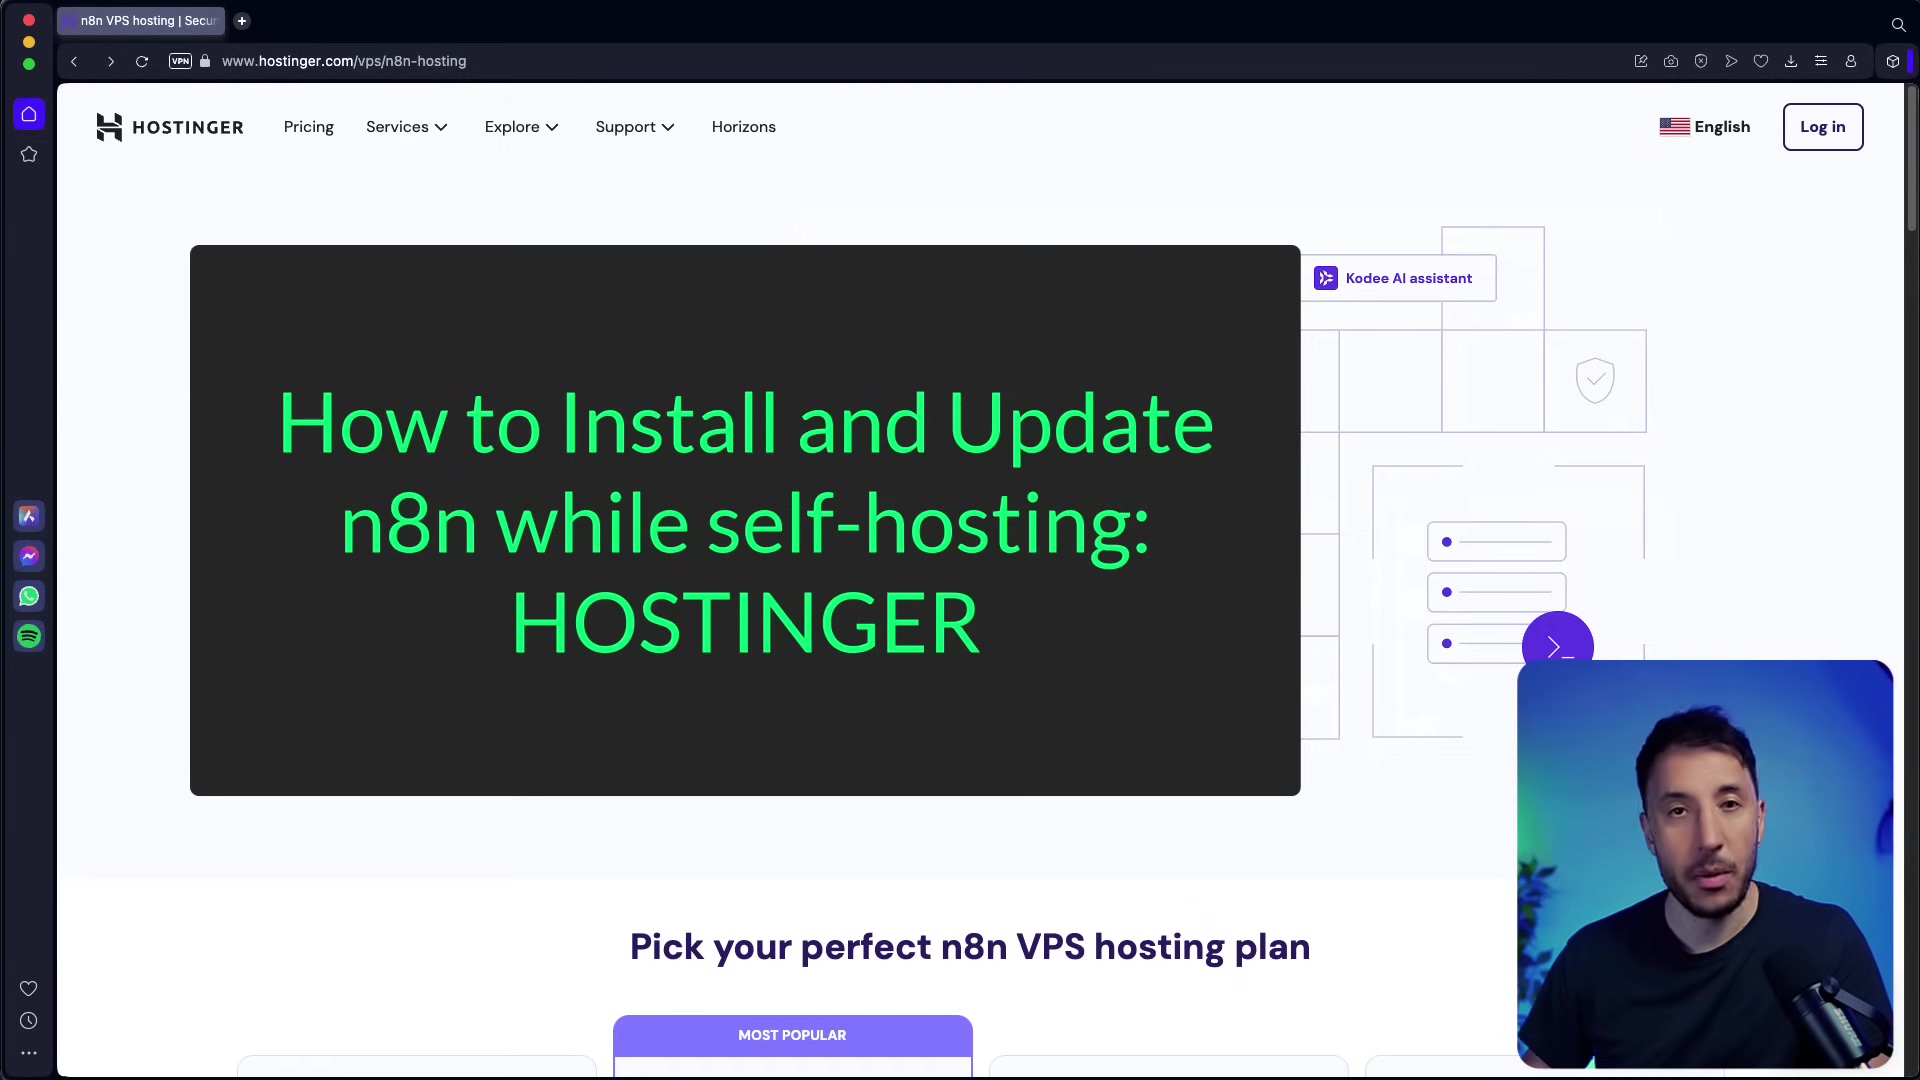
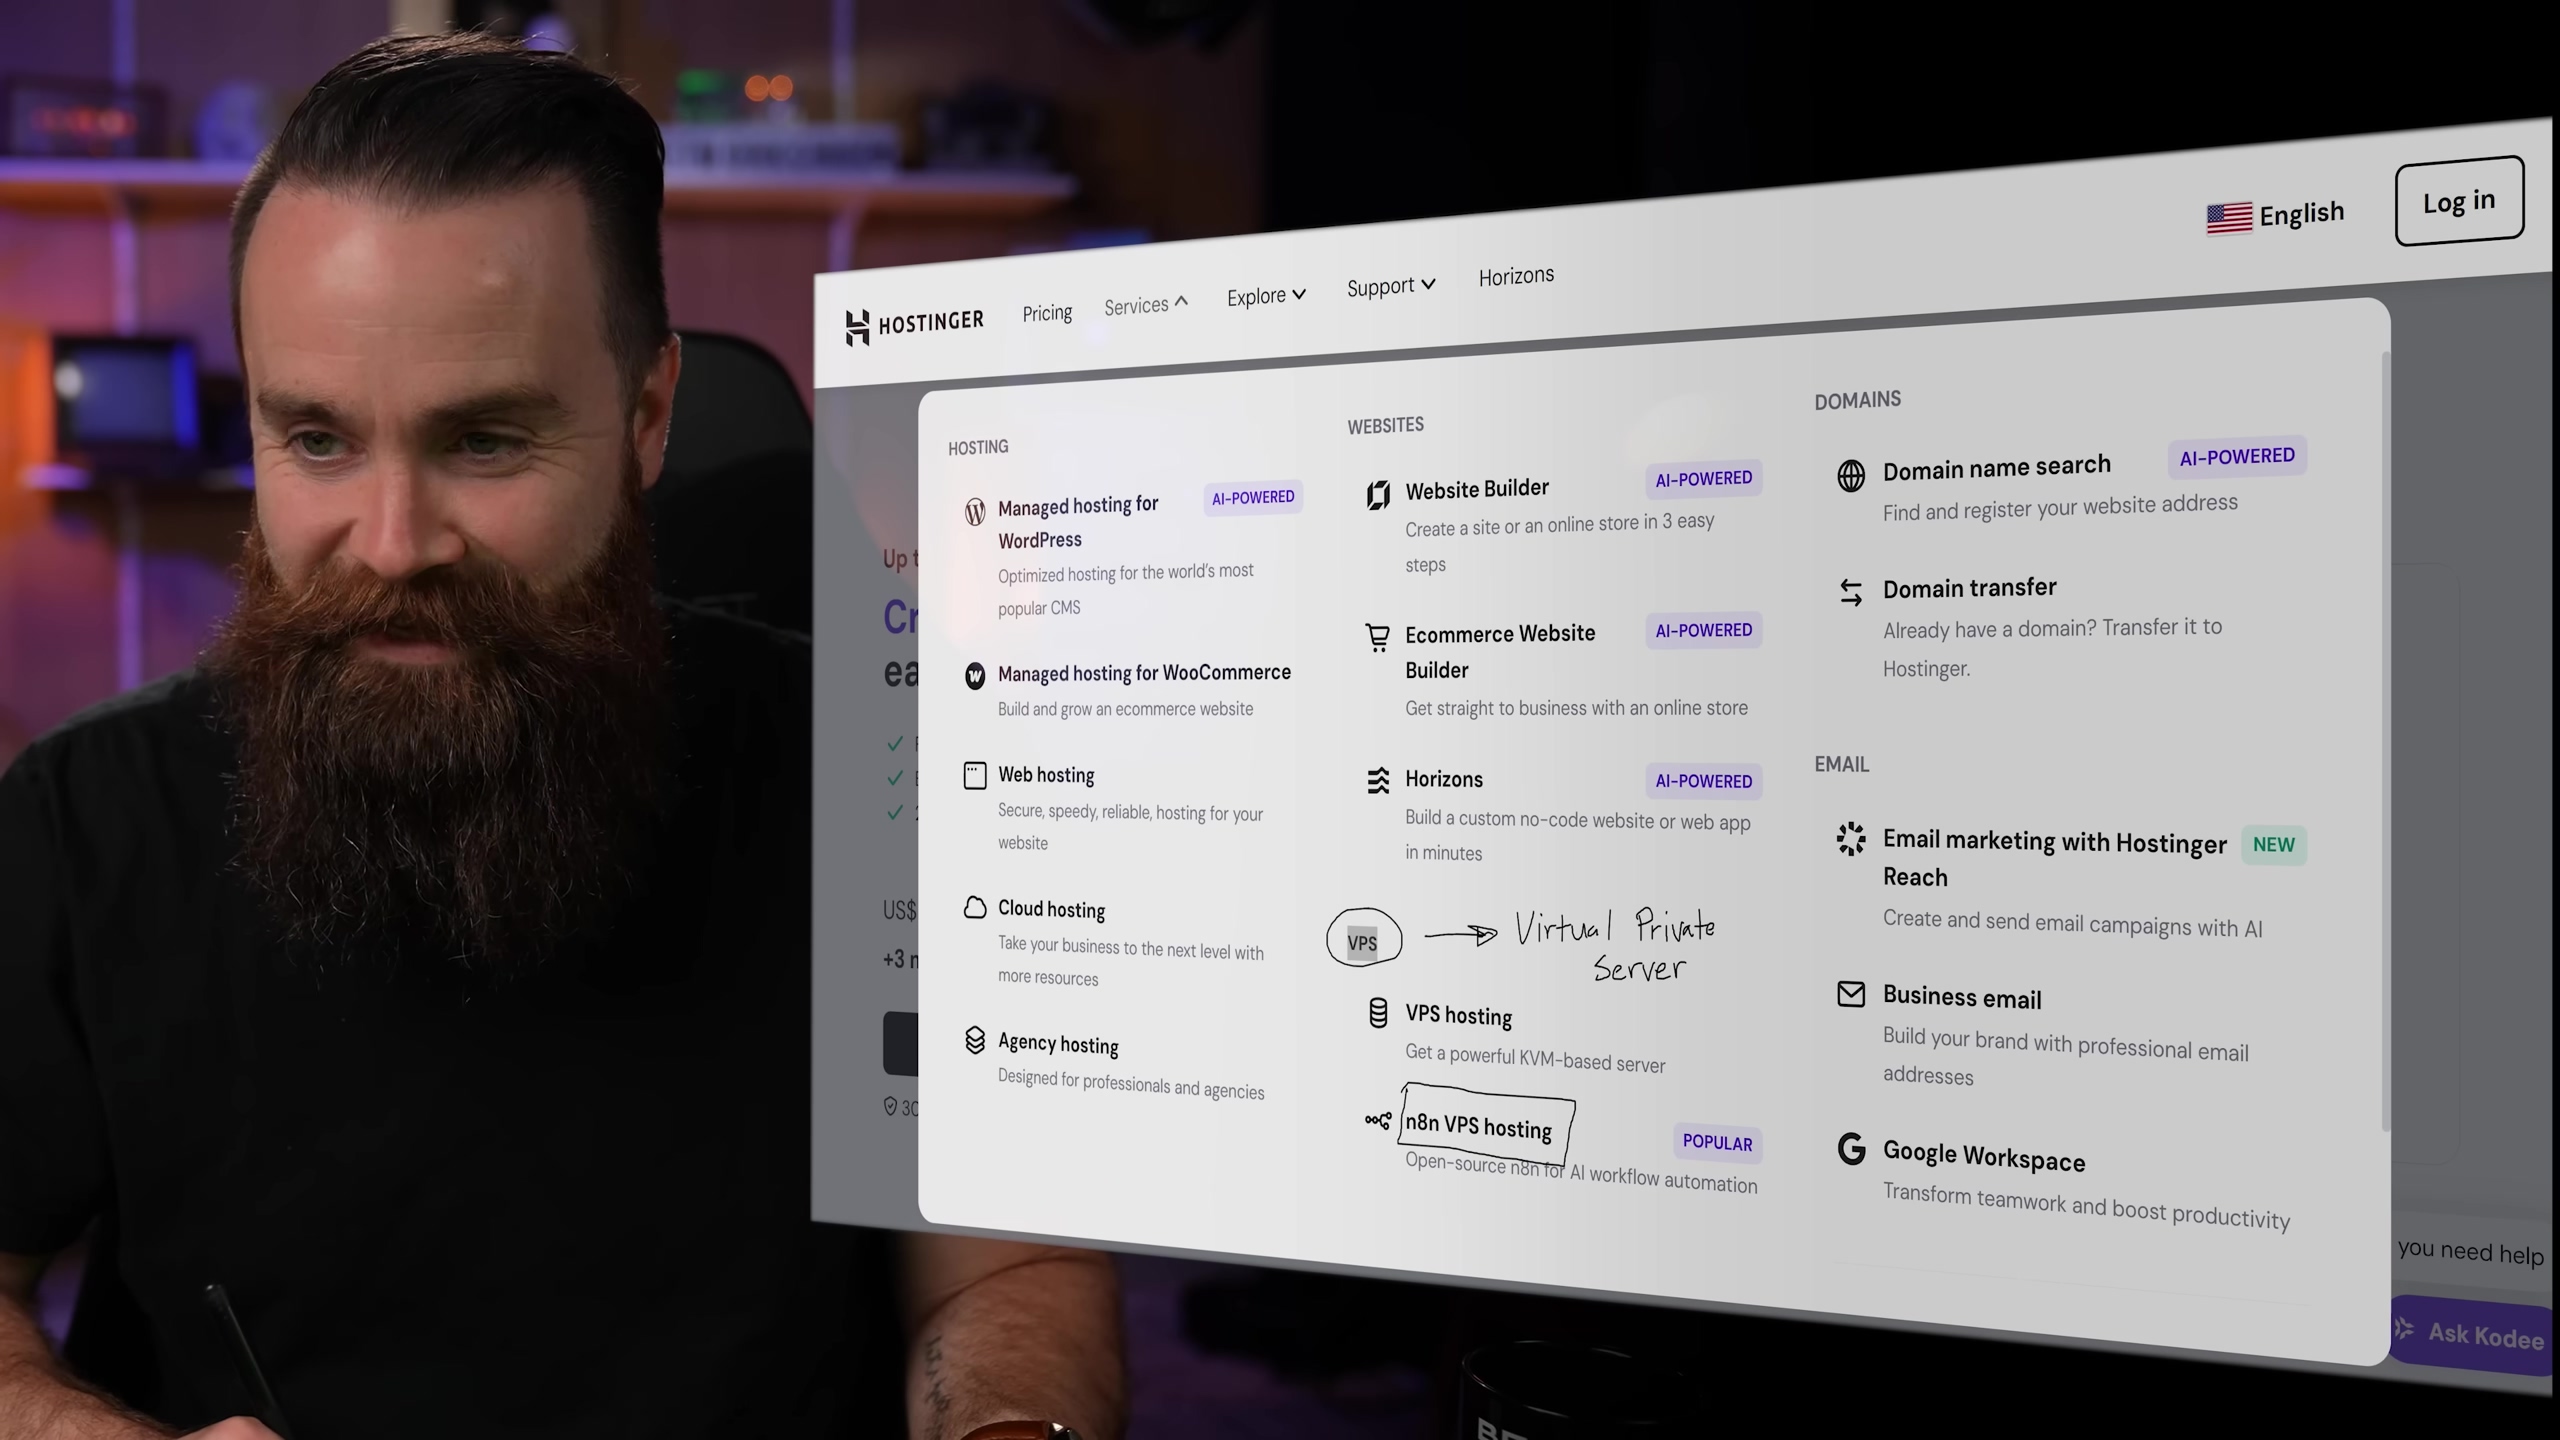
Hosting n8n in the cloud offers some serious benefits, especially if your automations need to talk to external services (and let’s be real, most do!). Services like Hostinger provide dedicated n8n VPS hosting options, which really streamline the setup. A KVM 2 plan is typically more than enough, allowing you to host n8n alongside other cool home lab projects or even your personal website. It’s like having your own private server in the sky, ready to do your bidding!
Let’s break down the pros and cons of each approach, so you can pick the one that fits your style:
| Feature/Option | DIY On-Premise n8n (Docker) | Commercial Cloud n8n (Hostinger VPS) |
|---|---|---|
| Initial Setup Complexity | Moderate (Linux, Docker knowledge required) | Low (Pre-configured VPS option available) |
| Hardware Requirements | Minimal (Raspberry Pi to server) | None (Provider manages hardware) |
| Cost | Hardware + Electricity (One-time + ongoing) | Monthly/Annual Subscription |
| Maintenance | High (Updates, backups, troubleshooting) | Low (Provider handles infrastructure) |
| Accessibility | Limited (Requires VPN/reverse proxy for external access) | High (Accessible from anywhere) |
| Scalability | Manual (Hardware upgrades) | Easy (Upgrade VPS plan) |
| Privacy/Control | Absolute (Data stays local) | High (Data on private VPS) |
| Recommended For | Advanced users, maximum privacy, specific hardware use cases | Beginners, ease of use, external integrations, quick setup |
Activating Your n8n Instance
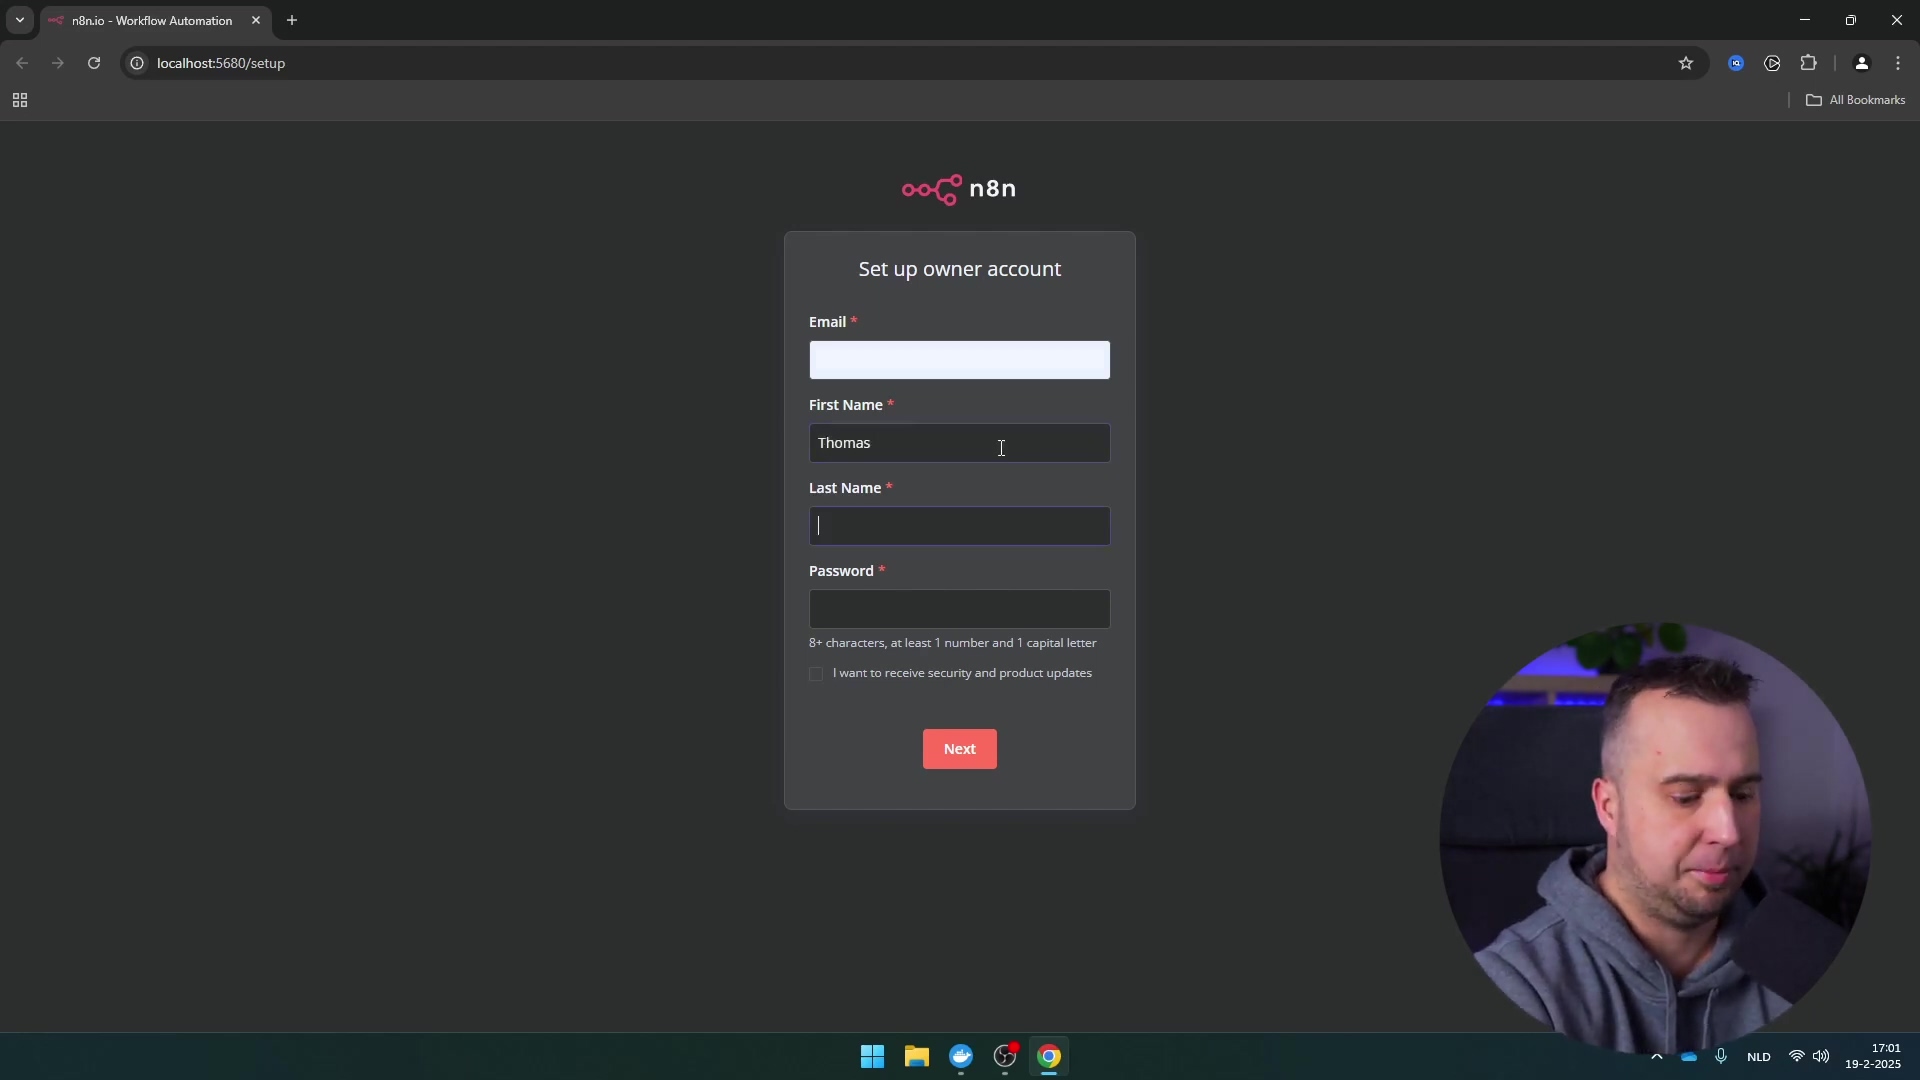
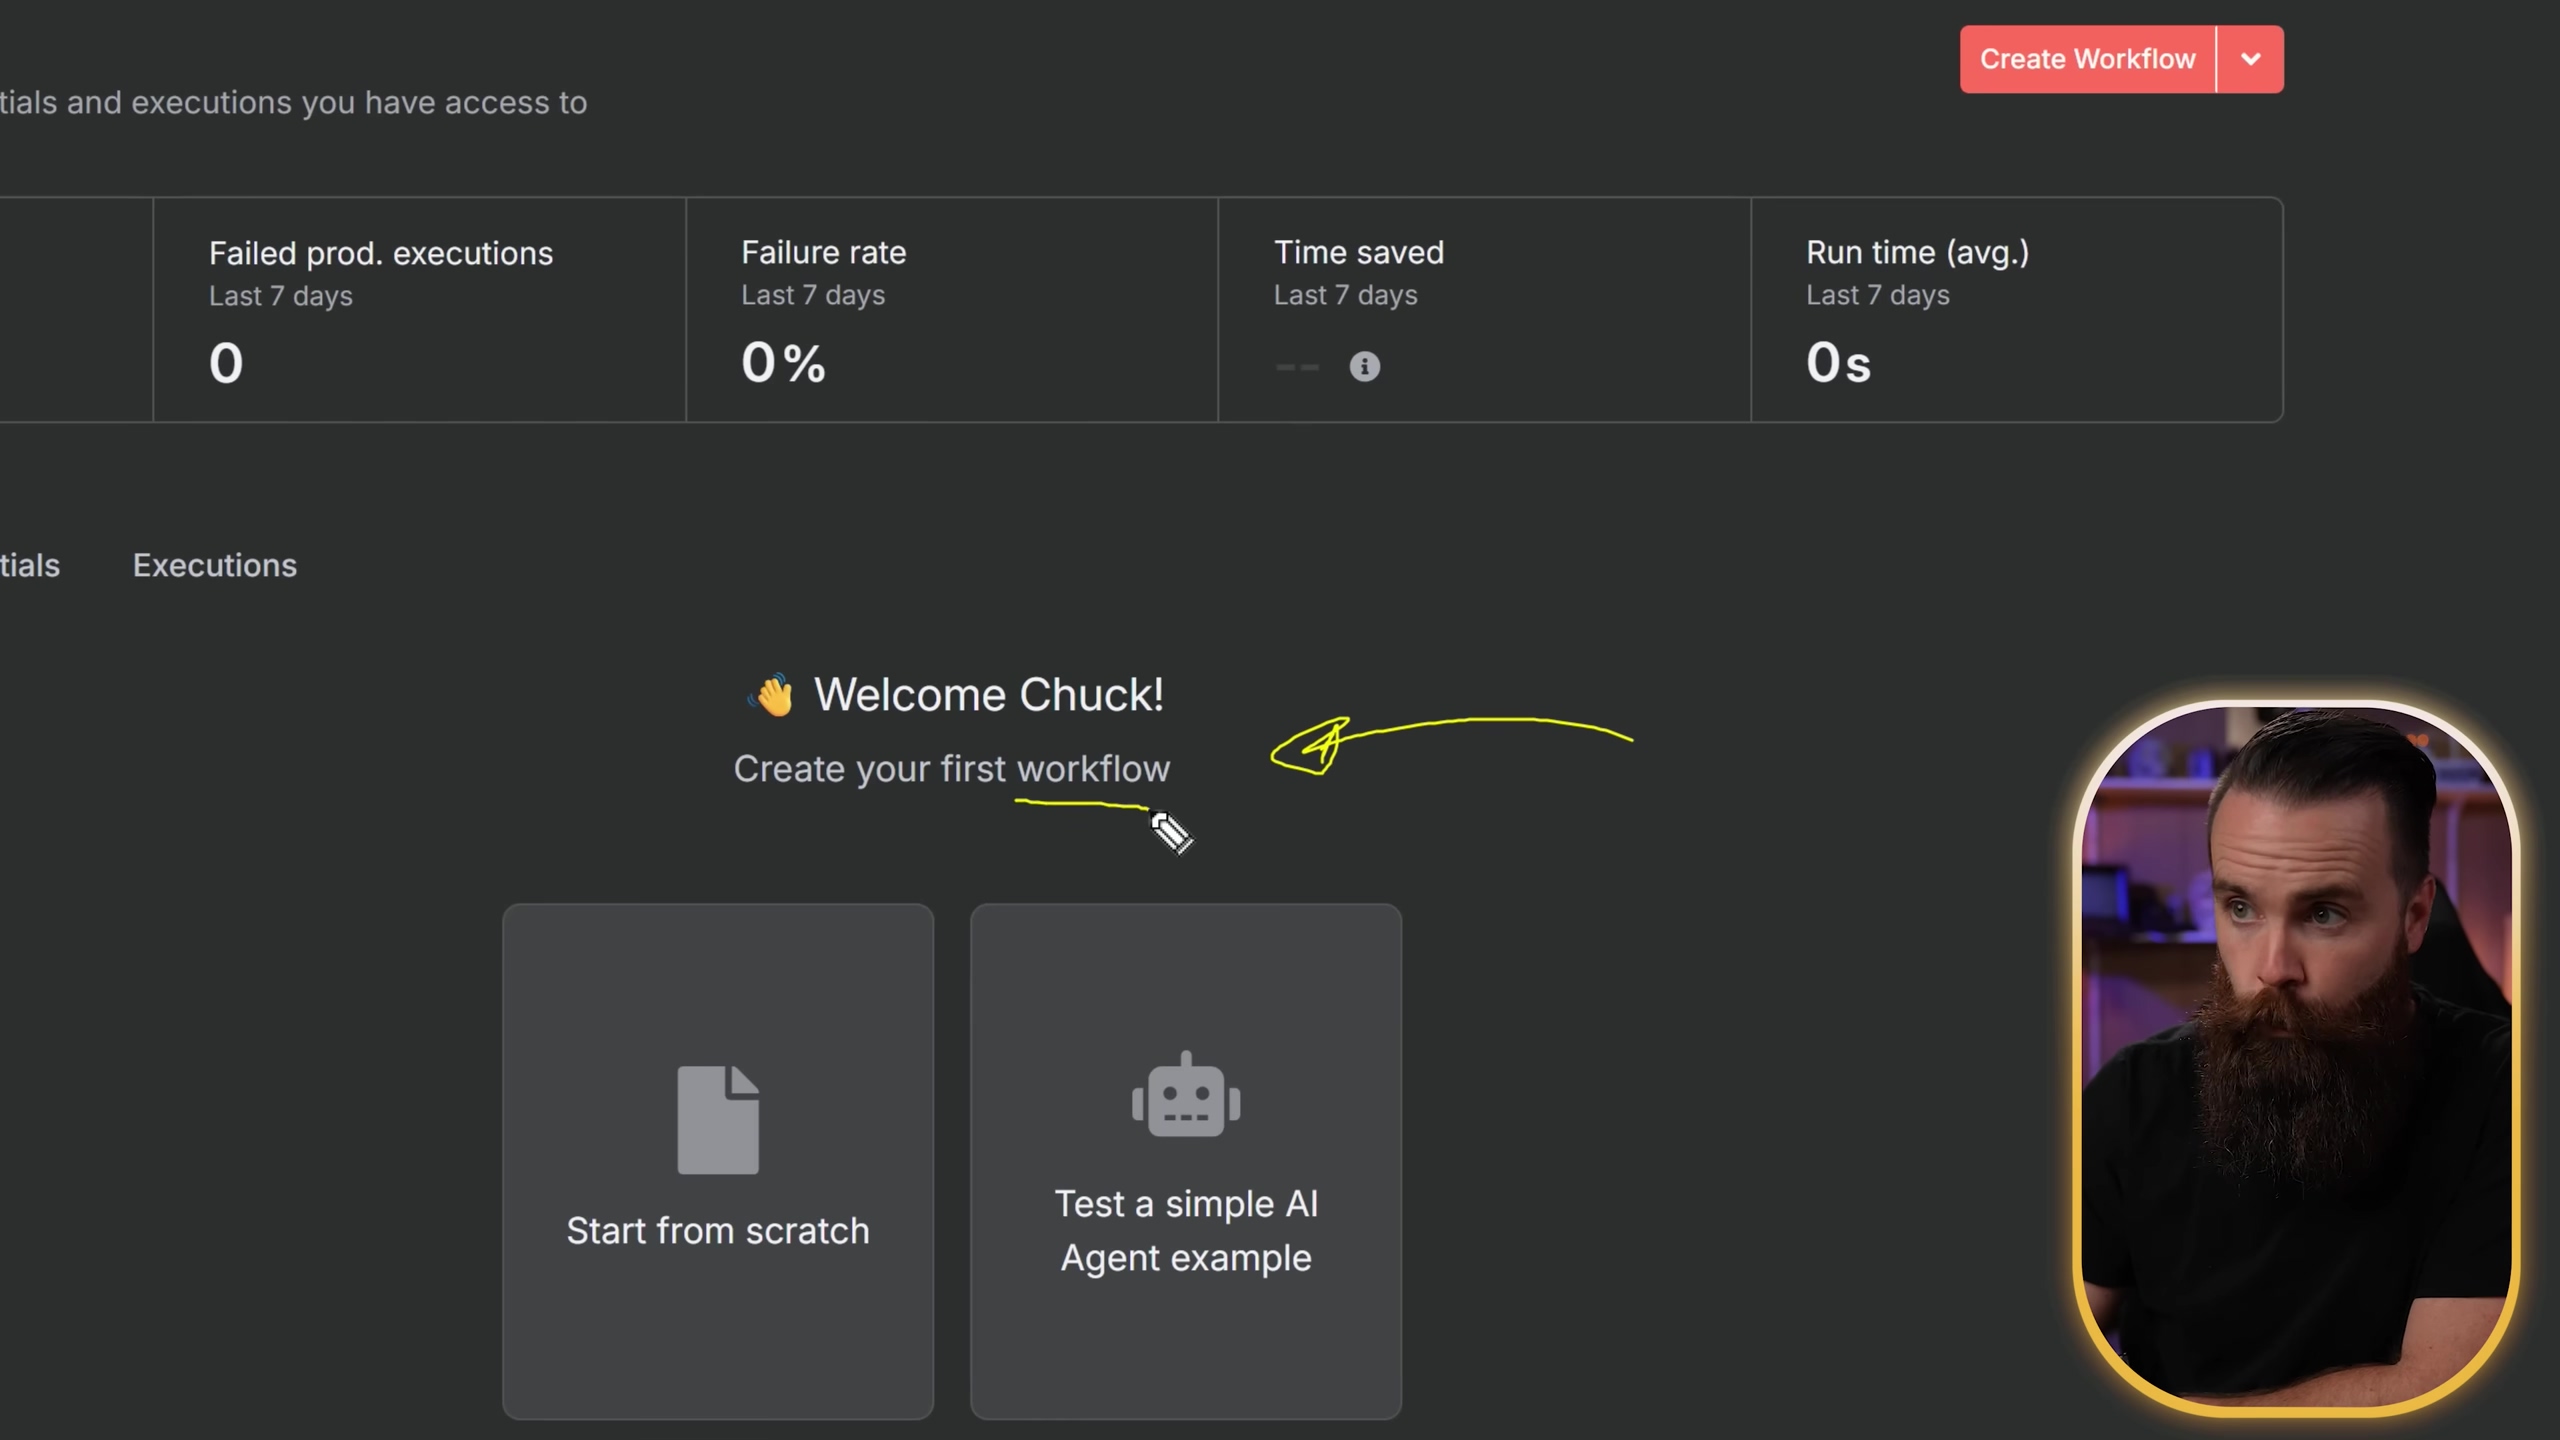
Alright, you’ve picked your battleground – on-premise or cloud. Now, let’s get your n8n instance up and running! Regardless of your chosen installation method, the very first step is always to create an owner account. This is super straightforward and crucial for securing your n8n instance, making sure only you are the master of your automation universe.
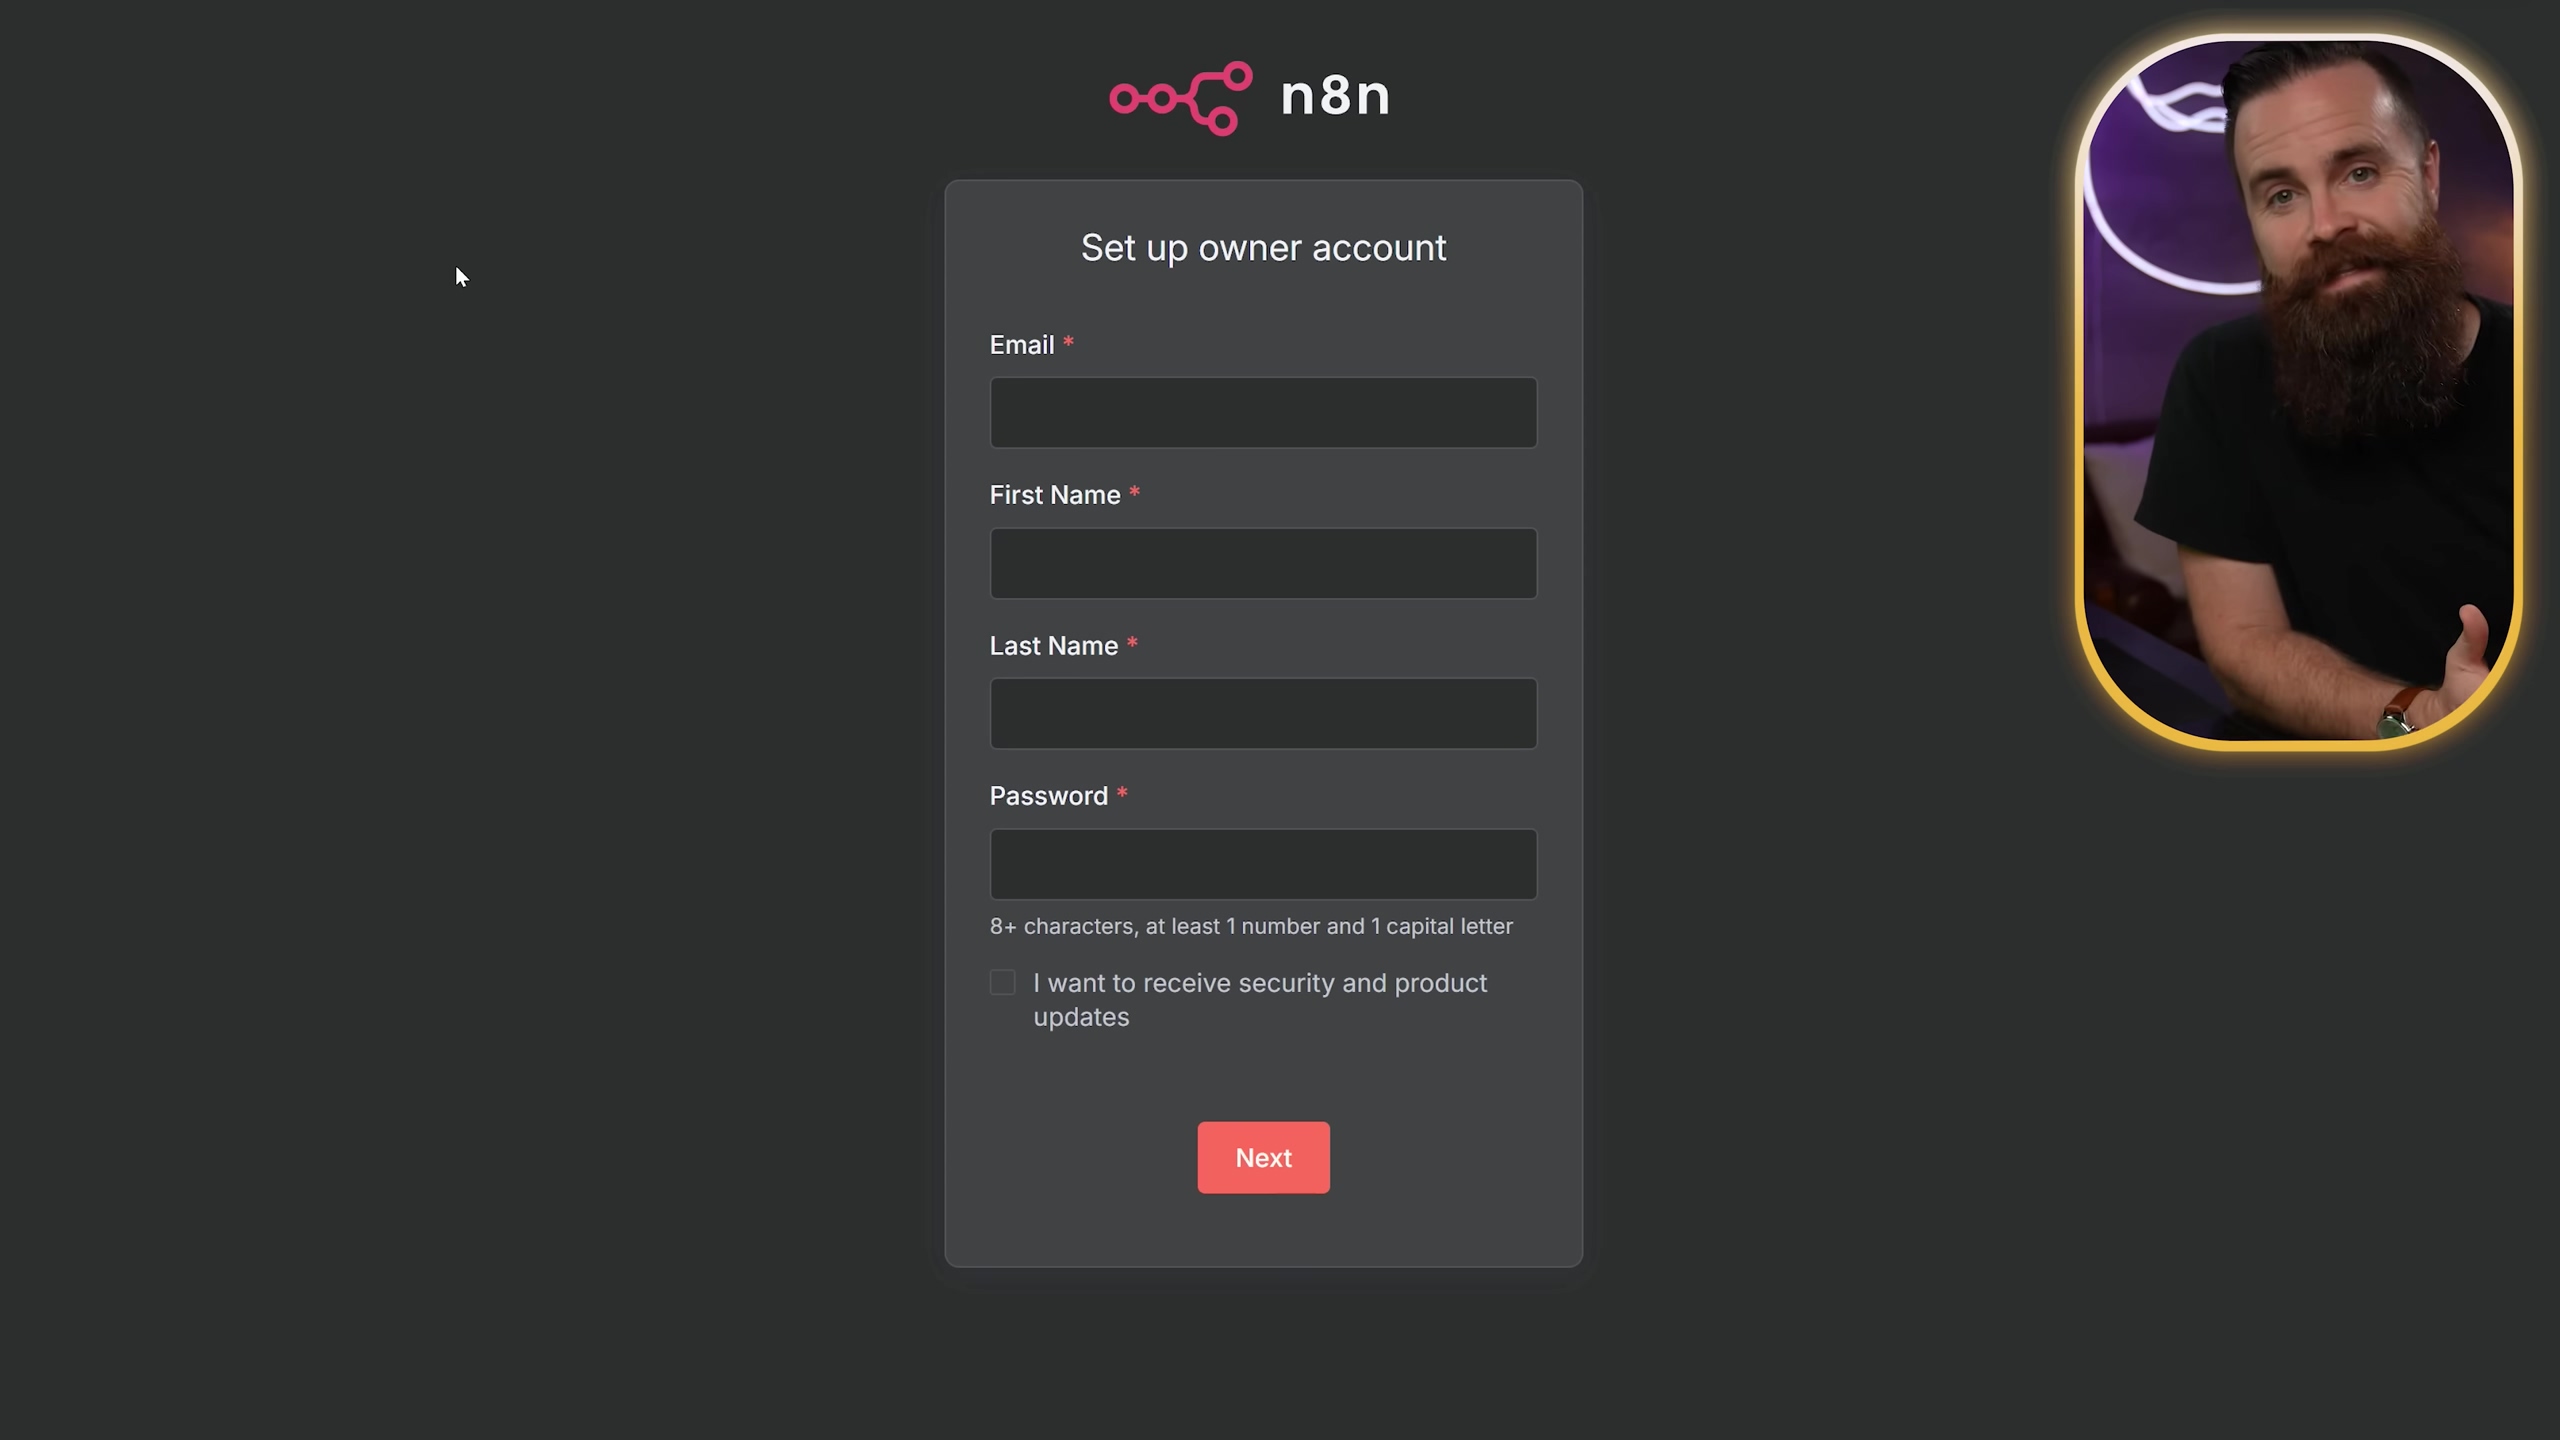
Expected Feedback: After you’ve created your account and logged in, you’ll be greeted by the n8n dashboard. This is your command center, your mission control for all your automation workflows. Get ready to feel powerful!
Building Your First Automation Workflow
This is where the fun begins! n8n workflows are built using interconnected ‘nodes,’ and each node is like a specialized robot performing a specific task. Think of it like building a Rube Goldberg machine, but for your digital life. For our first project, let’s create a simple workflow to aggregate news and send it to your Discord server. Super handy for staying updated without constantly checking websites!
Setting Up Triggers
Every single workflow in n8n needs a starting point, a ‘trigger.’ This tells n8n when to kick off your automation. You can manually trigger a workflow for testing (which we’ll do a lot!), or set it to run on a schedule, like every morning. For our daily news digest, a schedule trigger is absolutely ideal. It’s like setting an alarm clock for your news!
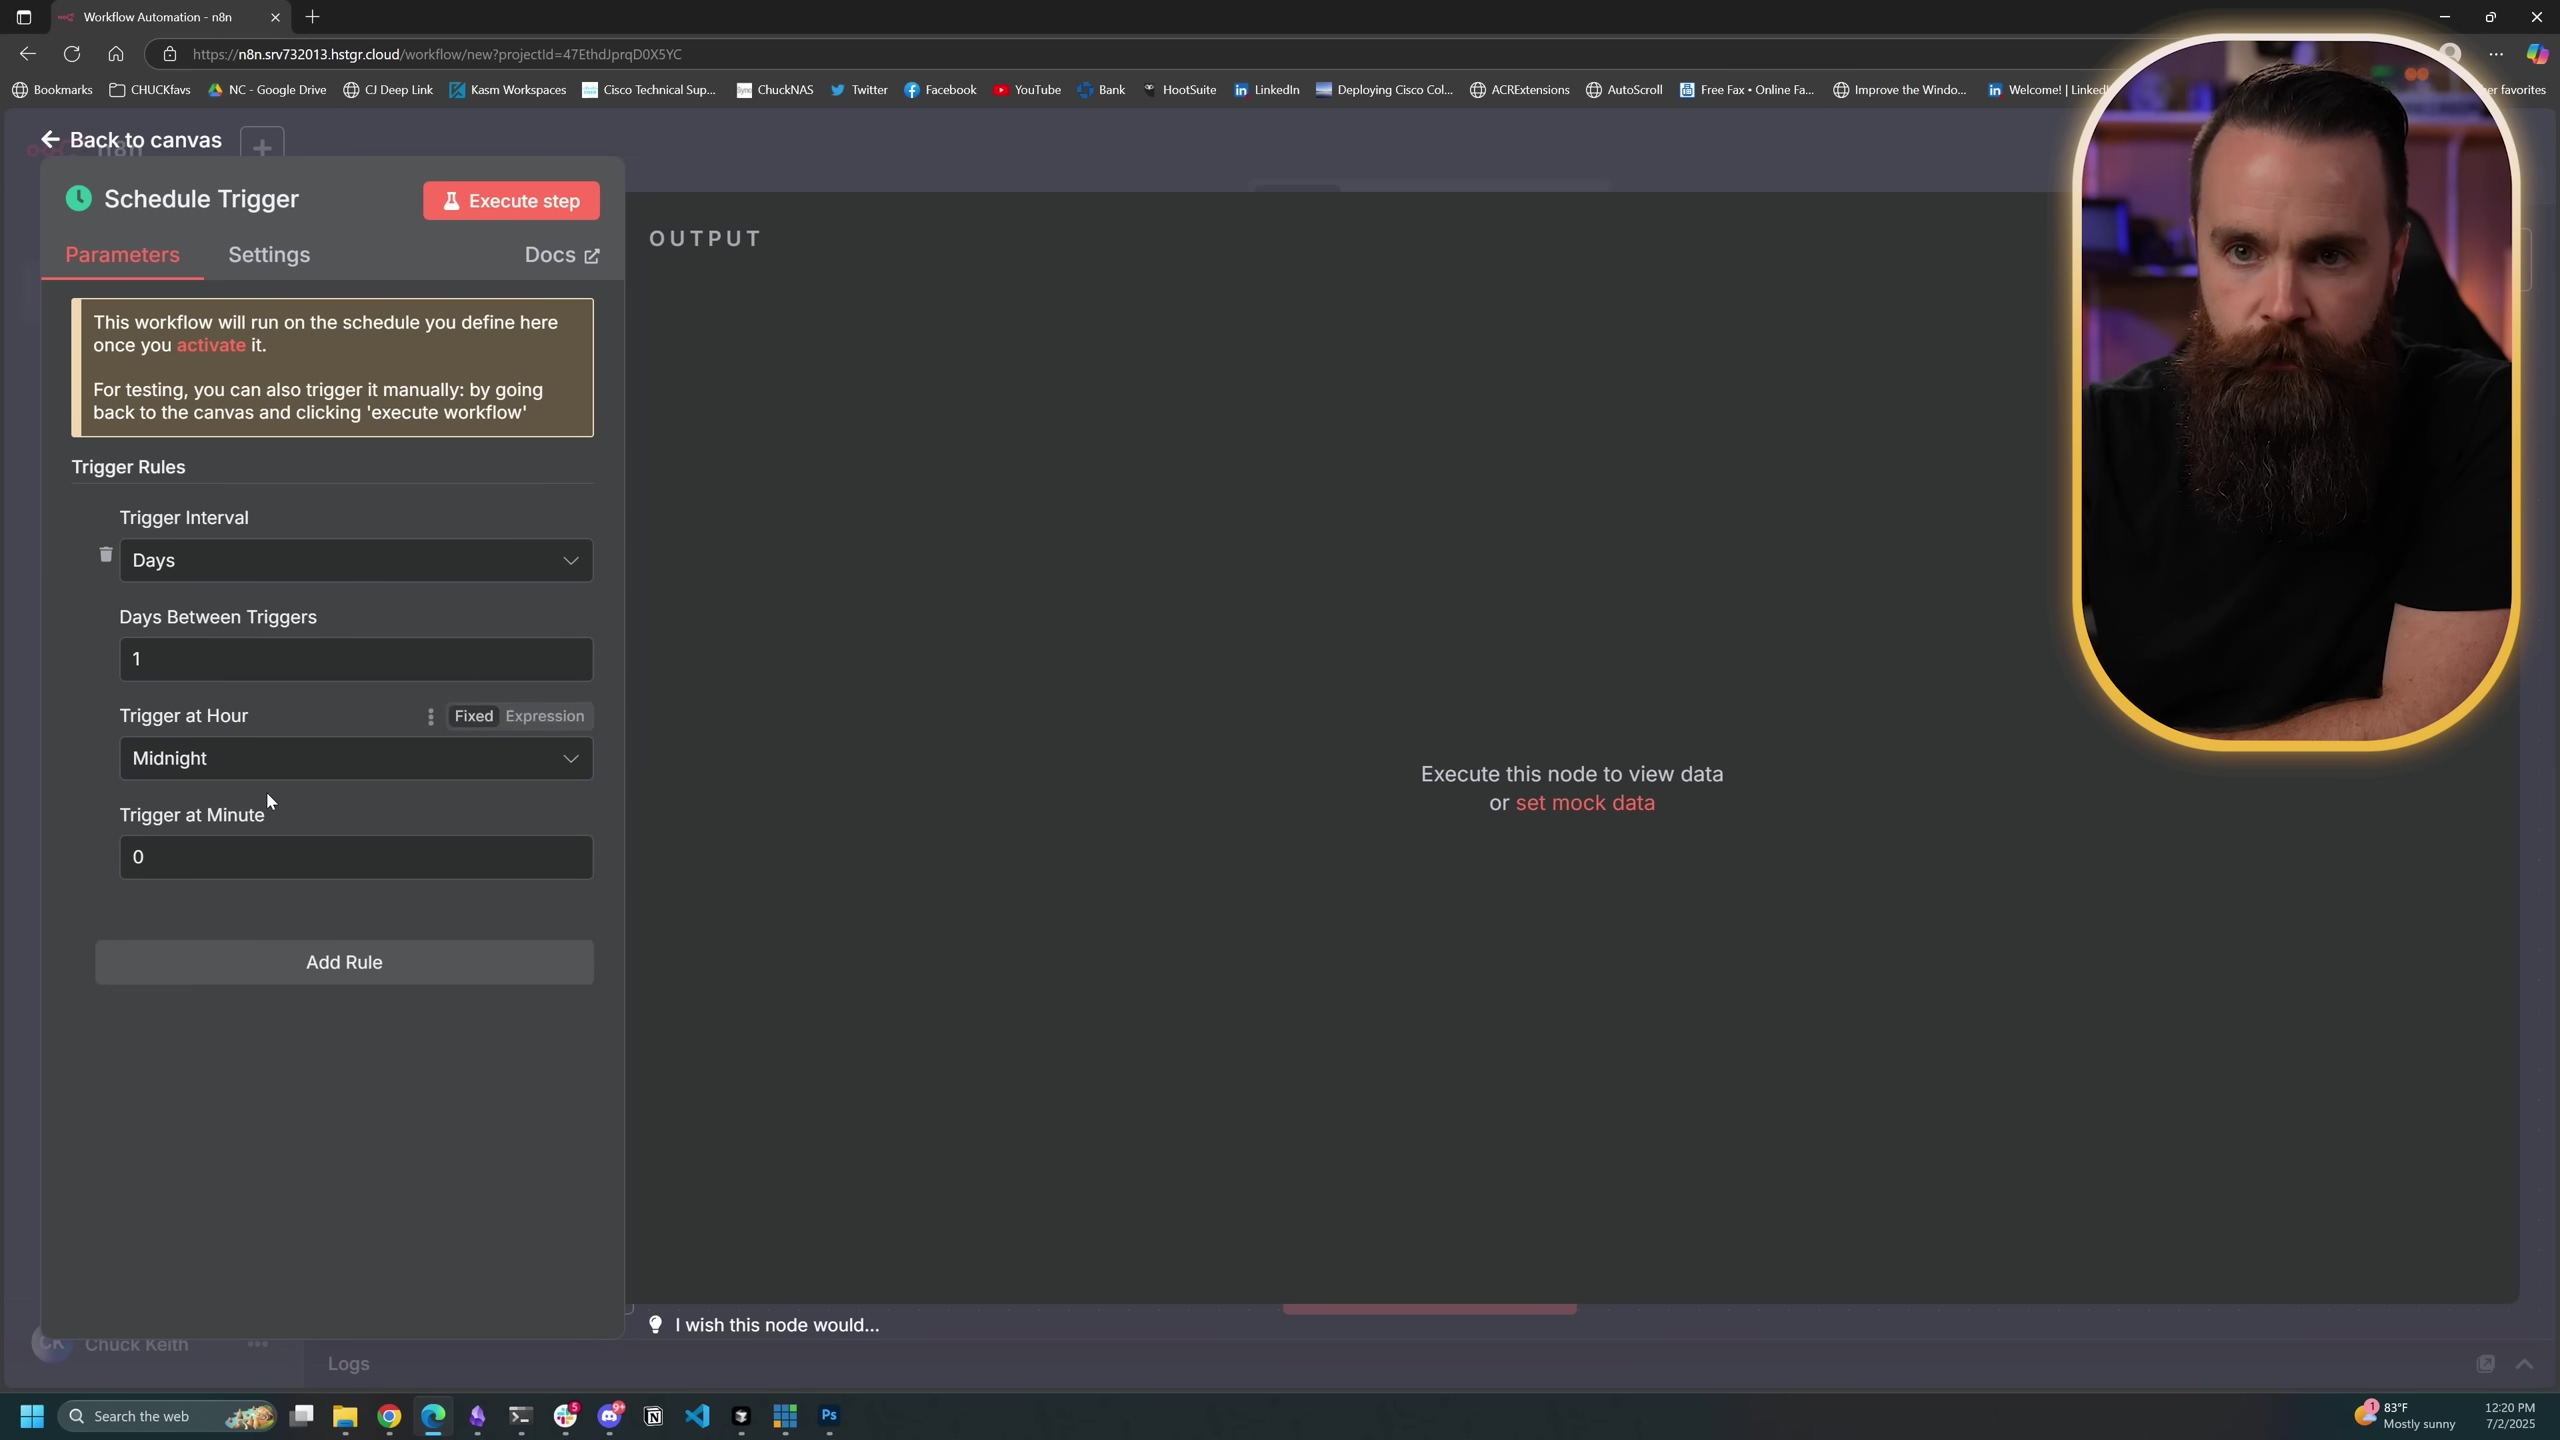
Expected Feedback: Once you add the ‘Schedule Trigger’ node, you’ll see its configuration options appear. You can set it to run daily, weekly, or at specific intervals. For testing, you can click the ‘Execute Workflow’ button on the top right to run it manually.
Adding RSS Feed Reader
Now that we have our trigger, we need to get the news! To pull news articles, we’ll add an ‘RSS Read’ node. RSS (Really Simple Syndication) is a web feed format that allows users to access updates to online content in a standardized, computer-readable format. This node will fetch articles from your specified RSS feed. For this example, we’ll use Bleeping Computer’s RSS feed. It’s a great source for tech news!
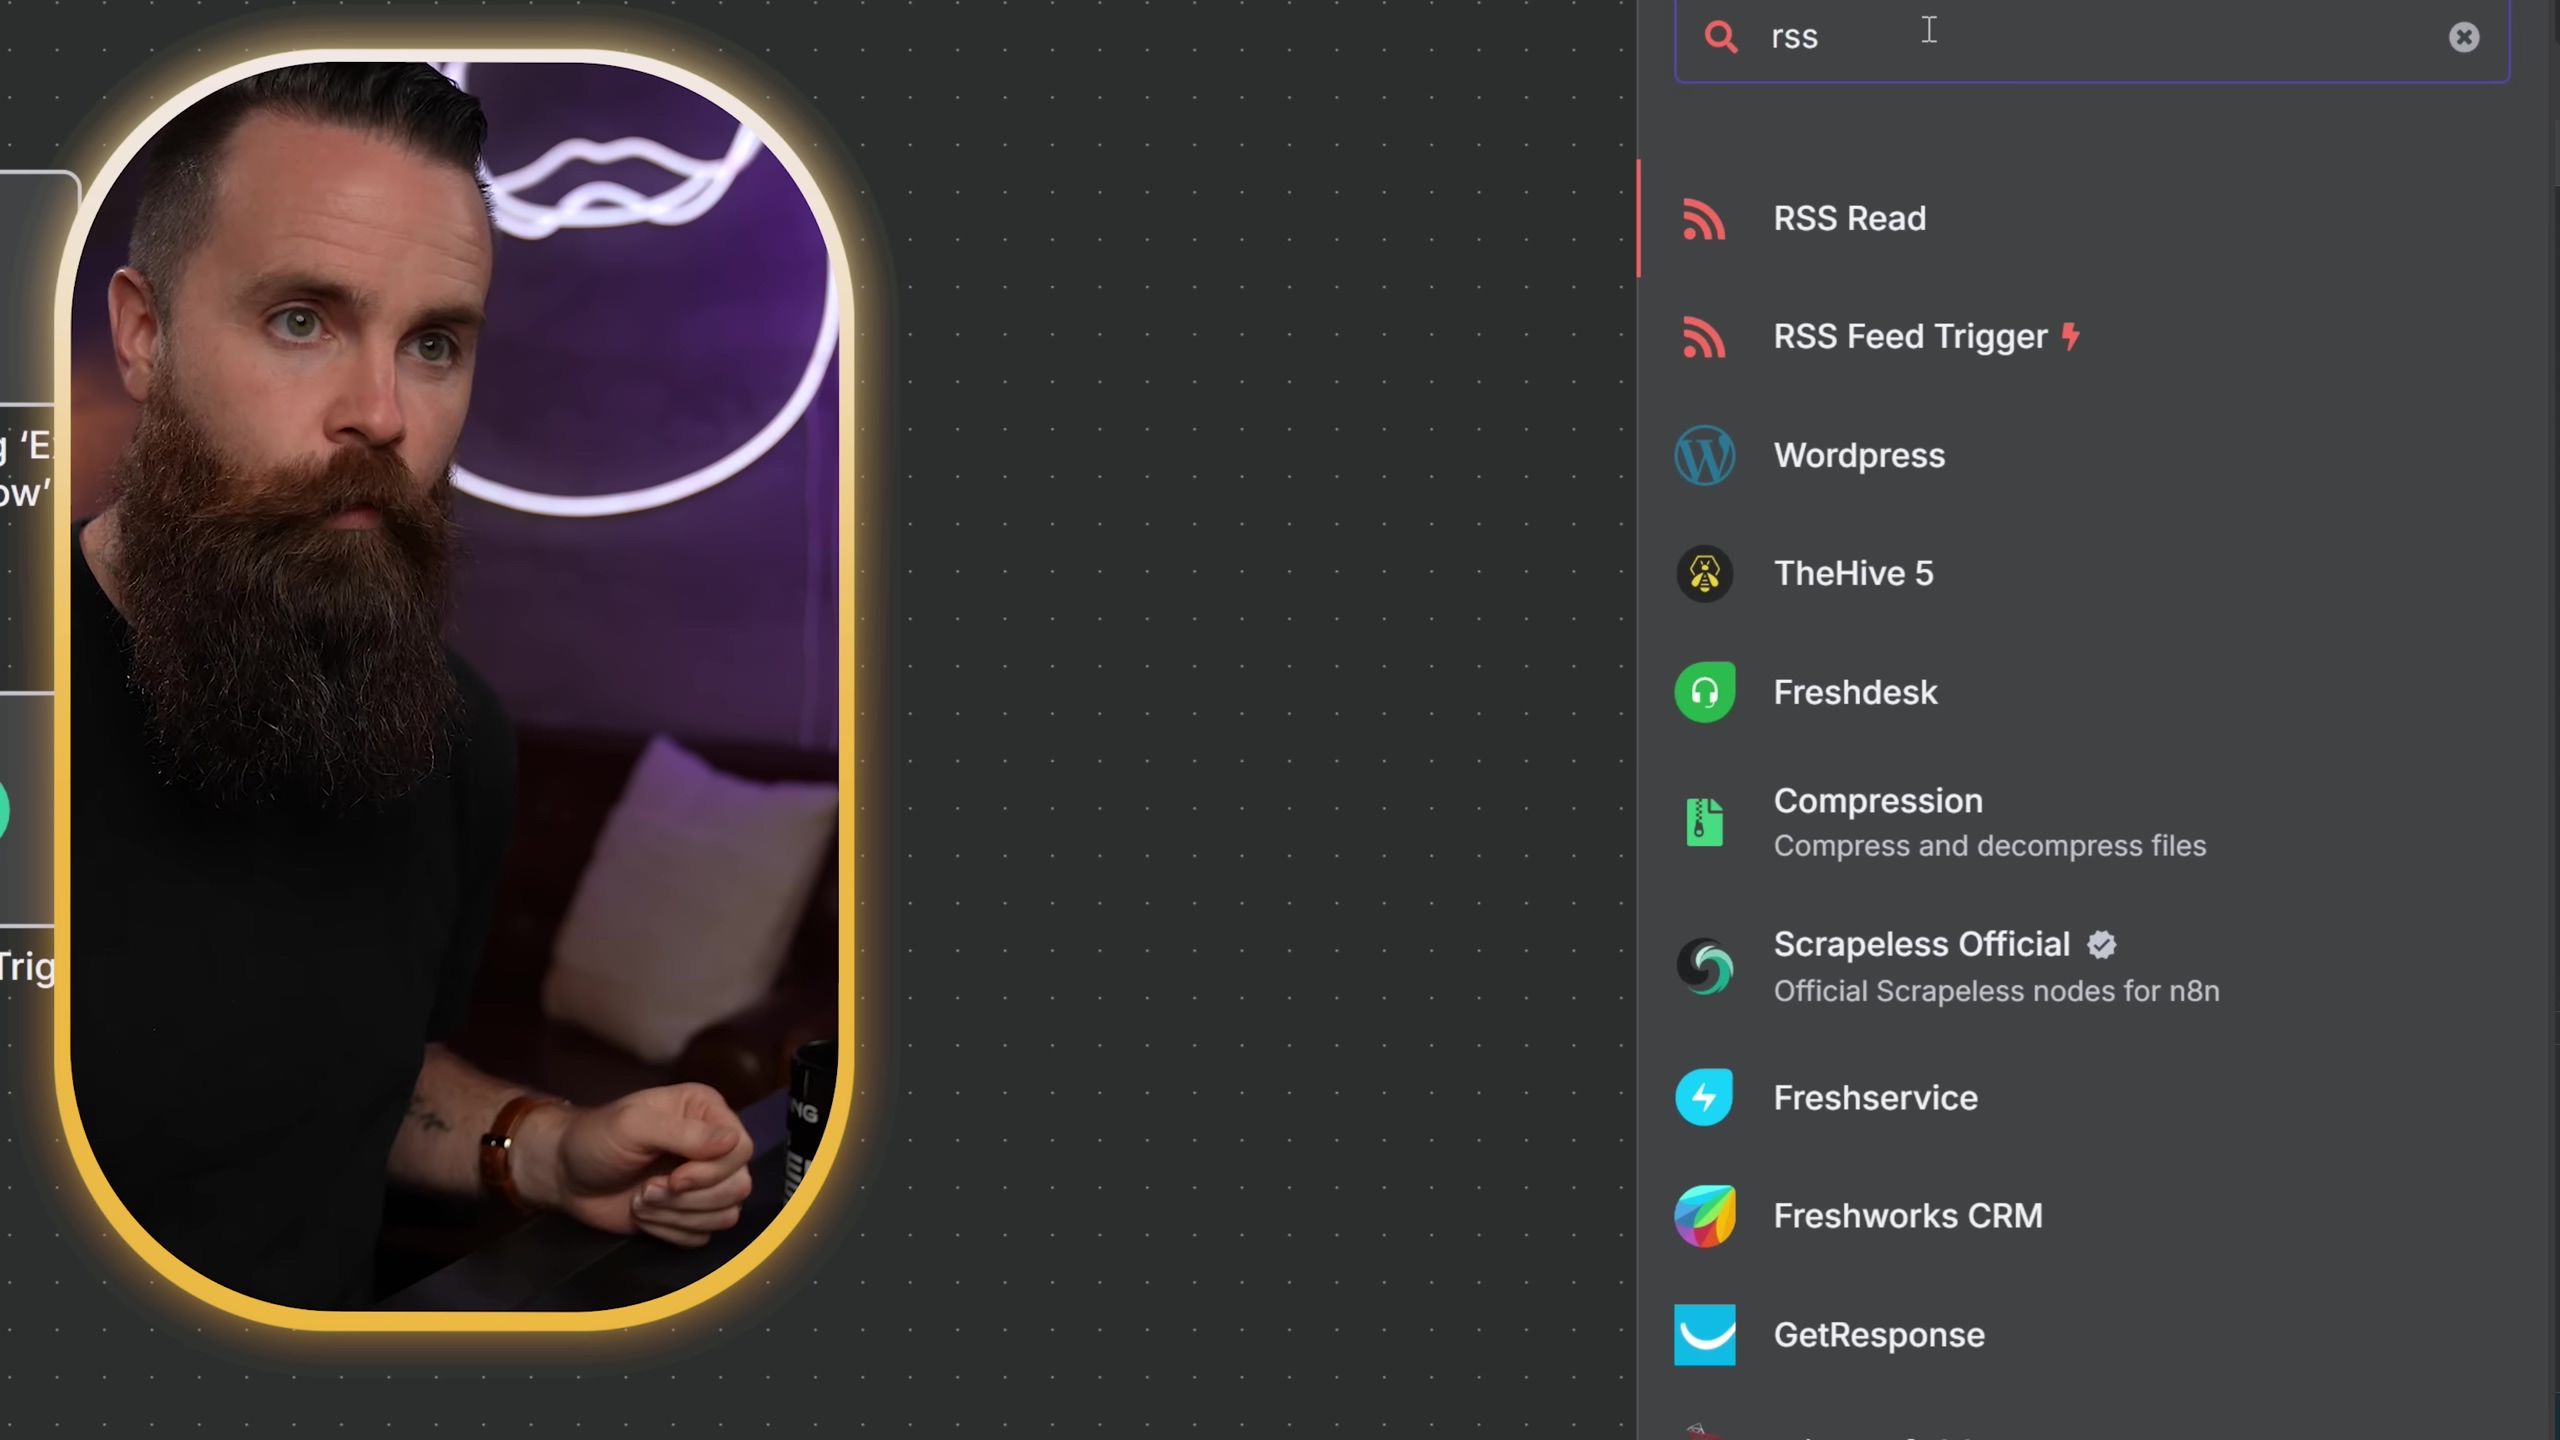
Expected Feedback: After adding the ‘RSS Read’ node and entering the URL, click the ‘Execute Node’ button (usually a small play icon on the node itself). You should see a preview of the data it pulled, showing recent articles with their titles, links, and other details. If you see data, you’ve nailed it!
Integrating with Discord
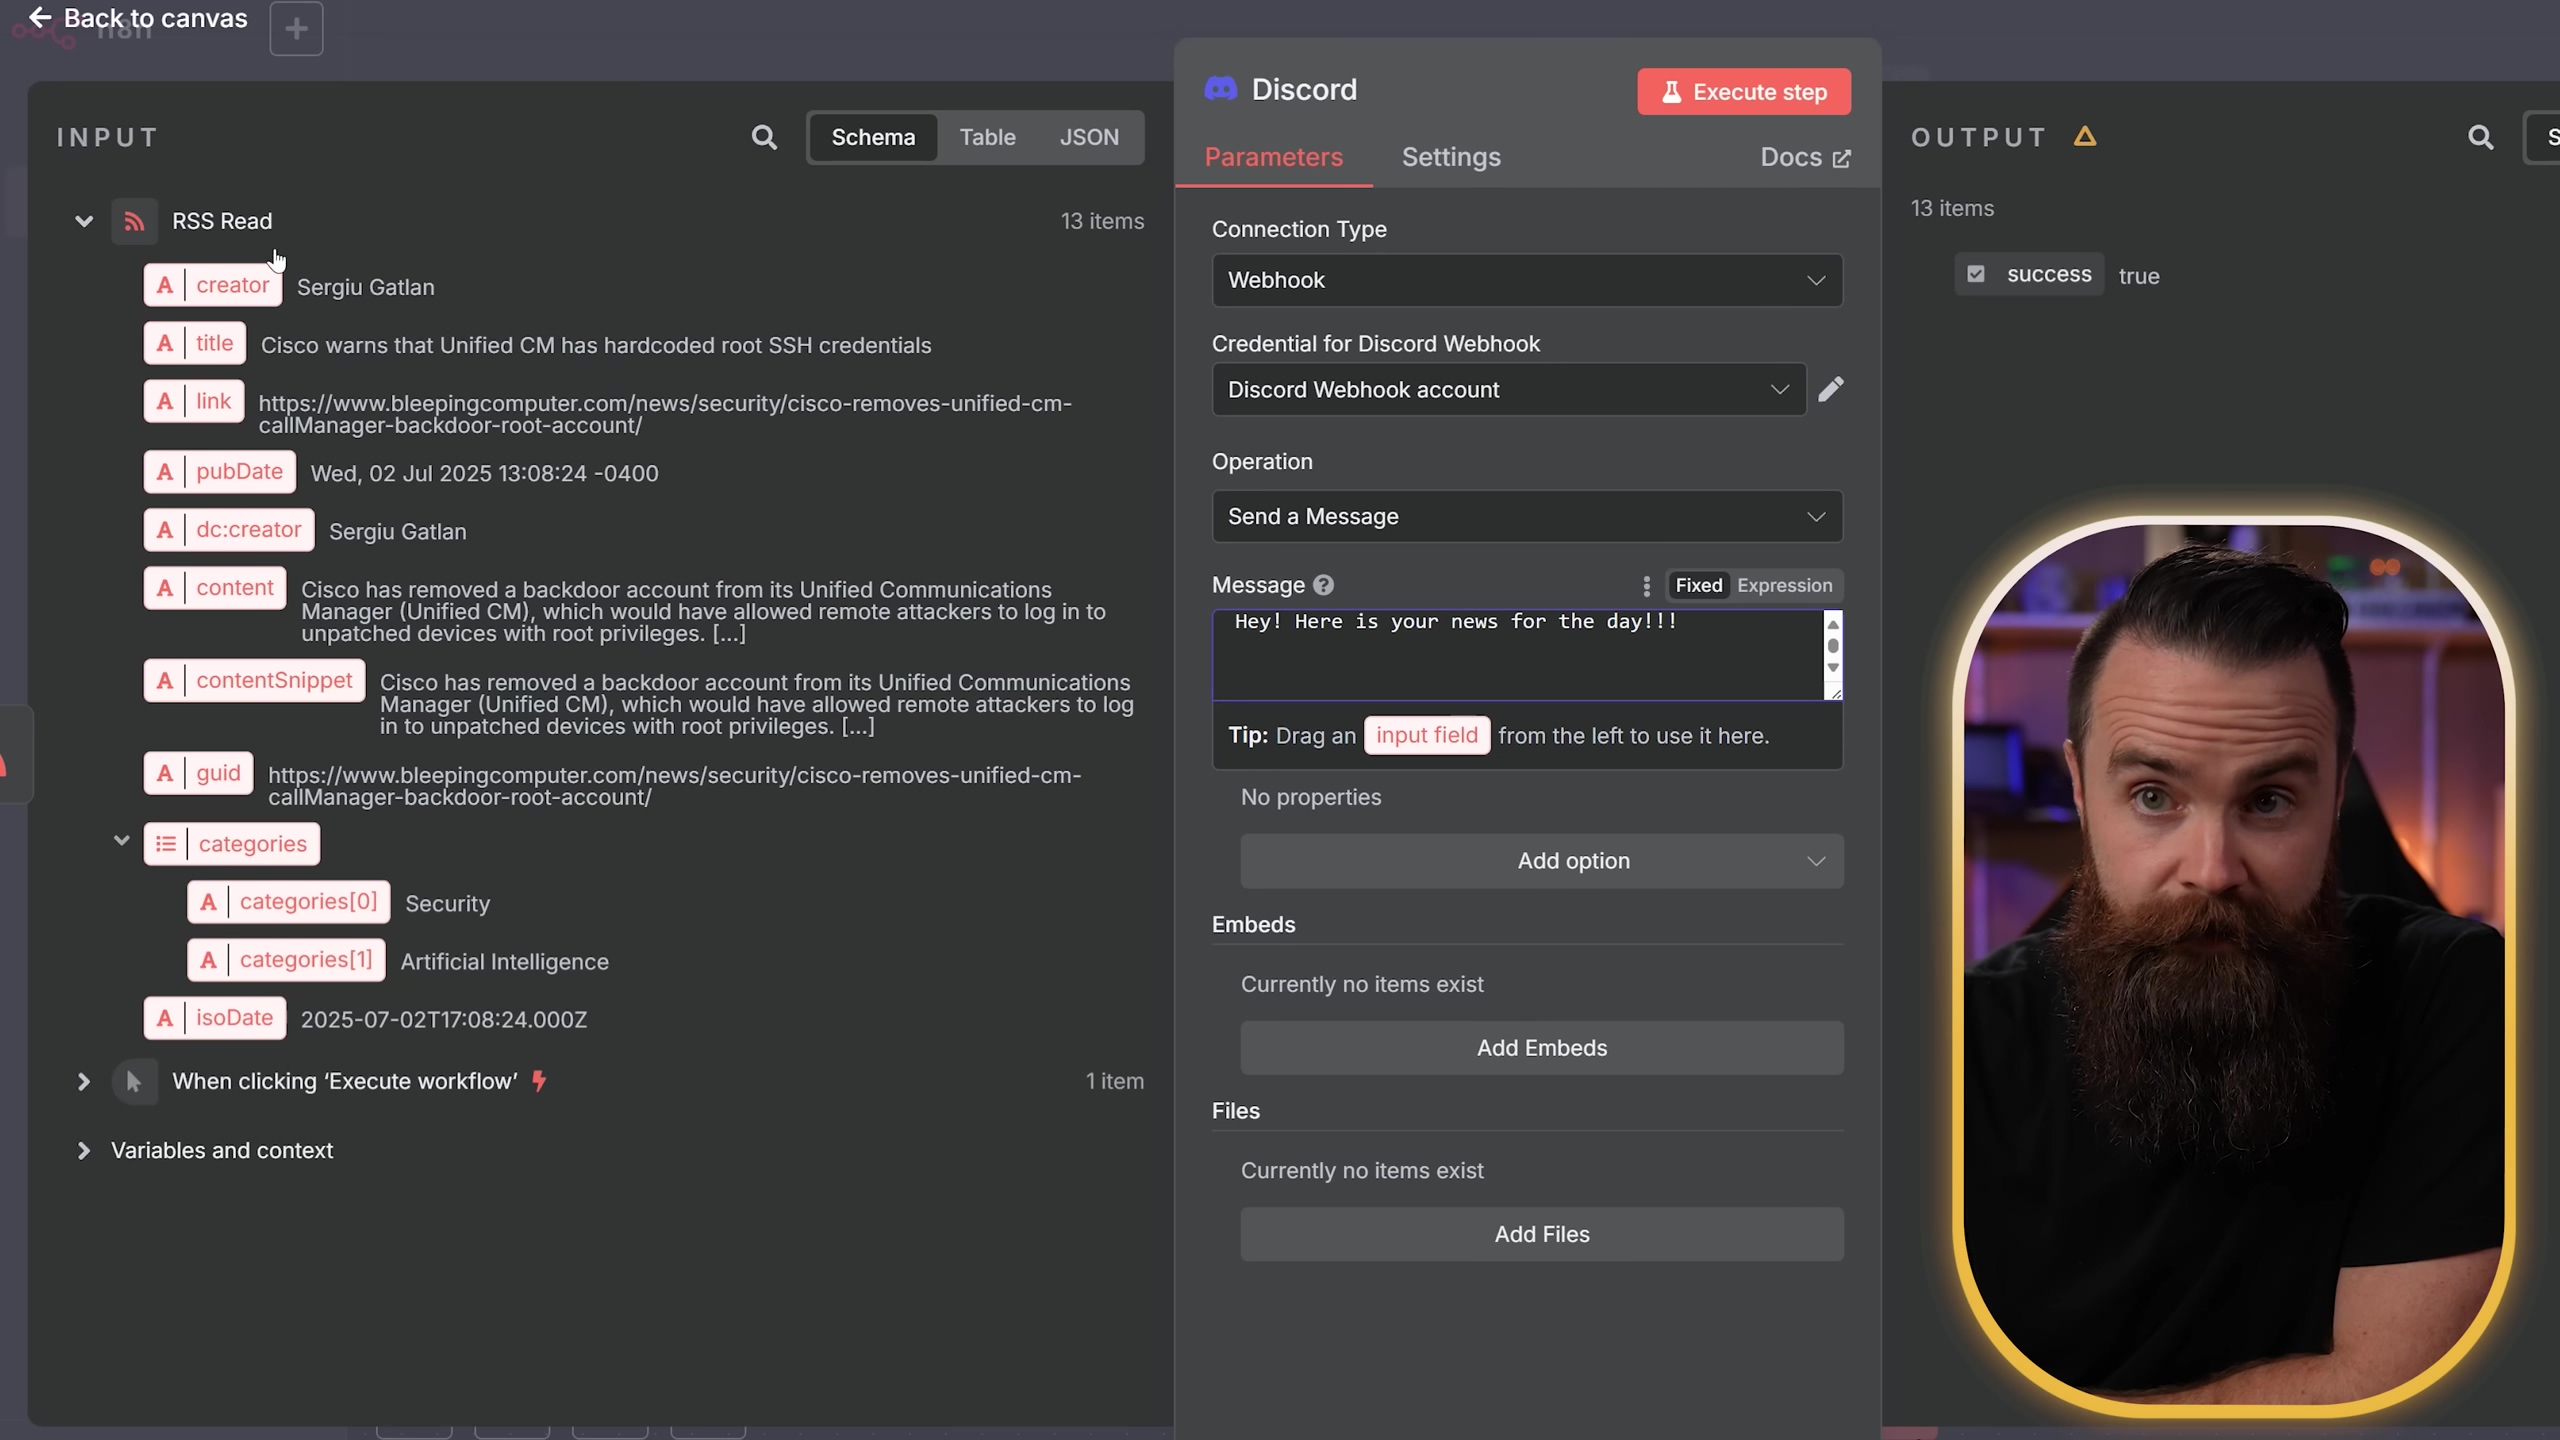
Okay, we’ve got the news, now let’s send it to your Discord channel! Next, add a ‘Discord’ node. Before you can send messages, you’ll need to set up a Discord webhook credential within n8n. This is super important because it allows n8n to connect securely to your Discord server without needing your personal login details. Think of a webhook as a special delivery address for automated messages.
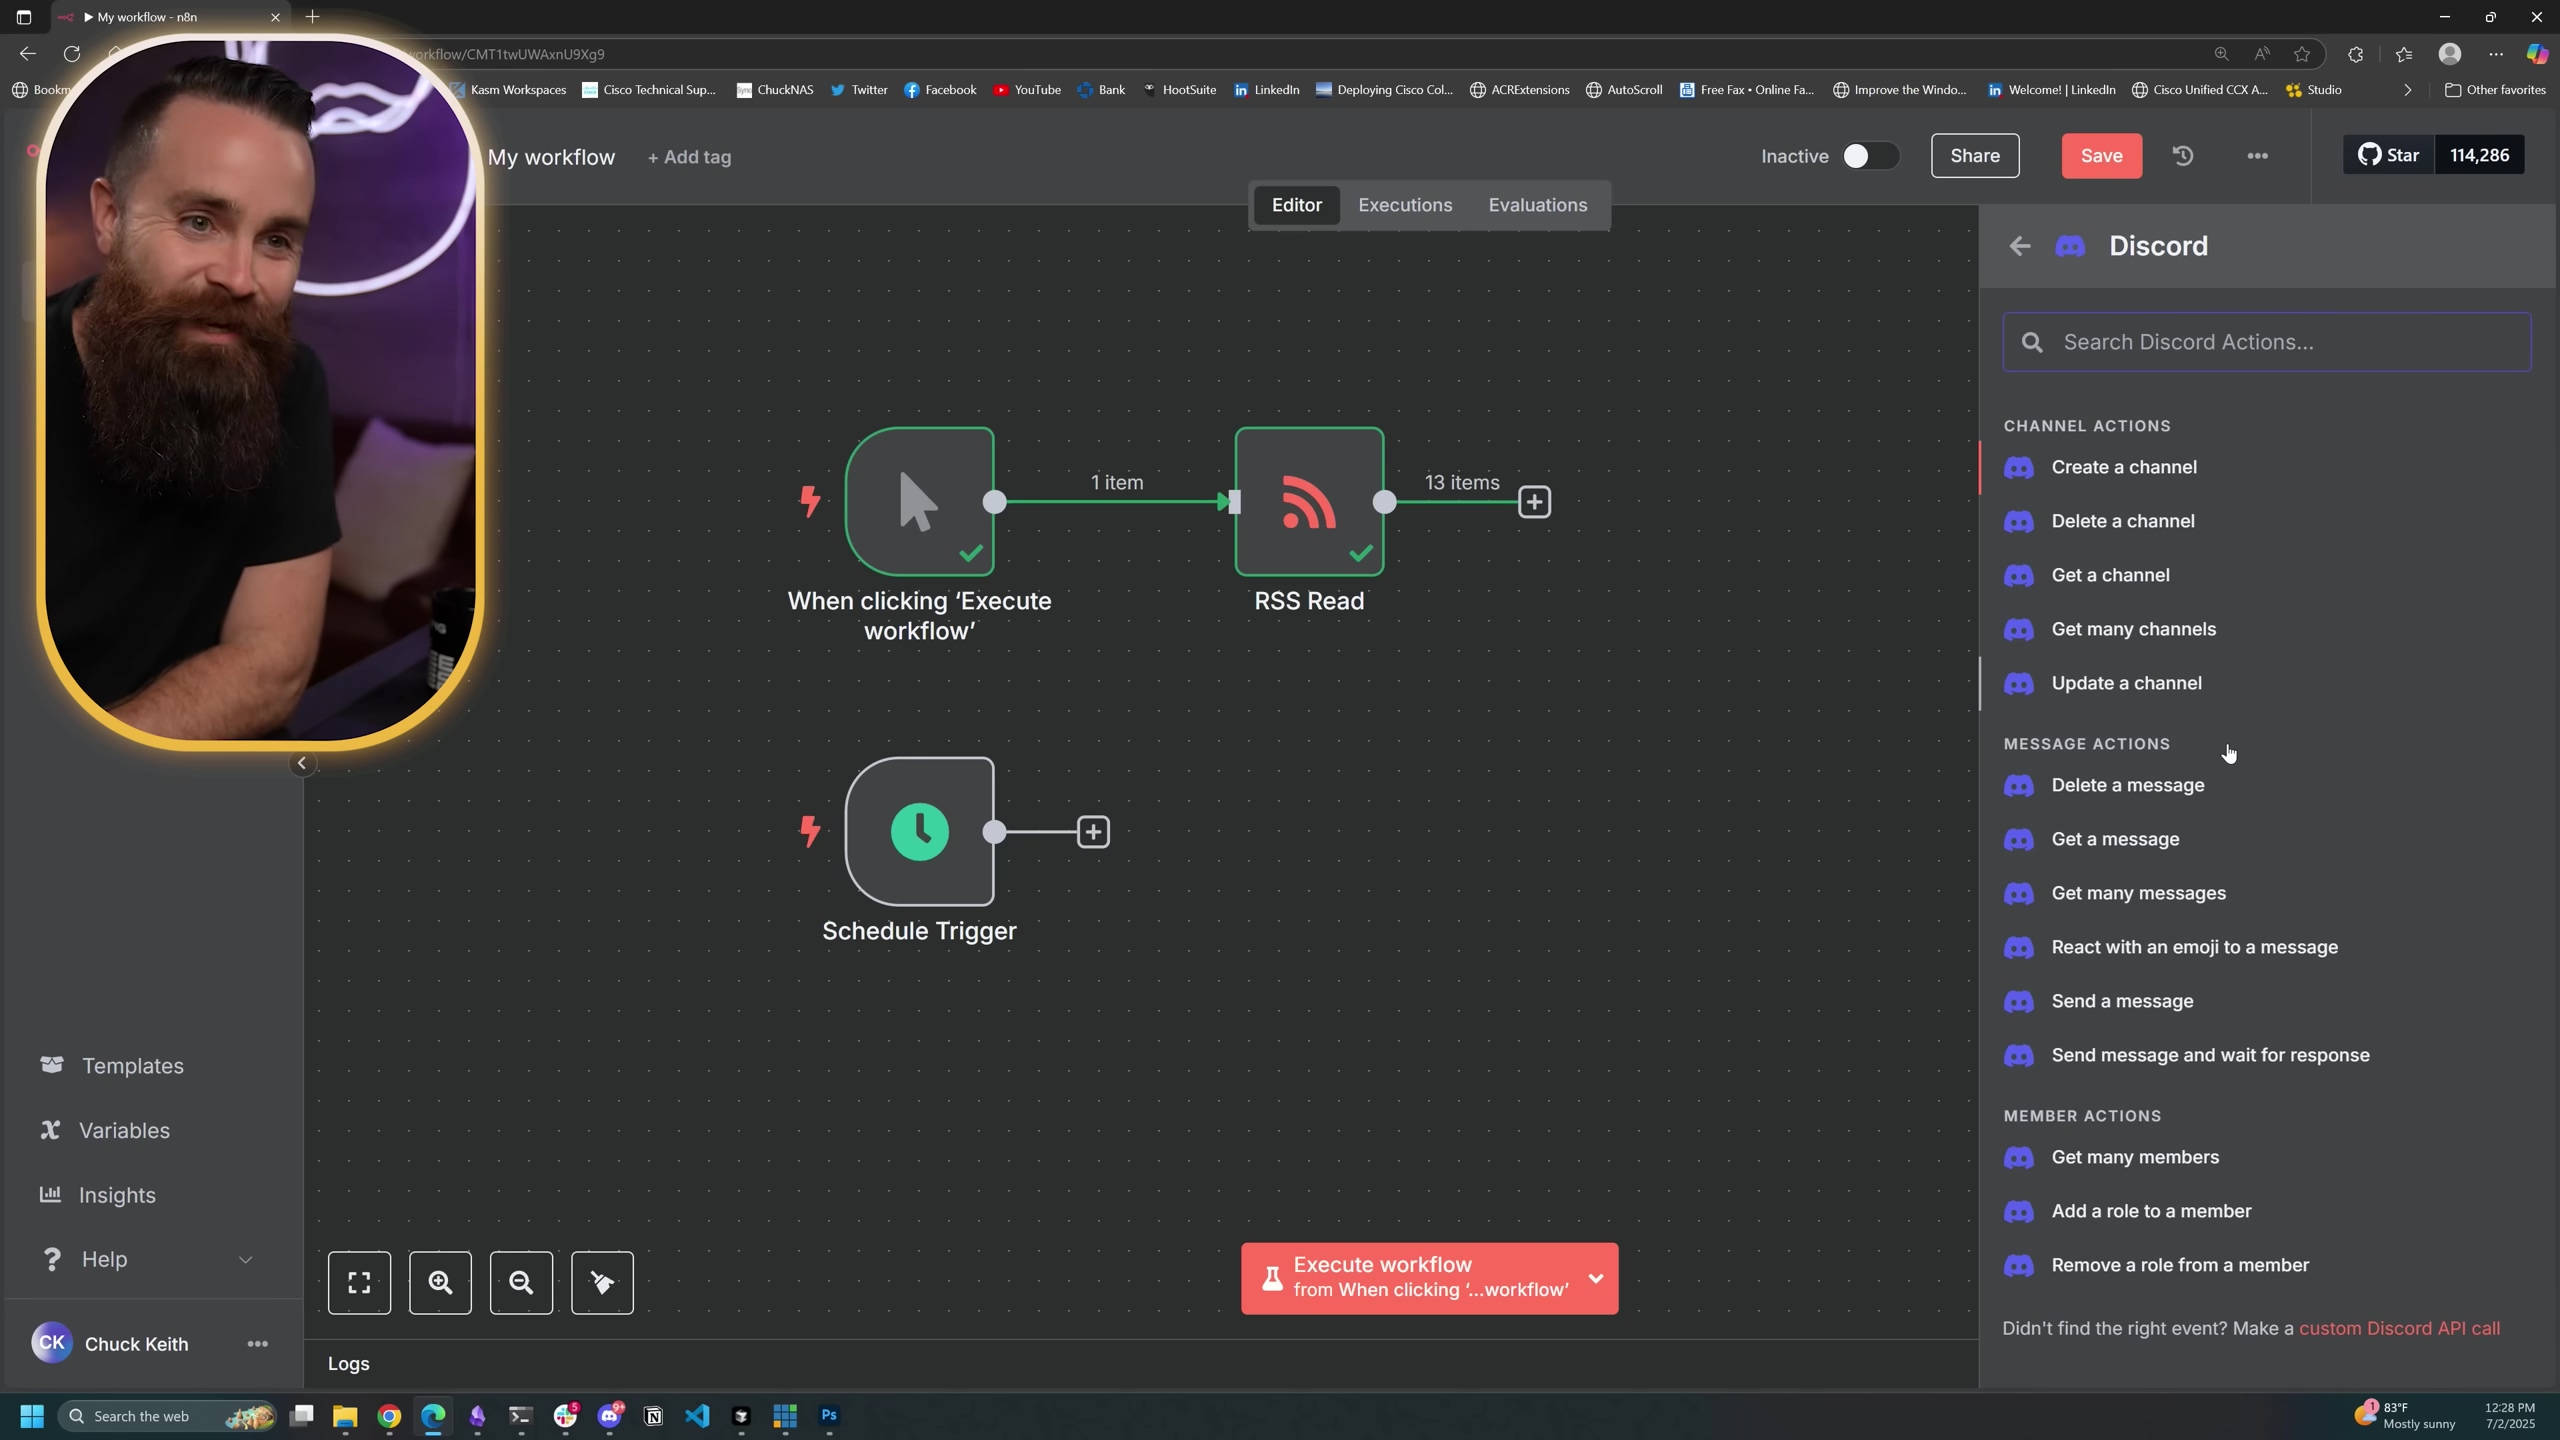
Expected Feedback: Once you’ve configured the Discord node and linked your webhook, you can test it by sending a simple message. If everything is set up correctly, you’ll see a message pop up in your Discord channel! Then, you can configure the Discord node to send a message, using data pulled dynamically from the RSS feed. This is where n8n’s expression builder comes in handy – you can dynamically insert content like article titles, creators, and links into your message. It’s like building a custom message template that fills itself in!
Limiting Output
Nobody wants to be spammed with a hundred news articles at once, right? To avoid an overwhelming number of messages, add a ‘Limit’ node between the ‘RSS Read’ and ‘Discord’ nodes. This allows you to specify the maximum number of articles sent. It’s like putting a cap on your news delivery!
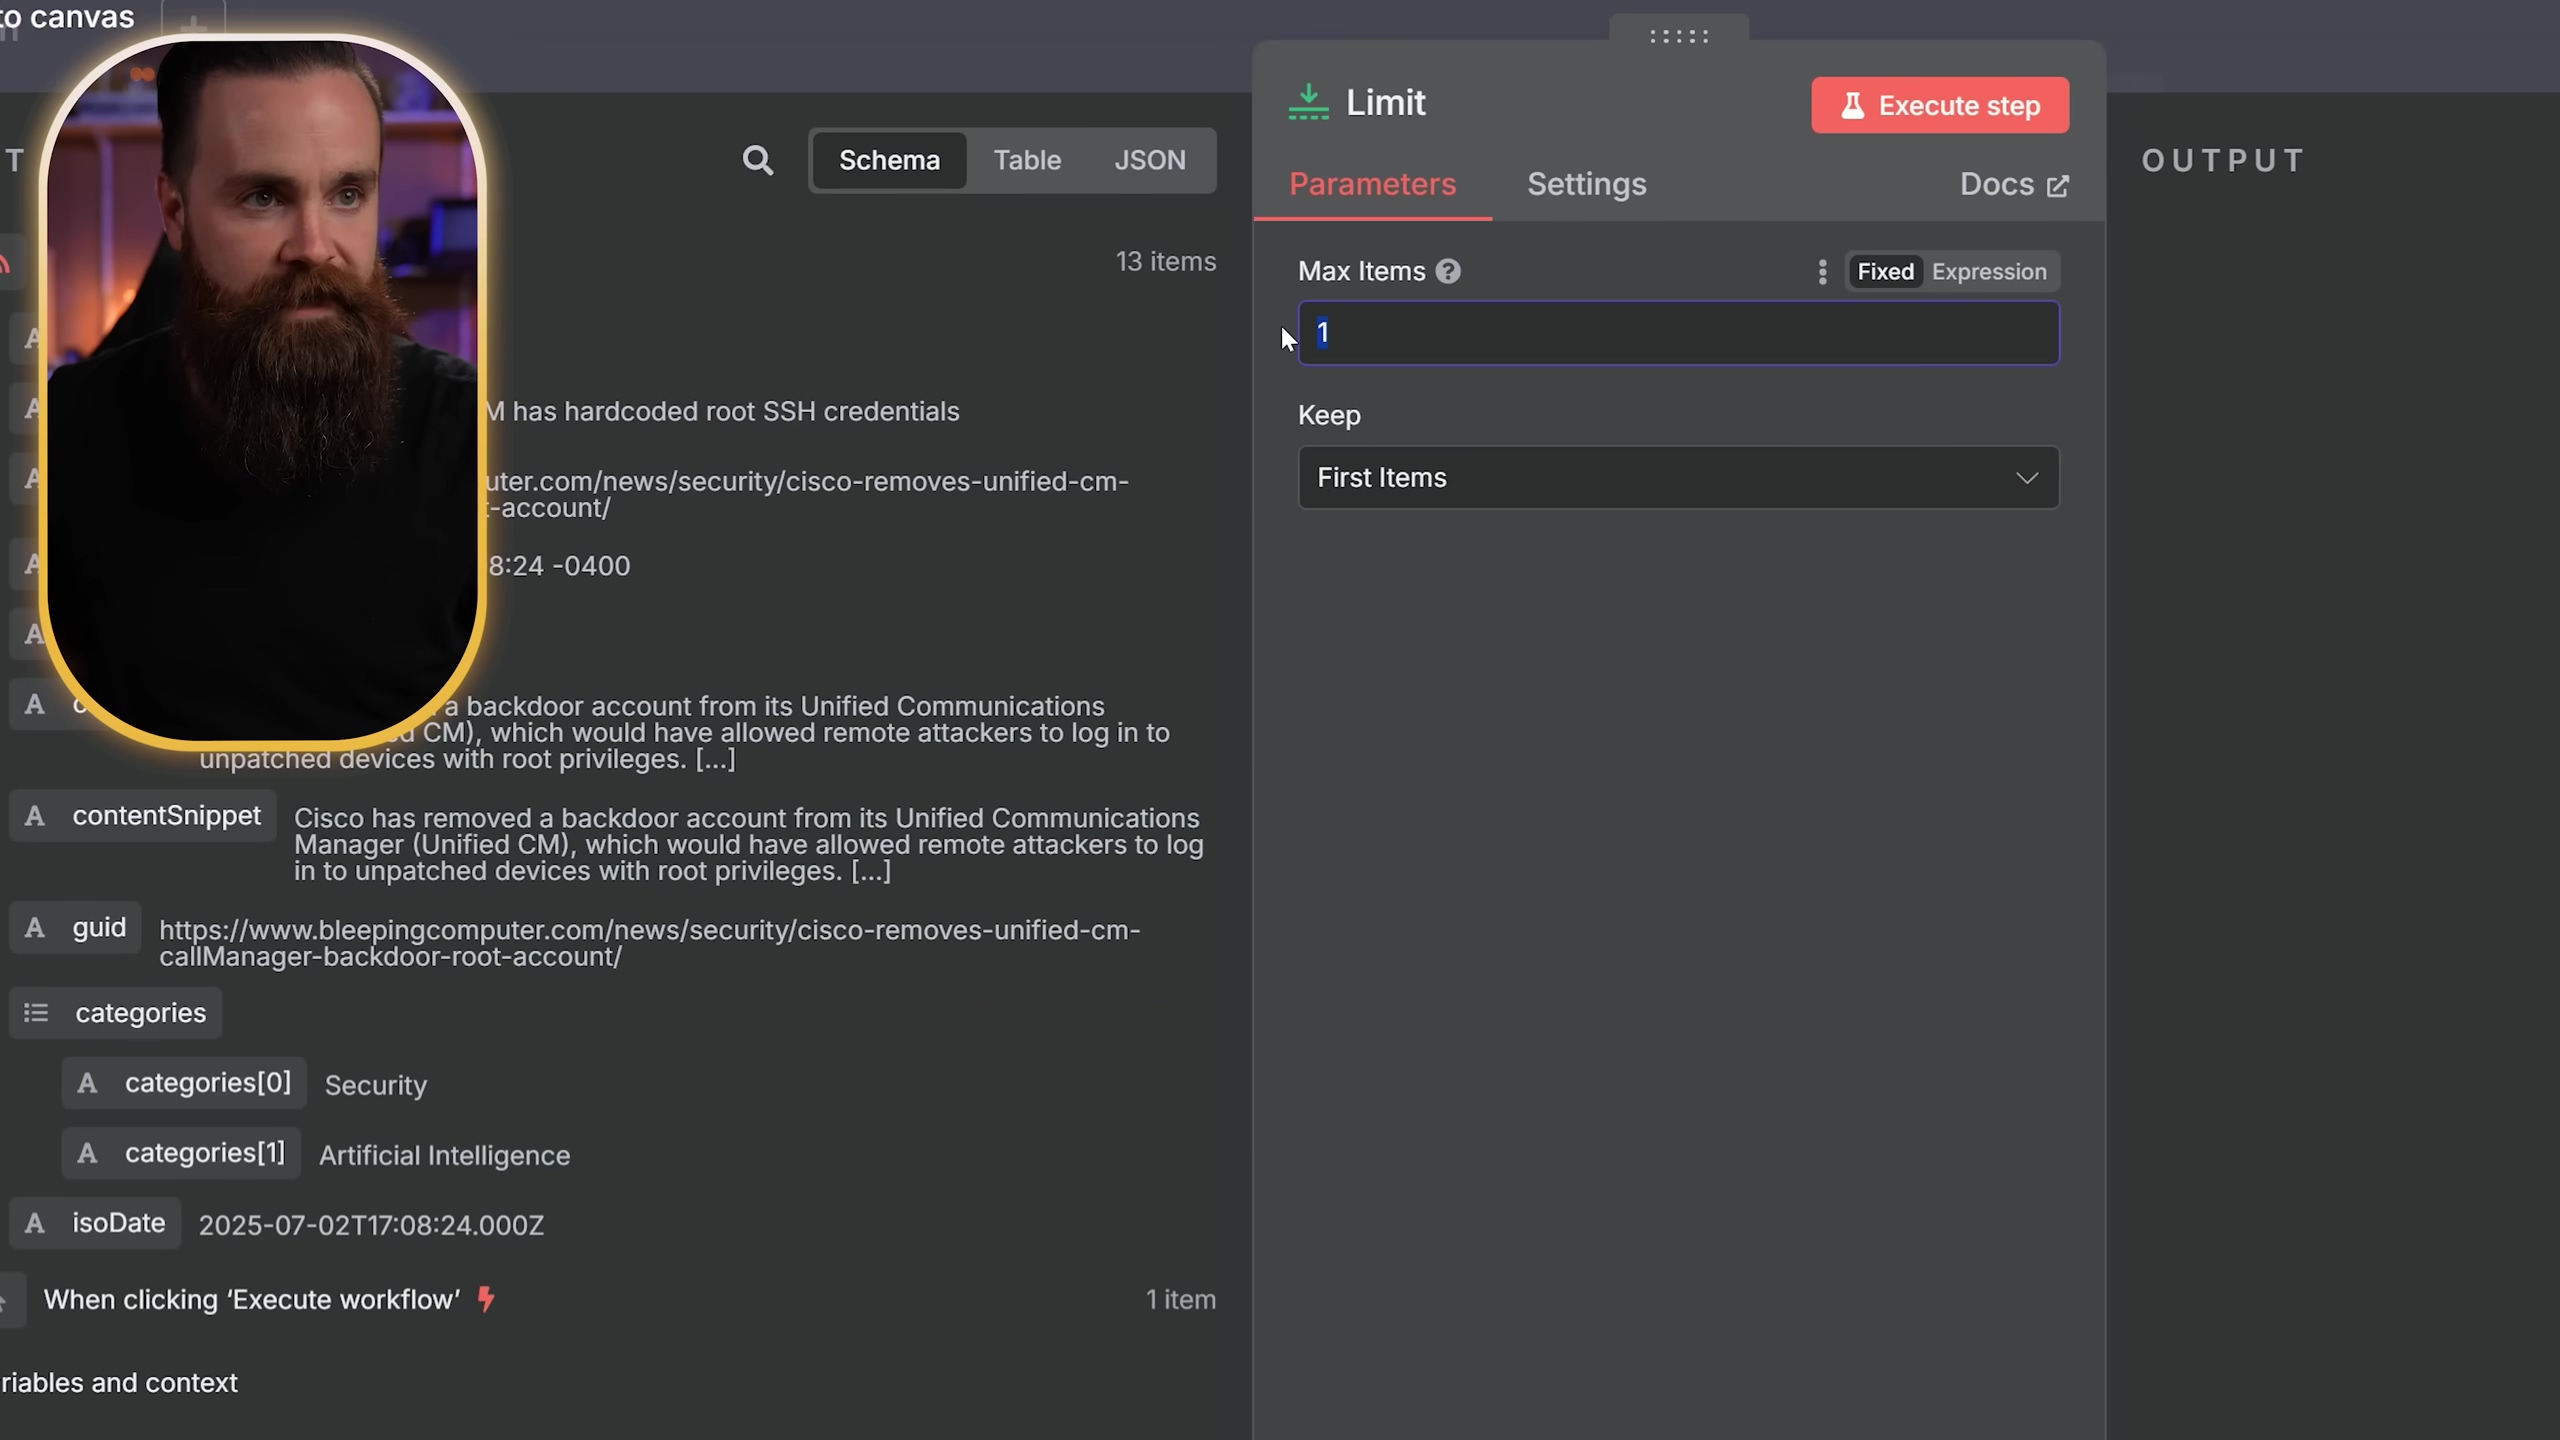
Expected Feedback: After adding the ‘Limit’ node and setting a number (say, 5), execute the workflow up to this point. You’ll notice that the data passed to the next node will only contain the number of items you specified, even if the RSS feed had more. Perfect!
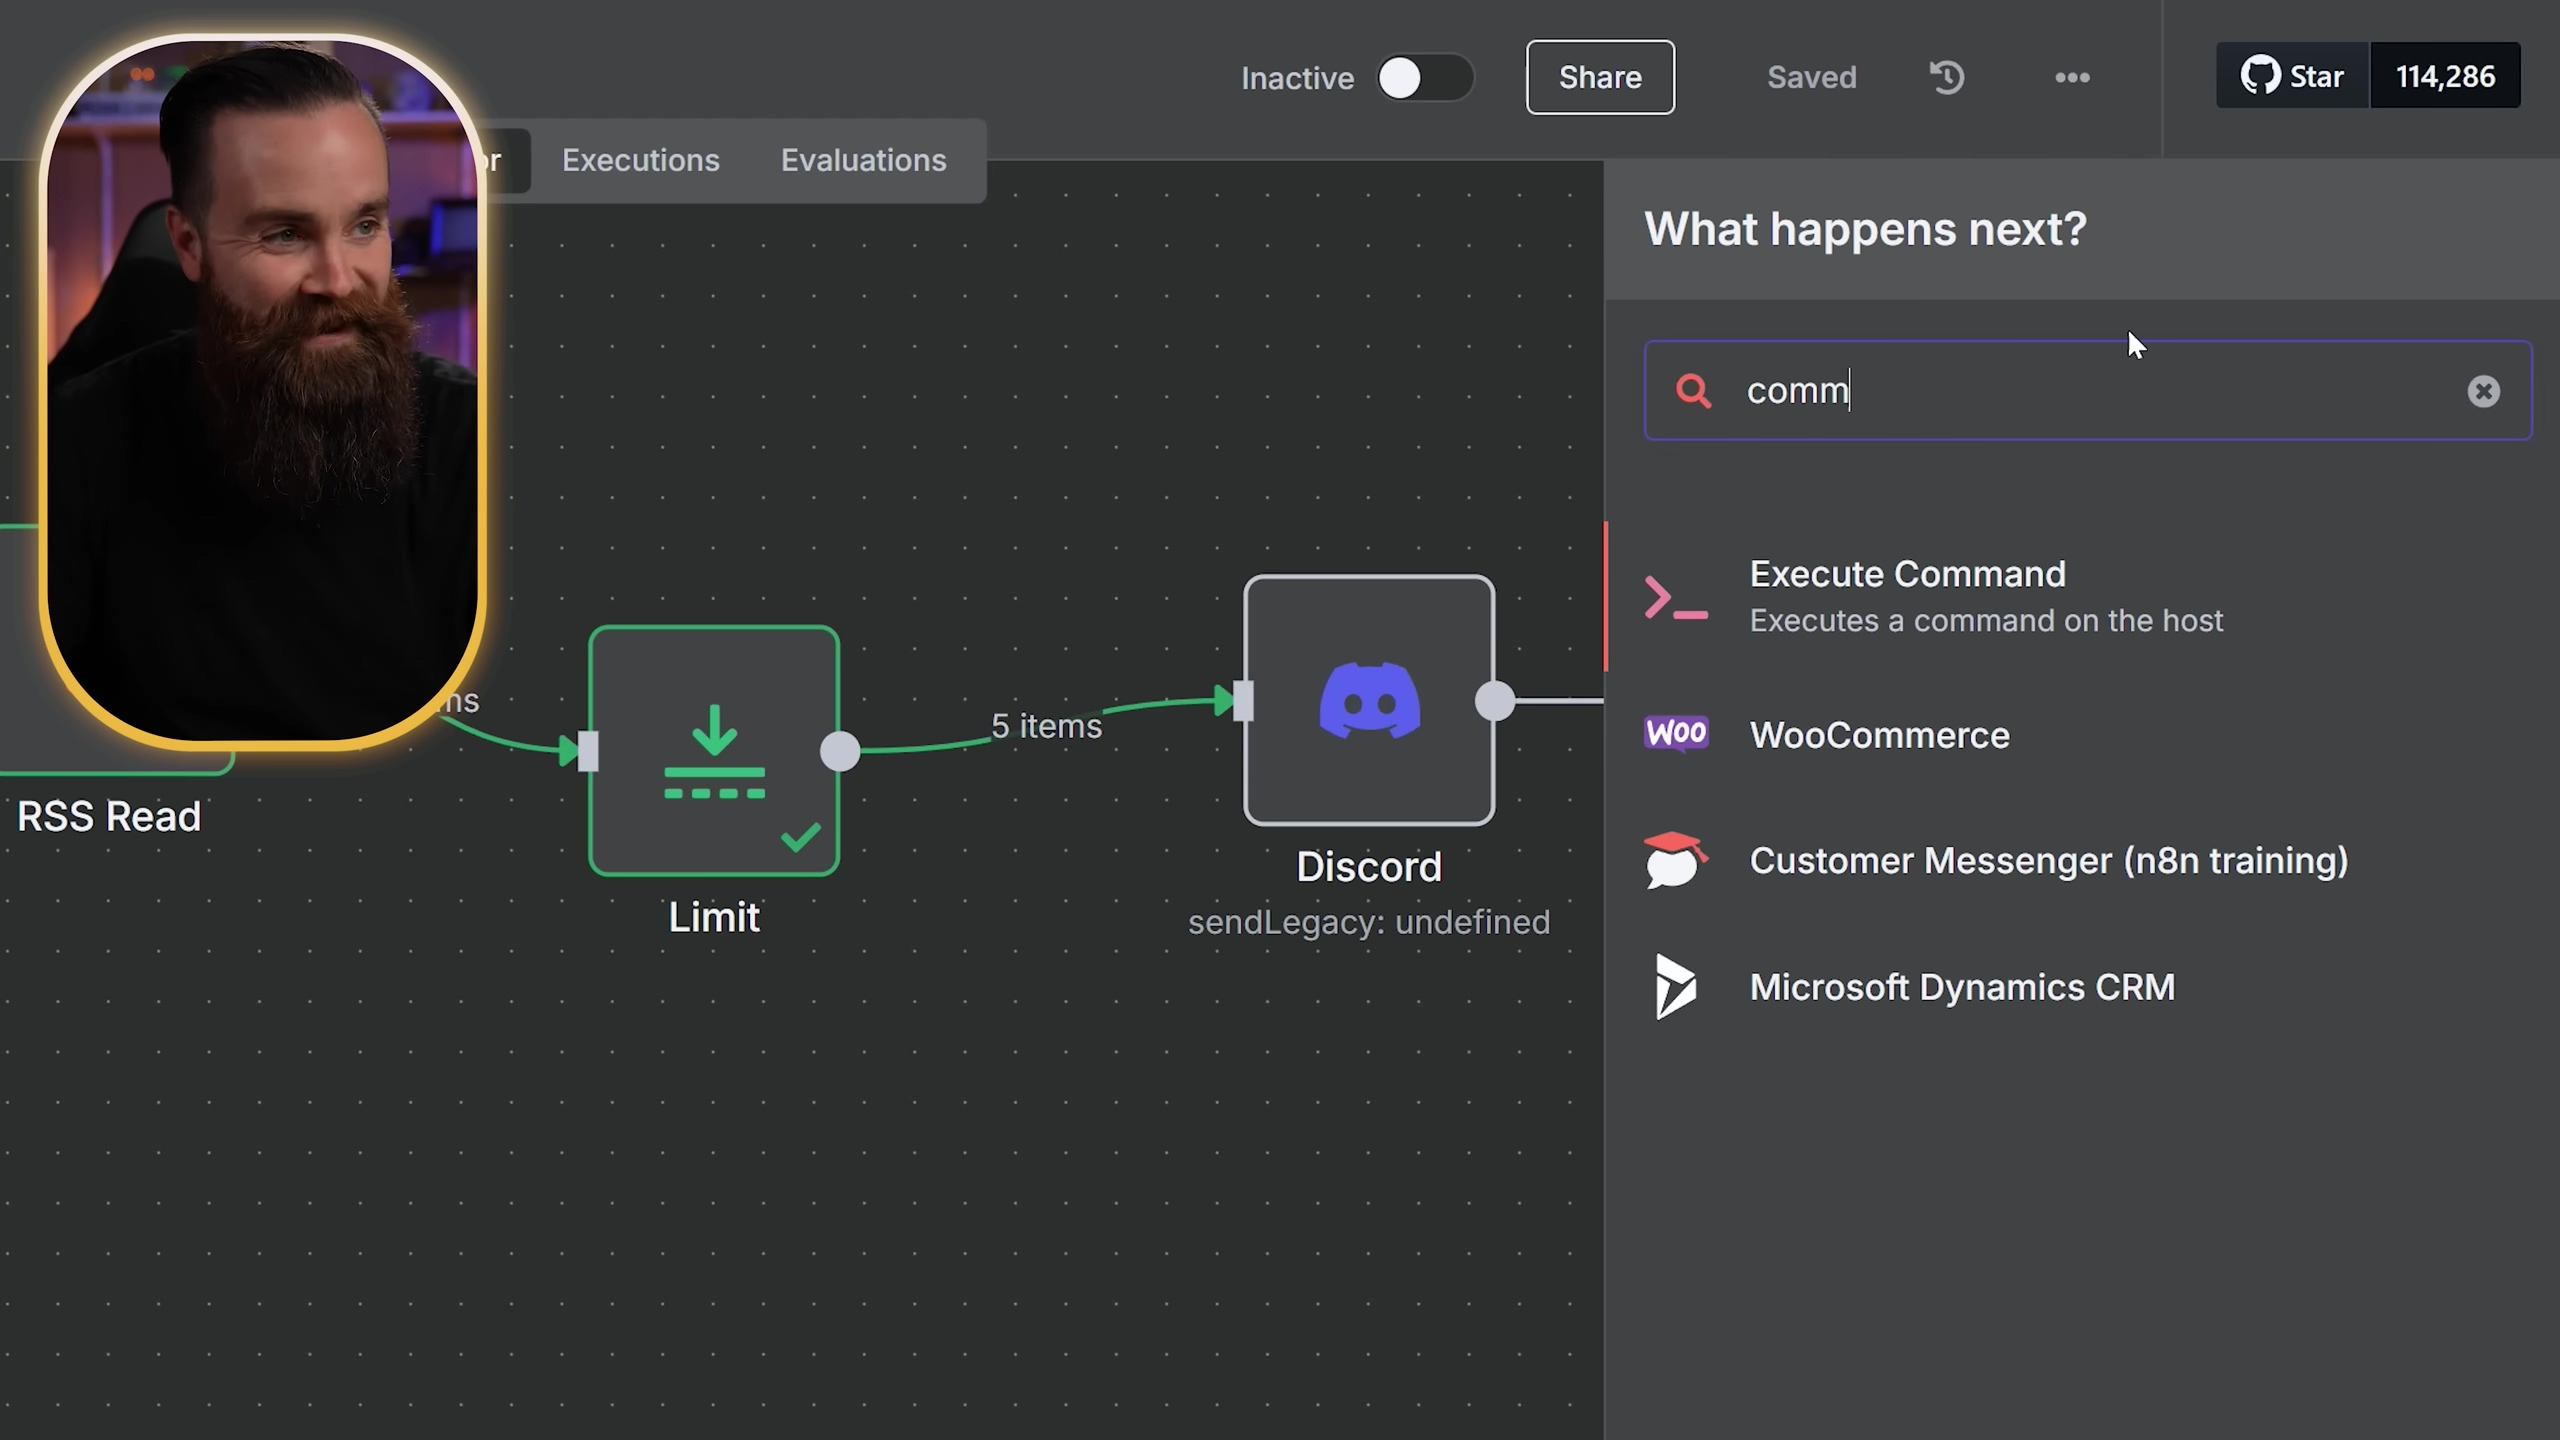
Executing Commands on Your Host
Here’s where n8n gets really powerful for home lab enthusiasts! n8n’s versatility extends to executing commands directly on your host machine (the server or computer where n8n is running). This is incredibly powerful for home lab automation or server management. Add an ‘Execute Command’ node and configure it to run a command like ping 1.1.1.1 to check network connectivity. This is a basic example, but imagine the possibilities: restarting services, checking disk space, or even triggering backups!
Expected Feedback: When you execute this node, you’ll see the output of the command in the node’s output data. For ping 1.1.1.1, you’d see the ping results, including response times and success/failure. If you see the command output, you’re golden!
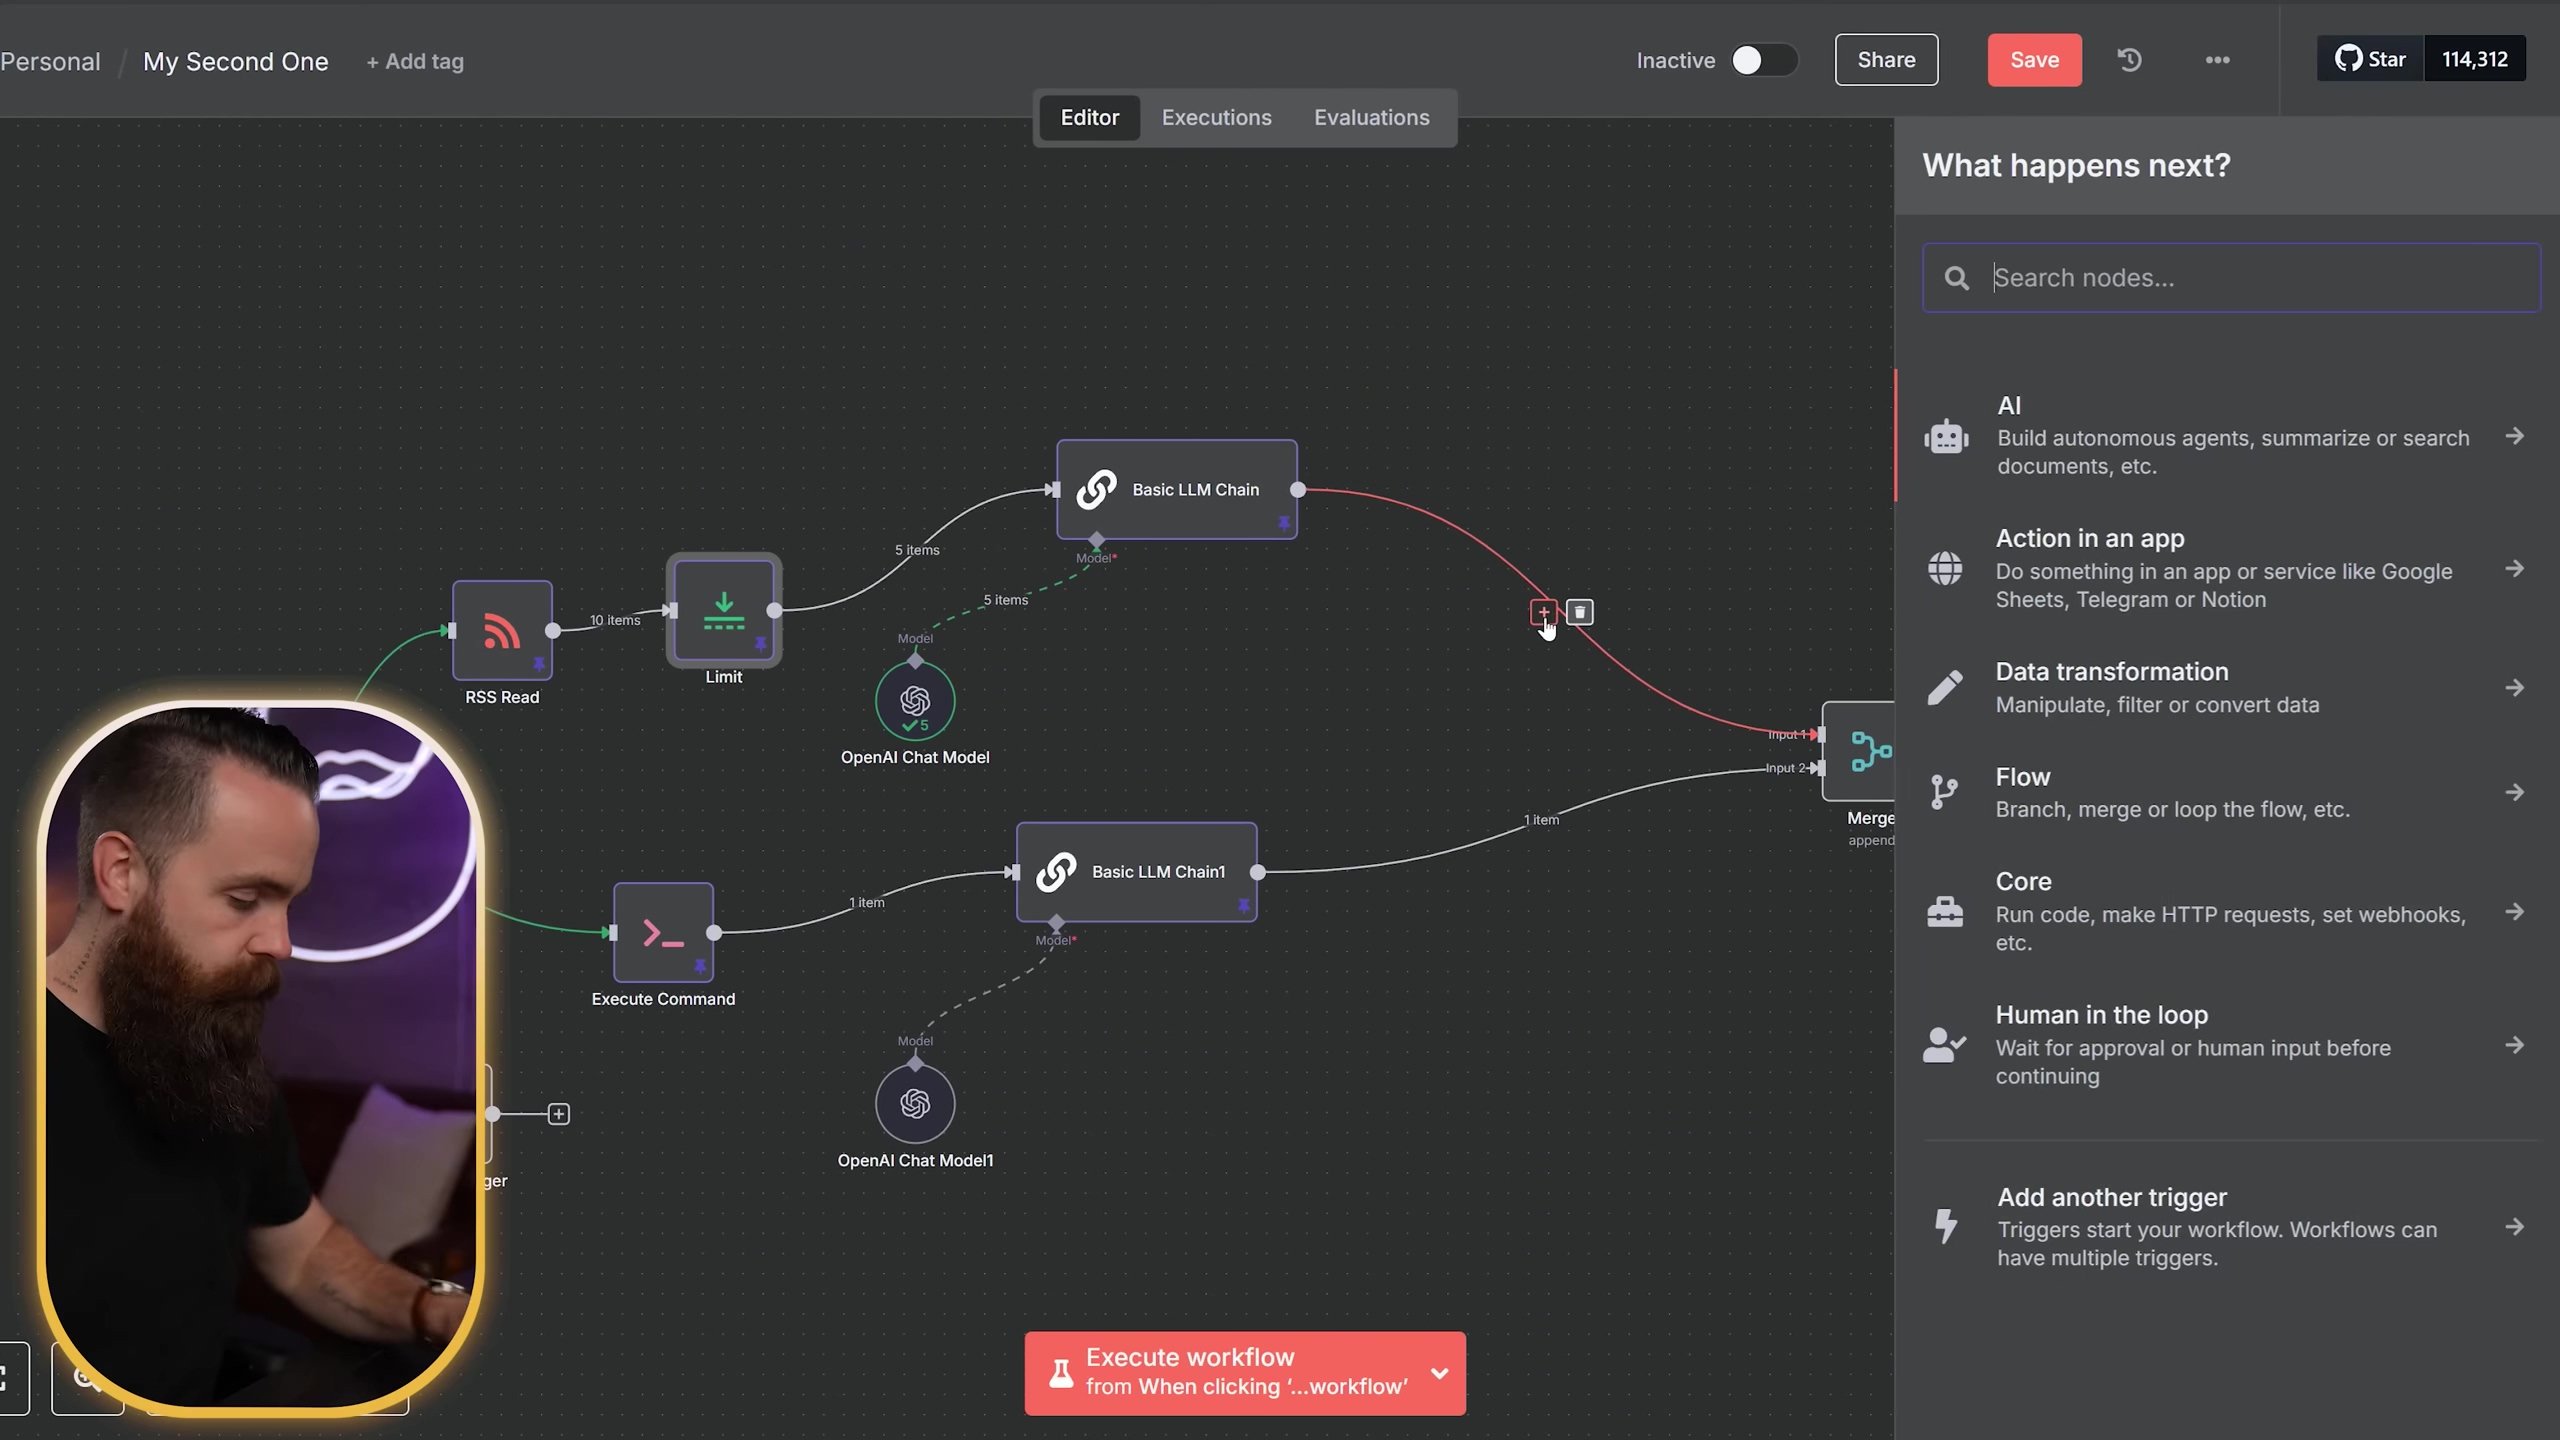
Merging Data Streams
What if you want to combine the news articles with the results of your command execution into a single message? That’s where the ‘Merge’ node comes in! To combine outputs from different nodes, such as RSS articles and command execution results, use a ‘Merge’ node. This node consolidates data from multiple incoming branches, allowing you to send a single, comprehensive message to Discord. It’s like combining two separate rivers into one mighty stream!
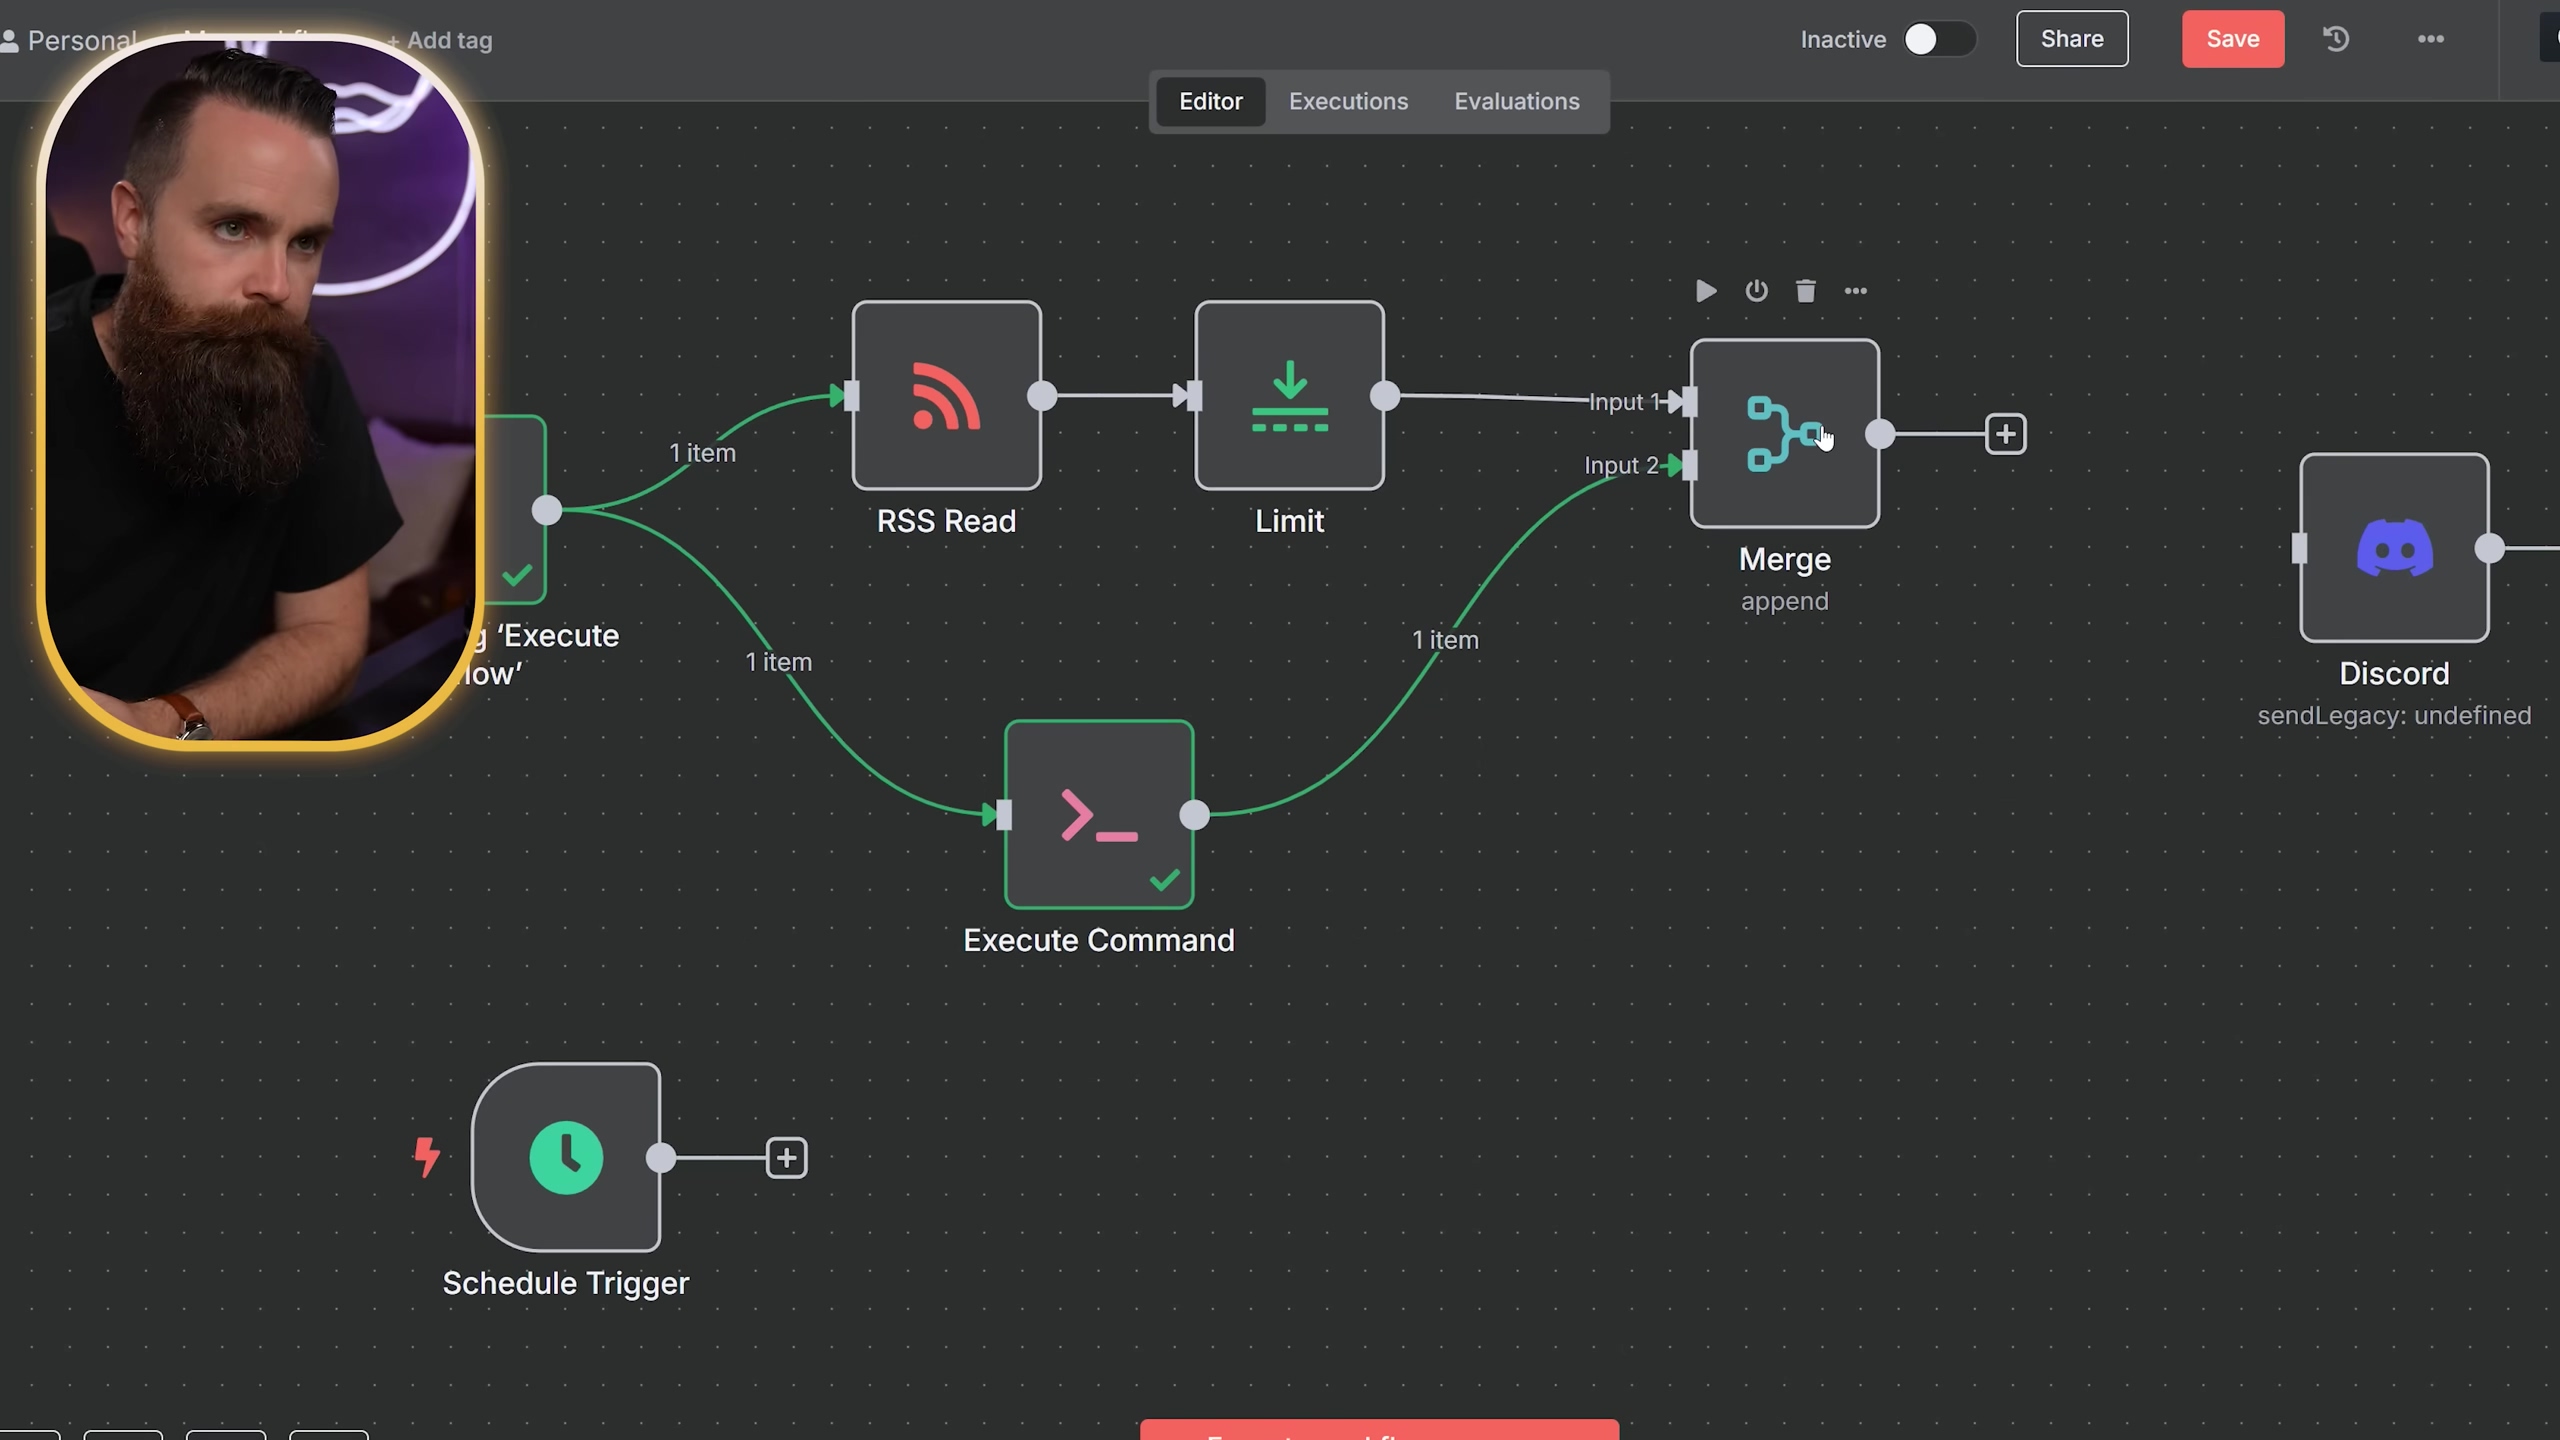
Expected Feedback: After connecting two different data streams to the ‘Merge’ node, execute it. You’ll see the output data now contains elements from both upstream nodes, combined into a single data structure. This is super useful for creating rich, multi-faceted notifications.
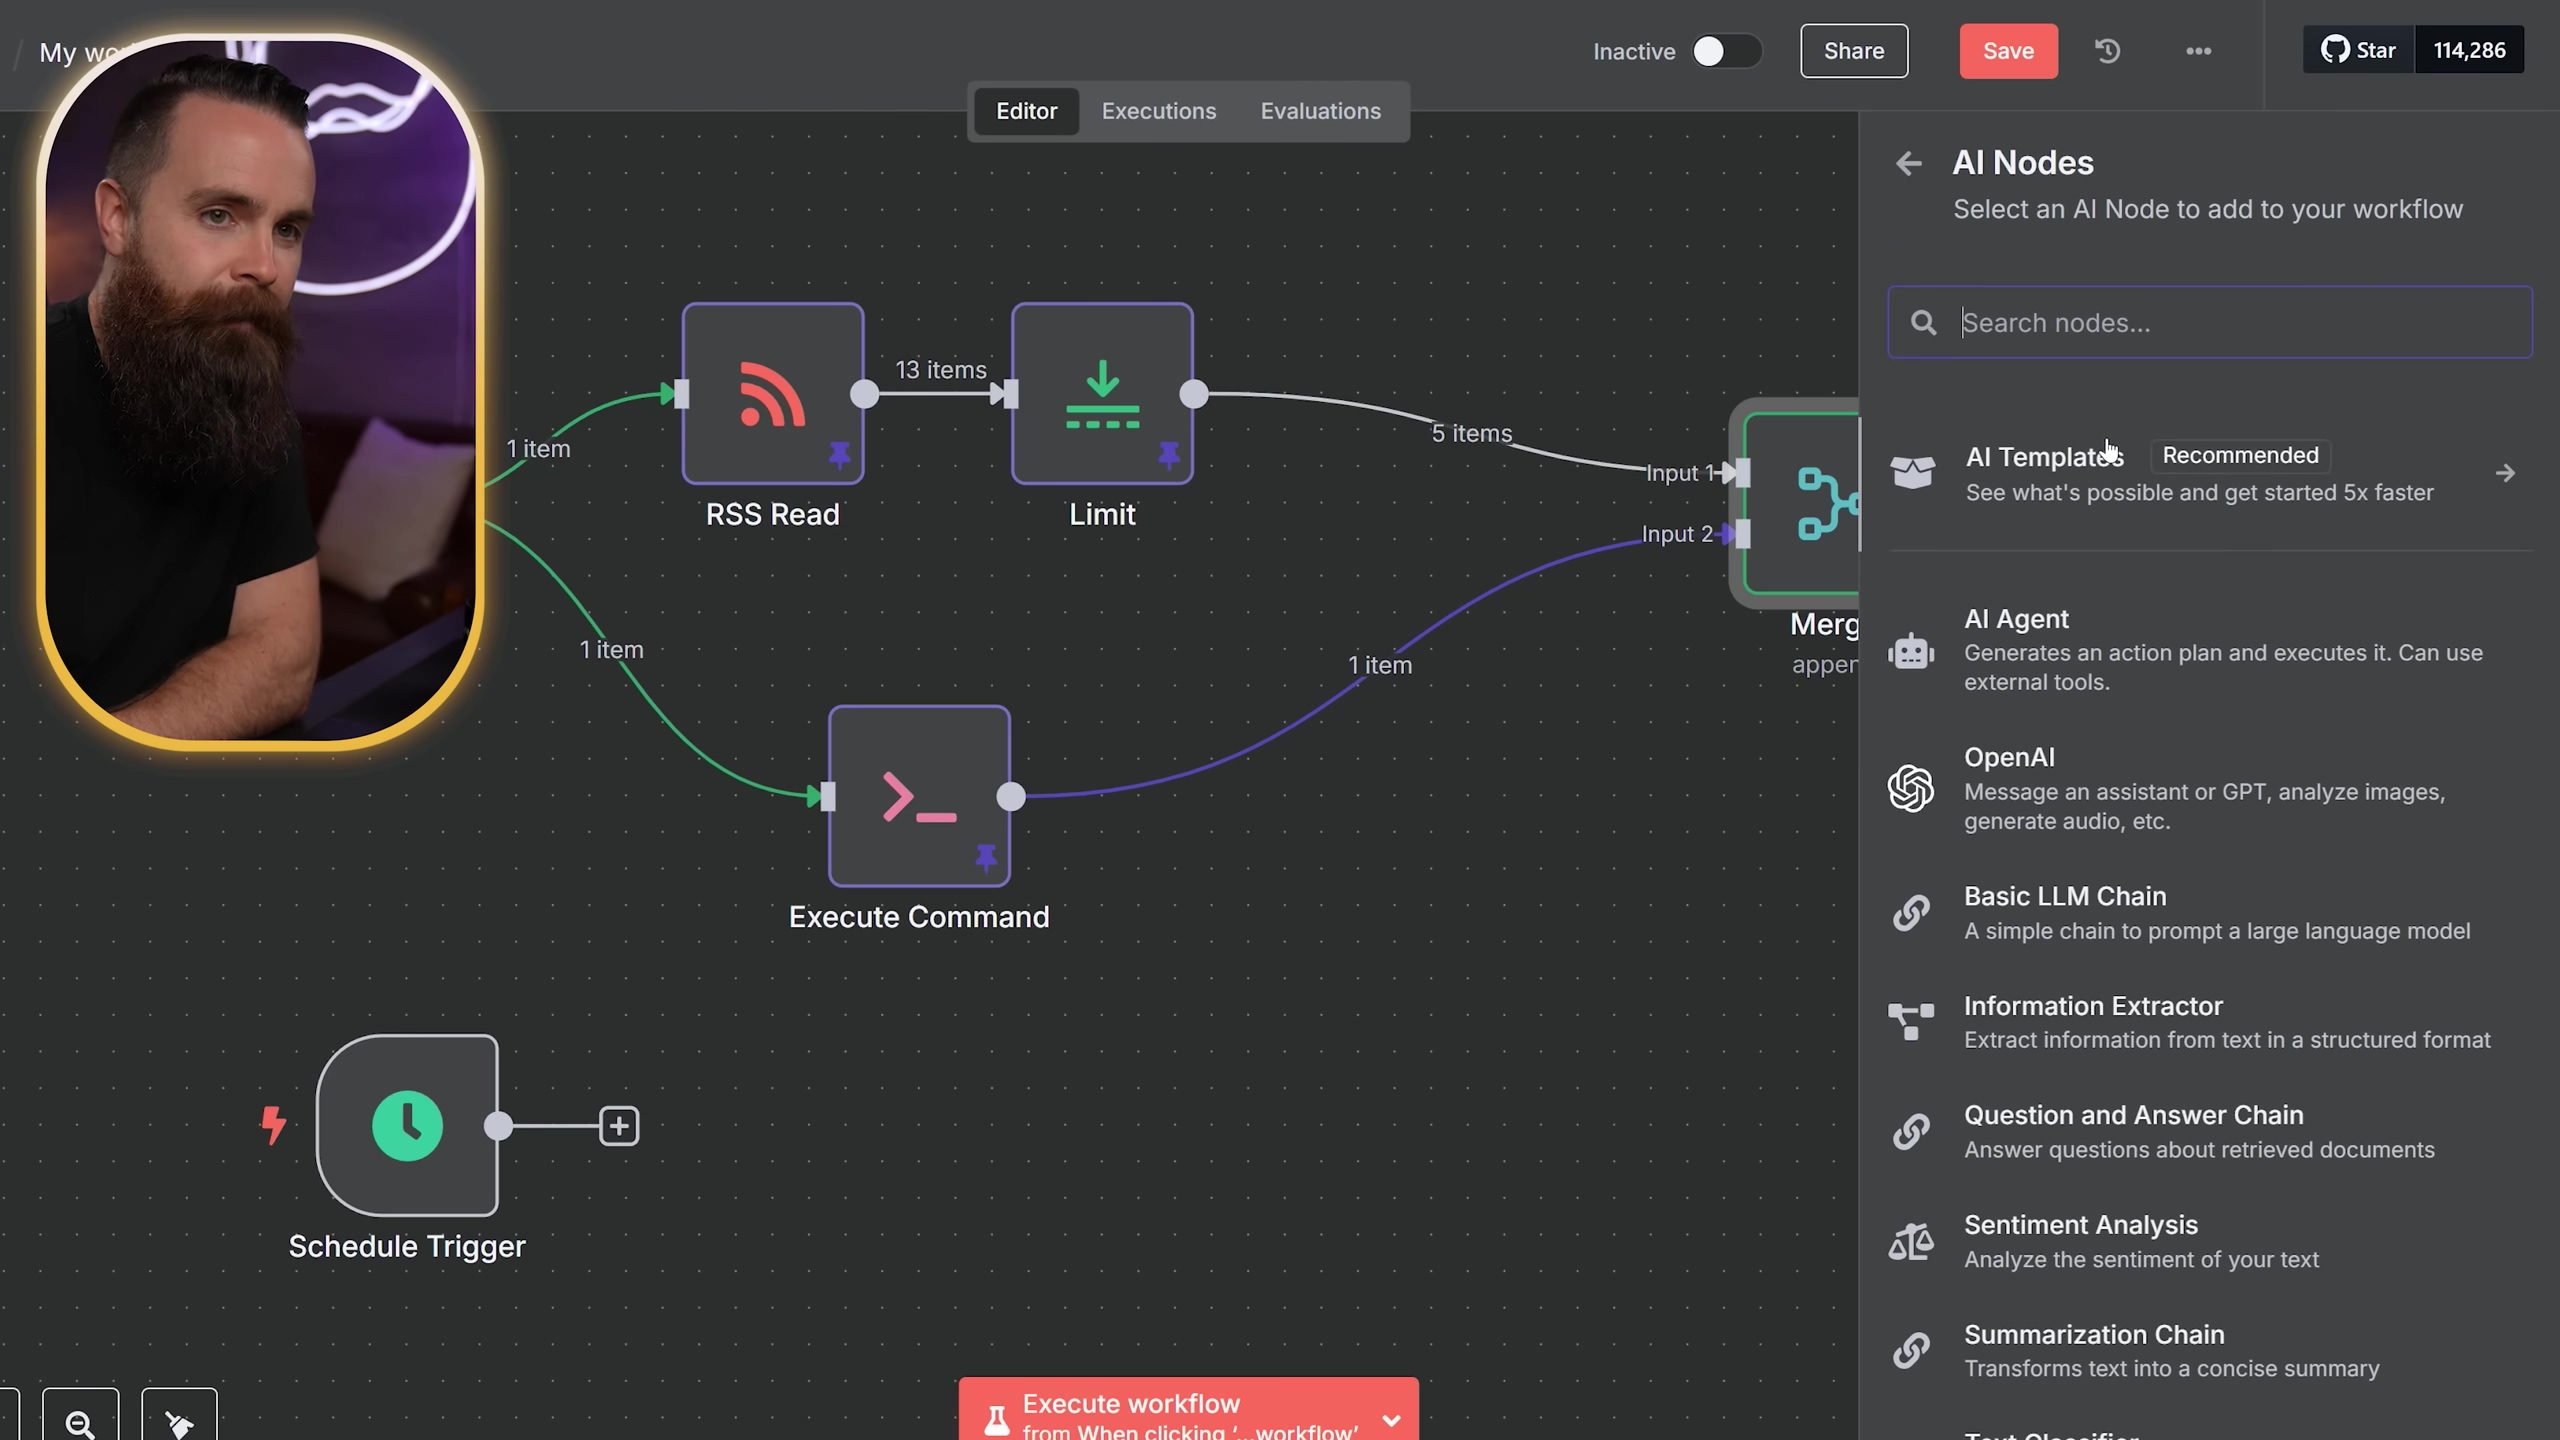
Advanced AI Integration with n8n
Now, let’s talk about the really cool stuff – integrating n8n with Artificial Intelligence! This is where n8n’s true power shines. You can summarize articles, analyze sentiment, or even create intelligent agents that can make decisions and take actions. The future is now, my friends!
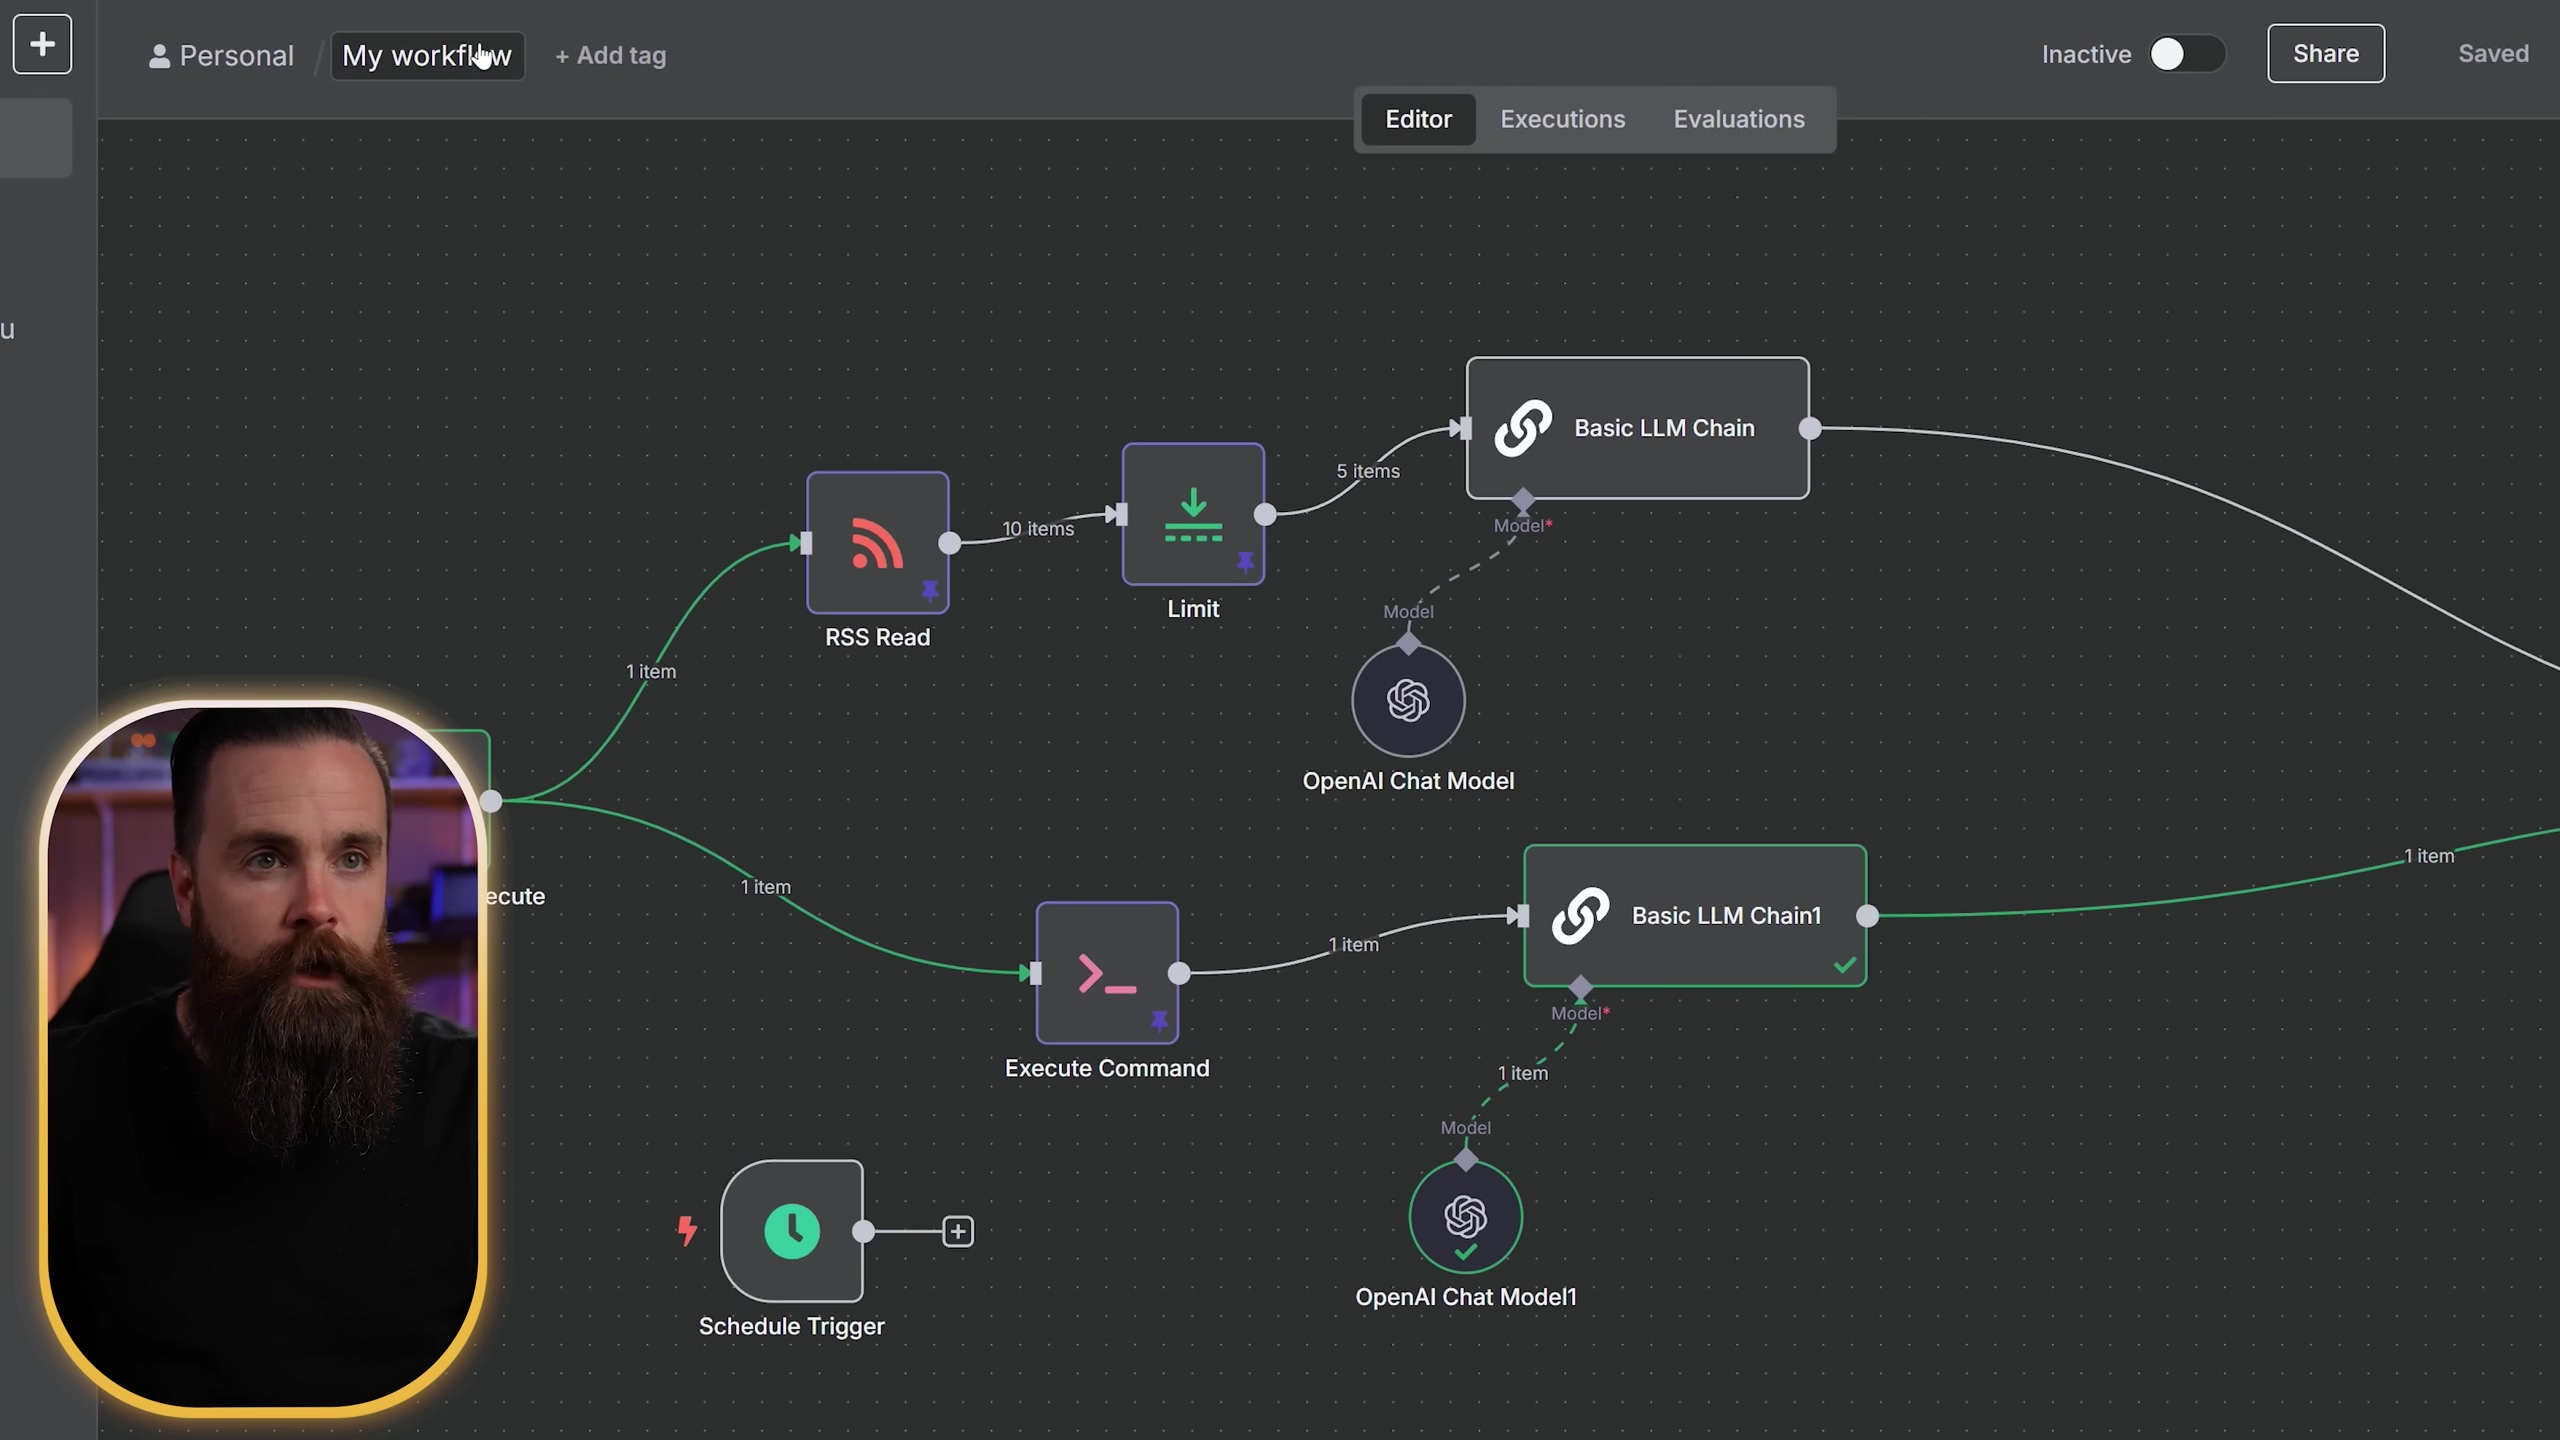
Summarizing Content with LLMs
Imagine getting a news digest where every article is already summarized for you. Yes, please! Insert a ‘Basic LLM Chain’ node between your ‘Limit’ and ‘Merge’ nodes. LLM stands for Large Language Model, like OpenAI’s GPT series or even a local Llama instance. Connect it to your chosen AI model. Then, provide a prompt, such as “Summarize this article in two sentences,” and feed it the article content from the RSS node. This transforms lengthy articles into concise, easy-to-digest summaries. It’s like having a personal editor for all your news!
Expected Feedback: When you execute this node, you’ll see a new field in your data, containing the AI-generated summary of each article. If the summary makes sense and is concise, you’ve done it right!
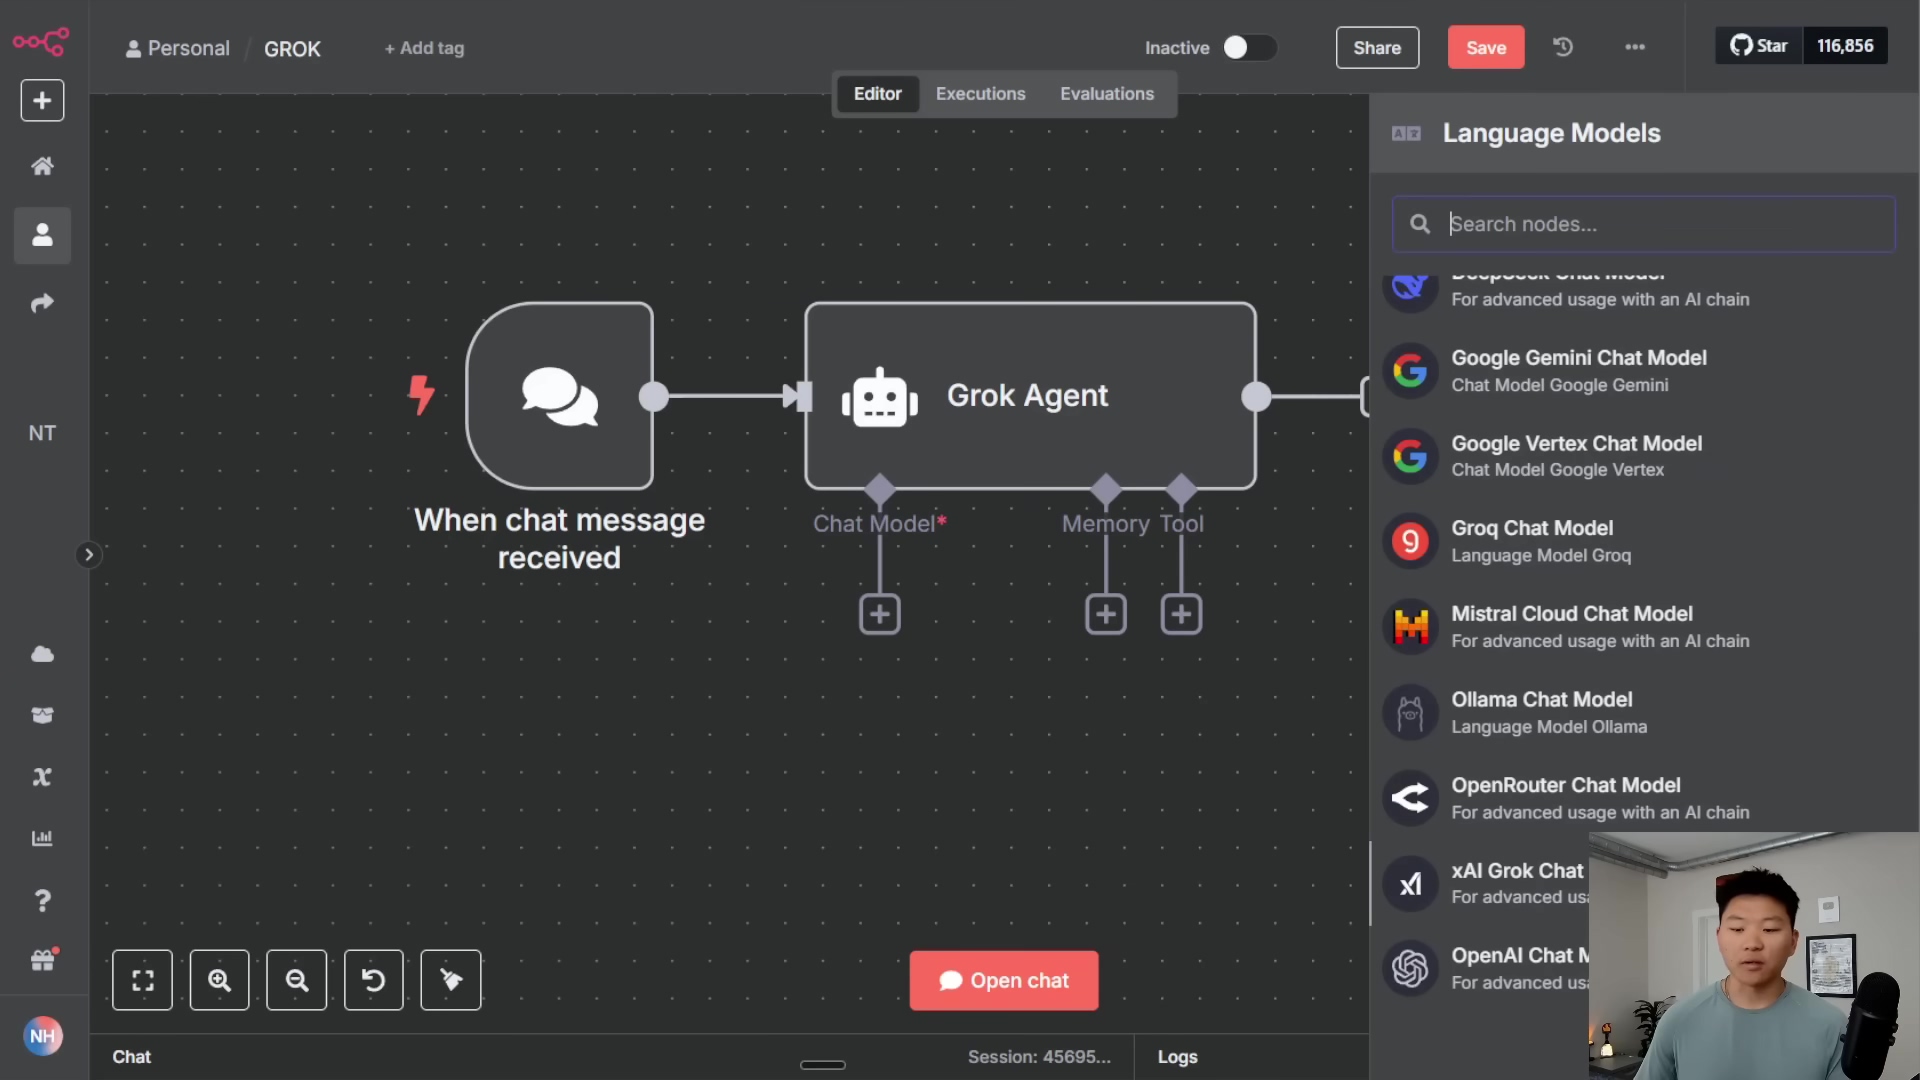
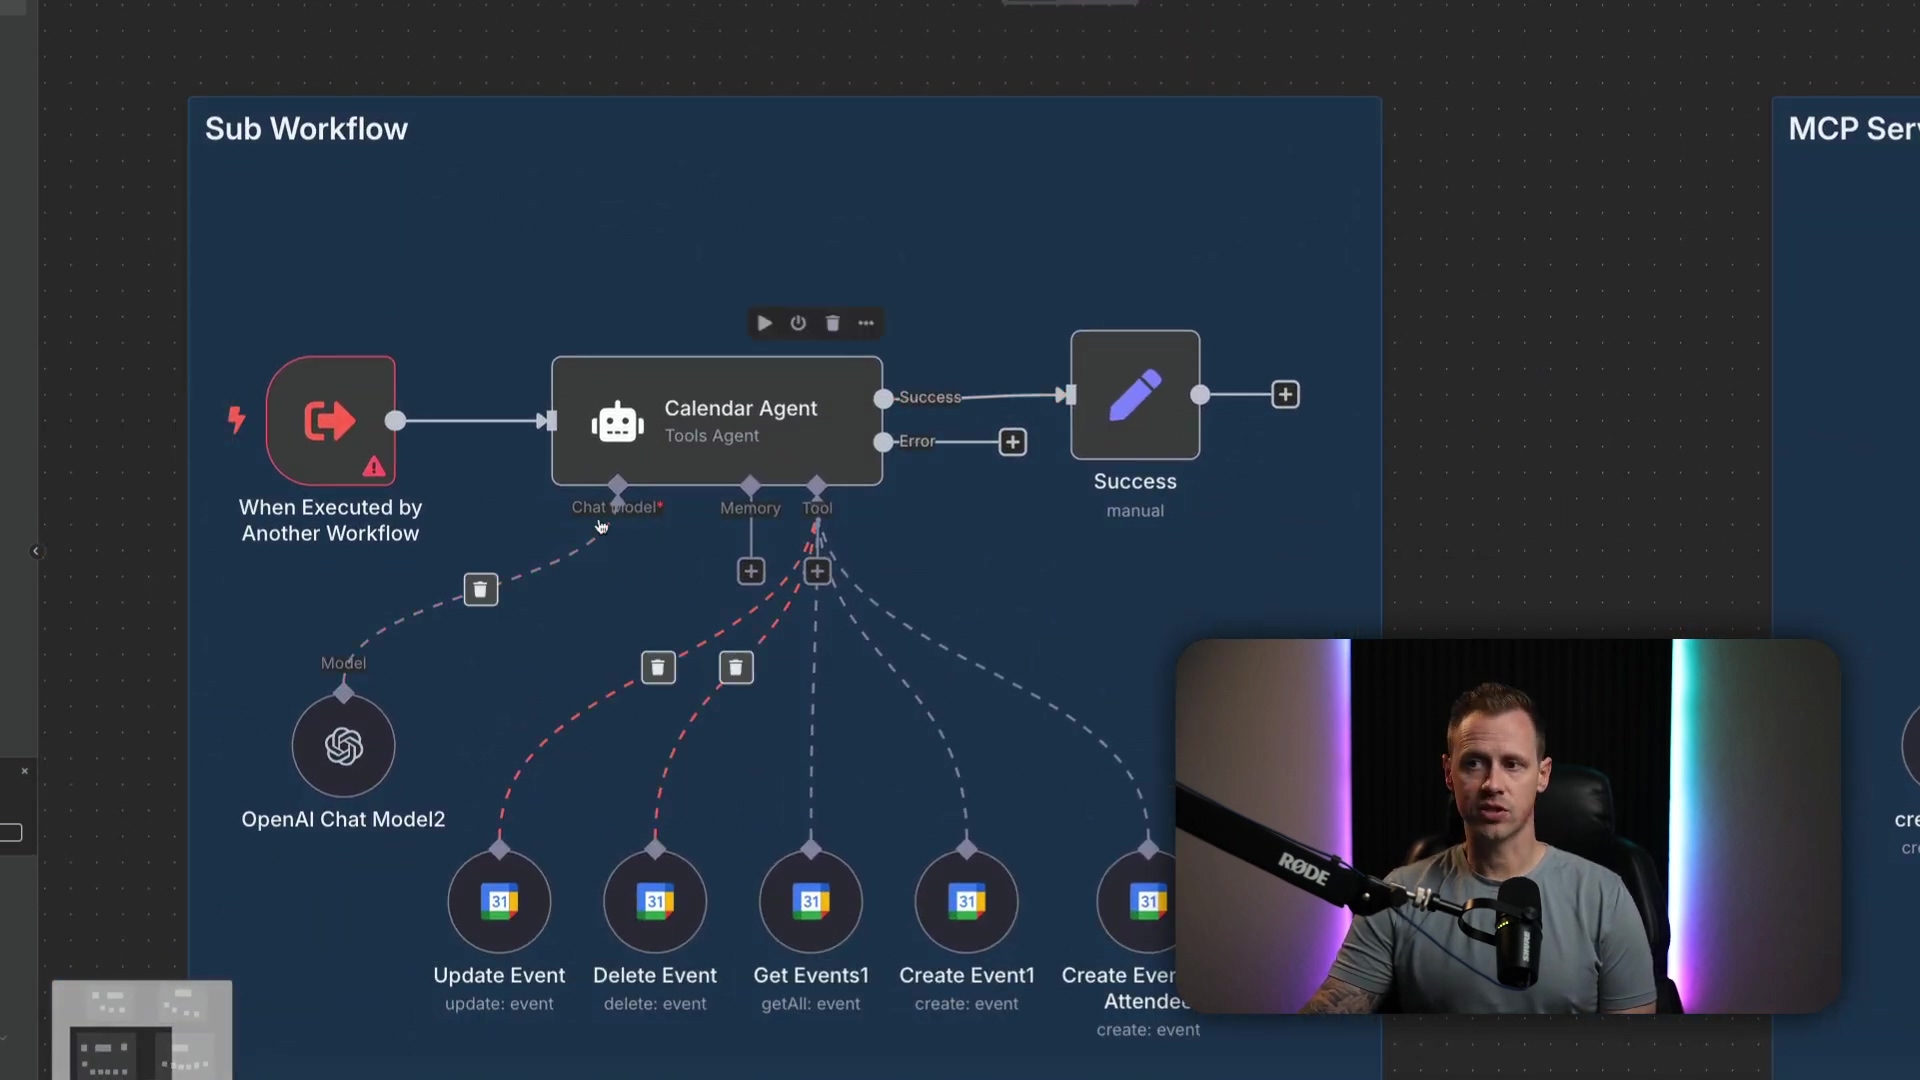
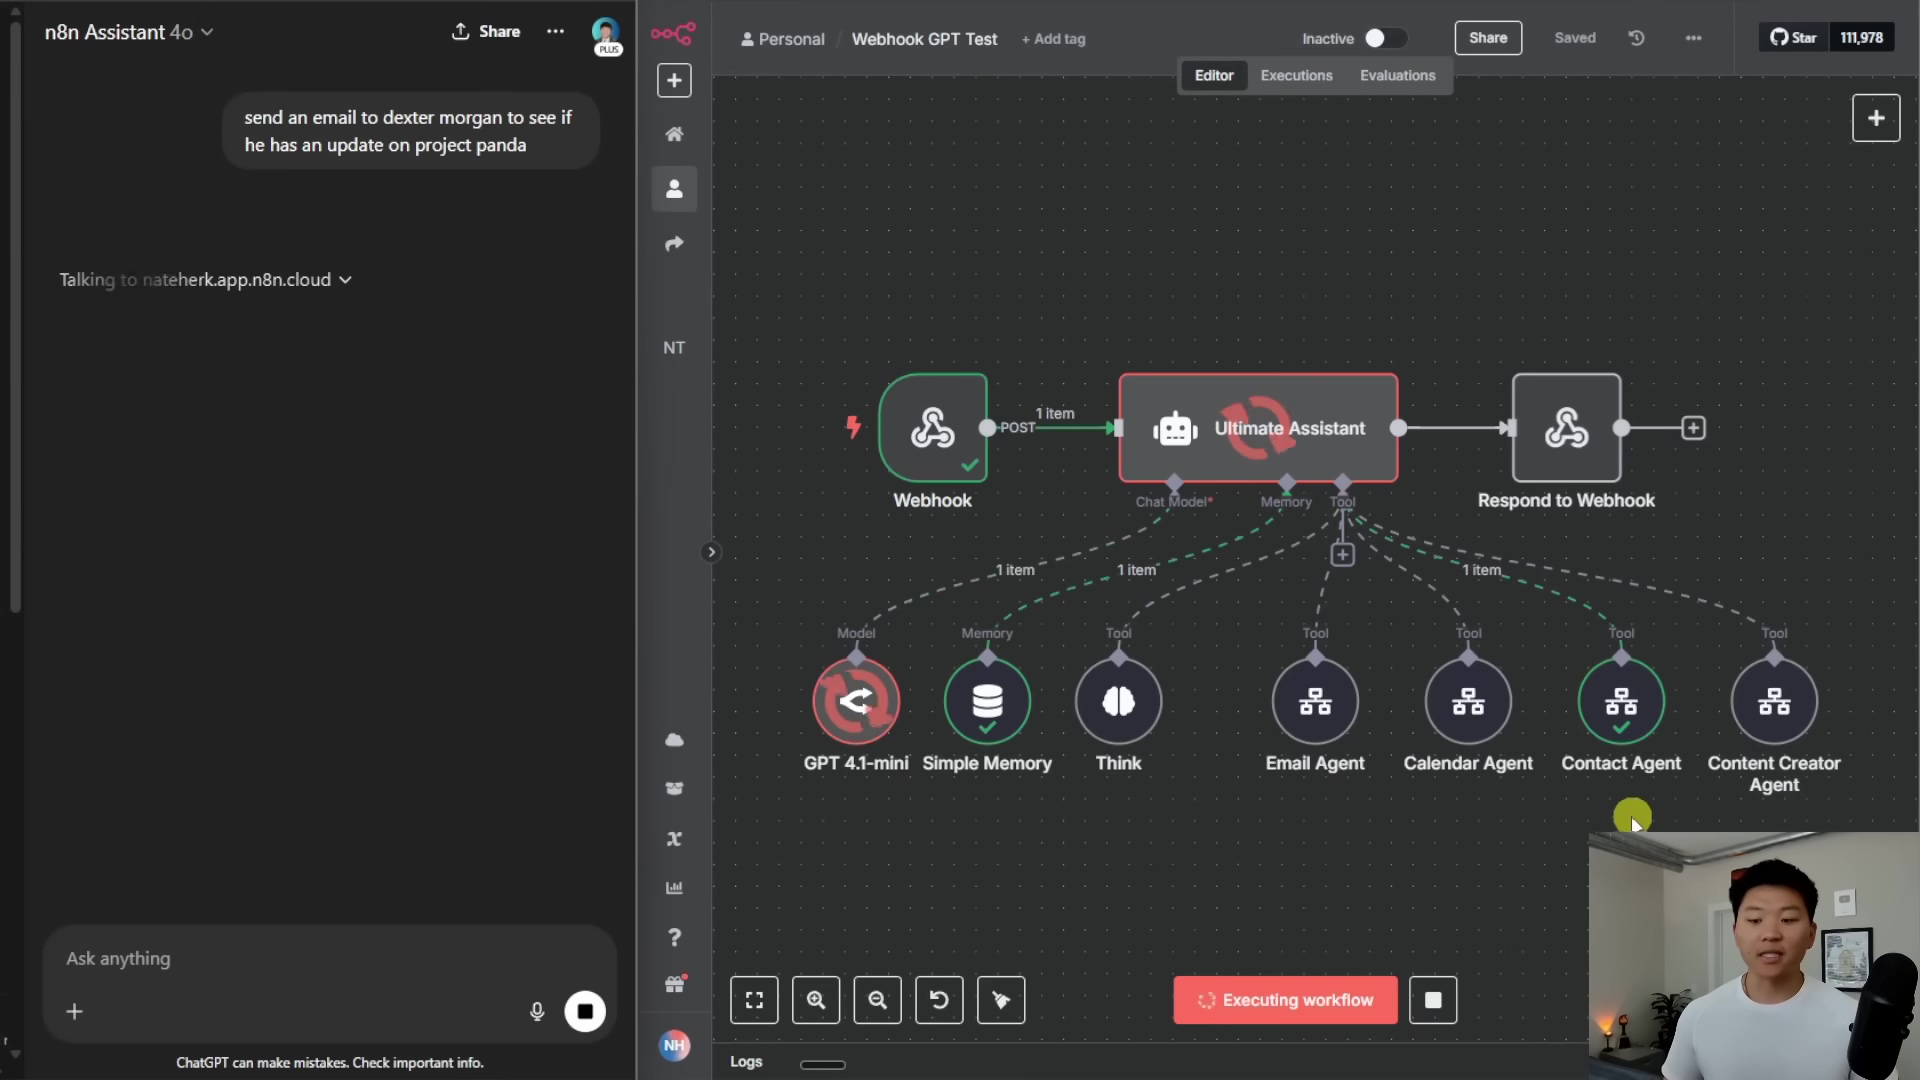
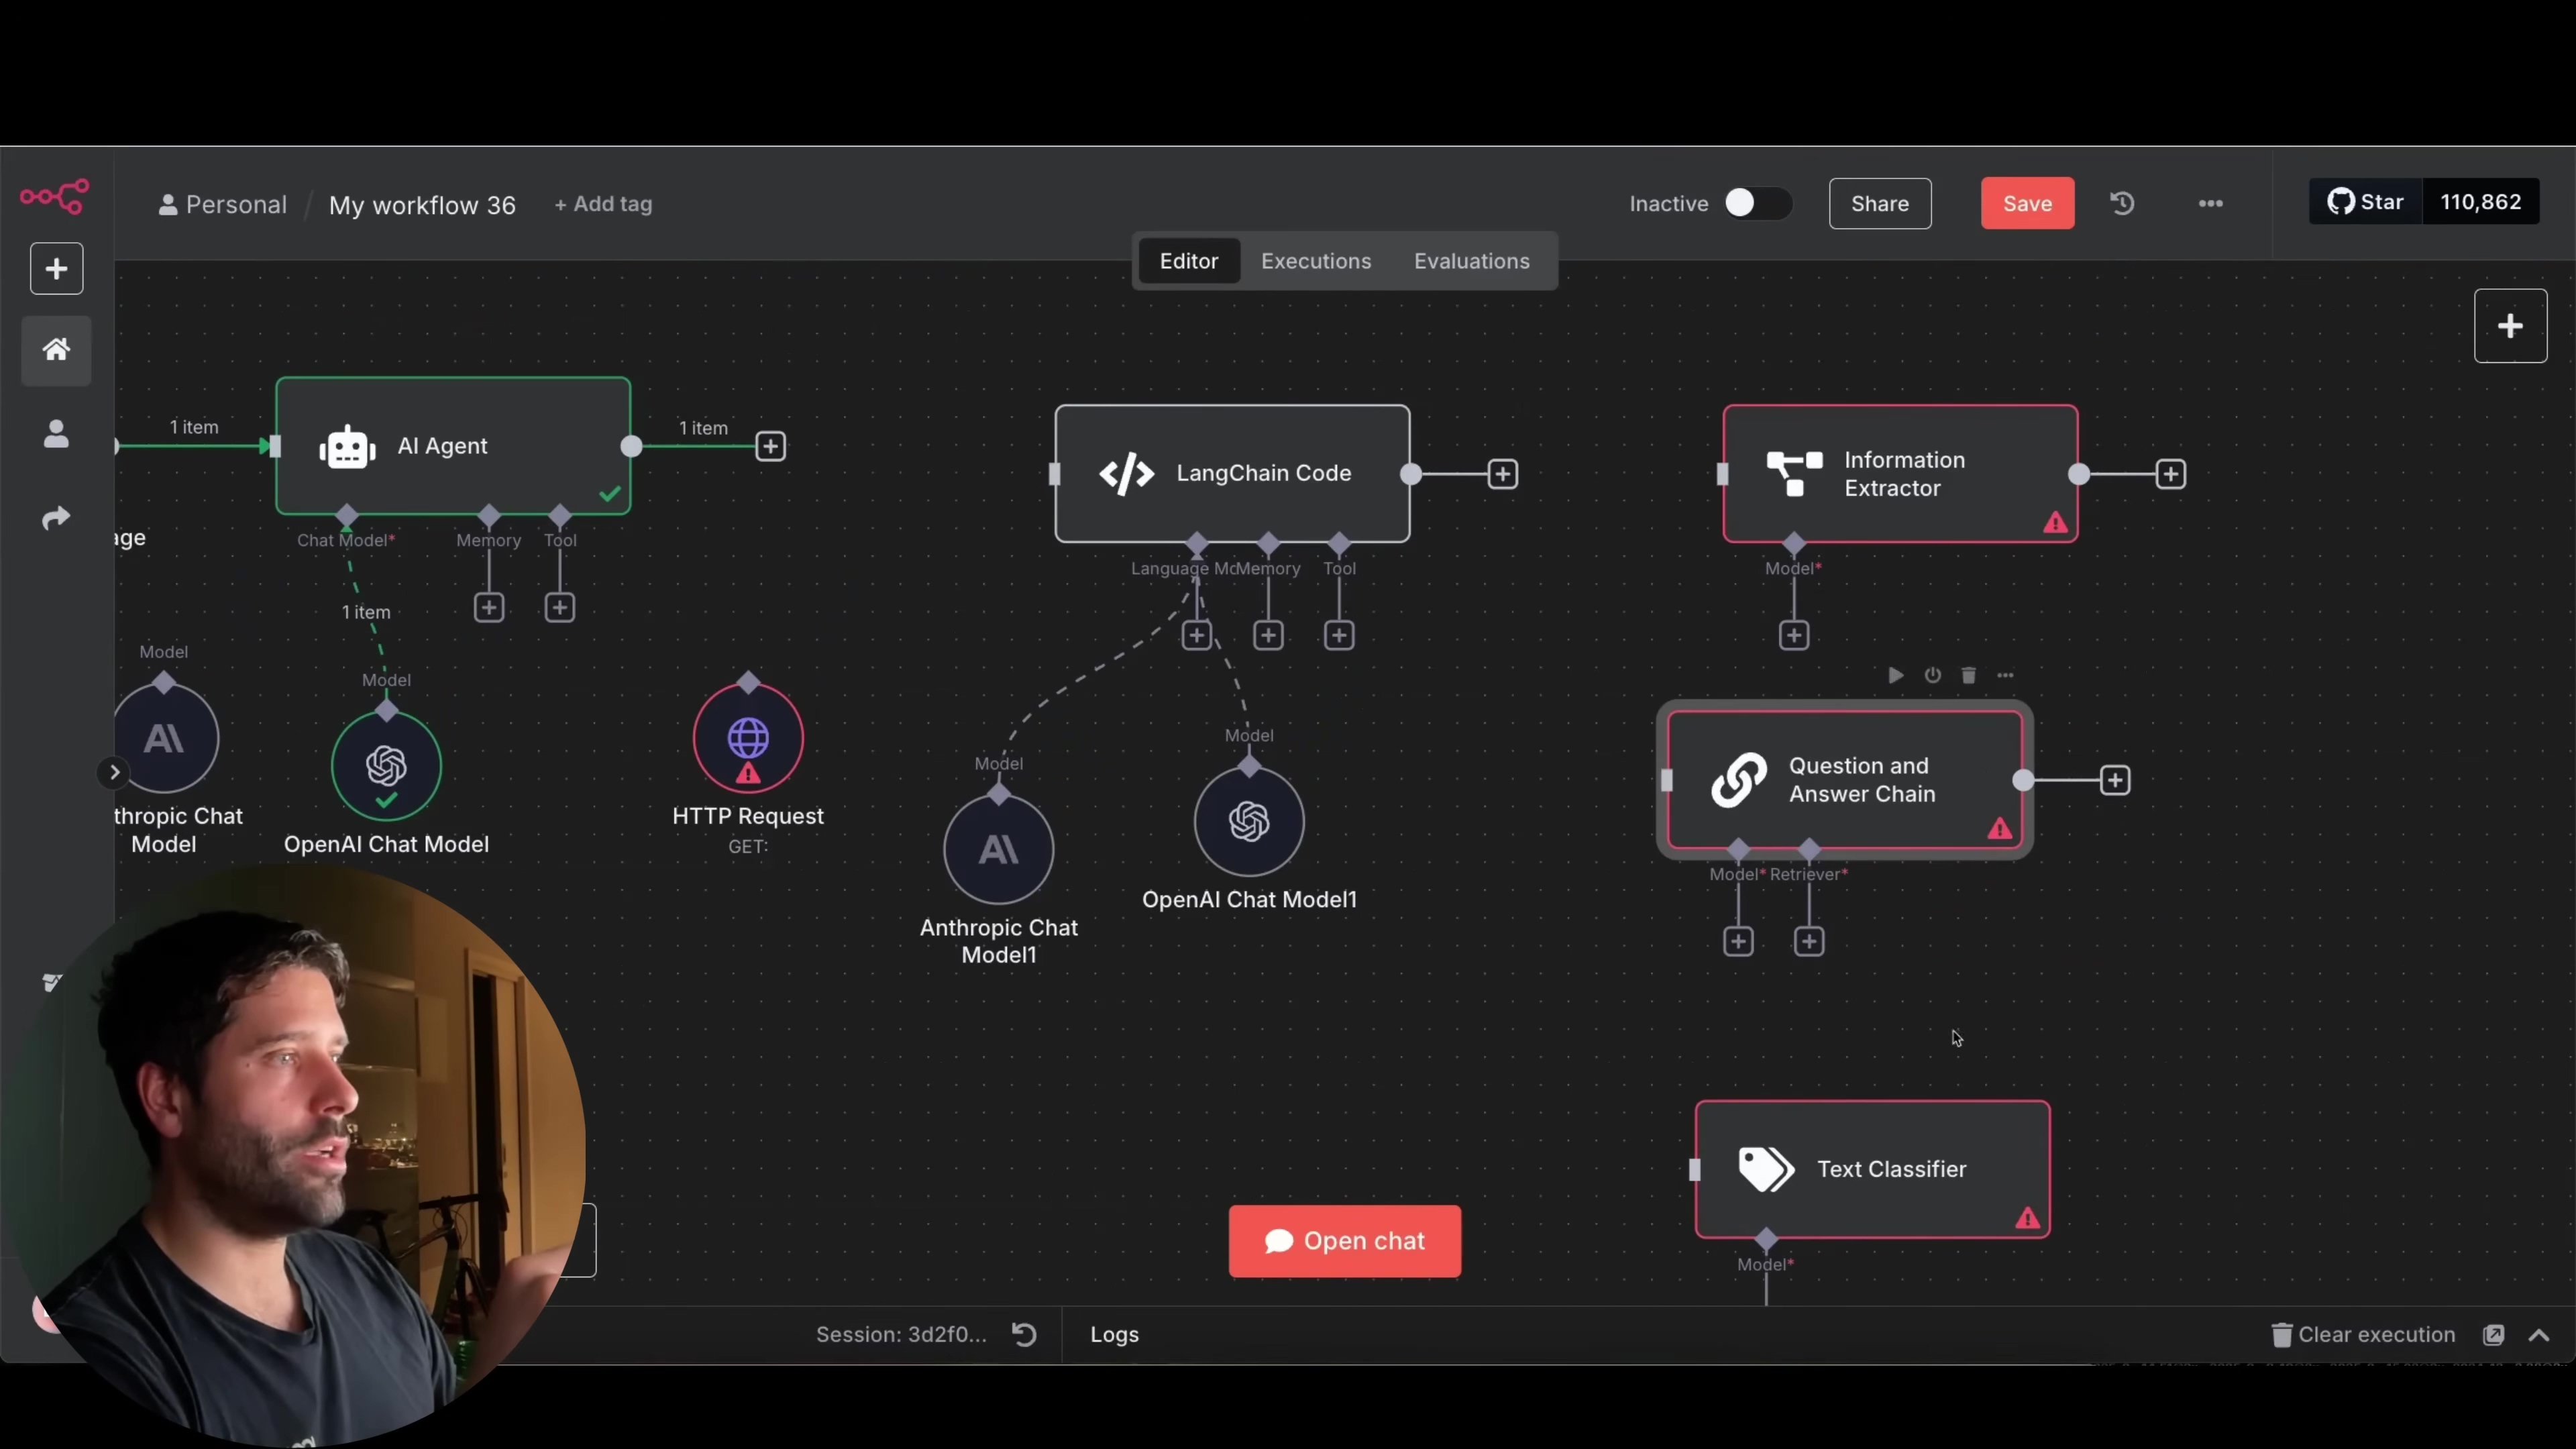
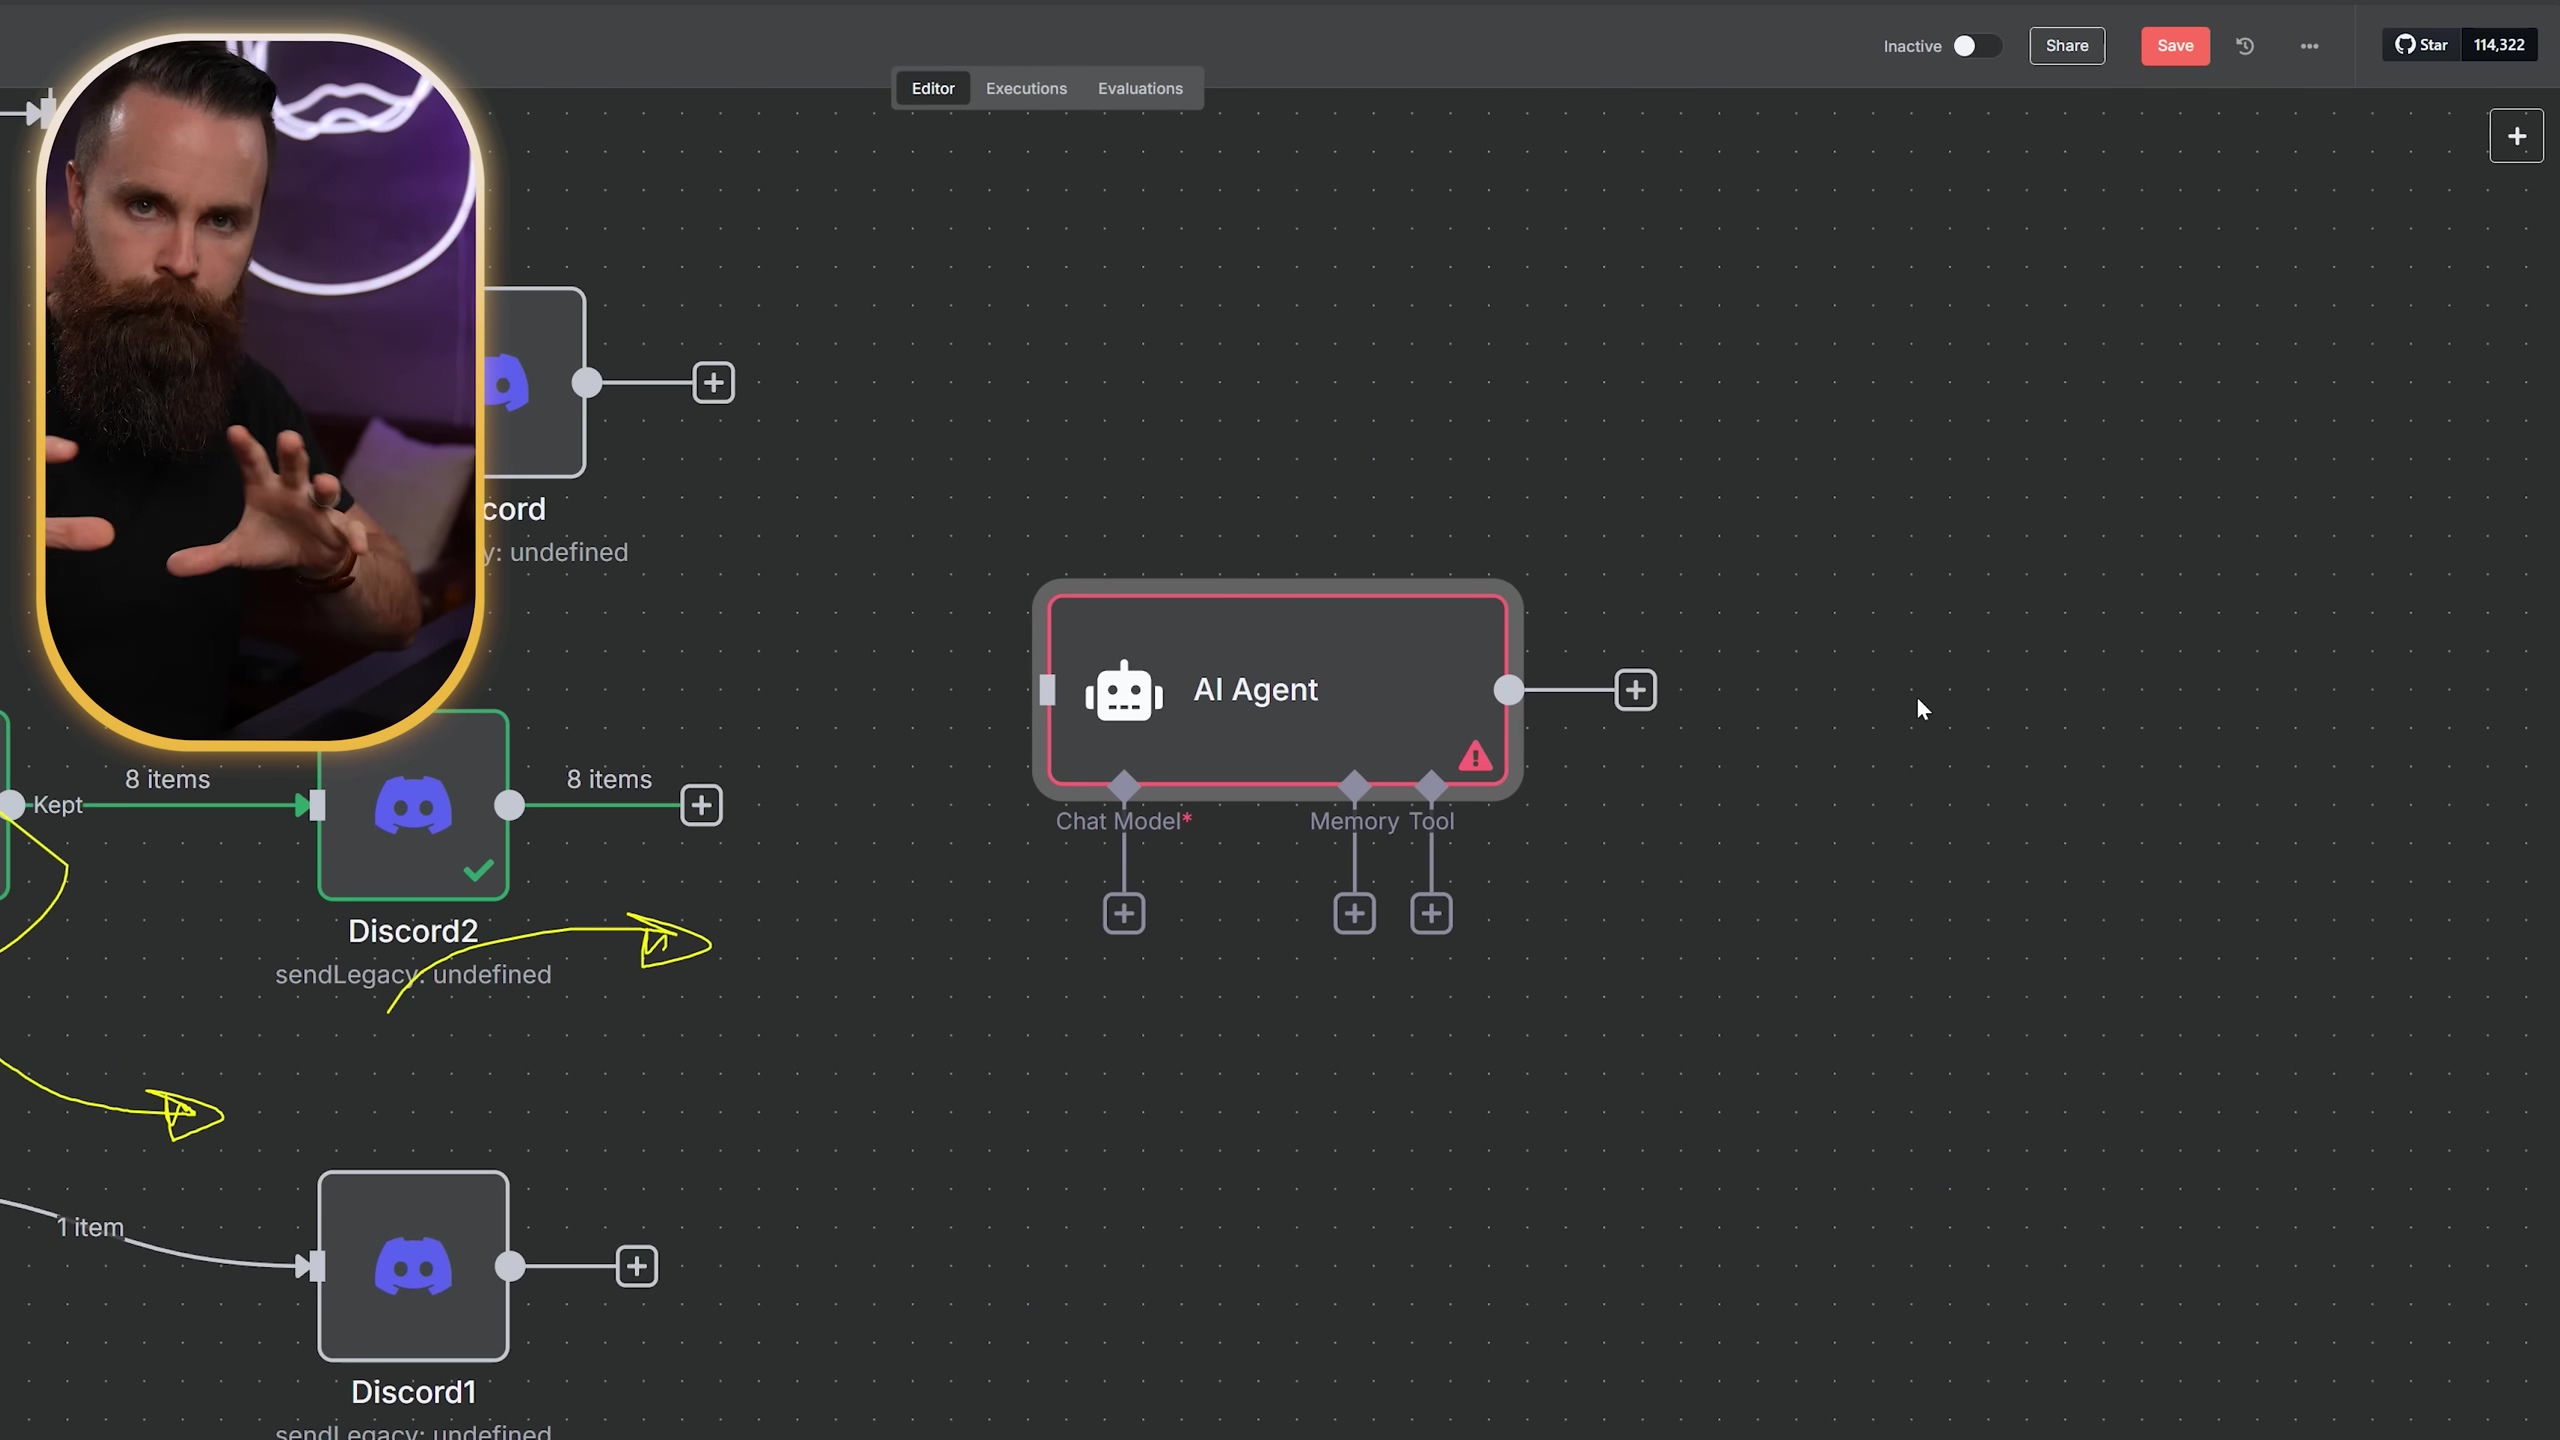
Building Intelligent AI Agents
For more complex tasks, the ‘AI Agent’ node allows you to create AI-powered assistants with memory and access to various tools. Imagine an agent that can troubleshoot your home lab, ping devices, and report issues, all autonomously. This is where automation meets true intelligence. It’s like giving your AI a brain and a toolkit!
Expected Feedback: Setting up an AI Agent is more involved, but after configuration, you can test it by providing a prompt. The agent will then use its tools and memory to generate a response or take an action. You’ll see its thought process and final output in the node’s data.
Manipulating Data with ‘Set Field’ Node
As your workflows get more complex, you’ll often need to reshape your data. The ‘Set Field’ node is crucial for fine-tuning the data passed between nodes. It allows you to select specific fields (like creator, title, link, and your shiny new AI summary) from previous nodes and combine them into a custom output. This gives you ultimate control over what information gets passed along. It’s like being a data sculptor!
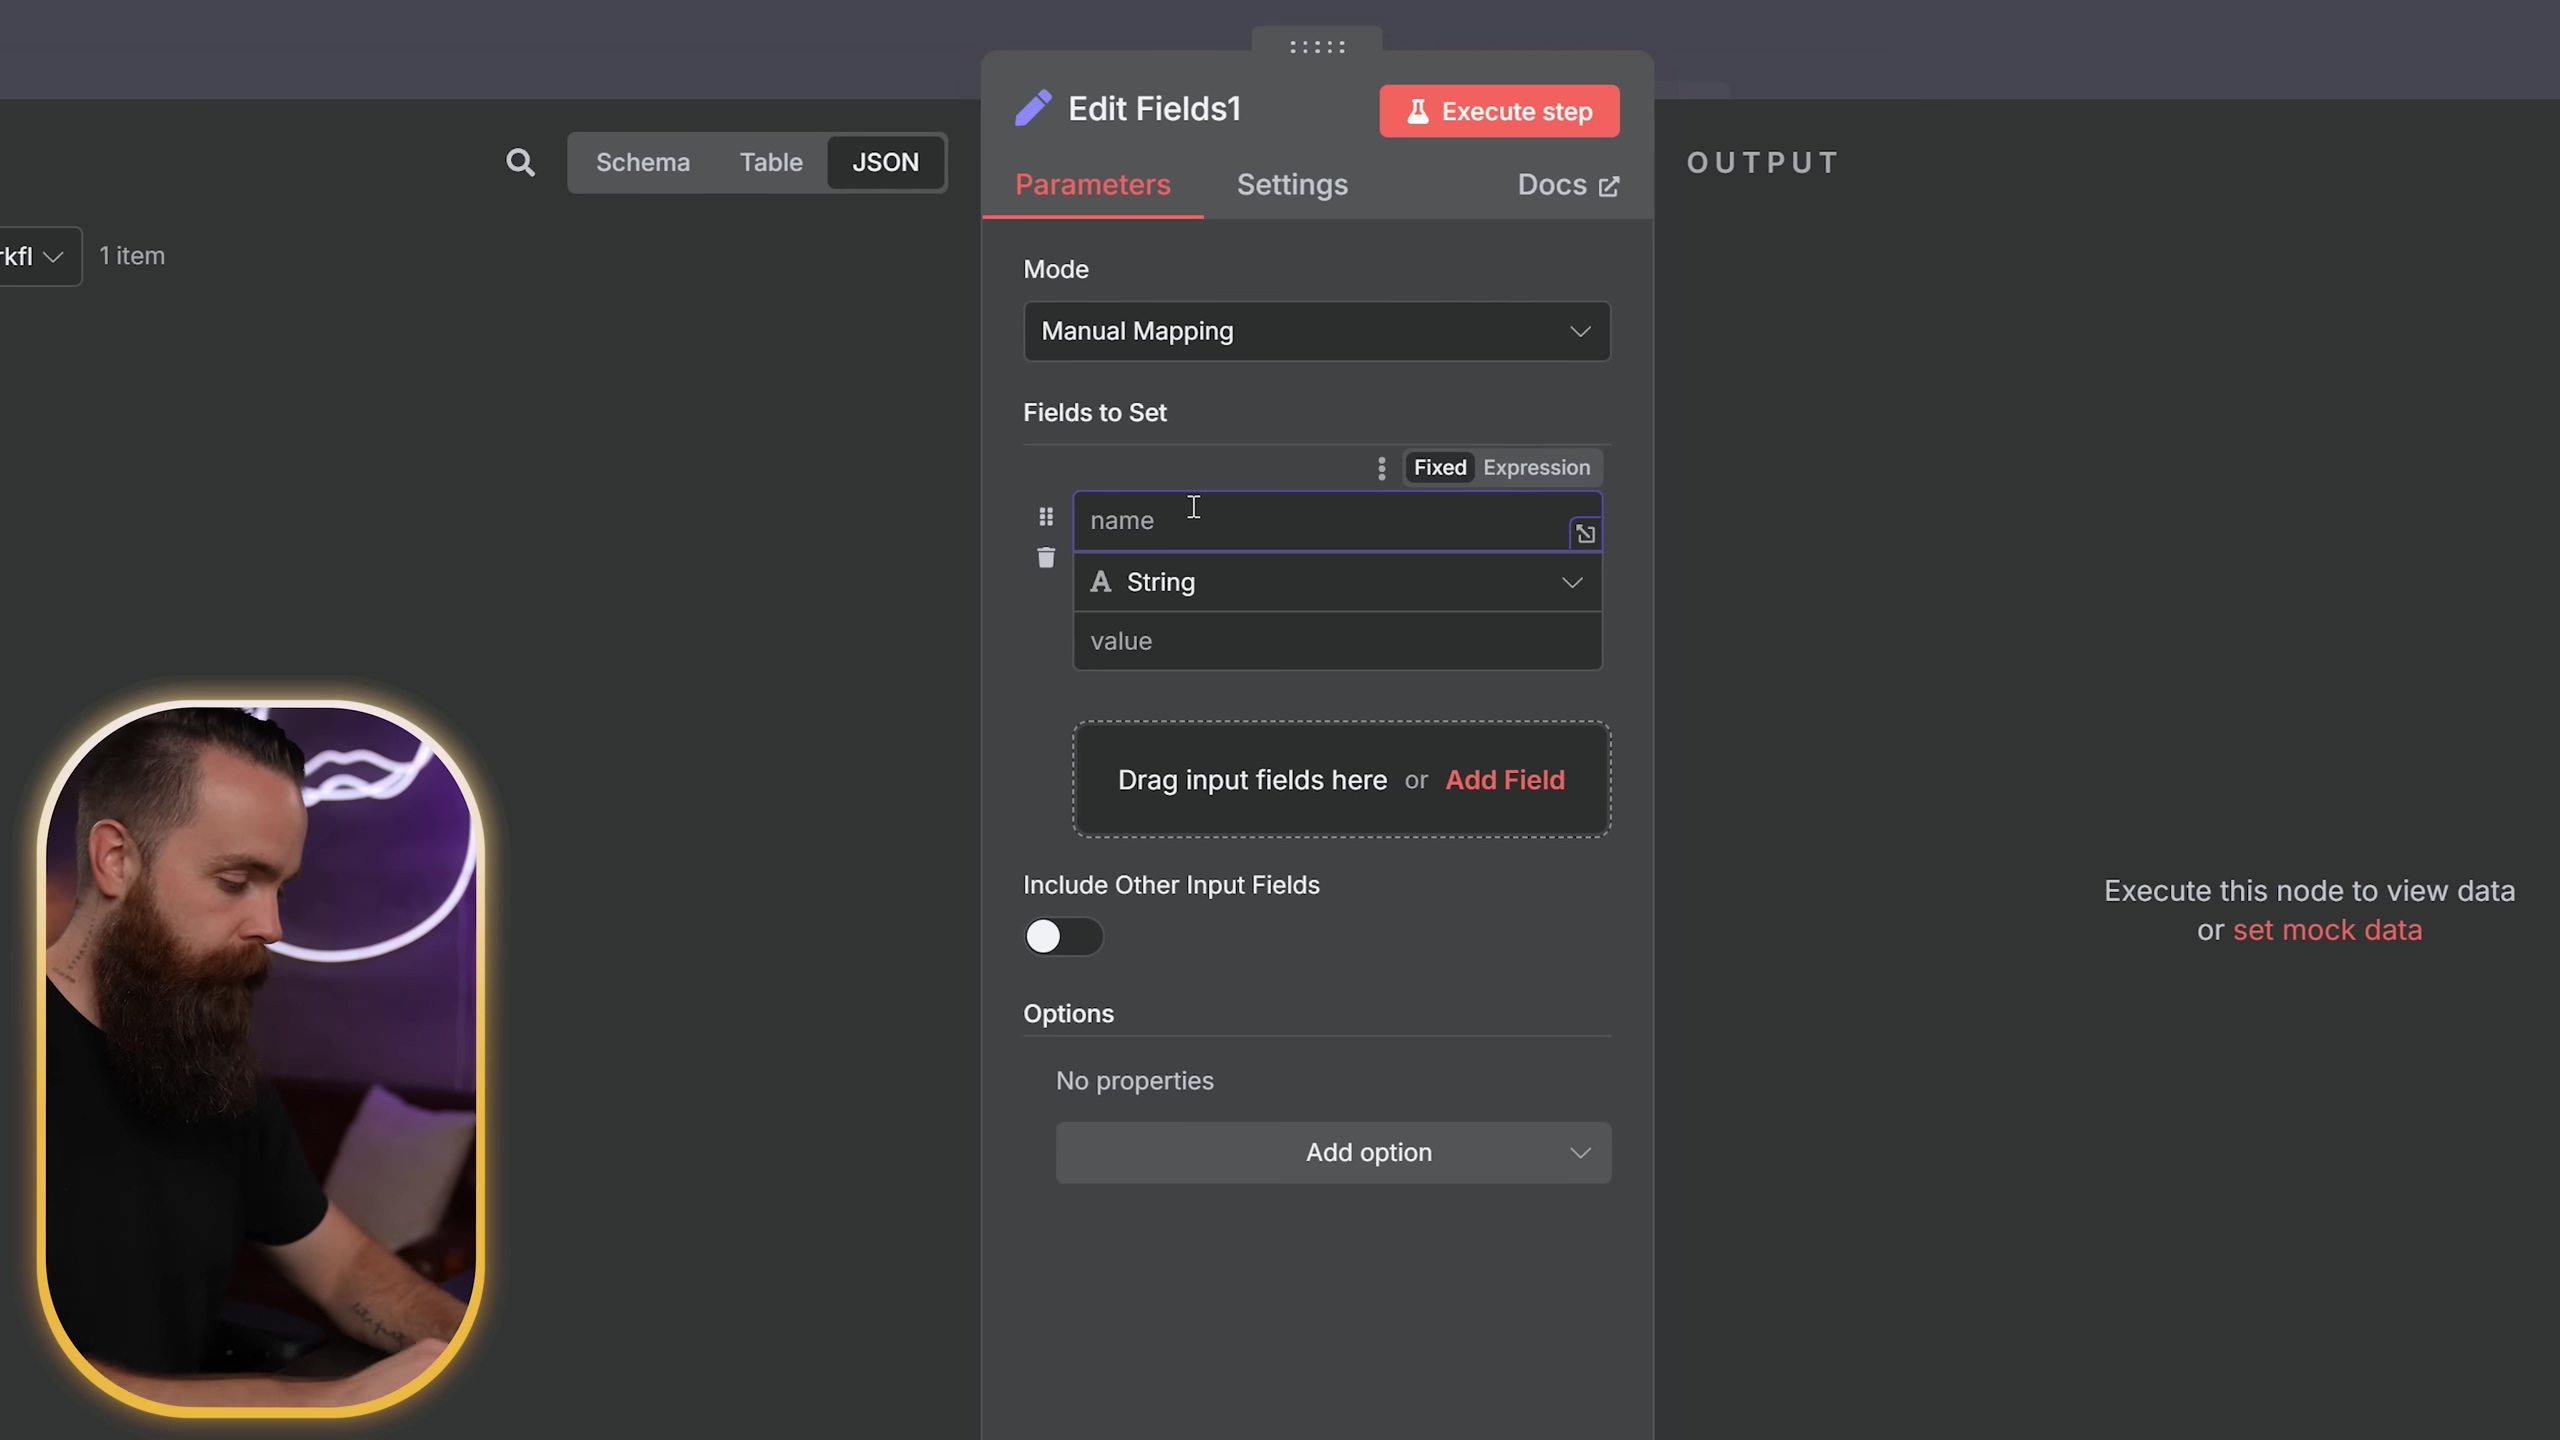
Expected Feedback: After configuring the ‘Set Field’ node, execute it. You’ll see the output data now contains only the fields you specified, organized exactly how you want them. This is super helpful for cleaning up data before sending it to another service.
Filtering YouTube Content
Did you know every YouTube channel has an RSS feed? You can also integrate YouTube channels into your news digest! Use a ‘Set Fields’ node to define an array of channel IDs, then an ‘RSS Read’ node to pull videos. A ‘Filter’ node can then limit videos to those published within a specific timeframe. This is perfect for catching up on your favorite tech channels without getting overwhelmed.
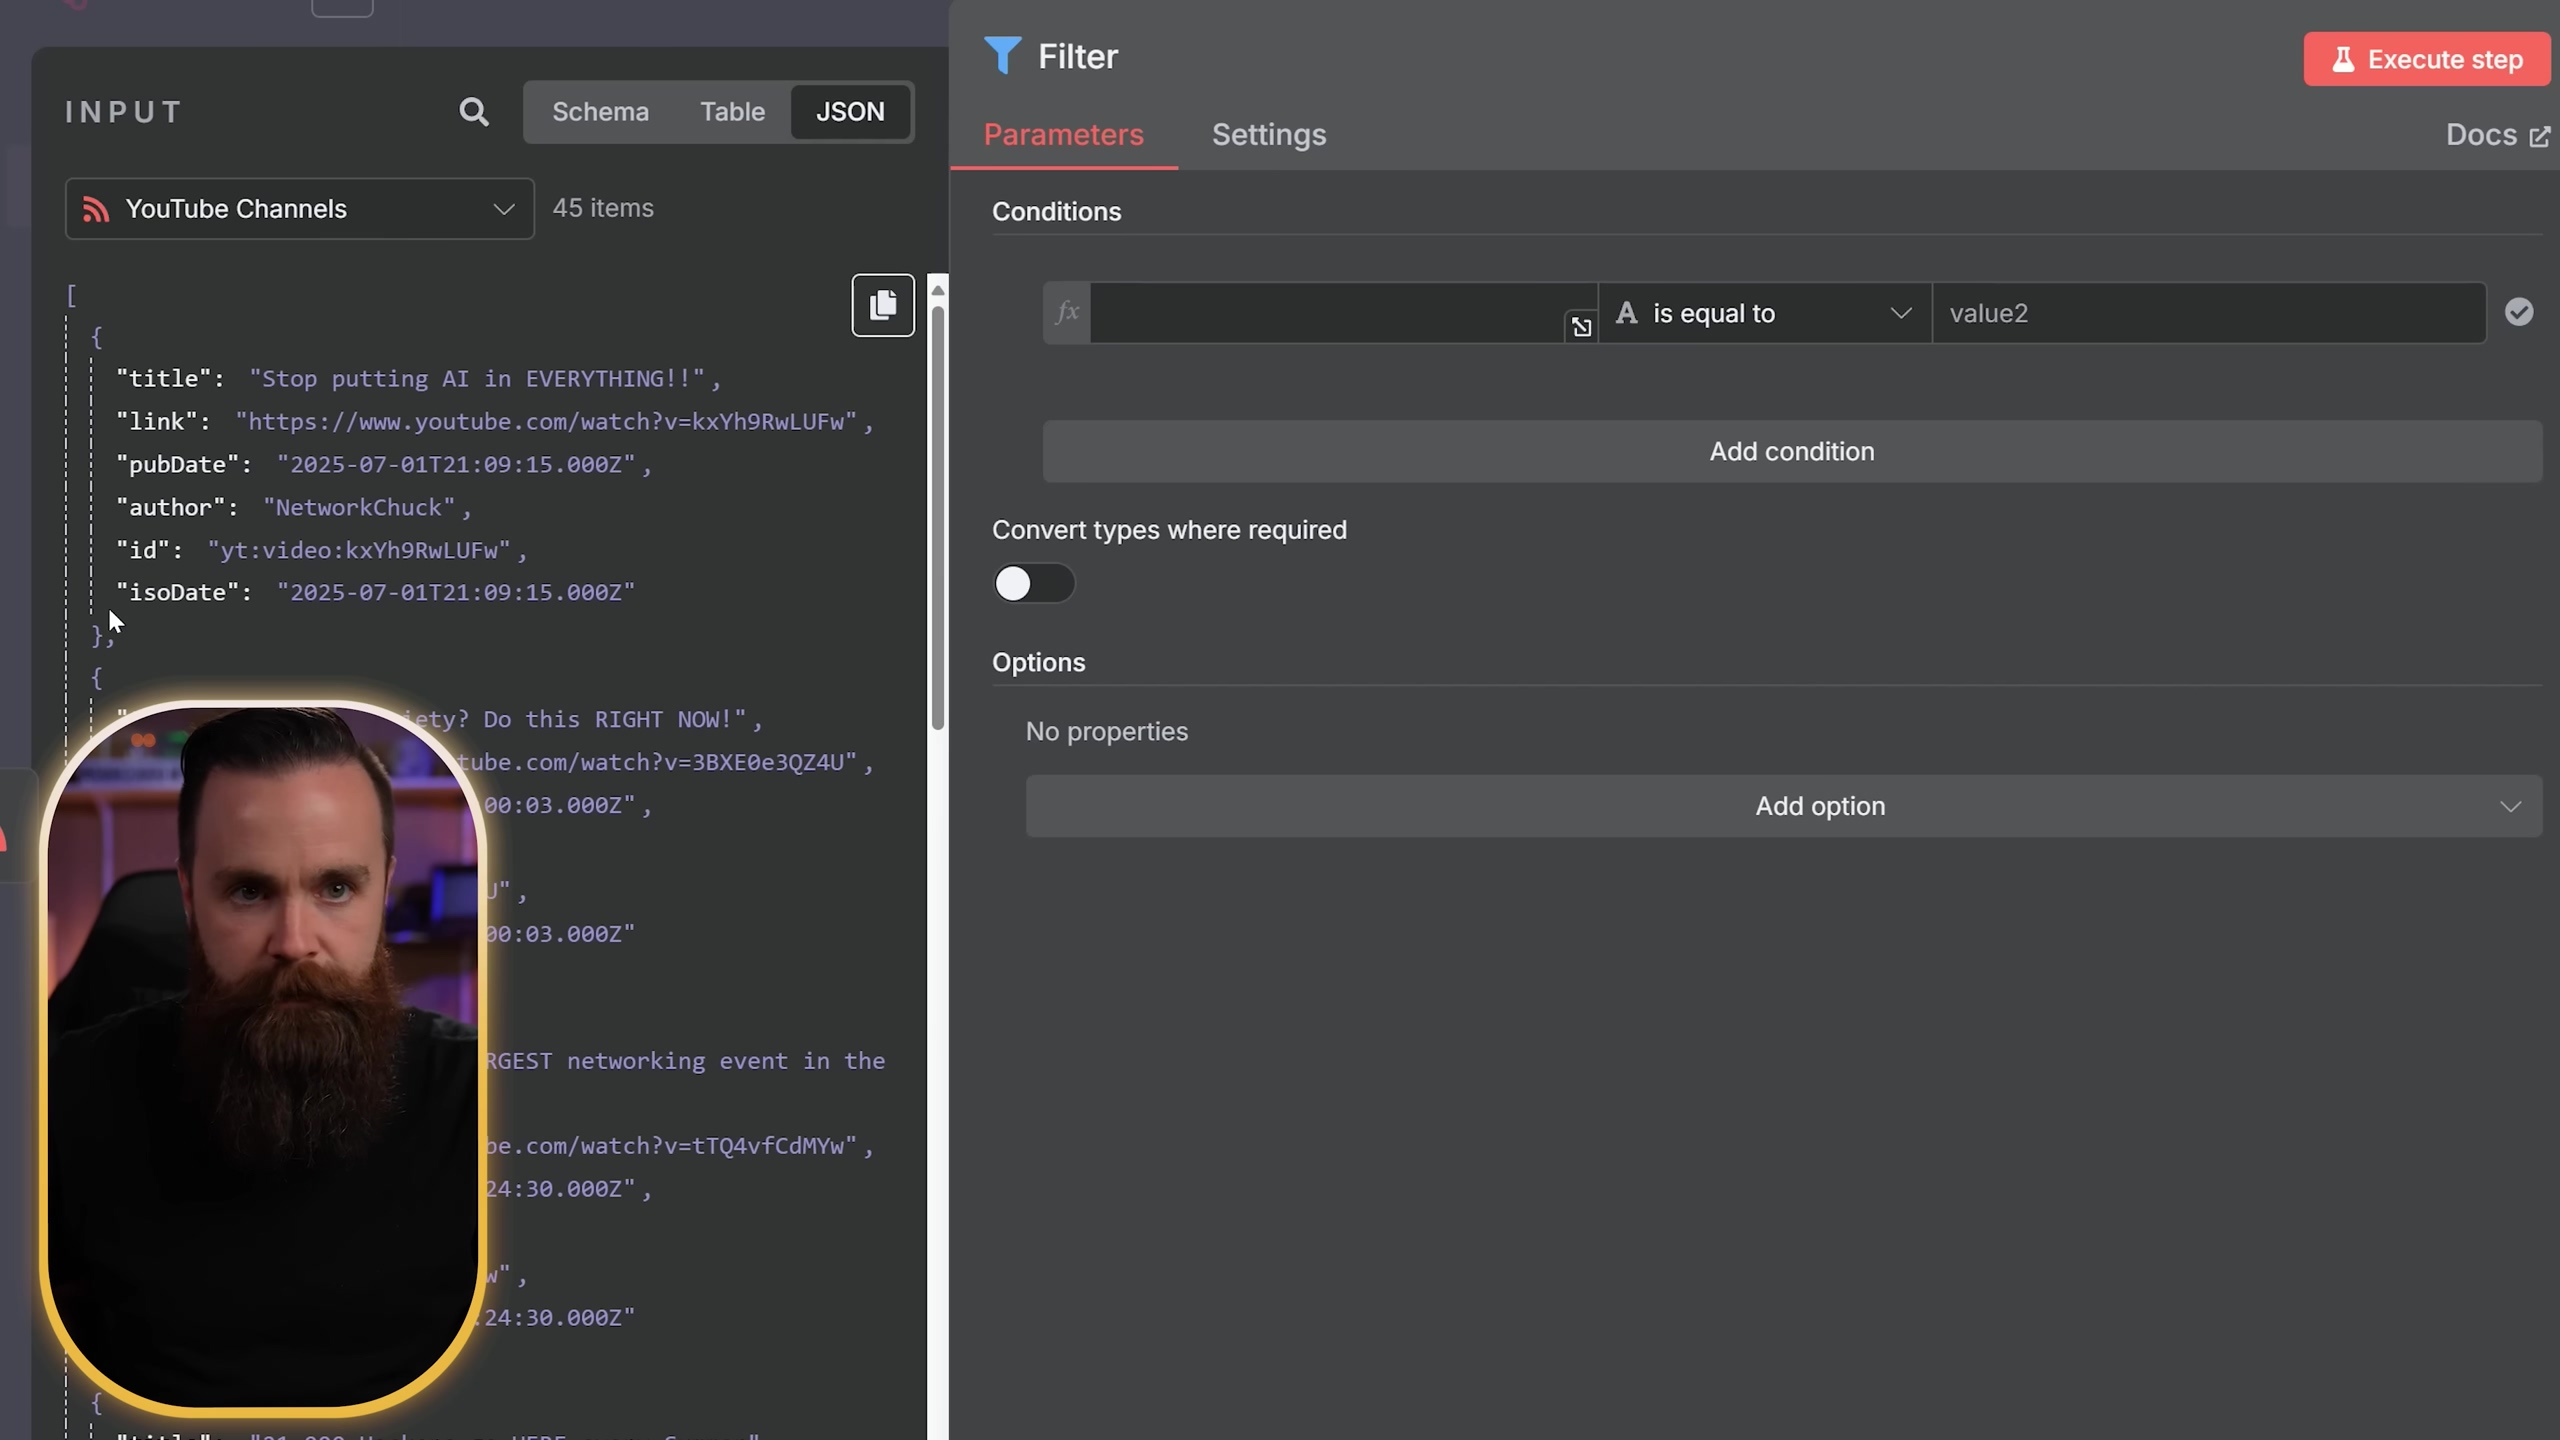
Expected Feedback: After setting up the ‘Filter’ node, execute it. You’ll see that only the YouTube videos matching your criteria (e.g., published in the last 24 hours) are passed through to the next node. This keeps your digest relevant and fresh!
AI Agents with Tools and Memory
Let’s dive a bit deeper into the ‘AI Agent’ node. This is a cornerstone for building sophisticated AI-powered automations. It allows you to define ‘tools’ (e.g., executing commands, making API calls to other services) that the AI can use, along with ‘memory’ to maintain context across interactions. This enables the creation of truly dynamic and responsive automated systems. Imagine an AI that can remember your past requests and adapt its responses accordingly – that’s the power of memory! It’s like giving your AI a long-term memory and a set of specialized gadgets.
Critical Safety & Best Practice Tips
Alright, before you go off automating everything under the sun, let’s talk about some crucial safety and best practice tips. These are lessons learned from countless hours of tinkering, and they’ll save you a lot of headaches down the road!
💡 Data Handling: Always be mindful of the data you’re processing. For sensitive information, prioritize local n8n instances (on-premise) and ensure proper access controls. When using cloud services, always, always, always understand their data privacy policies. Your data is precious, treat it that way!
💡 Testing Workflows: This is probably the most important tip! Before deploying any workflow to production (meaning, letting it run automatically for real), thoroughly test each node and the overall flow. Use the ‘Execute Step’ and ‘Pin Data’ features within n8n to analyze outputs at each stage and ensure data integrity. It’s like doing a dress rehearsal before opening night – you want to catch all the bugs beforehand!
💡 Credential Management: Securely store your API keys and credentials. These are the digital keys to your various accounts, so treat them like gold. n8n’s credential management system is robust and designed for security, but always follow best practices for service accounts and access tokens. Never hardcode credentials directly into your workflows!
Key Takeaways
- n8n is a powerful, open-source automation tool that offers greater flexibility and control than traditional services like Zapier or IFTTT.
- Workflows are built using interconnected ‘nodes,’ each performing a specific task, making complex automations feel like building with LEGOs.
- You can set up n8n on-premise (for ultimate control and privacy) or in the cloud (for ease of use and accessibility), with cloud options often simplifying initial deployment for beginners.
- n8n supports a wide range of integrations, including RSS feeds, Discord, command execution on your host, and advanced AI models like OpenAI.
- Data manipulation nodes like ‘Limit’ and ‘Set Field’ allow precise control over workflow outputs, ensuring your data is exactly where it needs to be.
- AI integration enables sophisticated automations like content summarization and intelligent agents that can make decisions and use tools.
Conclusion
Wow, you made it! You’ve just taken your first steps into the incredible world of automation with n8n. It truly empowers you to automate virtually any digital task, transforming your productivity and freeing up valuable time. From simple news aggregation to complex AI-driven home lab management, the possibilities are limitless. While the initial learning curve might seem a little steep (like learning to ride a bike, you might wobble a bit at first), the foundational principles are intuitive, and the rewards are immense. Trust me, it’s worth it!
As you delve deeper, consider how n8n can not only streamline your current processes but also unlock entirely new capabilities. Perhaps an AI could rate articles based on your personal preferences, or summarize YouTube videos, telling you which ones are a must-watch. The true power lies in your imagination and the robust framework n8n provides. So, take the plunge, experiment with workflows, and unleash the full potential of intelligent automation in your life. What will you automate first? Share your ideas in the comments below!
Frequently Asked Questions (FAQ)
Q: Is n8n really free to use?
A: Yes, n8n is open-source and can be self-hosted for free. There are also cloud options, some of which might have associated costs (like VPS hosting), but the core n8n software itself is free to use and modify. It’s like having a powerful engine that you can put into any car you build!
Q: What’s the biggest advantage of n8n over Zapier or IFTTT?
A: The biggest advantage is control and flexibility. Because n8n is open-source and can be self-hosted, you own your data and your workflows. You’re not limited by their pre-built integrations or pricing tiers. You can customize everything, connect to virtually any API, and even run it on your own hardware. It’s like having a custom-built robot versus a store-bought toy.
Q: I’m a complete beginner. Is n8n too complicated for me?
A: While n8n has a lot of advanced features, it’s designed to be user-friendly, especially with its visual workflow builder. This guide is written specifically for beginners like you! Start with simple workflows, use the ‘Execute Node’ feature to test each step, and don’t be afraid to experiment. The n8n community is also super helpful if you get stuck. You got this!
Q: How do I find the RSS feed for a website or YouTube channel?
A: For many websites, you can often find the RSS feed link in the footer, or by looking for an RSS icon (often an orange square with a white radio waves symbol). For YouTube channels, you can usually construct the RSS feed URL by taking the channel’s ID and appending it to https://www.youtube.com/feeds/videos.xml?channel_id=. A quick search for “[website name] RSS feed” will often yield results too!
Q: What if a node fails or my workflow doesn’t run as expected?
A: Don’t panic! This happens to everyone. First, check the ‘Execution Log’ in n8n – it will often give you clues about what went wrong. Use the ‘Execute Node’ and ‘Pin Data’ features to inspect the data at each step of your workflow. This helps you pinpoint exactly where the issue is. Often, it’s a small typo in a credential or an incorrect data field. Persistence is key in automation!
Q: Can n8n connect to any API?
A: Almost! n8n has a generic ‘HTTP Request’ node that allows you to connect to virtually any API, even if there isn’t a pre-built node for it. This is incredibly powerful and means your automation possibilities are truly endless. If an API exists, n8n can probably talk to it!