Watch the Video Tutorial
💡 Pro Tip: After watching the video, continue reading below for detailed step-by-step instructions, code examples, and additional tips that will help you implement this successfully.
Table of Contents
Open Table of Contents
- Understanding AI Agents: Beyond Chatbots
- Setting Up Your Free N8N Environment
- Building Your First AI Agent Workflow
- Executing and Debugging Your Agent
- Implementing Human-in-the-Loop Approval
- Strategic Content Enrichment
- Key Takeaways
- Conclusion
- Frequently Asked Questions (FAQ)
- Q: Why should I self-host N8N instead of using a cloud service like Zapier or N8N Cloud?
- Q: What if my email provider doesn’t support App Passwords?
- Q: My Docker container for N8N stopped. Did I lose all my data?
- Q: Can I use a different AI model instead of Google Gemini?
- Q: How can I make my AI agent’s prompts even better?
- Q: What if I want to send reminders via SMS or another channel instead of email?
Understanding AI Agents: Beyond Chatbots
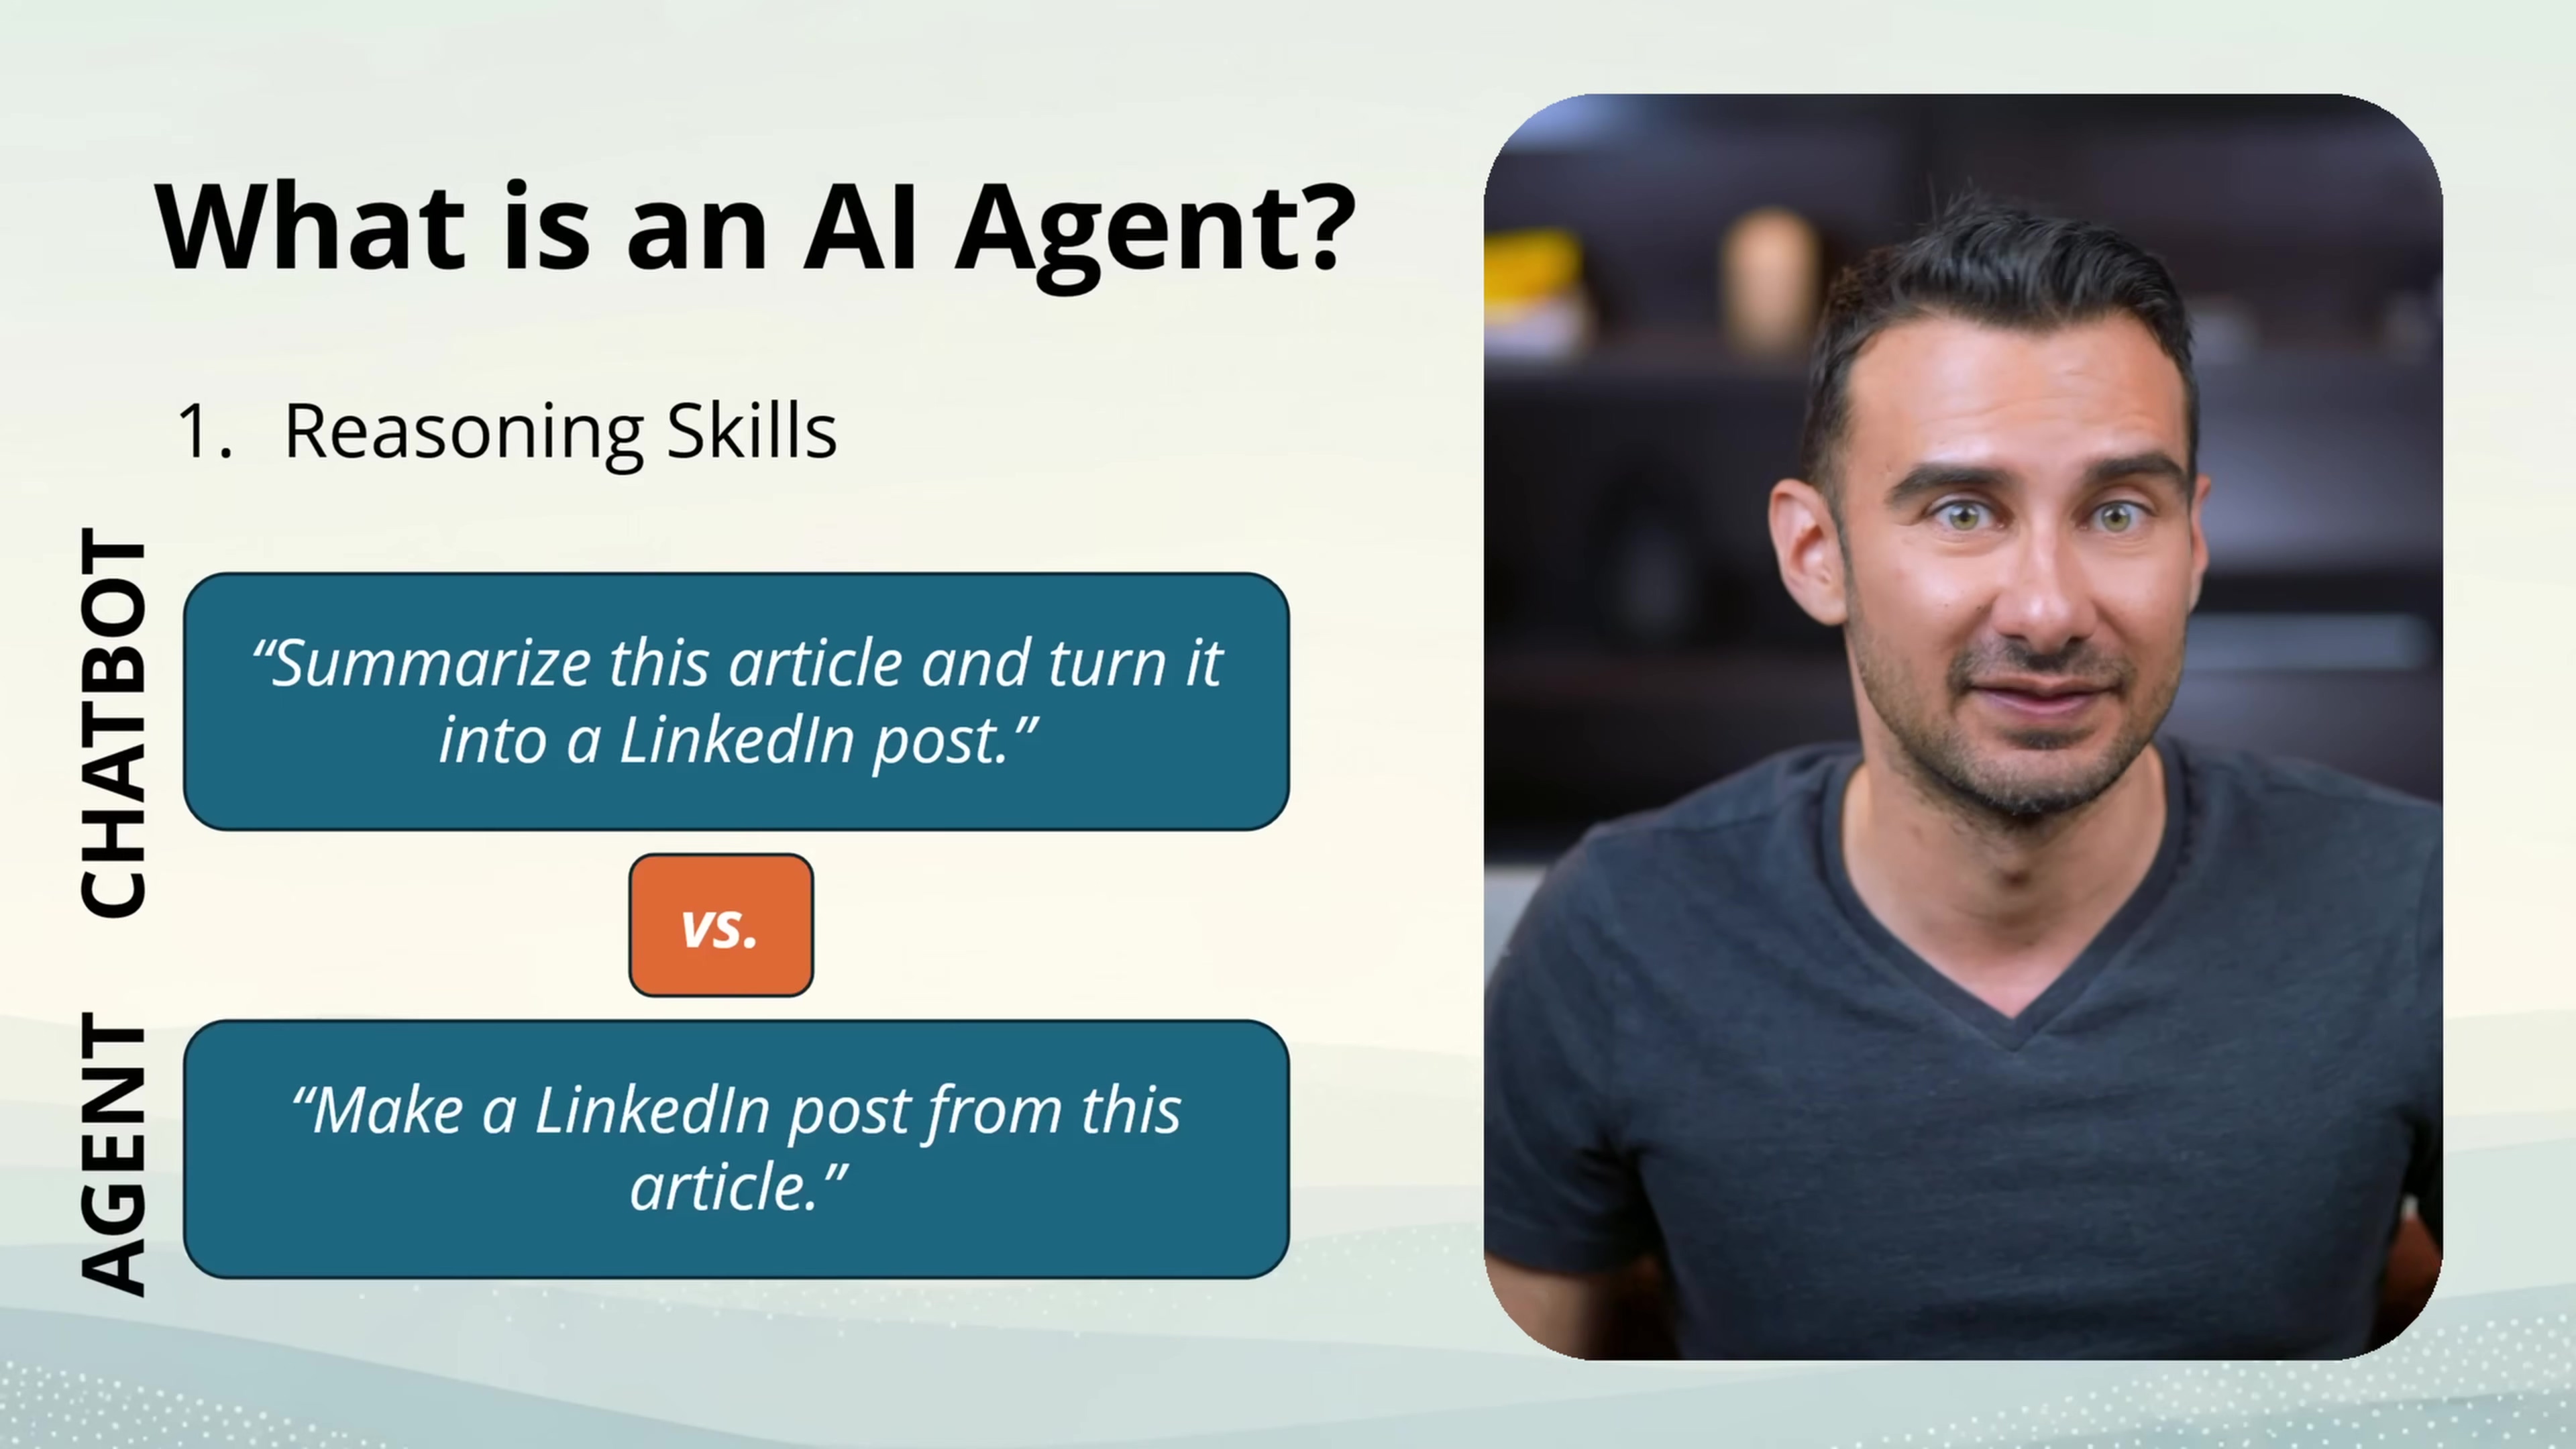
Before we start building, let’s get on the same page about what an AI agent actually is. Forget those simple chatbots that just follow a script. Think of an AI agent more like a super-smart, digital assistant that can actually think and act on its own. It’s like having a mini-robot employee! They’re way more sophisticated than just spitting out pre-programmed answers. Here’s what makes them special:
- Reasoning Skills: This is the brainy part. An AI agent can take a goal you give it (like “get these invoices paid!”) and figure out the best way to achieve it, even if you didn’t give it explicit, step-by-step instructions. It’s like telling a human assistant, “Please handle this,” and they just get it.
- Tool Access: This is where the magic happens. Our agent isn’t just sitting there thinking; it can do things! It can interact with other software, send emails, update databases, or even post on social media. Think of these “tools” as its arms and legs, allowing it to reach out and manipulate the digital world.
- Memory: Just like us, AI agents learn from experience. They can remember past conversations and actions, which helps them perform better over time. This context is super important for complex tasks, so they don’t forget what they were doing or who they were talking to.
Pretty cool, right? Now that we’ve got the concept down, let’s get our hands dirty and set up our N8N environment.
Setting Up Your Free N8N Environment
N8N is an amazing open-source workflow automation tool. If you’ve ever heard of Zapier or Make.com, N8N is in the same league, but with a huge advantage: you can run it completely free by self-hosting it! While N8N does offer a cloud service with a 14-day free trial (and up to 1,000 workflow executions), we’re going for the ultimate free setup here. This is where Docker comes in – it’s like having a magic box that lets you run N8N on your own computer without a ton of complicated setup.
Installing Docker Desktop
First things first, we need to get Docker Desktop installed on your machine. Think of Docker as a super-efficient way to package up software (like N8N) so it runs perfectly, no matter what computer you’re on. It keeps everything neat and tidy, preventing those dreaded “it works on my machine!” moments.
- Head over to the Docker Desktop website and download the version that matches your operating system (Windows, macOS, or Linux). Just pick the one for your computer, click download, and let it do its thing.
- Once downloaded, run the installer. It’s pretty straightforward, just follow the prompts. If you’re on Windows, it might ask you to enable WSL (Windows Subsystem for Linux). Don’t panic! This is just Docker’s way of making sure it has a good environment to run in. Just say yes if it asks.
- After the installation finishes, launch Docker Desktop. You’ll usually find it in your applications folder or Start menu. Give it a moment to start up; it might take a little while the first time. You’ll know it’s ready when you see the Docker whale icon in your system tray (Windows) or menu bar (macOS) and it says “Docker Desktop is running.”
Initializing N8N Data Volume
Okay, now that Docker is up and running, we need to create a special place for N8N to store all its important stuff – its configurations, workflows, and data. This is called a “data volume.” Why do we do this? Because if you just run N8N without a volume, all your hard work disappears every time you stop the N8N container. We don’t want that! A volume makes sure your data is persistent, like saving a game.
-
Open your Command Prompt (CMD) if you’re on Windows. Just type
CMDin your Start menu search bar and hit Enter. If you’re on macOS or Linux, open your Terminal application. -
Now, type (or copy and paste) this command and hit Enter:
docker volume create n8n_dataWhat to expect: If everything goes well, you should see
n8n_dataprinted right back in your command prompt. This means Docker successfully created that dedicated storage space for N8N. If you see an error, double-check that Docker Desktop is actually running and that you typed the command correctly.
Launching N8N with Docker
Alright, the moment of truth! We’re going to tell Docker to download the N8N software and run it. This command is a bit of a mouthful, but don’t worry, I’ll break it down.
-
In the same Command Prompt or Terminal window you used before, copy and paste this command and hit Enter:
docker run -it --rm --name n8n -p 5678:5678 -v n8n_data:/home/node/.n8n n8n/n8nLet’s decode that command:
docker run: “Hey Docker, start something up!”-it: “Run this interactively, so I can see what’s happening.”--rm: “Clean up the temporary container once I stop it (but don’t delete the data volume!).”--name n8n: “Let’s call this running instance ‘n8n’ so it’s easy to find.”-p 5678:5678: “This is super important! It means ‘map port 5678 on my computer to port 5678 inside the N8N container.’ This is how you’ll access N8N from your web browser.”-v n8n_data:/home/node/.n8n: “Remember thatn8n_datavolume we just created? This tells N8N to use that volume for its data, specifically storing it in the/home/node/.n8ndirectory inside the container. This is how your data persists!”n8n/n8n: “Finally, this tells Docker what software to run – the official N8N image from Docker Hub.”
What to expect: Docker will first check if you have the
n8n/n8nimage. If not, it will download it (this might take a few minutes, depending on your internet speed – it’s like downloading a big app). Once downloaded, you’ll see a bunch of log messages scrolling by in your terminal. Eventually, you should see something liken8n ready on port 5678or similar messages indicating it’s started. -
After a few moments (or once you see those “n8n ready” messages), open your favorite web browser (Chrome, Firefox, Edge, etc.) and type this into the address bar:
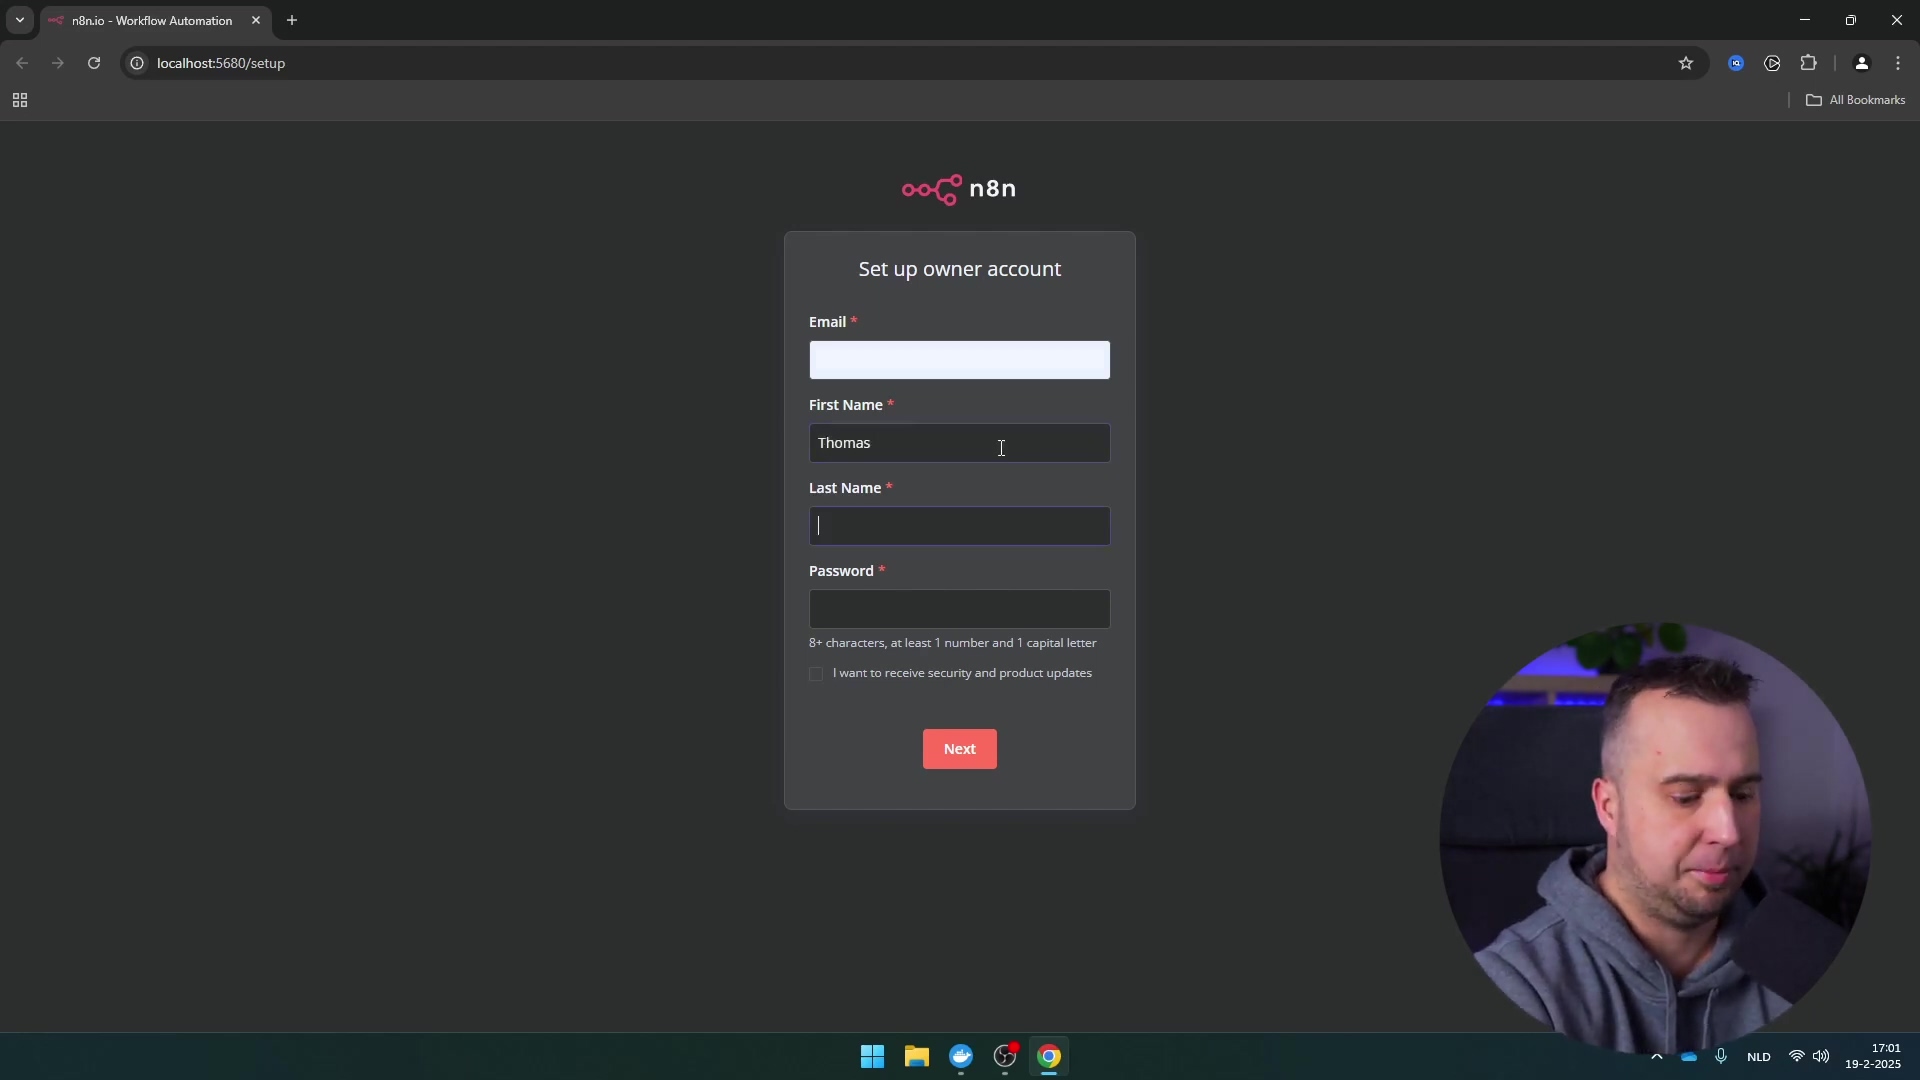
http://localhost:5678What to expect: You should see the N8N welcome screen! This is where you’ll create your first N8N account (username and password). Go ahead and do that. Once you’ve created your account, you’ll be directed to the N8N dashboard – your new command center for automation! Congratulations, you’ve just self-hosted N8N!
Building Your First AI Agent Workflow
Welcome to the N8N dashboard! It might look a little overwhelming at first, but trust me, it’s designed to be super intuitive. You’ll see options to create new workflows, check out analytics, and even browse through thousands of pre-built templates. For our AI agent, we’re going to start from scratch and build it piece by piece. It’s like building with LEGOs, but way more powerful!
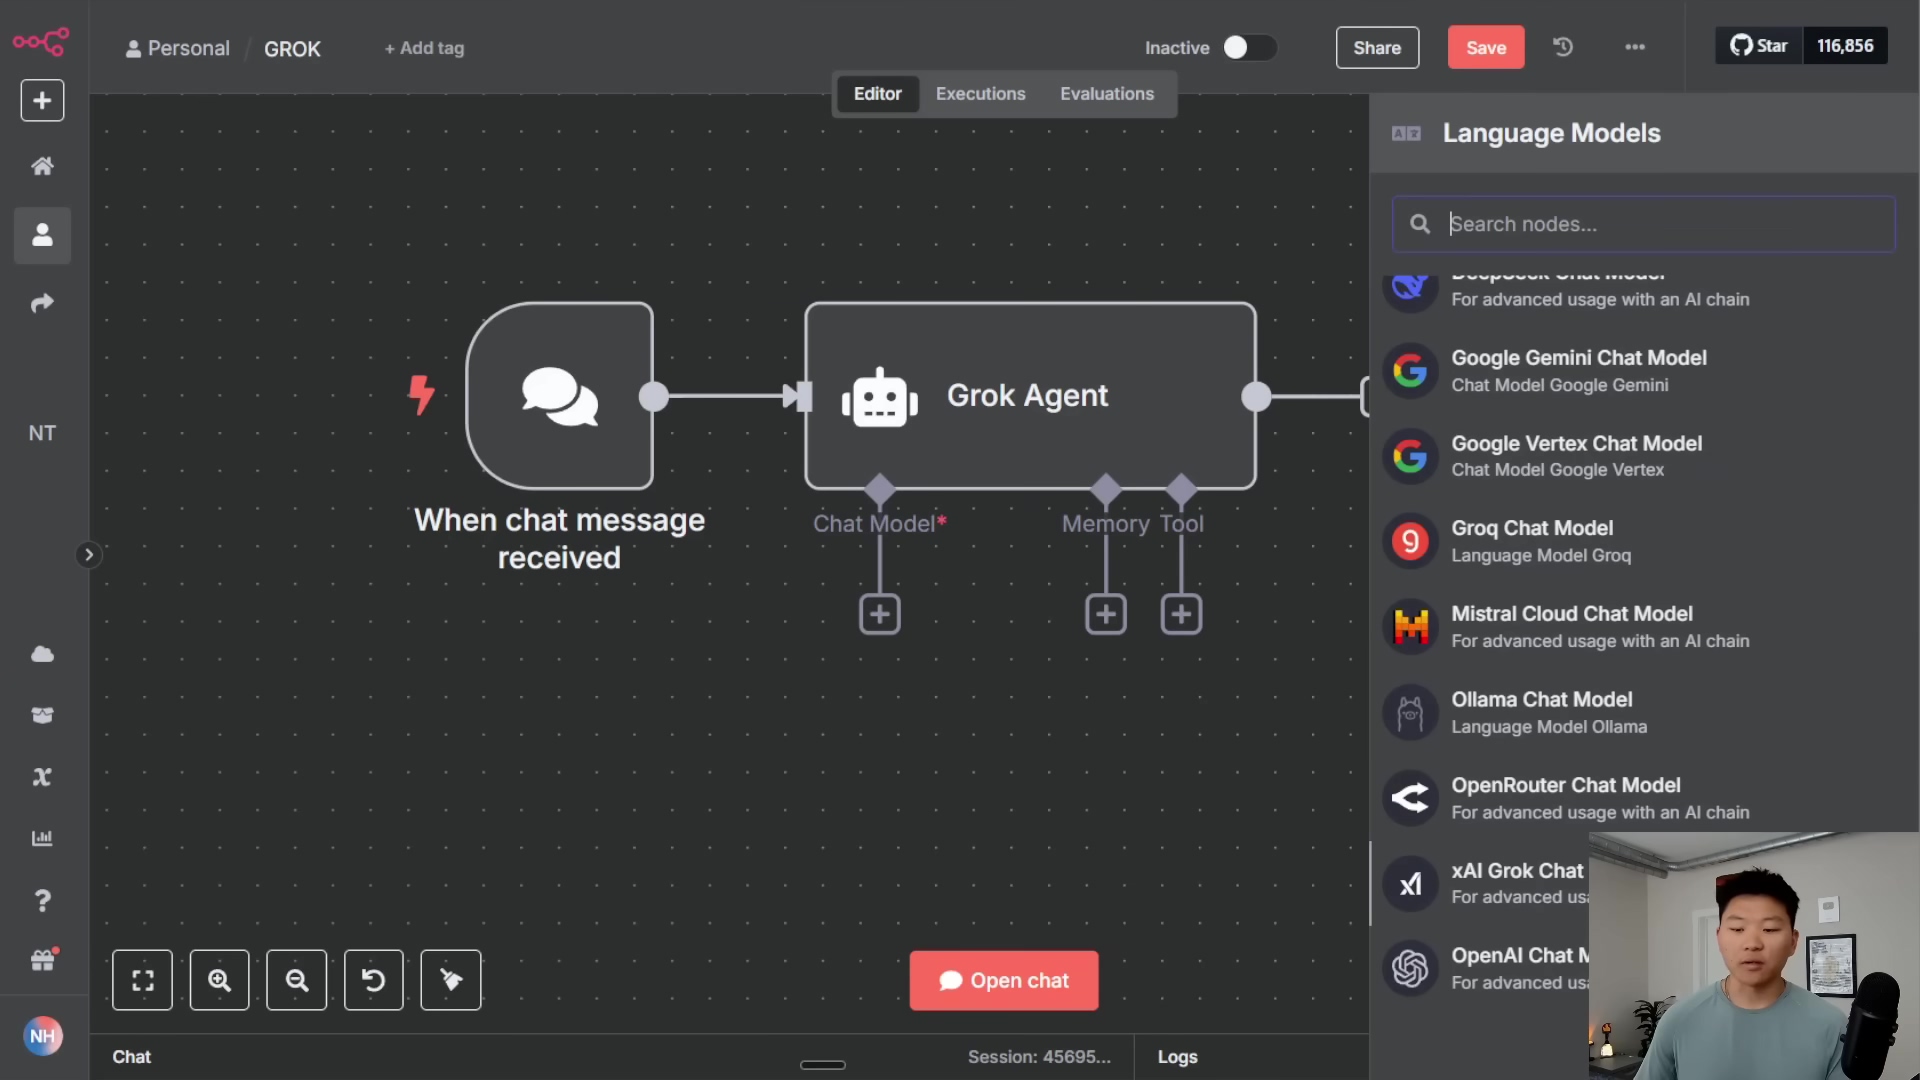
Initial Agent Setup and Troubleshooting
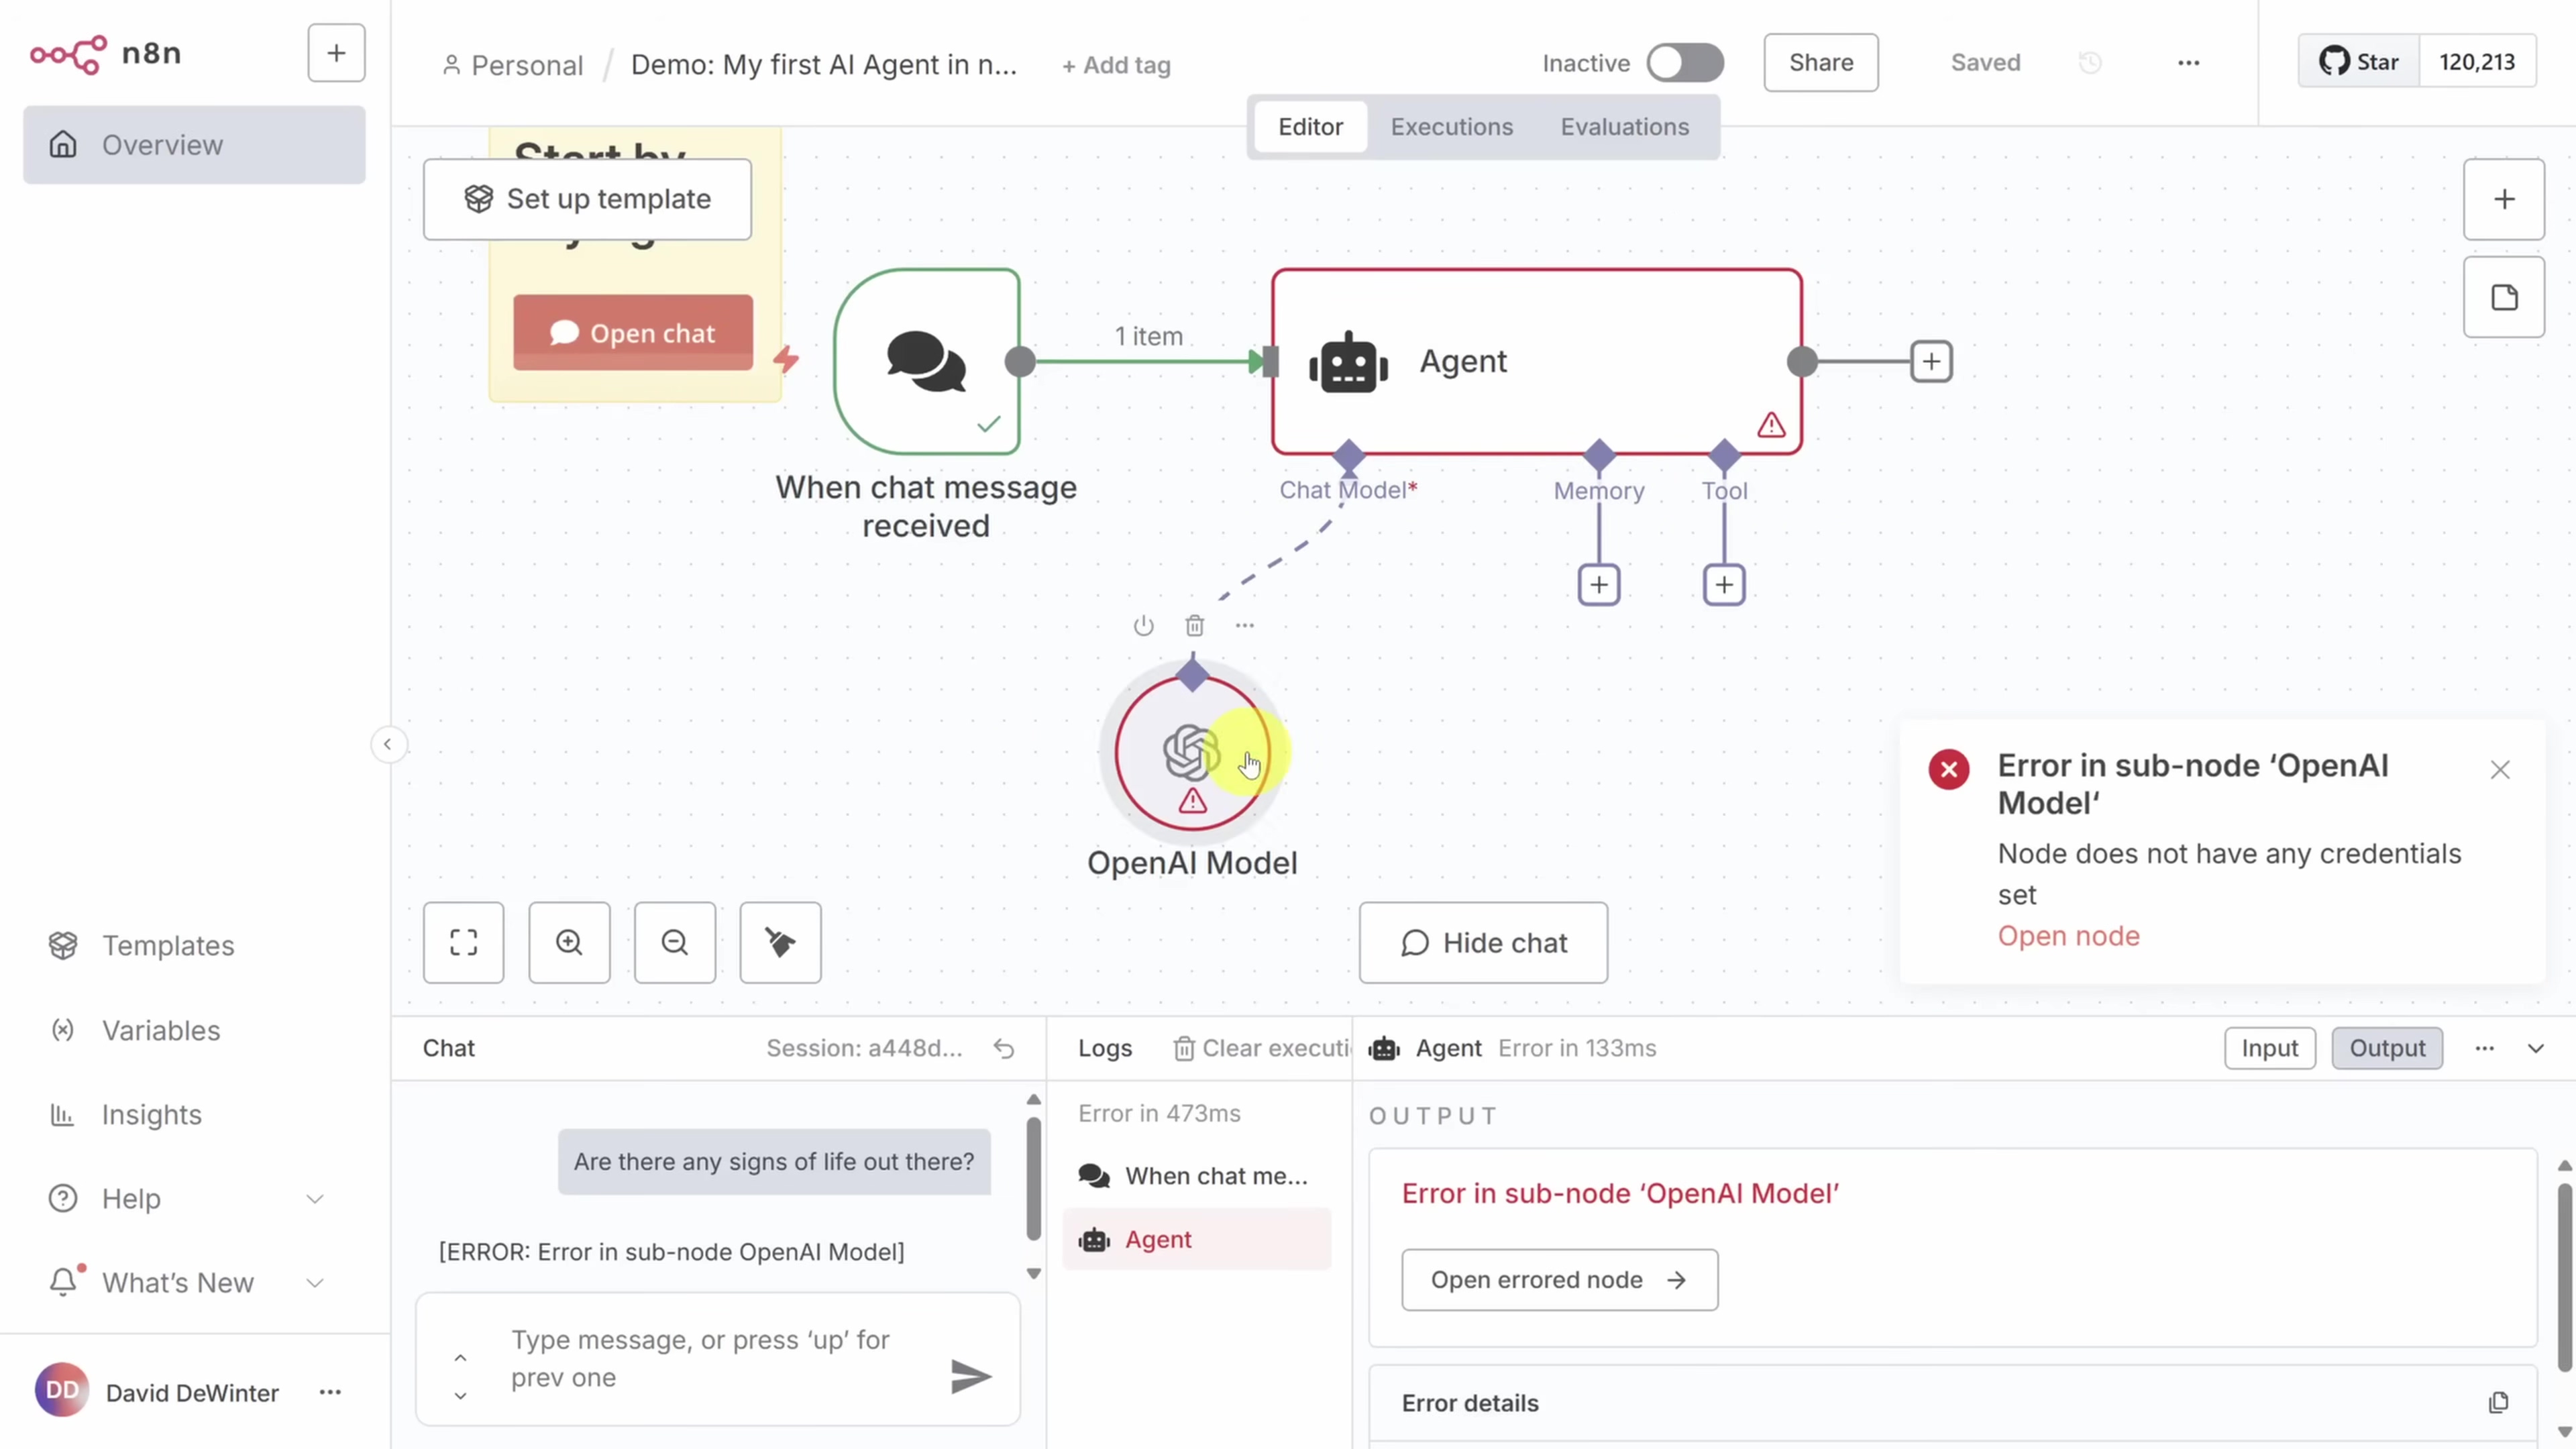
When you start a new AI agent workflow in N8N, you’ll typically begin with a ‘Trigger’ node (like ‘When chat message received’ if you were building a chatbot) and then an ‘Agent’ node. The ‘Agent’ node is where our AI brain lives. Now, here’s a common pitfall: when you first add an Agent node, it might throw an error. Don’t worry, this is usually because it’s trying to connect to an AI model (like OpenAI) but doesn’t have the necessary credentials (like an API key) yet. It’s like trying to drive a car without the keys!
Configuring the AI Model (Gemini for Free Use)
This is where we give our AI agent its smarts! We need to connect it to a powerful AI model. While many tutorials use OpenAI, I’m going to show you a fantastic free option that’s super generous with its limits: Google Gemini.
- Select a Model: In your N8N Agent node, you’ll probably see a default OpenAI model. Go ahead and delete that. Then, click the big plus icon (
+) to add a new model. From the list, select Google Gemini. For this tutorial, I’m using Gemini 2.5 Flashlight Preview 617, which offers a very generous free tier (up to 15 requests per minute and 1000 requests per day!). That’s plenty for our needs. - Obtain API Key: To use Gemini, you need an API key. Think of this as your secret handshake with Google’s AI services. Go to aistudio.google.com (you’ll need to sign in with your Google account). Once there, look for a button that says ‘Get API Key’. Click it, and then choose to create a new API key for a new project. Copy that long string of characters – that’s your API key!
- Add Credential in N8N: Back in N8N, in the Gemini model configuration, you’ll see a field for ‘API Key’. Click on ‘Create New Credential’. Give it a name (like “My Gemini Key”), paste your API key into the field, and save it. Pro tip: Always test the connection! N8N usually has a ‘Test Connection’ button. Click it to make sure N8N can successfully talk to Gemini. If it says “Connection successful,” you’ve nailed it!
Setting Up Agent Memory
Remember how we talked about AI agents having “memory”? This is where we set that up. For our invoice reminder agent, we don’t need anything super fancy. ‘Simple Memory’ will do the trick. This type of memory just stores the last few messages (usually the last five) exchanged with the AI model. This helps the agent keep track of the conversation context, so it doesn’t forget what it just said or what you just told it.
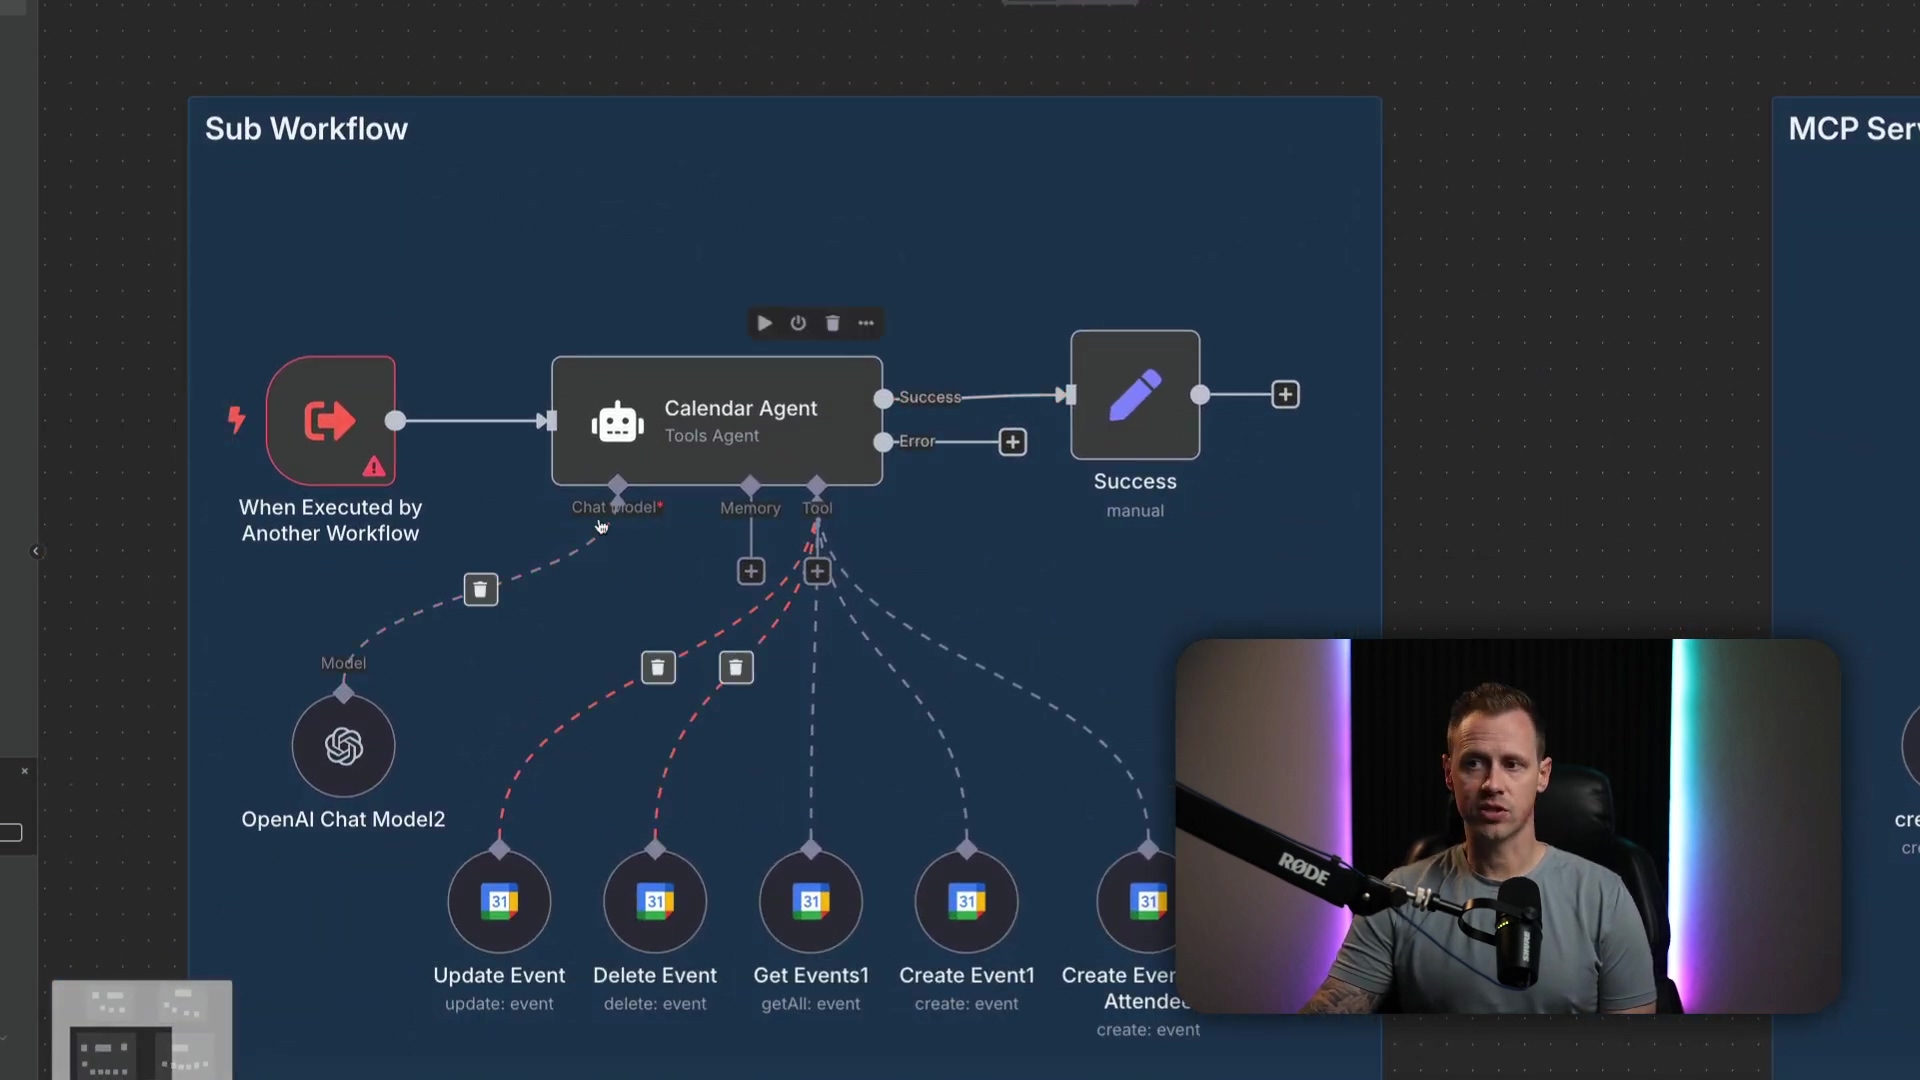
Integrating Tools: QuickBooks and Email
Now for the fun part: giving our AI agent its “tools”! These are the actions it can perform in the real world. Our agent needs two main tools: one to check for overdue invoices and another to send those reminder emails.
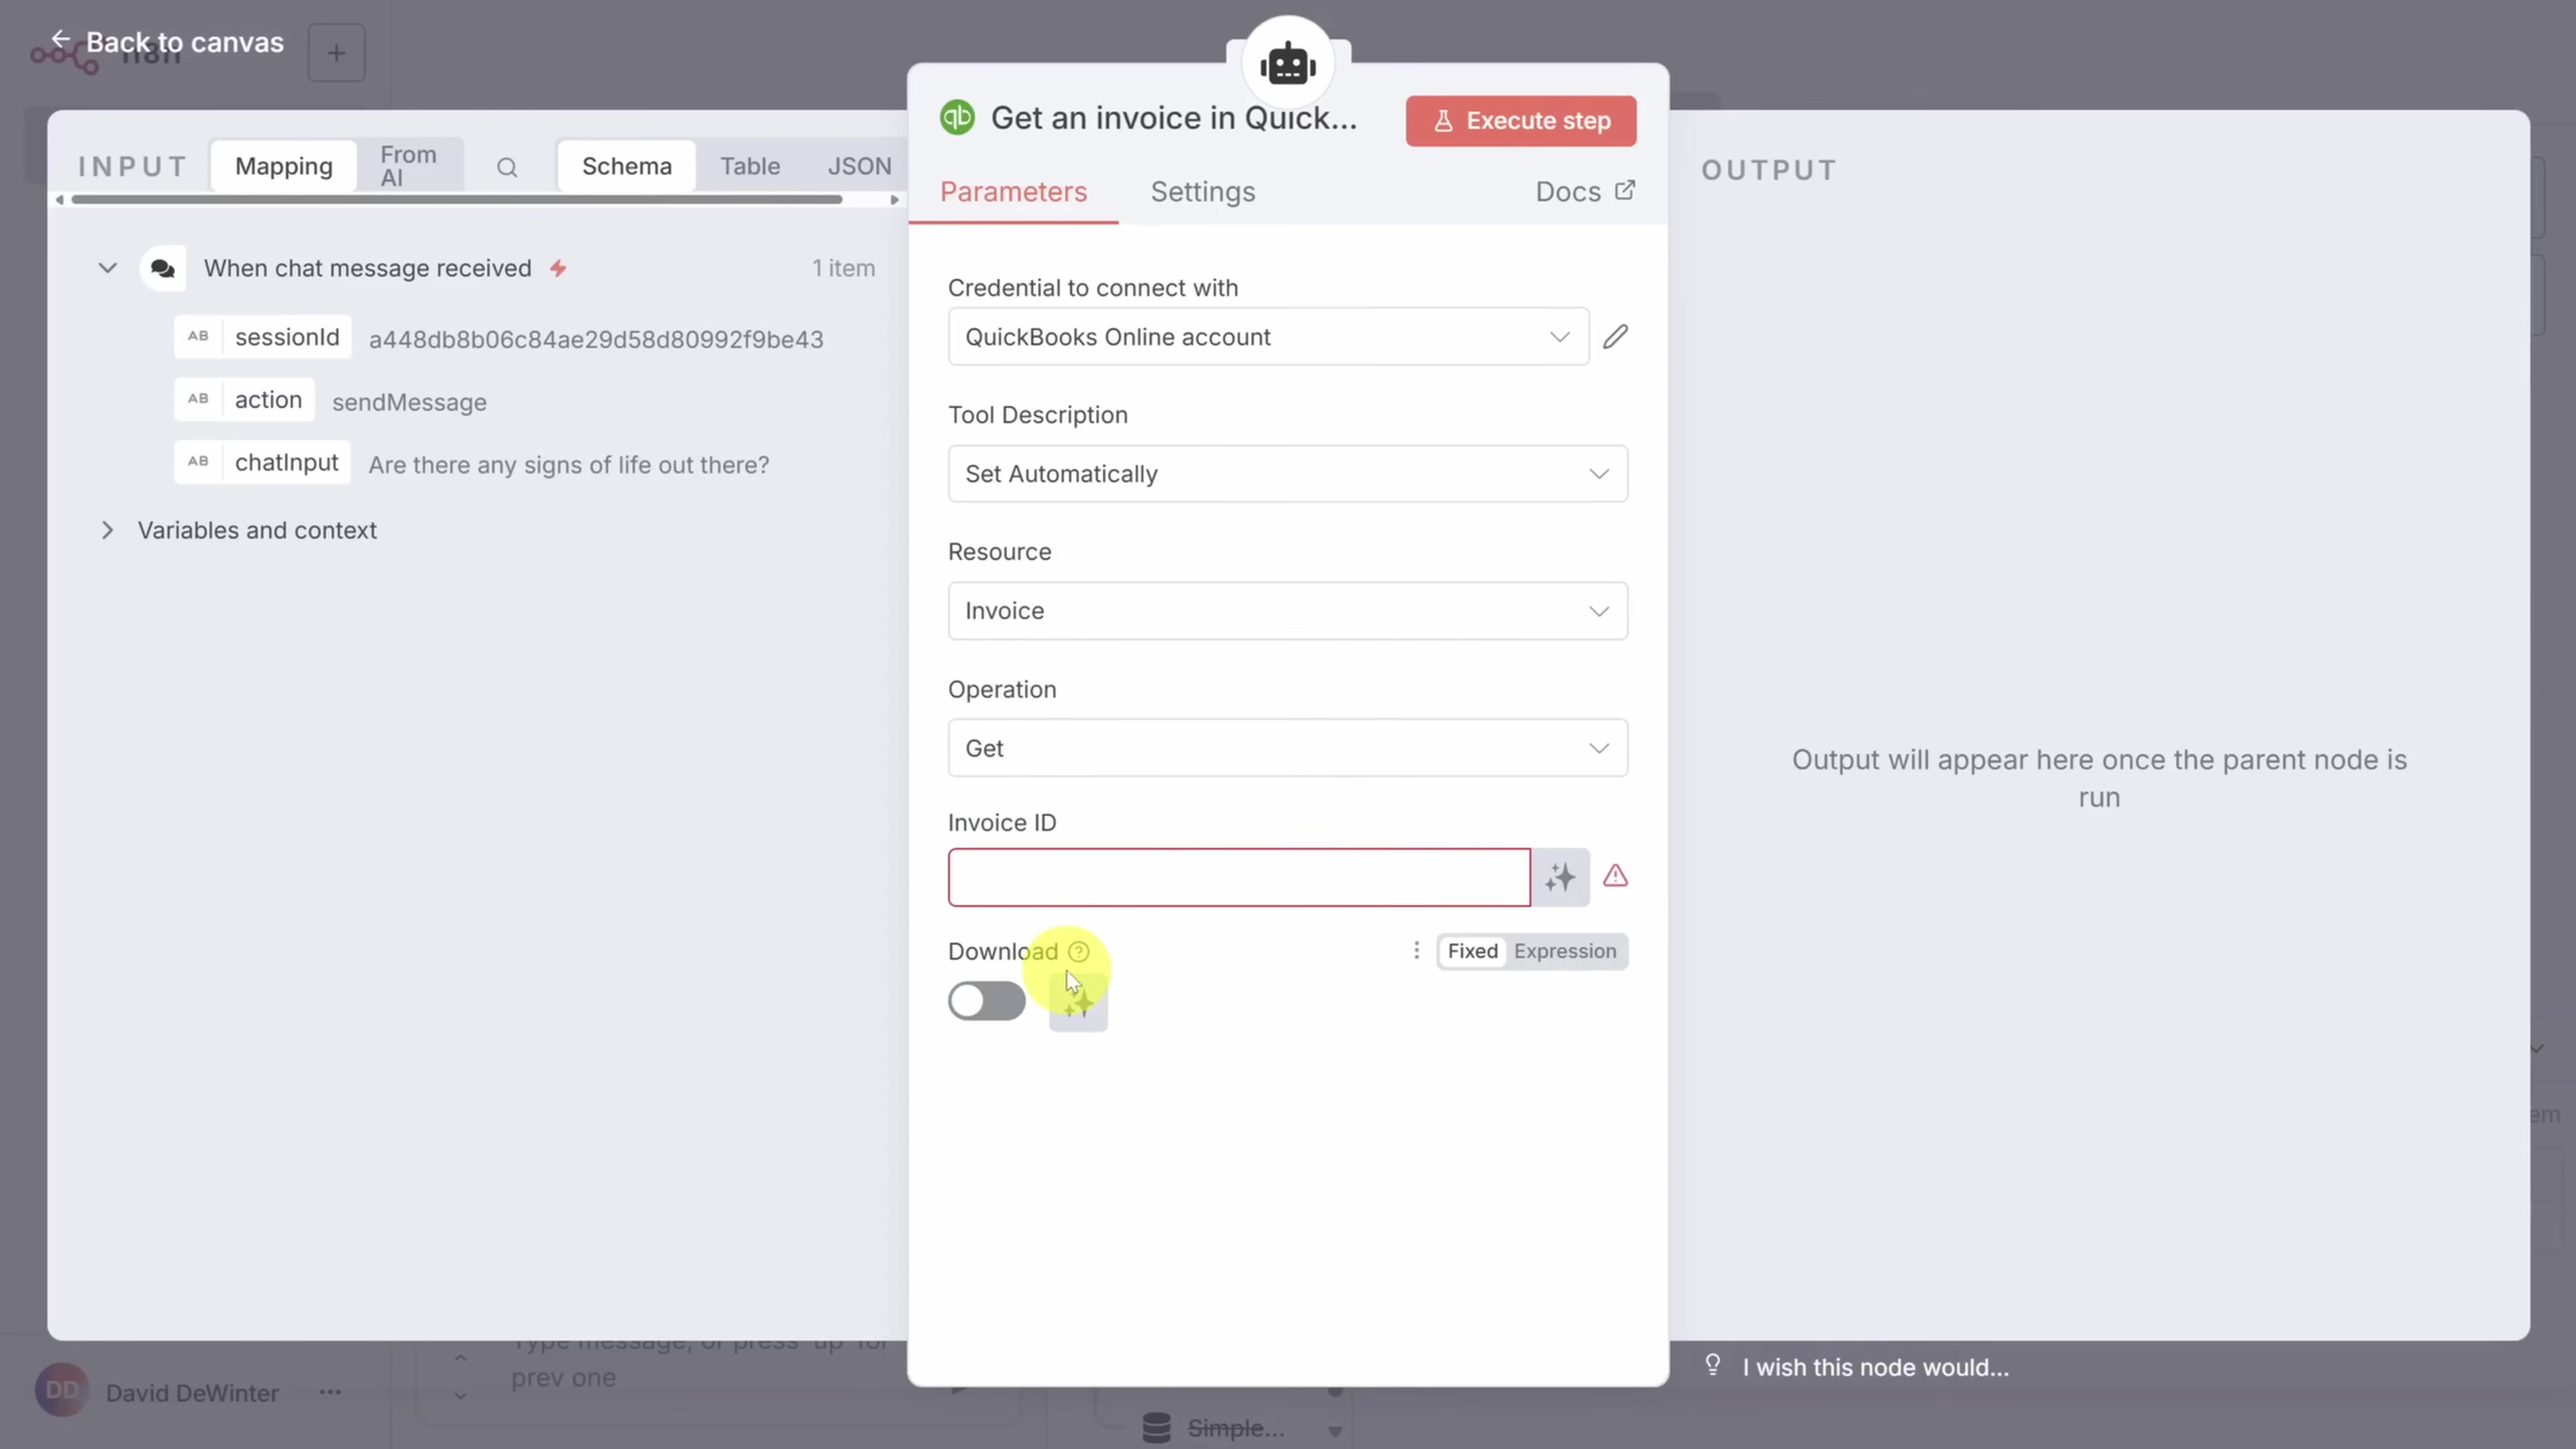
- QuickBooks Online Integration: If you’re using QuickBooks Online, this is where your invoice data lives. In N8N, add a QuickBooks Online tool. You’ll need to set up credentials for this, which usually involves connecting your QuickBooks account to N8N (N8N will guide you through the OAuth process, which is a secure way to grant access). Configure this tool to ‘Get Invoices’ and specifically ‘Get many invoices’. Here’s the cool part: instead of you telling it how to find overdue invoices, we’ll let the AI figure it out! Look for an “AI button” or a field where you can instruct the model to define the filter for ‘overdue’ invoices. This is where the agent’s reasoning skills come into play!
- Email Integration (SMTP): Our agent needs to send emails, right? So, we’ll add a Send Email tool. This usually involves configuring SMTP (Simple Mail Transfer Protocol) settings. For example, if you use Gmail, your SMTP server would be
smtp.gmail.com. For the password, do NOT use your regular email password! This is a huge security no-no. Instead, you need to generate an ‘App Password’ from your email provider’s security settings. For Gmail, you can do this at security.google.com under “App passwords.” This creates a unique password just for N8N, so your main account stays secure. Just like with QuickBooks, allow the AI model to define the recipient email, subject, and message body. This gives the AI the flexibility to craft personalized reminders.
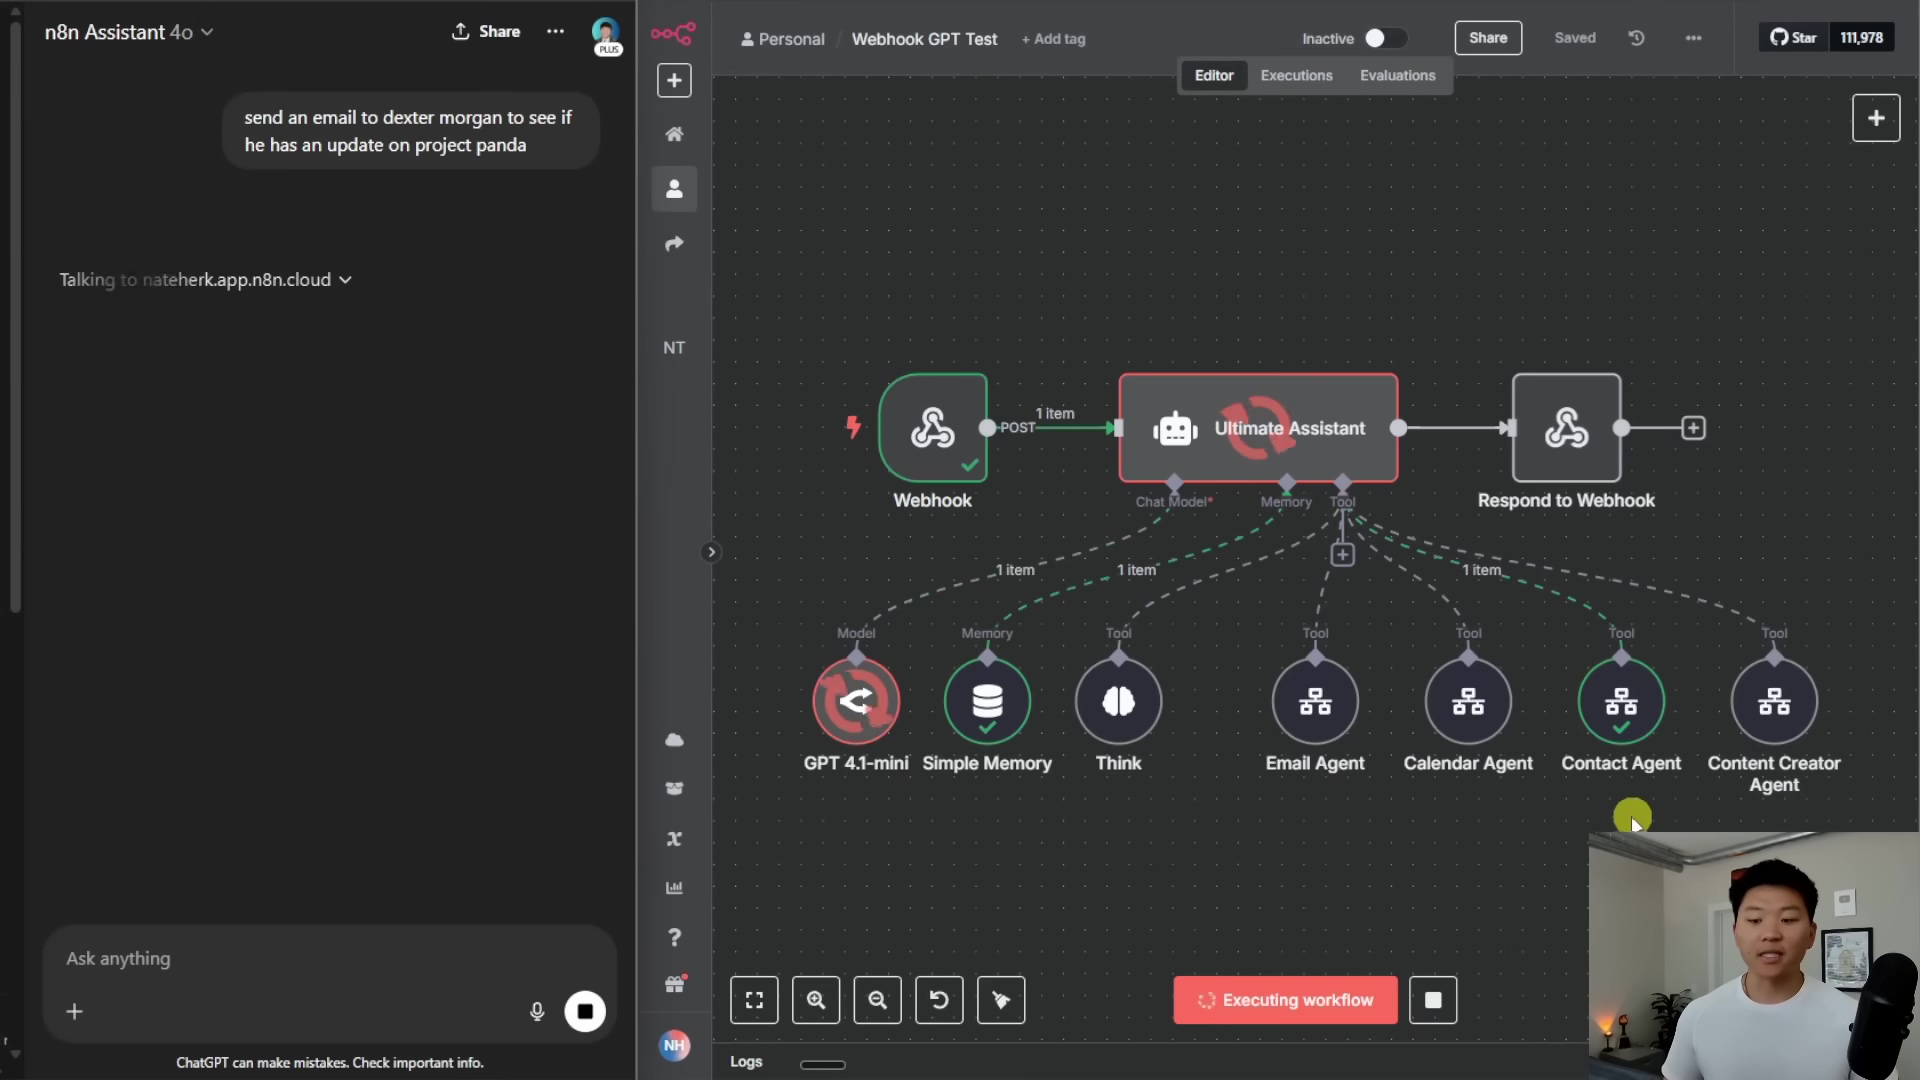
Crafting the Agent Prompt with ChatGPT
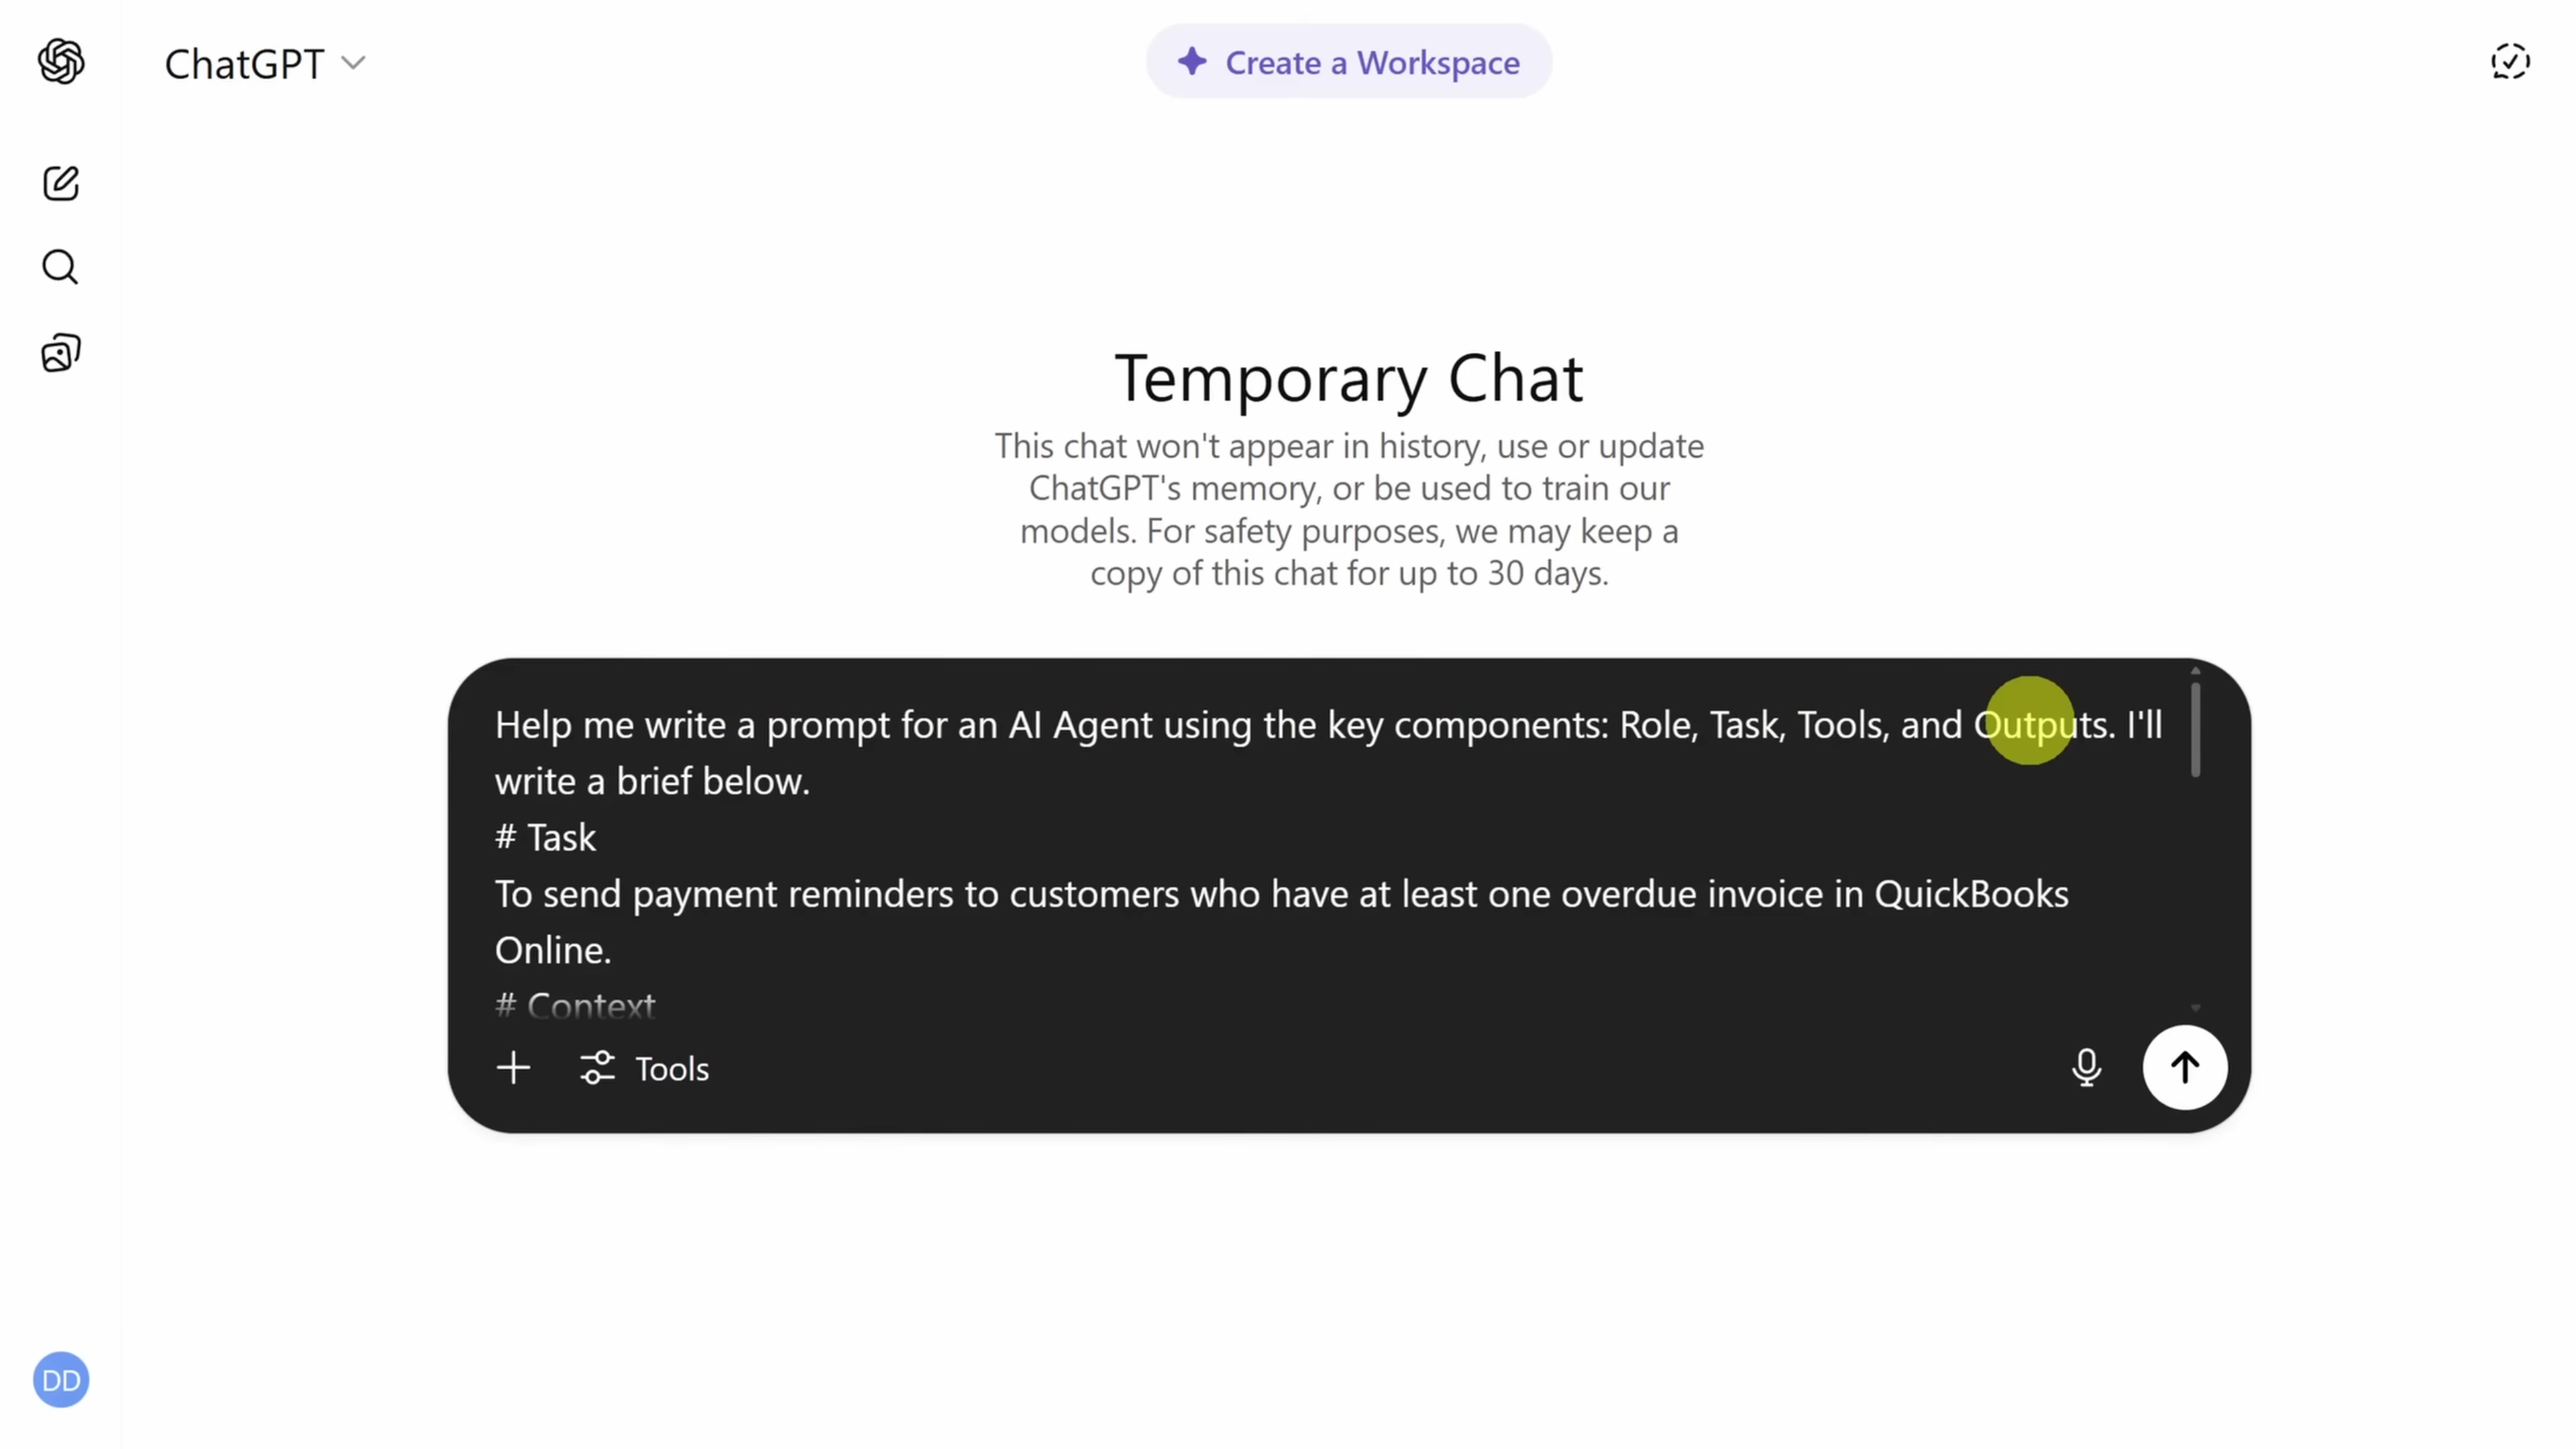
This is the “instruction manual” for your AI agent. The prompt is absolutely crucial because it tells the agent what its job is, how to behave, and what tools it has. Think of it as writing a very detailed job description for your digital employee. You can even use another AI, like ChatGPT, to help you draft a really effective prompt!
- Define Key Components: A good prompt usually has clear sections. I like to use a template that includes ‘Role’, ‘Task’, ‘Tools’, and ‘Outputs’. This helps keep things organized and ensures you don’t miss anything.
- Specify Task: Be super clear about the agent’s main objective. For us, it’s something like: “Your main goal is to send payment reminders to customers who have at least one overdue invoice in QuickBooks Online.” No ambiguity here!
- Provide Context: This is where you guide the agent’s behavior. For example, you might tell it to start with a polite tone for invoices that are only slightly overdue, but to become firmer (but still professional!) for those that are significantly past due. Also, a critical instruction: “Send only one email per customer, even if they have multiple overdue invoices.” This prevents spamming your clients.
- Describe Tools: Explain to the agent how to use the tools you’ve given it. For instance, tell it: “Use the ‘Get Invoices’ tool to retrieve overdue invoices from QuickBooks. Use the ‘Send Payment Reminder’ tool to send emails.” Be specific about the tool names you configured in N8N.
- Define Outputs: Finally, tell the agent what format you want its output in. For our workflow, we’ll want it to output the email details (recipient, subject, body) in a structured format like JSON. This makes it easy for N8N to process the information later.
Dynamic Date Integration
Here’s a little secret about AI models: they don’t inherently know what today’s date is! They’re trained on historical data. So, for our agent to accurately assess which invoices are “overdue” based on the current date, we need to feed it that information dynamically. Luckily, N8N makes this super easy with a little bit of JavaScript.
In your N8N workflow, you can use an expression to inject the current date. Look for a field where you can use expressions (often indicated by a {{ }} icon or a lightning bolt). Then, paste this snippet:
{{ DateTime.now.toFormat('yyyy-MM-dd') }}This little piece of code tells N8N to grab the current date and format it as ‘YYYY-MM-DD’ (e.g., ‘2023-10-27’). This ensures your agent always has the correct “today’s date” to work with when checking invoice due dates.
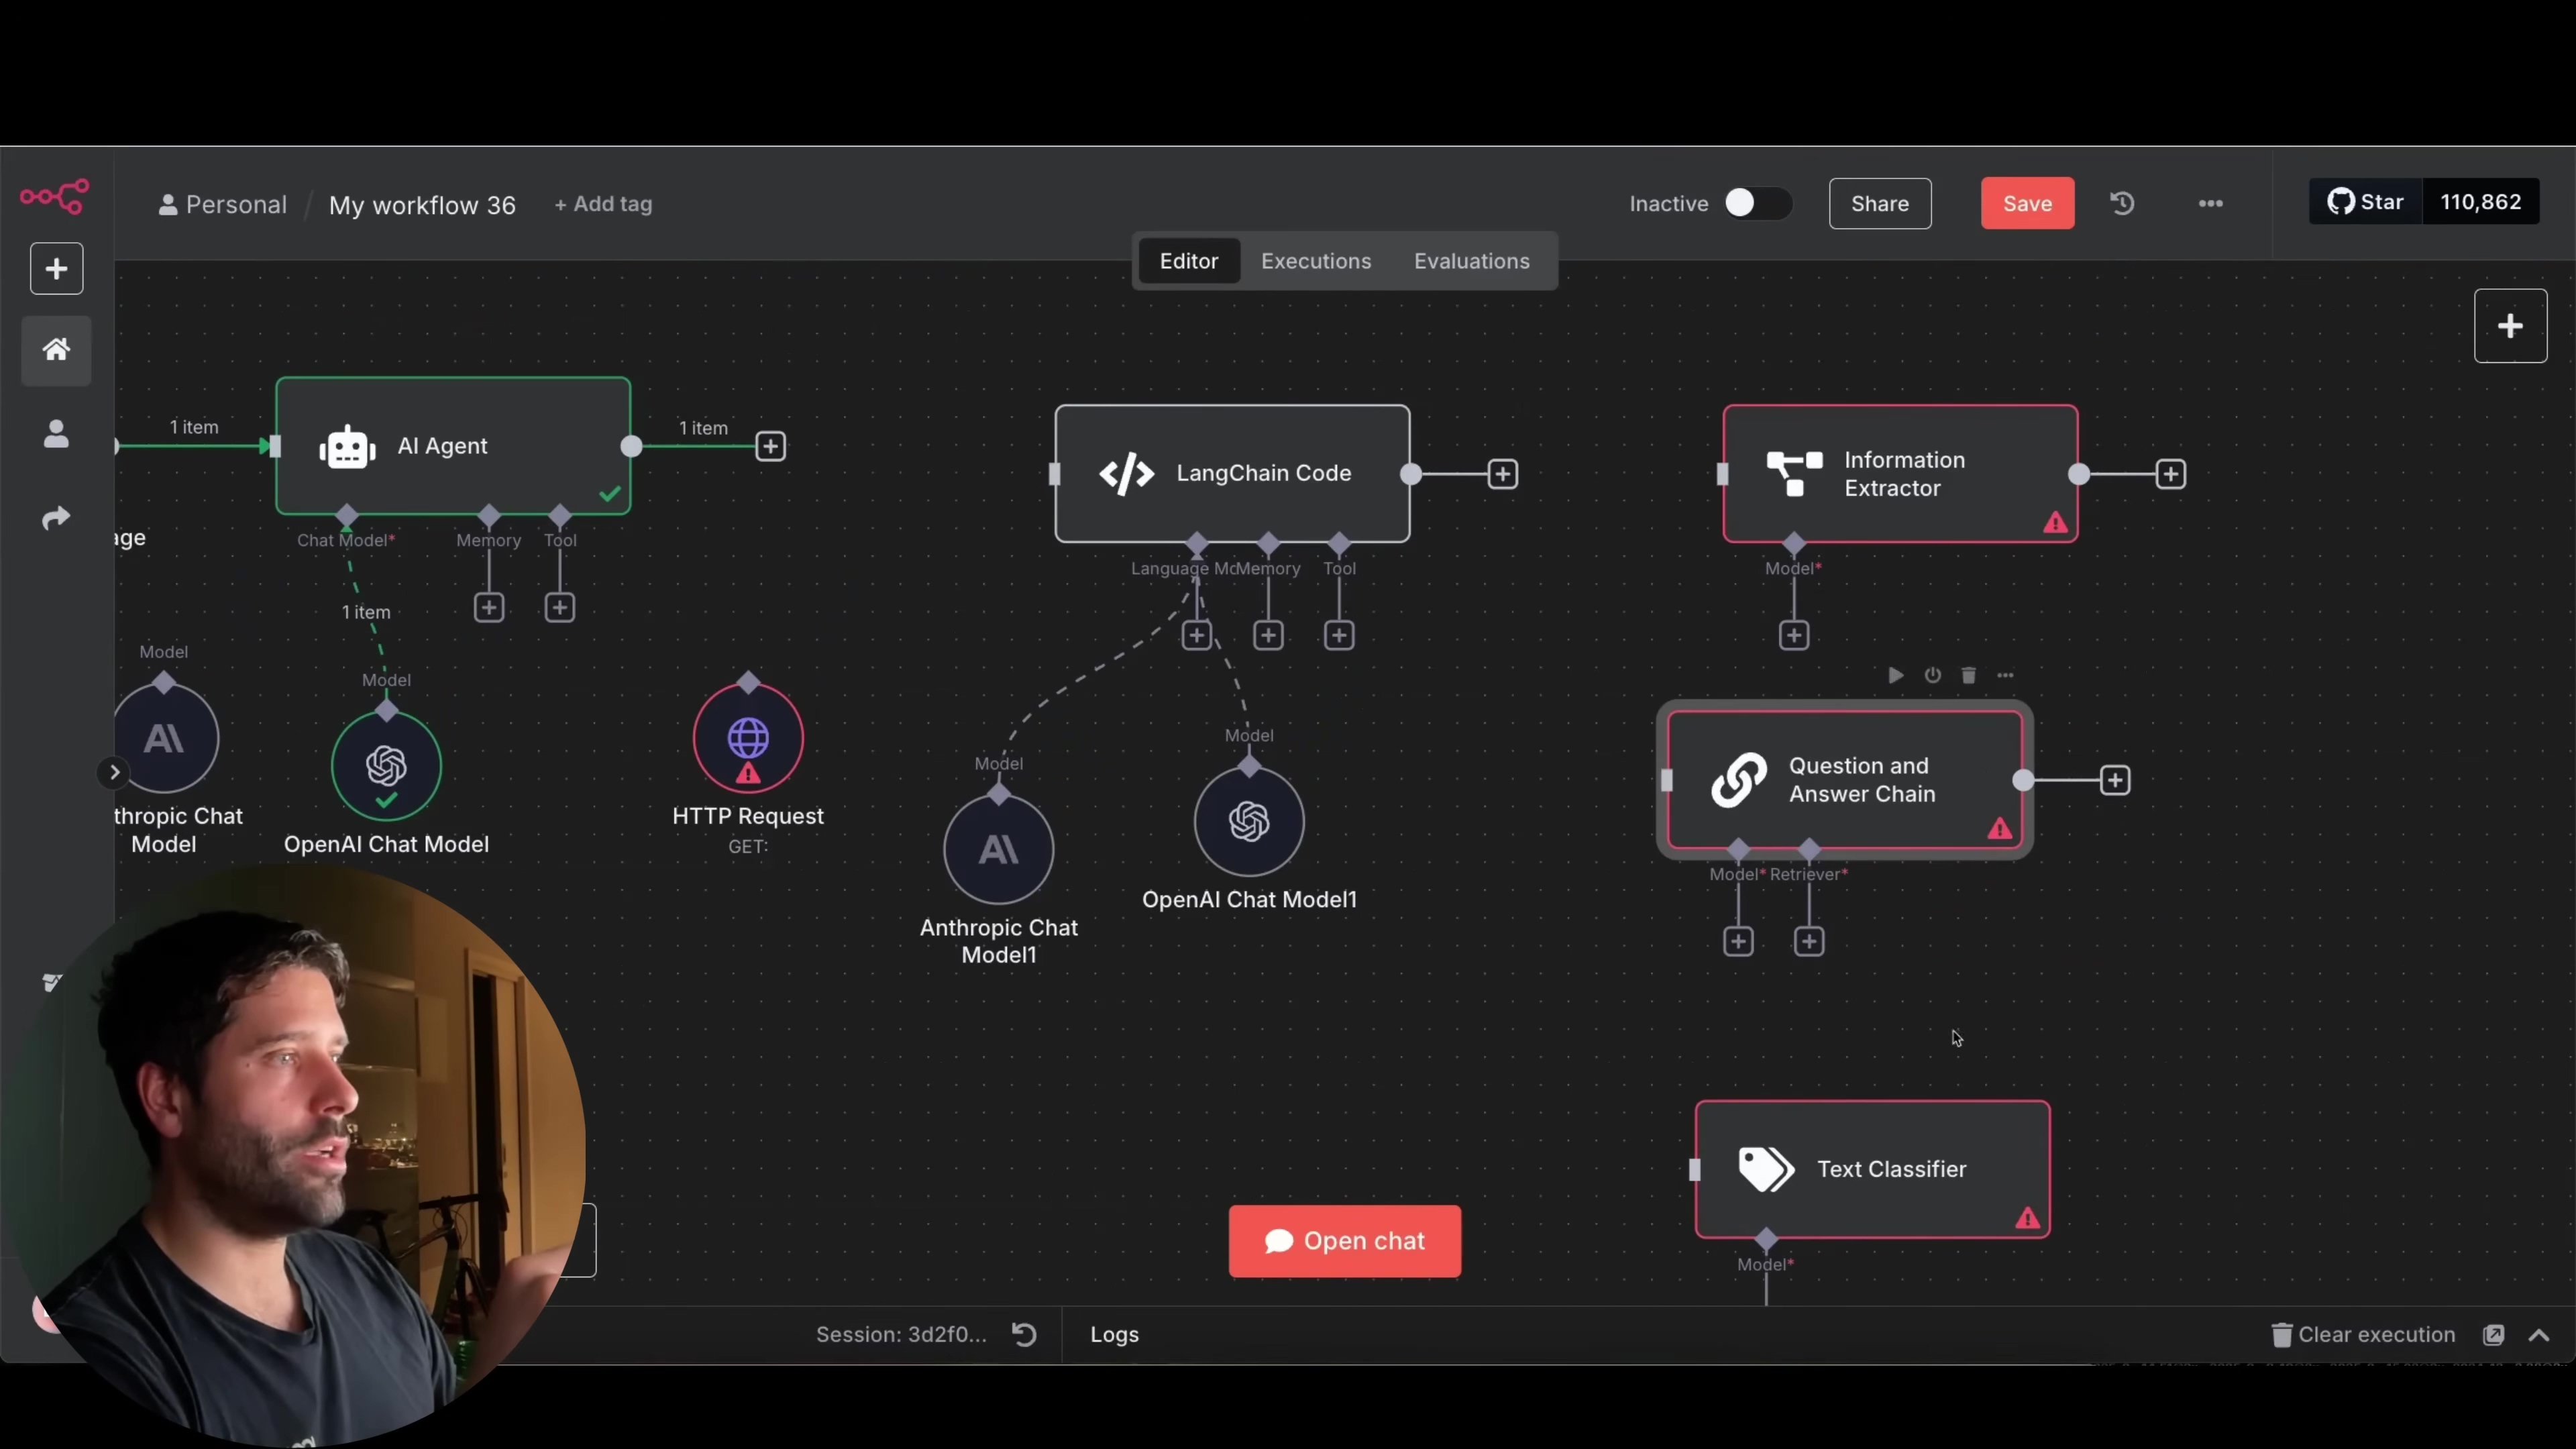
Executing and Debugging Your Agent
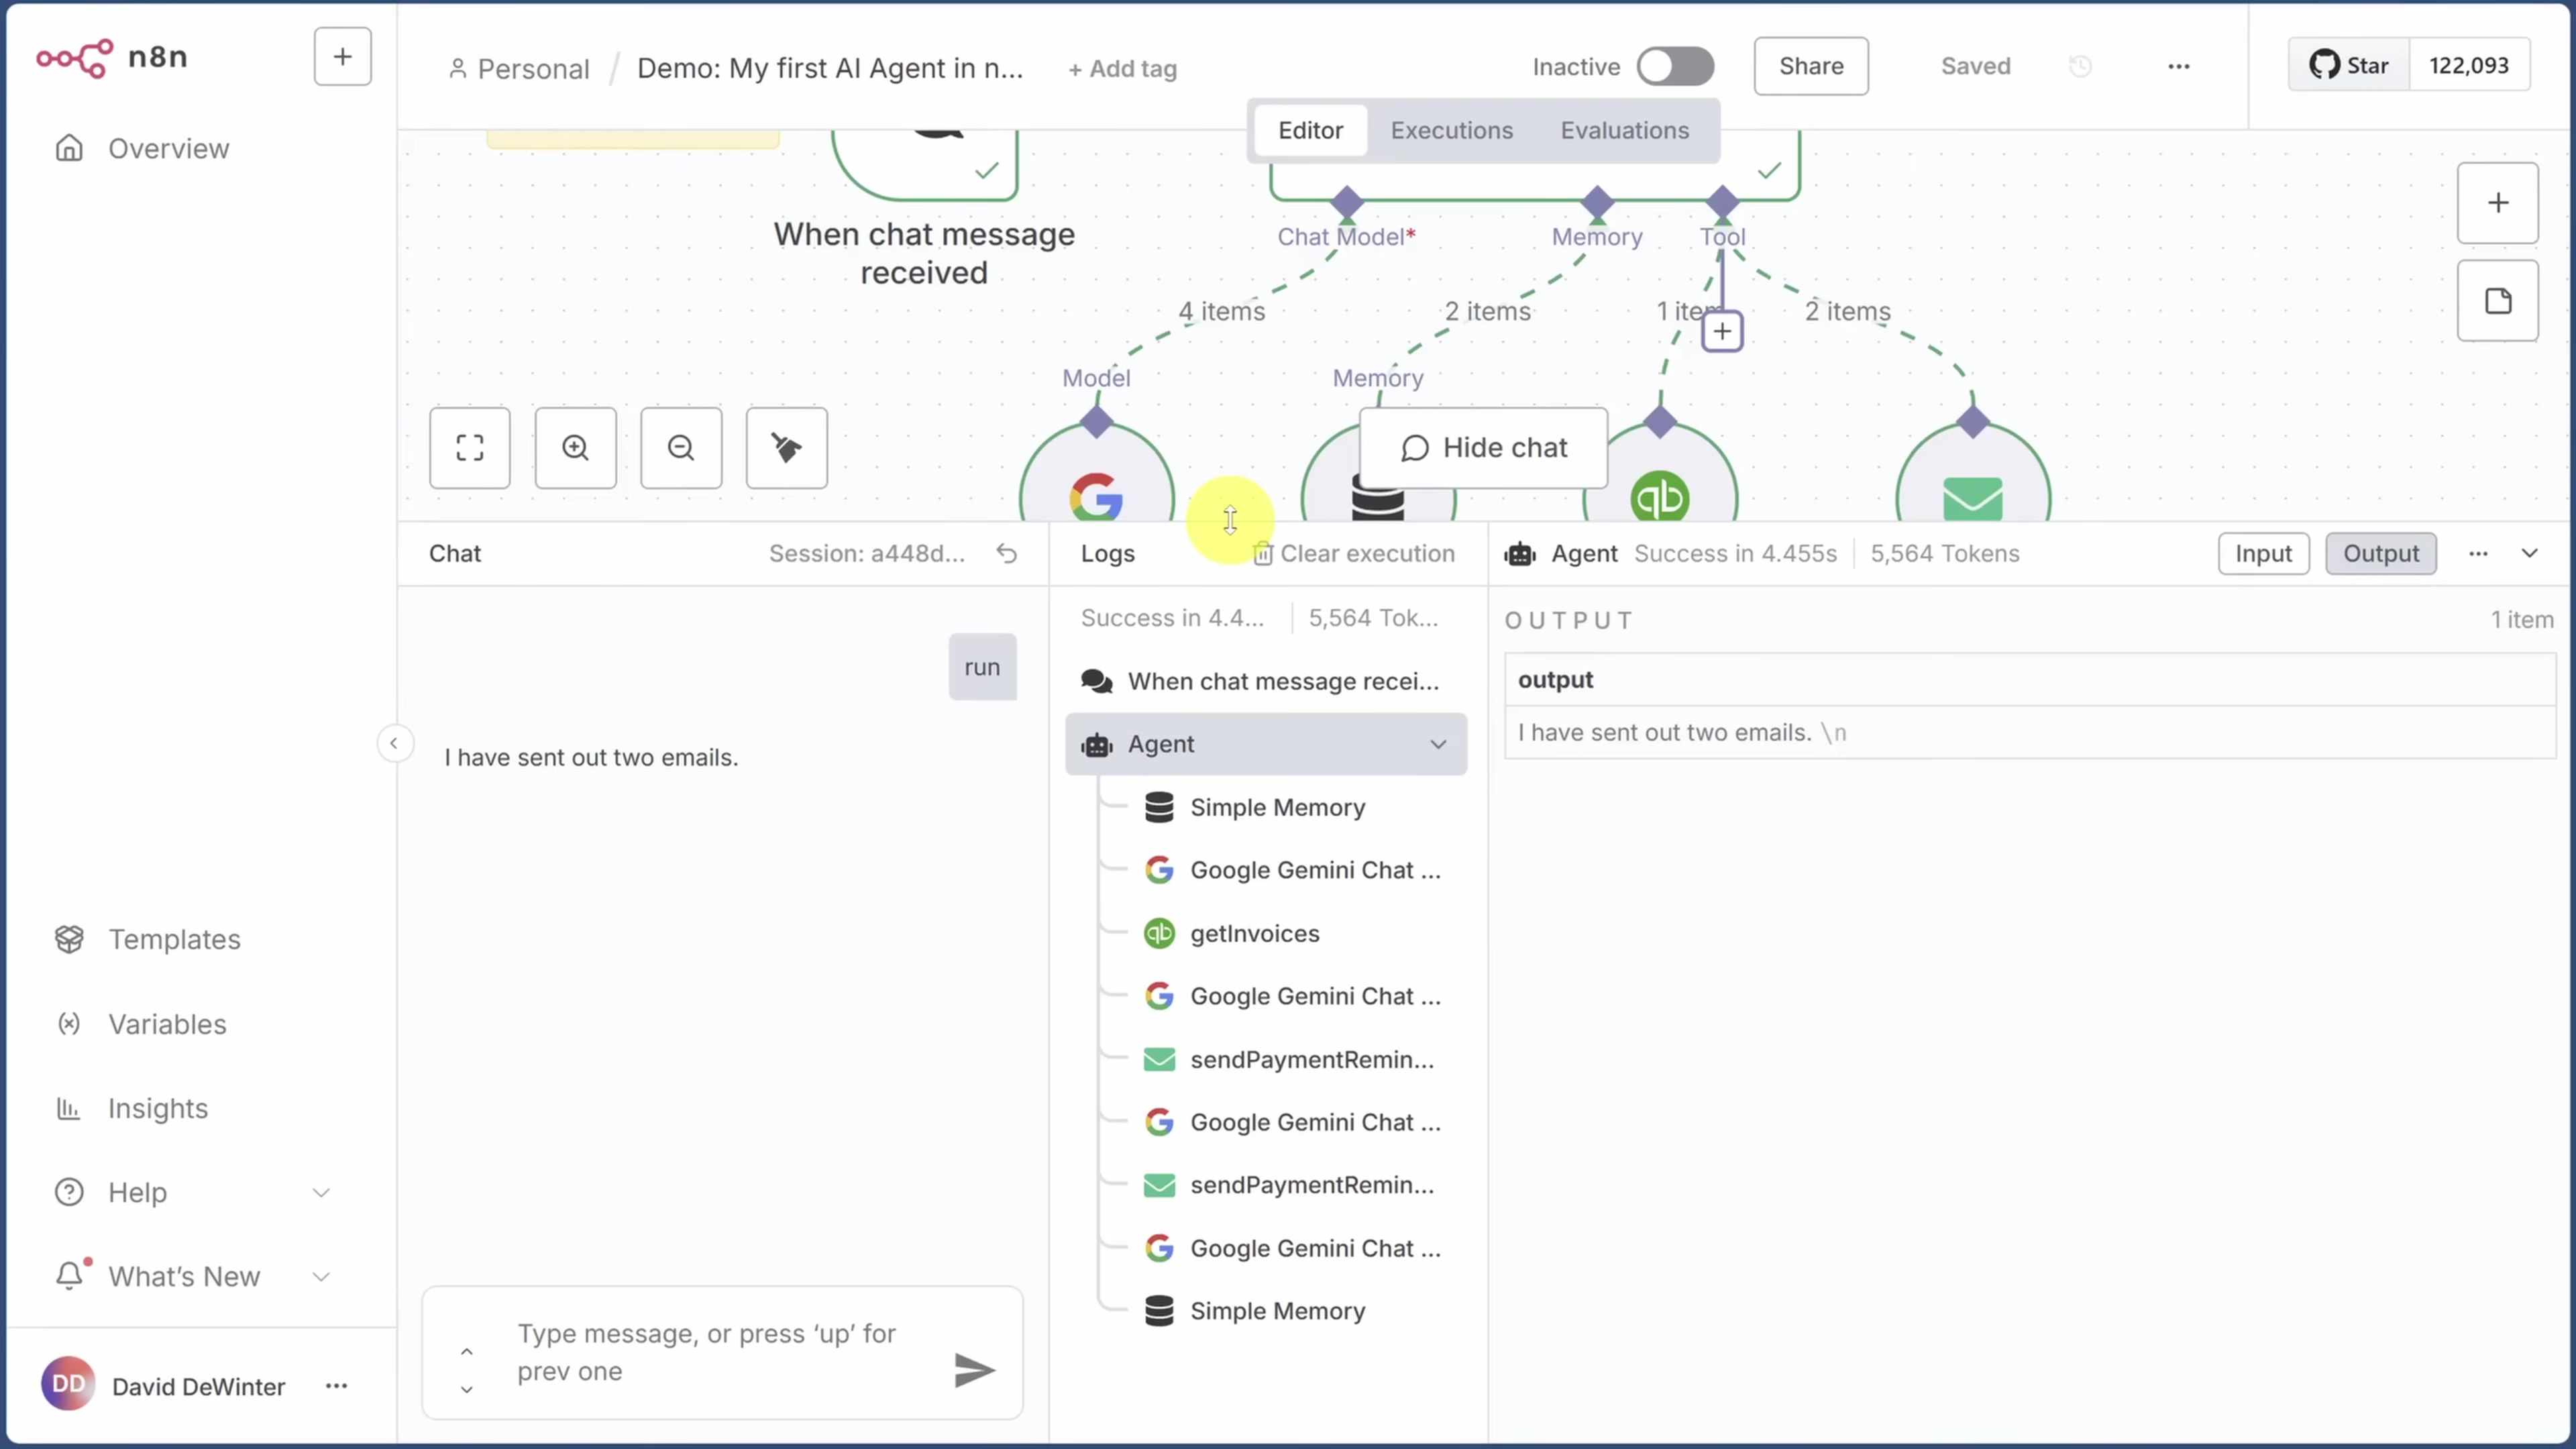
Alright, you’ve set up the model, memory, tools, and the all-important prompt. It’s time to hit that ‘Execute Workflow’ button! Don’t be discouraged if it doesn’t work perfectly on the first try. That’s totally normal in automation. Think of it as a puzzle – sometimes you need to adjust a few pieces.
N8N has an amazing logging system that will show you exactly what the agent tried to do and why it might have failed. Look at the ‘Execution Logs’ or ‘Output’ of your Agent node. Did it try to call a tool incorrectly? Did it misunderstand part of your prompt? Often, a minor tweak to your prompt (maybe making an instruction clearer or adding an example) is all it takes to resolve issues. It’s all about iterating and refining!
Implementing Human-in-the-Loop Approval
Now, this is a critical step, especially when dealing with sensitive tasks like sending payment reminders. We don’t want our AI agent just blindly sending emails without any human oversight, right? That’s where “human-in-the-loop” (HITL) approval comes in. It ensures that you have the final say before any email goes out. It’s like having a supervisor for your AI assistant.
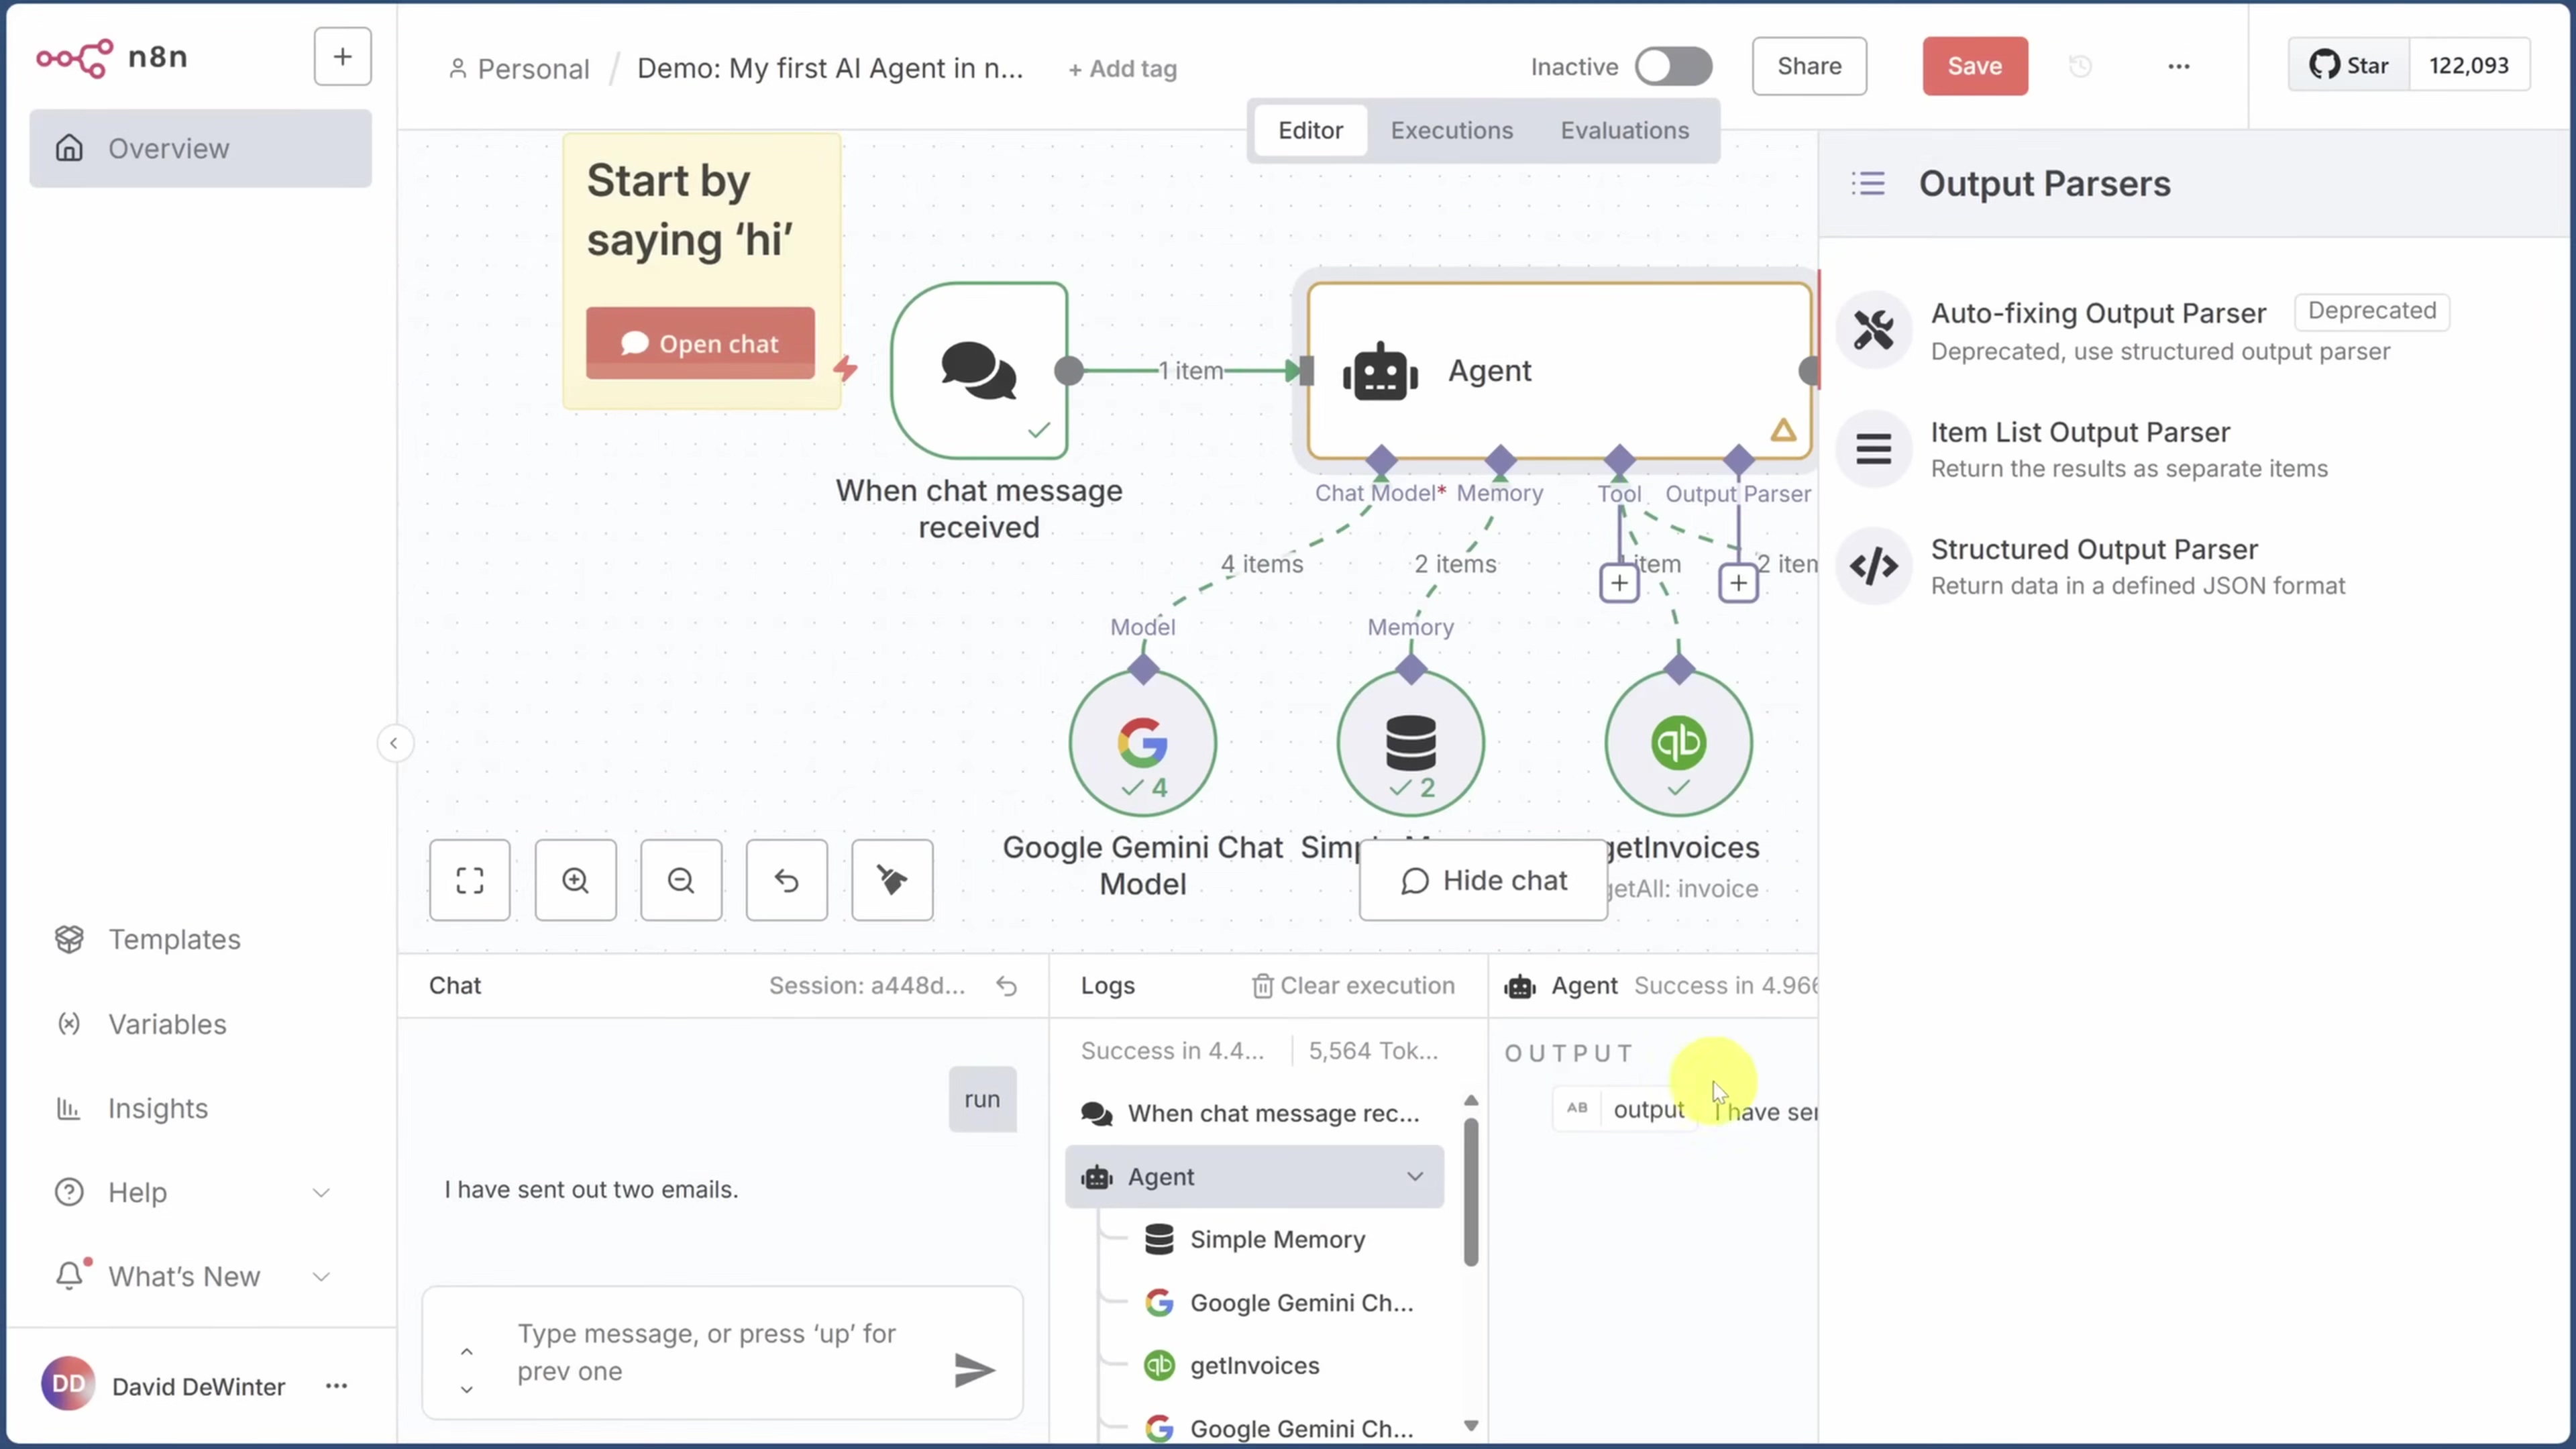
Configuring Output Parsing
Before we send anything for approval, we need the AI agent to output the email details in a structured, easy-to-read format. This is where N8N’s ‘Structured Output Parser’ node becomes super handy. You’ll define a JSON structure (like a blueprint) that tells the agent exactly how to present the email details, including the customer’s name, their email address, the subject line, and the body of the email. This makes it easy for N8N to grab those pieces of information and present them to you for review.
Setting Up Discord for Approvals
We’re going to use Discord as our approval system. Why Discord? Because it’s free, real-time, and super easy to integrate with N8N. You could use Slack, email, or another system, but Discord is a great starting point.
- Remove Direct Email Tool: First, go back to your Agent node and remove the direct email sending tool from its capabilities. This is important! We want the agent to write the emails, not send them directly. It’s like telling your assistant, “Draft this email, but don’t send it until I say so.”
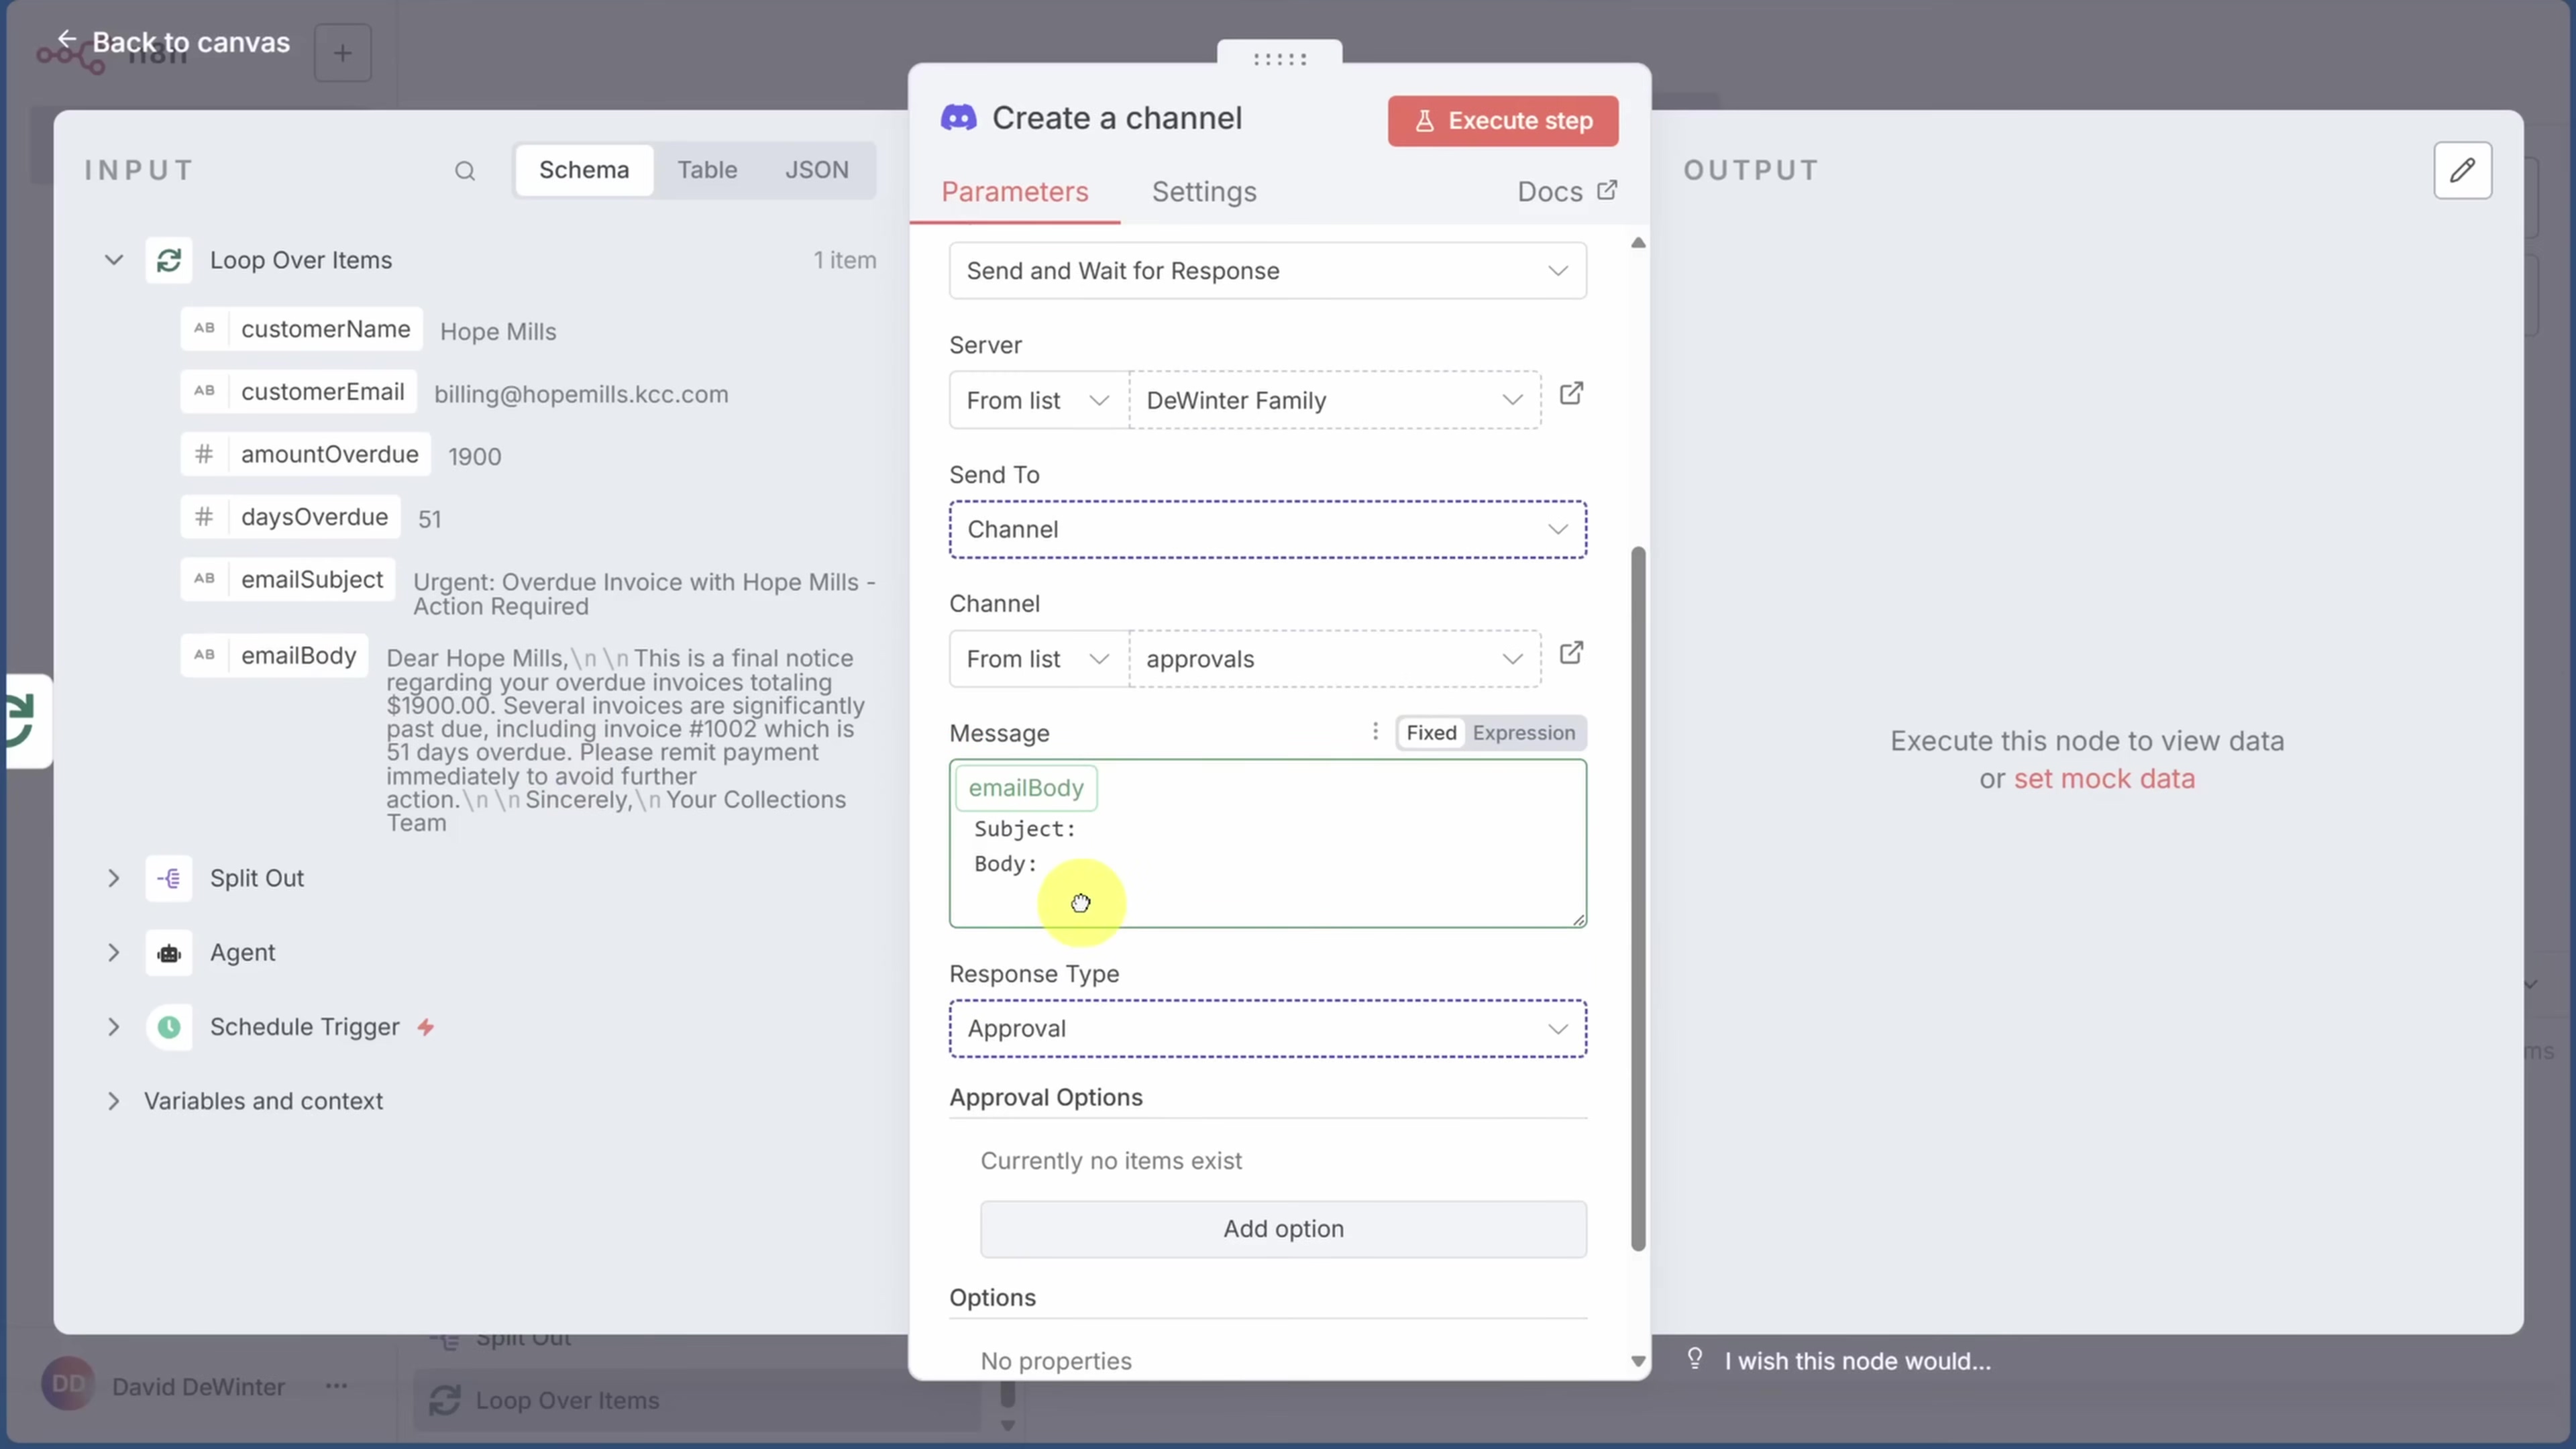
- Add Discord Tool: In your N8N workflow, add a Discord node. Specifically, you’ll want to use the ‘Send and Wait for Response’ node. This node will send a message to a specific Discord channel (you’ll need to create one, maybe called
#approvalsin your Discord server) and then wait for you to click an ‘Approve’ or ‘Decline’ button. You’ll need to set up Discord credentials in N8N, which involves creating a Discord bot and getting its token (Discord’s documentation can guide you through this, it’s a one-time setup). - Dynamic Message Content: Now, make that Discord message useful! Populate the message with the structured email details that your AI agent just outputted (customer name, subject, and the full email body). This way, you can see exactly what the AI wants to send before you approve it.
Looping and Conditional Sending
What if your agent finds multiple overdue invoices for different customers? We need a way to handle each one individually and get approval for each. This is where N8N’s flow control nodes come in.
- Split Out Items: After your ‘Structured Output Parser’ node, add a ‘Split Out’ node. This node is super handy because if your AI agent outputs details for, say, three different emails, the ‘Split Out’ node will turn that into three separate “items” that N8N can process one by one. It’s like separating a stack of papers into individual sheets.
- Loop Over Items: Next, add a ‘Loop Over Items’ node. This node will take each of those individual email details and process them one at a time. So, it will send the first email for approval, wait for your decision, then move to the second, and so on. This ensures you review each reminder separately.
- Conditional Email Send: After the Discord approval node (which will output
truefor approved orfalsefor declined), add an If node. This is your decision gate! Configure the ‘If’ node to check if the approval wastrue. If it was, then connect the ‘true’ branch of the ‘If’ node to your ‘Send Email’ tool (the actual one that sends the email). If the approval wasfalse, then that email simply won’t be sent. This is your safety net!

Strategic Content Enrichment
Required Resources and Cost-Benefit Analysis
Let’s talk brass tacks: what does this setup actually cost? The beauty of this DIY approach is that it’s incredibly cost-effective, especially compared to commercial solutions. Here’s a breakdown:
| Resource/Tool | Description | Cost (DIY) | Cost (Commercial Product) |
|---|---|---|---|
| Docker Desktop | Containerization platform | Free | N/A |
| N8N (Self-hosted) | Workflow automation platform | Free | Starts at $20/month (cloud) |
| Google Gemini API | AI model for reasoning | Free (generous limits) | Premium tiers available |
| QuickBooks Online | Accounting software (source of invoices) | N/A | Starts at $30/month |
| Email/SMTP Service | For sending emails | Free (e.g., Gmail with App Passwords) | Varies by provider |
| Discord | For human-in-the-loop approval | Free | N/A |
| Total Estimated Cost | Free (excluding existing services) | ~$50+/month |
As you can see, this DIY approach offers significant cost savings compared to relying solely on commercial, fully managed AI automation platforms. This is especially true for businesses with high volumes of transactions or specific integration needs that might rack up costs quickly on other platforms.
Critical Best Practice Tips
Here are some hard-earned lessons and best practices to keep your AI agent running smoothly and securely:
⚠️ Data Security: This is paramount! When you’re integrating with sensitive financial systems like QuickBooks, you must ensure your N8N instance is secured. If you’re self-hosting, use strong, unique passwords for your N8N account and make sure your computer’s firewall is set up correctly. Restrict access to your N8N instance to only those who need it. If you ever decide to use a cloud service, always adhere to their security best practices and enable two-factor authentication.
💡 Prompt Iteration: I can’t stress this enough: AI agent prompts are rarely perfect on the first try. It’s an iterative process, like sculpting. Be prepared to tweak, refine, and test your prompts based on the agent’s output and behavior during testing. Even small changes in wording can lead to significant improvements in how your agent understands and executes its tasks. Don’t be afraid to experiment!
⚠️ Human Oversight: For any critical tasks, especially those involving financial communications or customer interactions, always, always include a human-in-the-loop approval step. This is your safety net. It prevents embarrassing errors, maintains your brand reputation, and gives you peace of mind. Automation is great, but a human touch is still invaluable.
Key Takeaways
- AI agents are more than just chatbots; they can reason, use tools, and remember context to automate complex tasks.
- N8N provides a robust, and often free (when self-hosted!), platform for building these powerful agents.
- Integrating AI models like Google Gemini and business tools like QuickBooks and email is surprisingly straightforward with N8N’s visual, node-based interface.
- Crafting effective prompts and incorporating human-in-the-loop approvals are absolutely crucial for building reliable and safe automation workflows.
- Self-hosting N8N with Docker offers a super cost-effective solution for powerful business automation, putting enterprise-grade tools within reach for everyone.
Conclusion
Automating those overdue invoice reminders with an AI agent in N8N isn’t just about saving time; it’s about transforming a tedious, time-consuming chore into an efficient, automated workflow that directly impacts your business’s financial health. We’ve walked through the entire process, from setting up your free N8N environment to implementing that all-important human-in-the-loop approval system. You’ve got the power to reclaim valuable hours and ensure consistent, timely follow-ups!
While this DIY approach offers unparalleled flexibility and cost savings, remember there’s a bit of an initial setup time and some ongoing maintenance for self-hosted solutions. If convenience and minimal technical overhead are your top priorities, exploring N8N’s cloud offering or other commercial automation platforms might be a more suitable next step, even with the recurring costs. But hey, whichever path you choose, embracing AI automation is a powerful step towards a more efficient and profitable operation. Ready to stop chasing invoices and start growing your business? Go build your own AI agent today!
Frequently Asked Questions (FAQ)
Q: Why should I self-host N8N instead of using a cloud service like Zapier or N8N Cloud?
A: Self-hosting N8N with Docker offers significant cost savings, as you don’t pay monthly subscription fees for the platform itself. It also gives you more control over your data and environment. While N8N Cloud and Zapier are convenient, the free self-hosted option is perfect for those who want powerful automation without the recurring costs, especially for small businesses or personal projects.
Q: What if my email provider doesn’t support App Passwords?
A: If your email provider doesn’t offer App Passwords, you might need to use a dedicated SMTP service or explore other authentication methods they support. Some providers might require you to enable “less secure app access” (though this is generally not recommended for security reasons). Alternatively, you could use a transactional email service like SendGrid or Mailgun, which are designed for sending automated emails and integrate easily with N8N.
Q: My Docker container for N8N stopped. Did I lose all my data?
A: If you followed the steps to create a docker volume named n8n_data and used the -v n8n_data:/home/node/.n8n flag in your docker run command, then no, your data is safe! The --rm flag in the docker run command only removes the container when it stops, not the volume. To restart N8N and access your existing data, just run the same docker run command again. Docker will see the n8n_data volume and attach it to your new N8N container.
Q: Can I use a different AI model instead of Google Gemini?
A: Absolutely! N8N supports a wide range of AI models, including OpenAI’s GPT series, Anthropic’s Claude, and others. The process would be similar: select the desired model in the N8N Agent node, obtain an API key from that model’s provider, and add it as a credential in N8N. Just be mindful of the cost and rate limits associated with other models, as many are not free beyond a certain usage threshold.
Q: How can I make my AI agent’s prompts even better?
A: Prompt engineering is an art! To improve your prompts, try these tips: 1) Be extremely specific and unambiguous. 2) Provide examples of desired output. 3) Define the agent’s persona and tone (e.g., “You are a polite but firm financial assistant”). 4) Break down complex tasks into smaller sub-tasks. 5) Use clear delimiters (like triple backticks ```) to separate instructions from context. 6) Iterate and test frequently, observing how the agent responds to changes.
Q: What if I want to send reminders via SMS or another channel instead of email?
A: N8N is incredibly flexible! Instead of the ‘Send Email’ tool, you could integrate with other communication tools. For SMS, N8N has integrations for services like Twilio. For other channels, you might find dedicated nodes or you could use a generic HTTP Request node to interact with any API (like a messaging platform’s API). The core logic of the AI agent and human-in-the-loop approval would remain the same; you’d just swap out the final communication tool.